When logging into the Bot module, you are presented with the landing page that consists of the application menu on the left and the Overview page on the right.
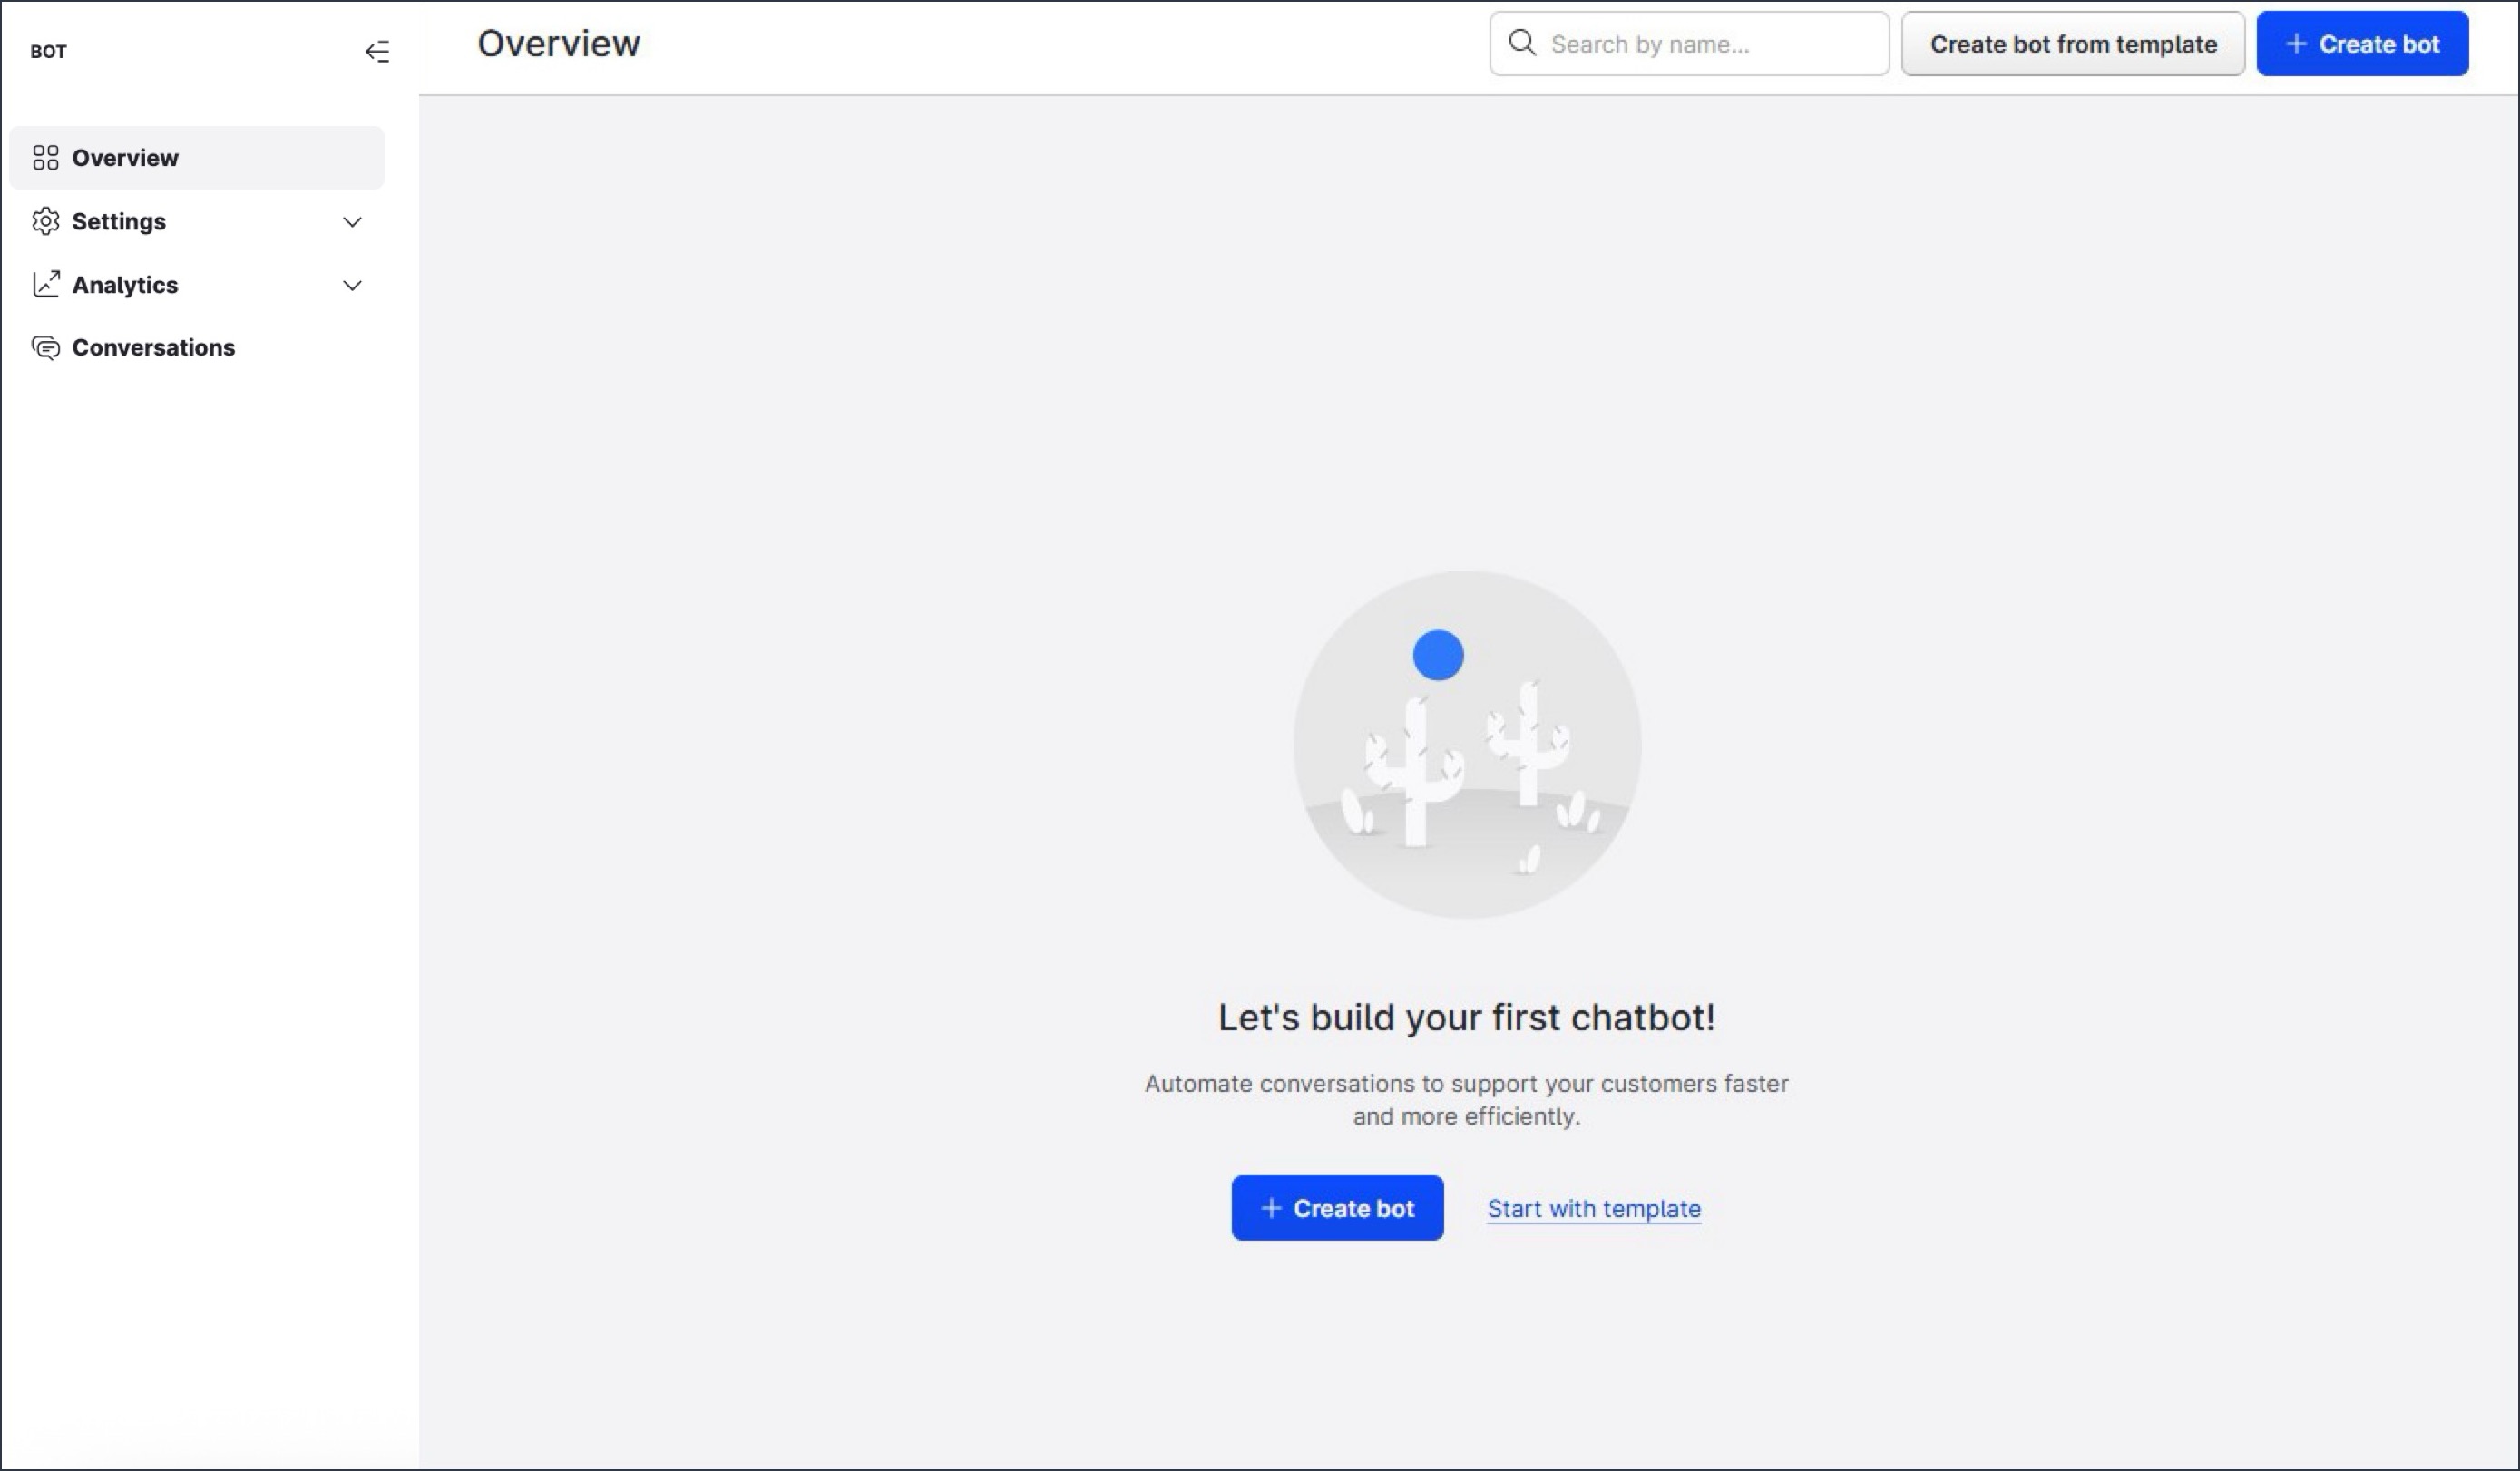
Application menu
The application menu allows you to access various settings and configuration options for your bots.

-
Overview returns you to the Overview page.
-
Settings offers the following options:
-
Company Settings
-
-
Analytics lets you view and analyze the data associated with your company's usage of Bot. Choose from the following options:
-
Conversations allow you to view existing conversations between your bots and your customers. You can also use this page to send a direct message to a customer on their social channel without leaving the Bot module. For more information, see Conversations.
Overview page
The Overview page lists the existing bots, if any, and allows you to create new bots.
Create your first bots
When logging in to the Bot module for the first time, the Overview page looks like this:
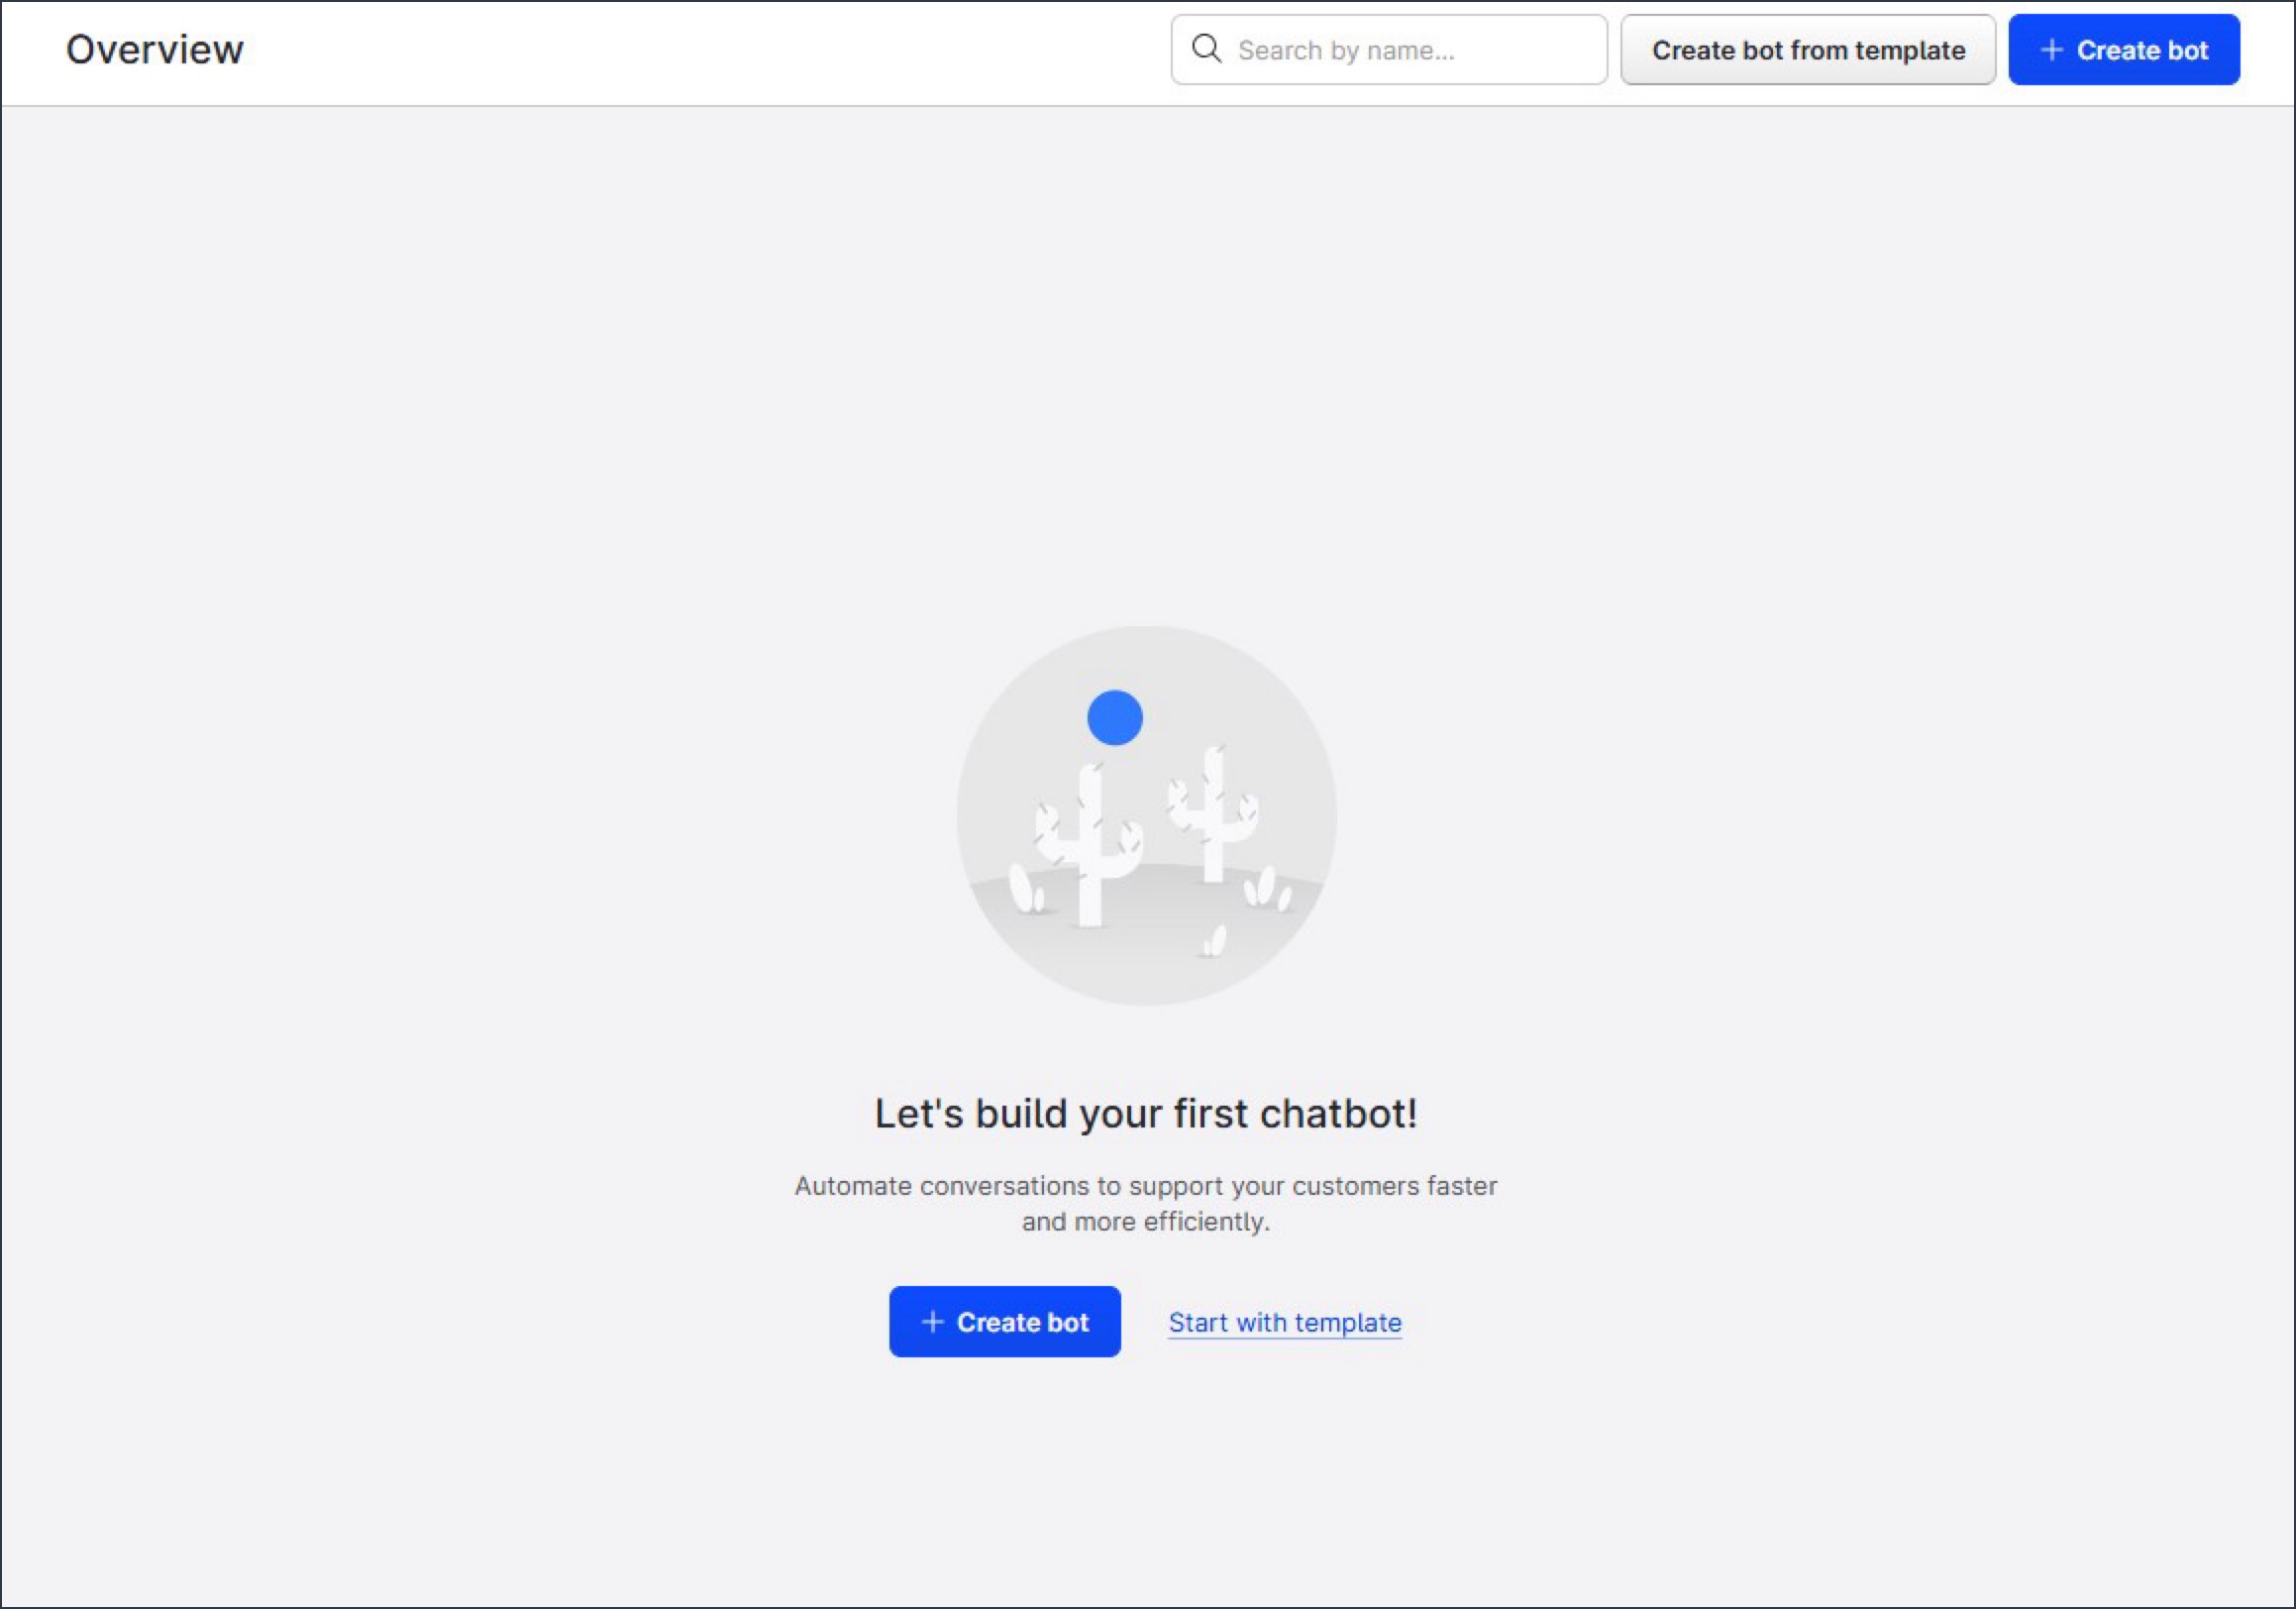
The first step is to create your first bot. You can choose either of the following options on the top of the Overview page:
-
Create bot
This creates a completely empty bot environment with no previous configuration or placeholder content. -
Create bot from template
This allows you to choose from an Emplifi-provided selection of templates that include sample configuration and placeholder content to help you get started.
This option is recommended for first-time users.
When naming your bot, use a clear, concise naming convention.
Review your existing bots
With time, as you keep creating more bots in your Emplifi account, the Overview page shows all the existing bots.
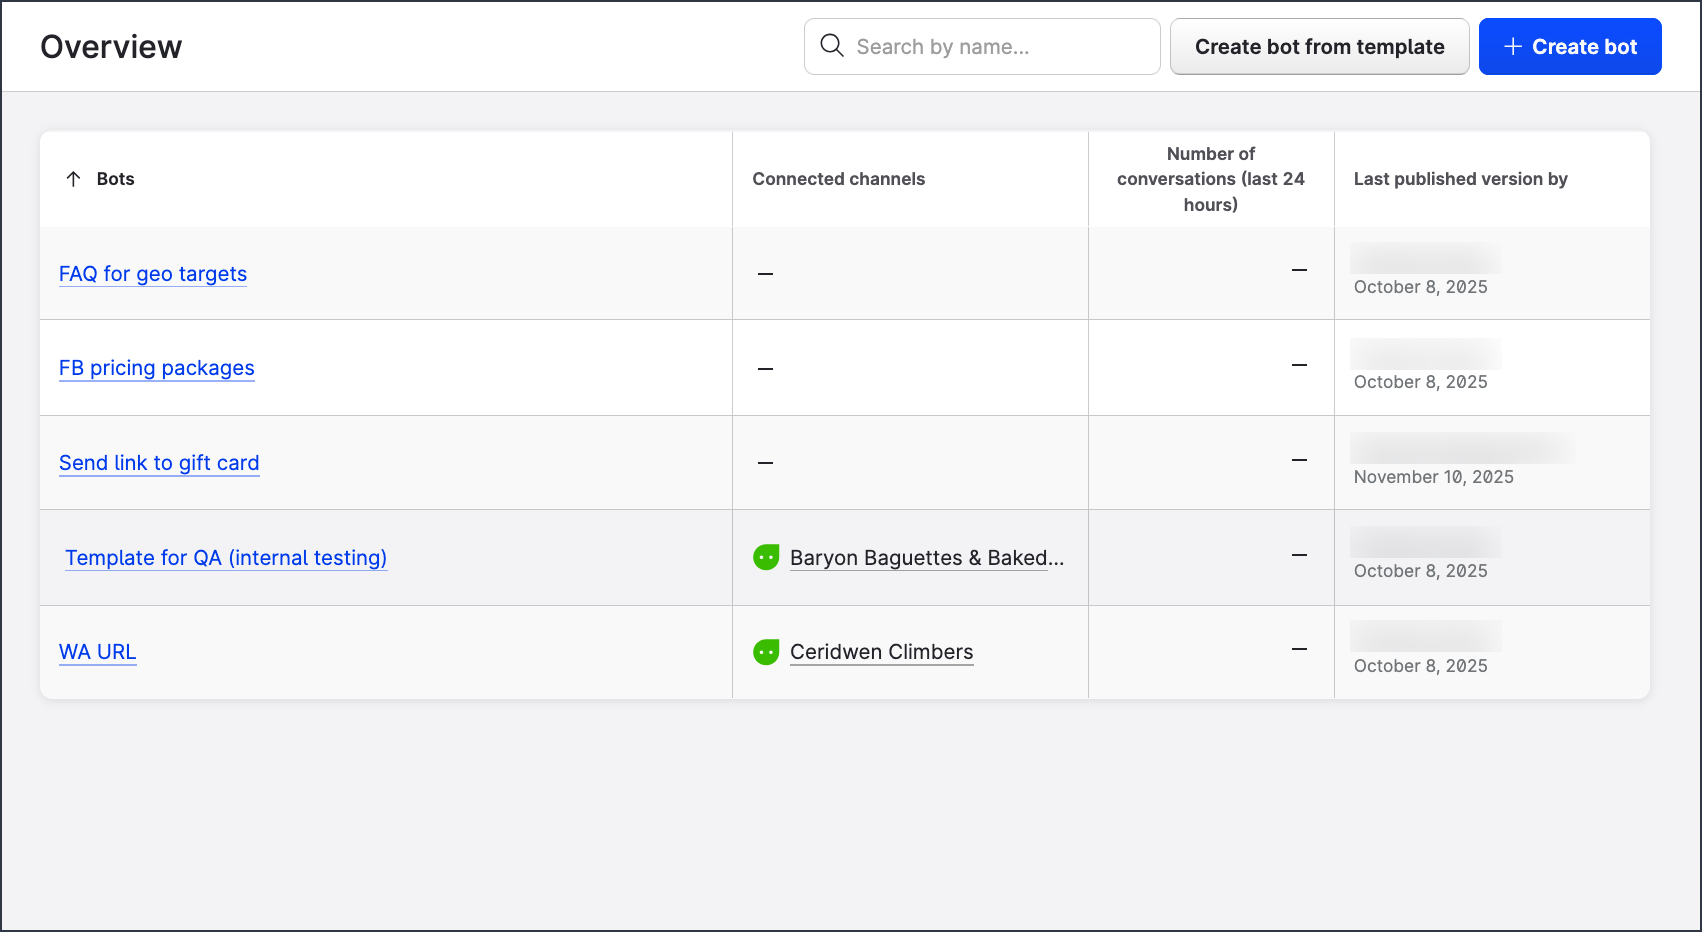
The basic data displayed for each bot entry in the view includes the following standard columns (from left to right):
-
Bots shows the bot name.
-
Connected channels shows any channels or profiles that are currently connected to the bot, whether test or “live” channels.
Click the channels or profiles displayed to open the bot natively, linking you to the platform where your bot was published (Web, Facebook Messenger, Instagram, X (formerly Twitter), WhatsApp Business). If you have multiple channels or profiles connected to your bot, they display as an expandable list, allowing you to select which option you want to open natively. -
Number of conversation (last 24 hours) shows the total number of conversations the bot received within the last 24 hours. The number is displayed as a numeric value to indicate the high-level volume of conversations your bot received, at a glance.
-
Last published version by shows the name of the user who last published the bot and the date when it happened, allowing you to identify who may have made changes to the bot.
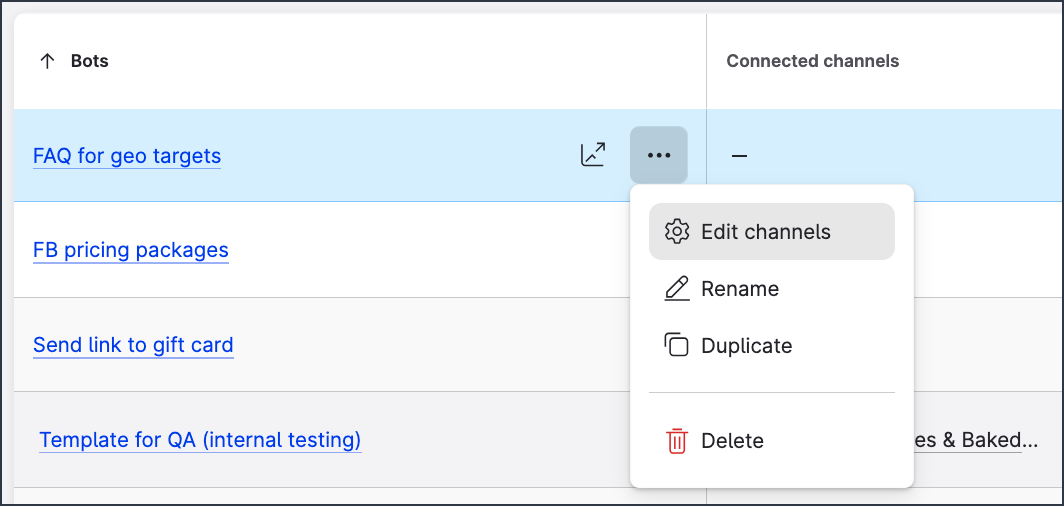
Hover over a bot to show additional options.

-
Analyze
Click to open a new webpage with a pre-filtered analytics view of the bot via the Unified Analytics module. This option provides you with quick access to analytics to help assess the performance of your bot.
-
The ellipsis menu (…)
This menu provides the following options:-
Edit channels opens an expandable channel/profile management interface, allowing you to edit the profiles or channels that the bot is deployed on (see further in this article).
-
Rename opens a simple interface to allow you to rename your bot at any time.
-
Duplicate allows you to instantly create an identical copy of the bot.
-
Delete allows you to delete any bot if it is no longer in use or needed.
Use with caution to avoid losing any assets or bot designs you want to retain.
-
Edit channels for your bot
To add or remove channels/profiles, click the ellipsis menu and select Edit channels.
If you have multiple channels or profiles added to your bot environment, they display as a selectable list of options.
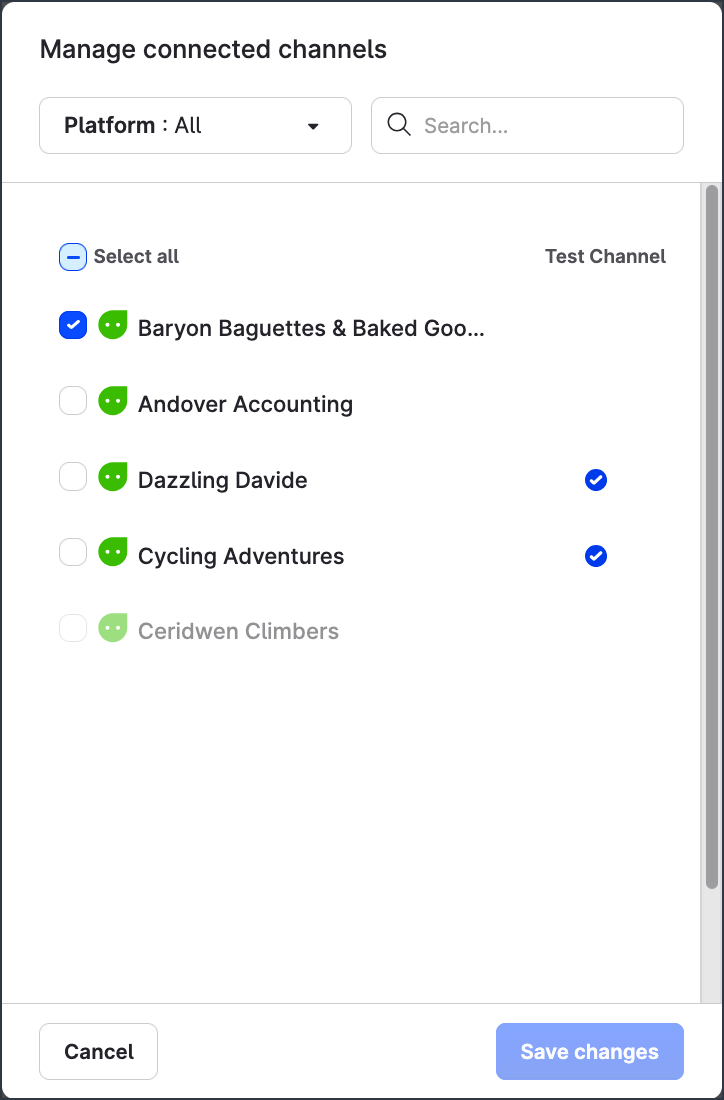
The channels are displayed alphabetically with the following hierarchy:
-
Channels connected to the bot are displayed first in the list and have a blue tick mark shown in the left-most selection checkbox.
-
Available channels (not connected to any bot, available to be connected) are listed next. Select a channel to add it to the bot.
-
Unavailable channels (channels that are already connected to another bot) are listed last. They are grayed out and cannot be selected.
You can search and filter the channels/profiles using the options at the top of the dialog.
Once you have made your selections via the checkbox selectors, click Save changes for them to take effect.
Additional notes on channels
-
Test channels
When editing channels for your bot, you may notice a Test channel column on the far right of the displayed list. This column displays a blue tick for any channel or profile that was designated as a test channel. This is an identifier that facilitates the testing of bots without any interactions from the test activities being included in Bot analytics, preserving data integrity and accuracy.
You can set or unset this identifier at any time via Settings → Channels in the application menu.
When you test a bot for the first time, a test webchat channel is automatically created and attached to the bot in order to provide you with a basic initial testing environment. You can then see it in the Connected channels column for the bot on the Overview page. -
Social/private messaging channels
For owned social or private messaging profiles to be available within this list, they must be added to your Emplifi account and be enabled for use with chatbots via the Settings module of the Emplifi platform. Otherwise, they will not display.
Settings dialog
To open the individual settings of a specific bot, click the bot from the list of existing bots displayed on the Overview page, and then click Settings at the top.
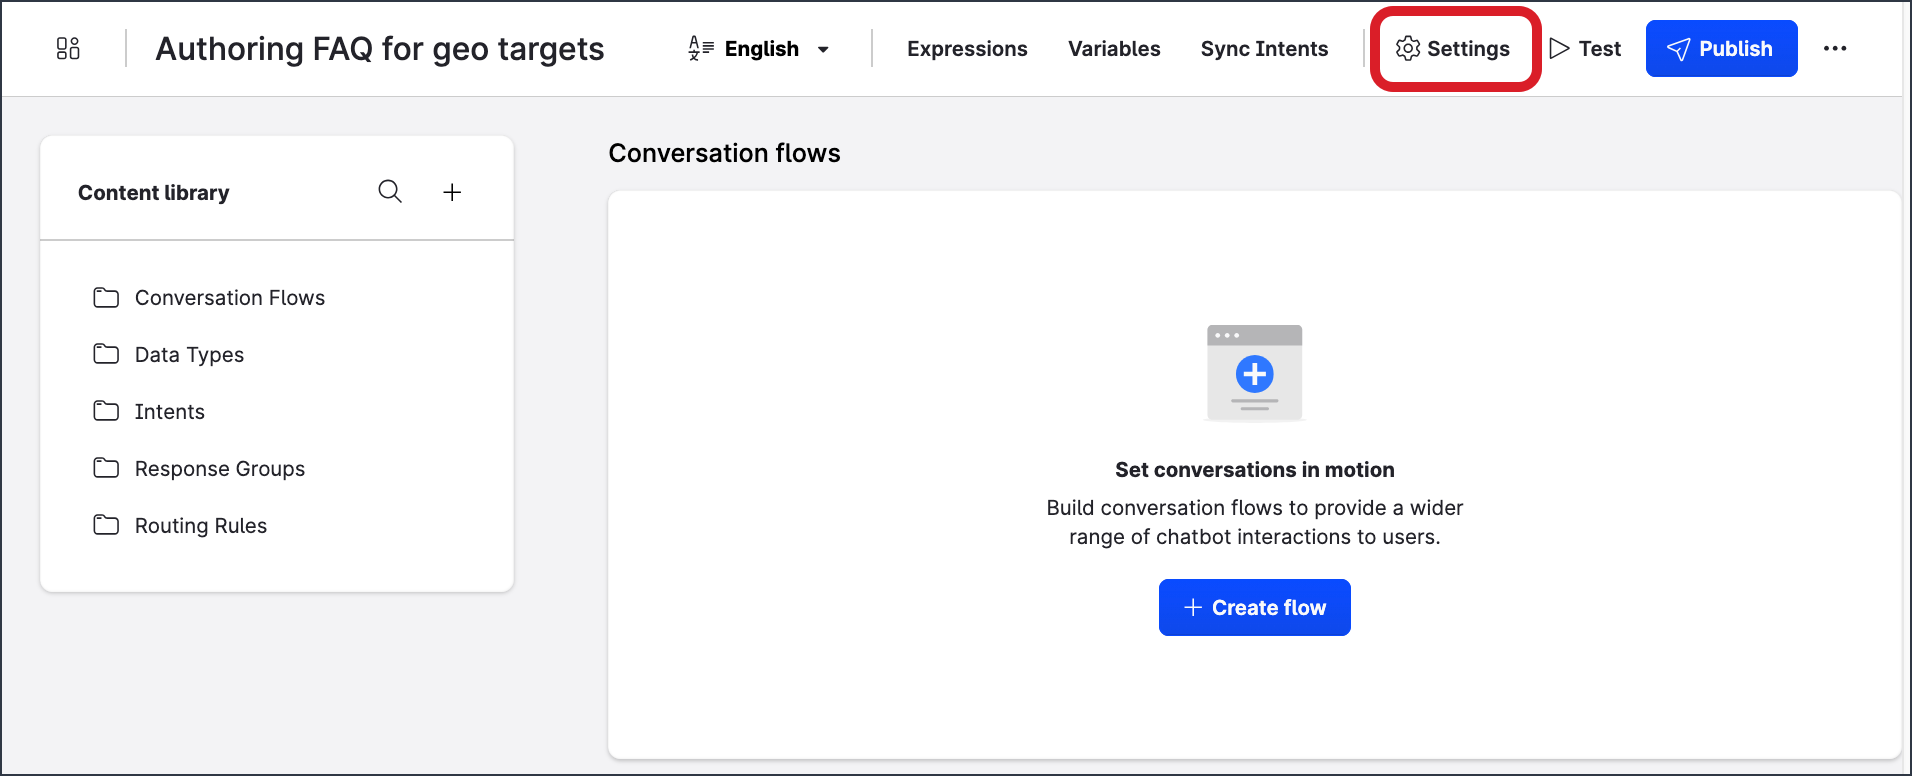
The Settings dialog with four tabs opens.
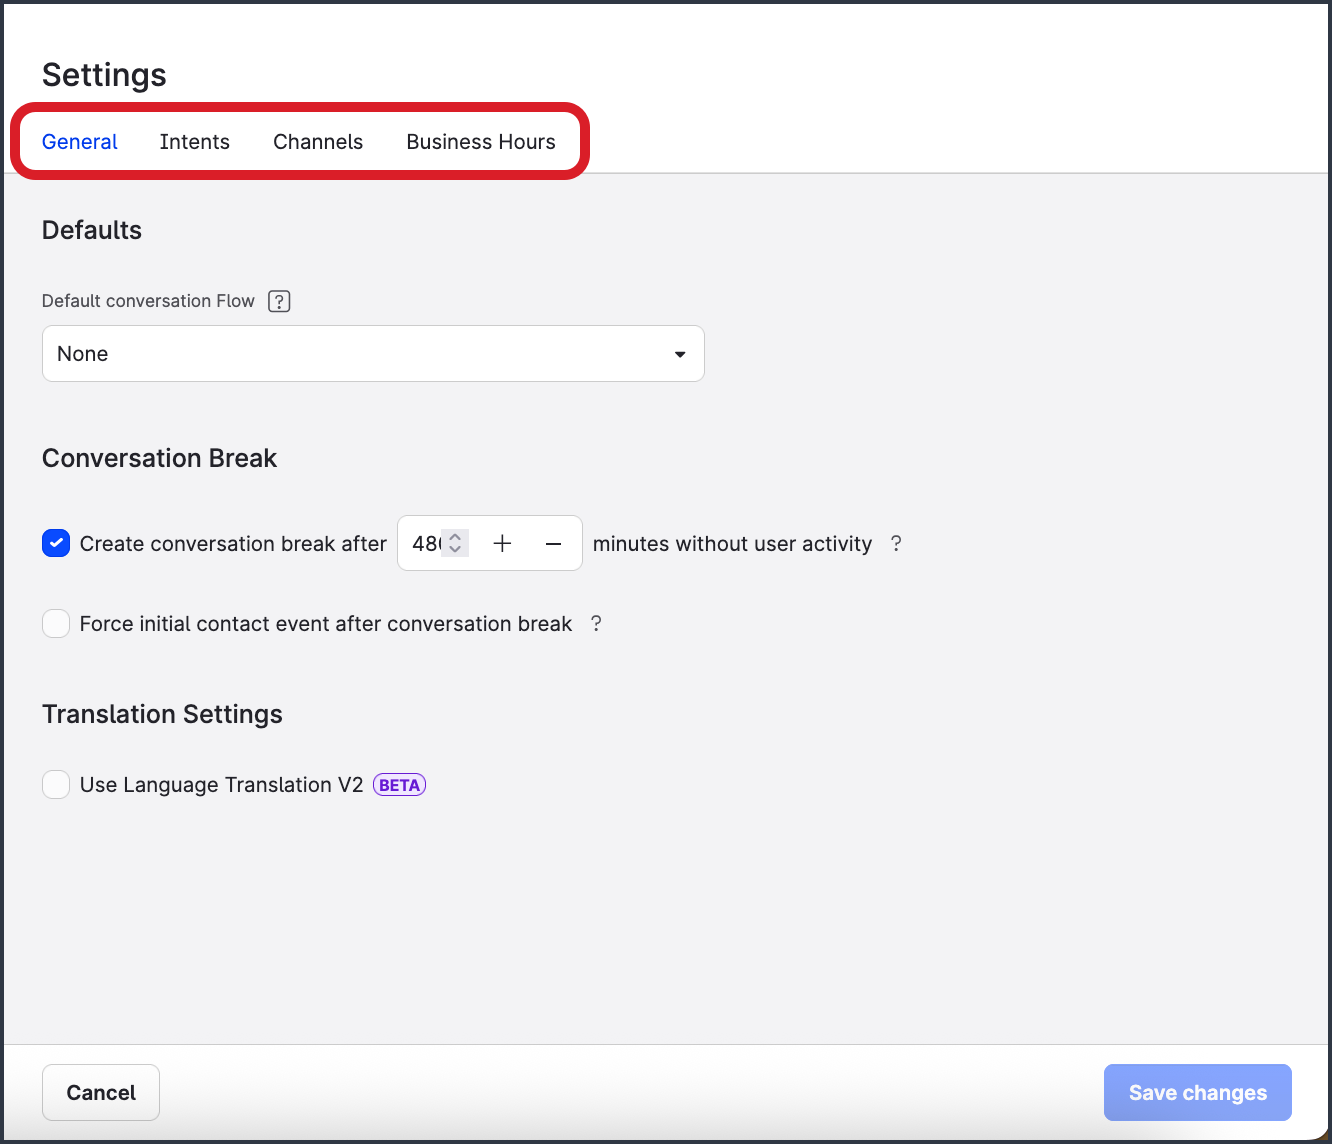
Depending on the channel that you are deploying your bot to, not all of the settings may be required or available for your bot.
General
-
Defaults
-
Default conversation Flow
The default conversation flow allows you to define what flow customers will be shown when first interacting with your bot.
The default conversation flow is triggered only if there are no other routing rules or specific configurations in place that would otherwise override this default.
-
-
Conversation Break
-
Create conversation break after […] minutes without user activity
This setting enables tracking for containment analytics. By default, when you create a new bot, this setting is enabled with the default inactivity threshold set to 480 minutes (8 hours). -
Force initial contact event after conversation break
(Optional) This setting allows you to artificially add an “initial contact” event to any conversation started with your bot after a conversation break is used. This is useful if you want to provide a specific user experience to all users, like showing a default greeting, regardless of if they are returning customers or not. This event can be used as a value in routing rules within your bot.
-
-
Translation Settings
-
Use Language Translation V2 Beta
See November 12, 2025 for more information.
-
Intents
-
Defaults
-
Default Intent Handler
Use this setting if you configured intents within your bot.
After you have created intents, you need to configure an intent handler to analyze and identify the intent expressed by users and route them to the correct conversation flow or action (per the configuration in your bot).
Once created, your handler will appear in the dropdown. If you have not created an intent handler, this dropdown will be empty.
-
Default Fulfillment Handler
Use this setting if you configured intents within your bot.
In most cases, the fulfillment handler will be the same as the intent handler because fulfillment simply governs what action is taken to fulfill an identified or matched intent from a user conversation.
As mentioned above, once your intent handler is created, it will appear in the dropdown. In the majority of cases, you will be able to use the same handler for both intent and fulfillment and you will not need to create two identical handlers. -
Intent match confirmation
(Optional) This setting is used when you want your chatbot to send a message to users when an intent is matched, based on what they have typed into the bot. It essentially asks the user to confirm if bot correctly understood the nature of the query.
-
Intent feedback
(Optional) This setting is used when you want your chatbot to allow users to provide limited feedback on the responses they receive, denoted via emoji reactions.
-
Channels
-
Chatbot language
This setting allows you to switch between language variants available within your bot (configured within the language dropdown on the authoring header menu), for the purpose of configuring the optional settings described further in this section (where available). -
Get started button
This setting allows you to enable a Get Started button to be shown to users of your chatbot the first time they start a conversation with it.
-
Button Label
This setting allows you to alter the default text shown to users when they see the Get Started button.
-
Persistent menu
This setting allows you to configure a persistent menu on supported channels (Facebook Messenger, Webchat, and App (embedded chat)).
Once configured, the menu provides a persistent set of up to three buttons that users can activate by clicking a list menu that displays next to their text entry field of the customer-facing bot interface. These buttons can either support a web URL link that opens a separate webpage or a postback event to trigger navigation to a specific flow in the bot.
For flow navigation from these buttons to work correctly, you must configure a routing rule with the matching postback/button value within your bot.
SMS Message Filtering
(Optional; only for bots deployed on an SMS channel) This setting allows you to choose to process only the first message in a series of SMS messages within a given time period (in milliseconds). This is useful for intent matching or flow routing behaviors. It helps avoid confusion if there are delays in sending multiple messages from the end user or other issues due to character limits with SMS messages. -
SMS STOP Message
(Only for bots deployed on an SMS channel) This setting allows you to customize the “stop/unsubscribe” message that you send to customers and the timeframe in which you send it (for example, every 14 days). This mechanism is often a legal requirement for any SMS sending behaviors from brands/organizations, depending on the geographic region.
Business Hours
-
Timezone
This setting allows you to set the default timezone for your bot. This is useful for defining business hours and when customers can expect your human agent teams to be available if they need to escalate an issue. This setting is also used in conjunction with any analytics and metadata for agent handling times and bot message timestamps.
-
Business Hours
(Optional) This setting is specific to your bot and allows you to define the business hours of your bot by enabling the toggles for each day of the week and setting the times accordingly. The business hours can then be used for logic routing within your bot, for example, if you want to send an “out of hours” message to customers who attempt to contact your human agents and inform them of any wait times or alternative methods to find support.
-
Holiday Hours
(Optional) Similar to the business hours, this setting allows you to define specific dates when your hours of operation may deviate from your usual hours. This can be useful for national holidays (Christmas, Thanksgiving, bank holidays) or periods where a business may close or have reduced hours for a period of time (for example, Christmas shutdowns or New Years Eve/Day).