Bots can be configured to detect the "intent" of customer messages and then direct or answer the customer in a predefined manner. They do so by using an intent handler, which is loaded with intents that can be defined here and used while authoring a bot. For more information, see Intents and Bot Authoring.
Handlers use predefined intents to understand the user's questions and to provide responses. Intents represent the different purposes/questions that the customer might have. These are then fed into and processed by the handler, which determines which intent is the best match based on the user's actual statement. Some handlers can store responses that are associated with the intents, and these can also be returned to and used by the bot. Handlers that are set up to return responses are called "fulfillment handlers."
Example: George is an Omega Market customer who wants to know the policy on returns. Once George enters his question with the word "return", the Omega Market bot routes George to information on their return policy. The bot did this by first detecting the purpose of his inquiry and then routing him to the correct information.
Accessing the handler page
-
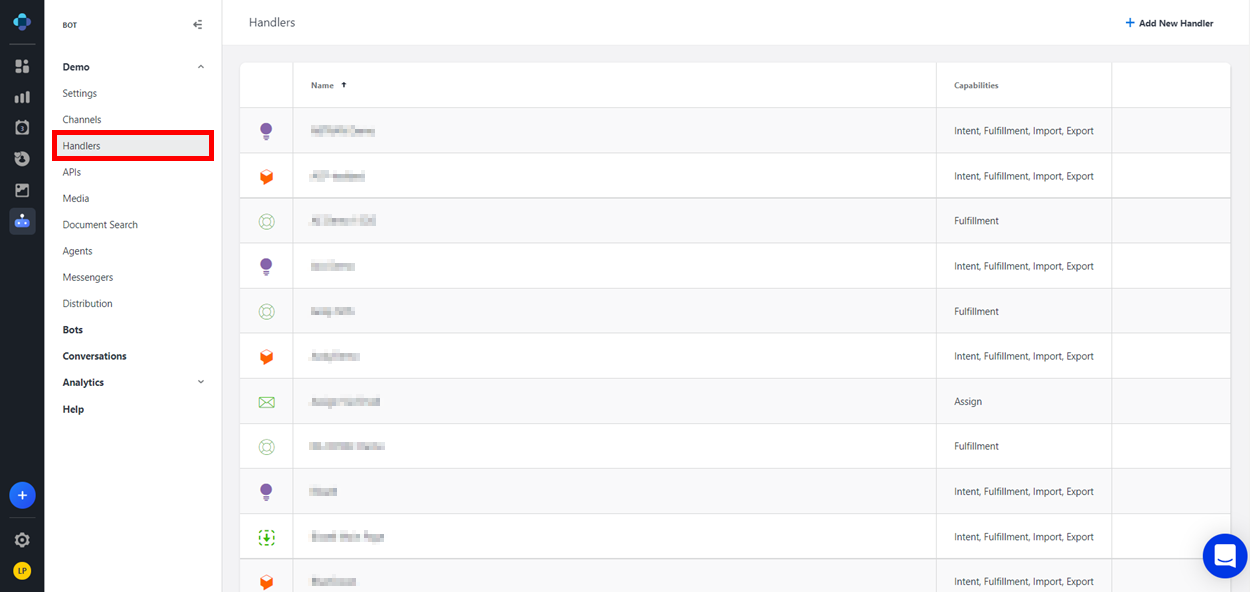
From the Application Bar, click Your Company Name.
-
Click Handlers.
Setting up handlers
When it's time for you to begin configuring your bot, you add handlers to the bot. Handlers detect the intent of the customer during a bot conversation and then offer answers accordingly.
When adding handlers to your bot, you have two choices: Default and Fulfillment.
If you add a Default Intent Handler, your bot sends every user statement to that handler to see if it matches an intent. The Default Intent Handler must be a handler that is capable of processing intents (such as Emplifi Knowledge, DialogFlow, or Microsoft LUIS).
If you add a Default Fulfillment Handler, your bot attempts to use that handler to provide a response if it has no other option (such as a response on a conversation flow or a routing rule). The Default Fulfillment Handler must be a handler that is capable of providing responses.
Additional Buttons
|
Icon |
Button Name |
Description |
|---|---|---|
|
|
Test |
Allows you to test the Authoring and Querying functions of Emplifi Knowledge handlers. |
|
|
Edit |
Allows you to edit the settings for the handler. |
|
|
Delete |
Removes the handler. A confirmation message will display. Click OK to delete the handler. |
Emplifi Knowledge
The Emplifi Knowledge intent engine imports all topics from Emplifi Knowledge into your bot. This feature is available through integration with Emplifi Knowledge software.
For more information about Emplifi Knowledge, contact your Emplifi representative.
To set up an Emplifi Knowledge handler:
-
At the top of the Handlers page, click the + Add New Handler button.
-
On the drop-down list that appears, click Emplifi Knowledge. A dialog window appears.
-
Enter the appropriate information in all the relevant fields.
-
Name: Enter the Emplifi Knowledge Base name.
-
Authoring API URL: Enter the Emplifi Knowledge Base URL address for the Authoring API.
-
Authoring API Username: Enter the username that you use to sign into the Authoring API.
-
Authoring API Password: Enter the password that you use to sign into the Authoring API.
-
Querying API URL: Enter the URL address for the Querying API.
-
Querying API KB Name: Enter the Emplifi Knowledge Base name for the Querying API.
-
Querying API Secret Key: Enter the secret key for the Querying API.
-
Querying API Default Touchpoint: Enter the default touchpoint for the Querying API. This is the audience receiving the response if no other audience is specified.
-
For Example: A touchpoint could be "Public Web" or "Facebook".
-
-
Querying API Touchpoint: Enter the touchpoint for the Querying API. This is the audience receiving the response.
-
For Example: A touchpoint could be "Public Web" or "Facebook".
-
-
Querying API Topic Context: Enter the topic context for the Querying API.
-
For Example: Topic context could be "Global" or "Agent Only". The default is "All".
-
-
Querying Language: Enter the language that appears for the user. The default language is English.
-
Roles: Enter the names of any privileged areas within the responses, separating each name with a comma and no space.
-
For Example: Web,Web/Mobile,Web - G,Mobile - G
-
-
Suggestion Count: Enter how many suggested topics (i.e. near-matches for the user's query) are displayed.
-
Split Responses: Select this checkbox to split a single response into multiple bot responses.
-
Show Topic Label in Article: Select this checkbox to display the Emplifi Knowledge Topic label in the first section of the response, followed by the topic's content. The user can click on the topic to expand it.
-
Truncate Response After X Words: Enter the number of words that appear in a response before it truncated.
-
Show More Message: Enter the text prompting users to display the entire response.
-
-
Click Add to save the Emplifi Knowledge handler.
Emplifi Social
The Emplifi Social intent engine is used for Facebook and Twitter bots. It is used so that the customer can escalate the conversation to a live agent, who then uses Emplifi Social to respond.
In order to use the Emplifi Social intent engine, you will need an access token.
To set up an Emplifi Social handler:
-
At the top of the Handlers page, click the + Add New Handler button.
-
On the drop-down list that appears, click Emplifi Social. A dialog window appears.
-
In the Name field, enter the name that you would like the handler to have.
-
In the Access Token field, enter the access token for Emplifi Social.
-
Click Add to save the Emplifi Social handler.
DialogFlow
The DialogFlow intent engine contains a large collection of predefined intents. A bot developer can add customized intents as well. If you decide to use DialogFlow as your intent engine, or to import existing DialogFlow intents, follow these steps to authenticate your DialogFlow handler.
To set up a DialogFlow handler:
-
At the top of the Handlers page, click the + Add New Handler button.
-
On the drop-down list that appears, click DialogFlow. A dialog window appears.
-
The fields in the dialog window are automatically filled with information from the JSON Key file that is generated from DialogFlow.
-
Click Add to save the DialogFlow handler.
Document Results
The Document Results handler can provide answers to user questions by linking to relevant documents stored on the Bot platform.
To set up a Document Results handler:
-
At the top of the Handlers page, click the + Add New Handler button.
-
On the drop-down list that appears, click Document Results. A dialog window appears.
-
Enter the appropriate information in all the relevant fields.
-
Handler Name: Enter the name for the Document Results handler.
-
Search Index: Select the search index that the handler searches for relevant documents. For more information about configuring search indexes, see Document Search.
-
Result Message: Configure the language and content of the message accompanying document results.
By default, the result message reads, “This document [{{name}} - {{description}}] ({{link}}) may be helpful to you.” In the message received by the user, the variables are replaced with the respective document’s information.
-
Tag Mapping: Use the drop-down menu to select a tag by which to filter the document results. In the text field, enter the tag value that the handler searches for. For more information about configuring tags, see Document Search.
-
-
Click Add to save the Document Results handler.
The Document Results handler can also be added to a Handler List (for more information, see the "Handler List" section below). In the Handler List settings, you can configure the confidence floor that determines when the Document Results handler’s response is prioritized over intent matches and which documents to display in the case of multiple matches.
Email
The Email intent engine option is a legacy feature that will eventually be removed from Emplifi Bot.
Handler List
You can use the Handler List if you want to run a question through multiple handlers at once.
Example: Suppose you have some answers in a DialogFlow handler and some in Emplifi Knowledge. You could set up a Handler List that first checks the DialogFlow handler for an answer, and if there is no matching intent, it would then check the Emplifi Knowledge handler.
To set up a Handler list:
-
At the top of the Handlers page, click the + Add New Handler button.
-
On the drop-down list that appears, click Handler List. A dialog window appears.
-
Click + Add Handlers to List to display the available handlers.
-
From the list, select the handlers that you would like to add to your Handler List, then click Add Selected Handlers.
-
Click Save to add the Handler List.
LivePerson
LivePerson is a live chat application that can be used as a fulfillment handler by Emplifi Bot, so that conversations can be routed through LivePerson to a live agent when required.
To set up a LivePerson handler:
-
At the top of the Handlers page, click the + Add New Handler button.
-
On the drop-down list that appears, click LivePerson. A dialog window appears.
-
Enter the appropriate information in all the relevant fields.
-
Name: Enter the name for the LivePerson handler.
-
Account ID: Enter this information from your LivePerson account.
-
App Key: Enter this information from your LivePerson account.
-
-
Click Add to save the LivePerson handler.
LUIS
LUIS is an intent engine with built-in intents that can be modified for improved language understanding. It uses machine learning to understand natural language messages in ten languages.
If you decide to use LUIS as your intent engine or to import existing LUIS intents, follow these steps to authenticate your LUIS handler.
To set up a LUIS handler:
-
At the top of the Handlers page, click the + Add New Handler button.
-
On the drop-down list that appears, click LUIS. A dialog window appears.
-
Enter the appropriate information in all the relevant fields.
-
Name: Enter the LUIS agent name.
-
Programmatic API Key: Enter the key for the LUIS account.
-
App Name: Enter the name of the application on the LUIS platform.
-
App ID: Enter the ID of the application on the LUIS platform.
-
-
Click Add to save the LUIS handler.
NICE
NICE inContact is a live chat application that can be used as a fulfillment handler by Emplifi Bot, so that conversations can be routed through NICE inContact to a live agent when required.
To set up a NICE handler:
-
At the top of the Handlers page, click the + Add New Handler button.
-
On the drop-down list that appears, click NICE. A dialog window appears.
-
Enter the appropriate information in all the relevant fields.
-
Name: Enter the name of the NICE handler.
-
Access Key ID: Enter this information from your NICE account.
-
Access Key Secret: Enter this information from your NICE account.
-
Point of Contact: Enter this information from your NICE account.
-
-
Click Add on the NICE handler.
Salesforce
Salesforce is a live chat application that can be used as a fulfillment handler by Emplifi Bot, so that conversations can be routed to a live agent on the Salesforce platform when required.
To set up a Salesforce handler:
-
At the top of the Handlers page, click the + Add New Handler button.
-
On the drop-down list that appears, click Salesforce. A dialog window appears.
-
Enter the appropriate information in all the relevant fields.
-
Name: Enter the name of the Salesforce handler.
-
Client ID: Enter this information from your Salesforce account.
-
Client Secret: Enter this information from your Salesforce account.
-
Username: Enter the username of your Salesforce account.
-
Password: Enter the password of your Salesforce account.
-
Point of Contact: Enter the Point of Contact ID for the Salesforce account.
-
Escalation Trigger: Configure the conditions under which an escalation to a live agent is triggered.
-
-
Click Add to save the Salesforce handler.
For more information about configuring the Salesforce handler, including the actions that must be taken on the Salesforce platform, please request the "Salesforce Integration" guide from your Emplifi representative.
Web Bot
The Web Bot handler quickly crawls your website to set up a bot conversational flow based on the site navigation and contents. The Web Bot set-up allows you to define the URL and crawling directives for your bot.
To set up a Web Bot handler:
-
At the top of the Handlers page, click the + Add New Handler button.
-
On the drop-down list that appears, click Web Bot. A dialog window appears.
-
In the Site name field, enter the name of your website.
-
In the Initial crawl URL field, enter the URL address where the bot should crawl for information.
-
Click + Add Locator. A new row appears in the Crawling Directives box.
-
Click the Settings button in the new row.
-
Enter the Crawling Directives in the following fields:
-
Element Selector: Selects a specified element.
-
Name Selector: Selects the specified name.
-
Image Selector: Selects elements with the specified image.
-
Link Selector: Selects a specified link.
-
Subtitle Selector: Selects the specified subtitle.
-
Links to New Page: Finds the specified link to a new page.
-
-
Click Apply to add the Crawling Directives.
-
In the Fetch delay (ms) field, enter a fetch delay value in milliseconds.
-
Click the Save button to add the Web Bot handler.
Community
Community is another Emplifi platform that can be used as a fulfillment handler by Emplifi Bot, so that conversations can be routed to a live agent on the Community platform when required.
To set up a Community handler:
-
At the top of the Handlers page, click the + Add New Handler button.
-
On the drop-down list that appears, click Community. A dialog window appears.
-
Enter the appropriate information in all the relevant fields.
-
Name: Enter the name of the Community handler.
-
Labels: Enter the labels that are affixed to user messages that are escalated to Community.
-
-
Click Add to save the Community handler.