Intents are your bot's interpretations of user messages. They are determined through natural language processing and trigger certain actions from your bot. When an intent's predefined conditions are matched by a message from the user, your bot can offer a configured response or route the user to a configured conversation flow. When you set up your bot, you will need to either import intents or create your own.
Adding new intents
To add a new intent:
-
Open Emplifi Bot and on the Overview page, select the name of the Bot.
-
In the Content library of the bot authoring page, click Intents.
-
Click Add intent either from the prompt button on the right-hand side of the screen, or via the + icon shown when hovering your mouse over the intents folder.
Configuring intents
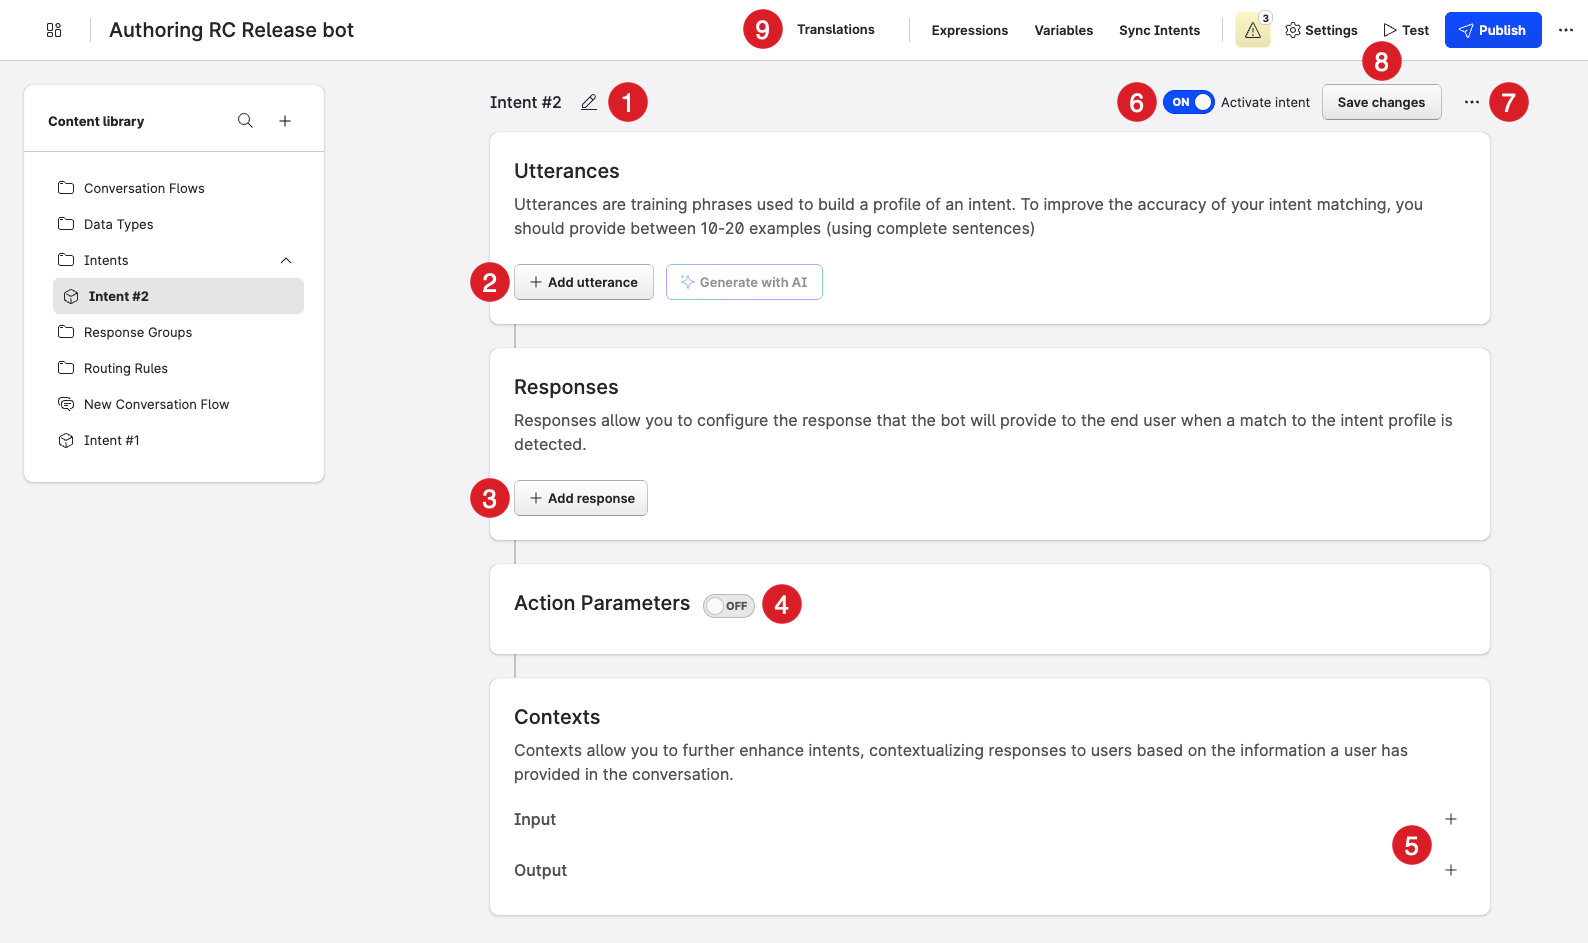
After you’ve created your new intent, in the Content library, click the new intent, and configure the following:
-
Name: Click the pencil icon to rename the intent.
-
Utterances: Click + Add utterance to add utterances (also known as training phrases) to build the intent profile. Utterances are questions your customers will ask your Bot. Use full and complete sentences/questions that your users would ask. To delete an utterance, hover your cursor over the relevant utterance and click the trash bin icon.
Note: To give the intent profile the highest likelihood of correctly identifying and matching user utterances, it is recommended that you add at least 10 distinct examples of how someone may ask a question. For example, think of the different ways someone may order food in a restaurant or express interest in seeing a movie. Be sure to use full sentences rather than 1 or 2 isolated keywords.
After adding your first utterance, you can use the Generate with AI option to automatically generate more examples based on the first utterance. You can continually generate batches of 5, deleting utterances that you feel aren’t a definitive match for the intent profile you are configuring, improving the relevance of the generated examples.
-
Responses: You can choose to add a simple, static response to be shown to users when an intent match is detected. As best-practice, we recommend instead routing users to a specific conversation flow via a shortcut or routing rule when the intent match is detected, to provide a better user experience.
-
Action parameters (optional): Switch the toggle on to add a parameter to the configured action. This is used to configure the specific values that you would like the bot to look for and/or prompt for after matching a user's utterance with an intent. For more information, refer to the “Action parameters” subsection below.
-
Contexts (optional): Click the + icons next to Input and Output to further enhance your intent. Adding an Output Context tag to an intent means that the conversation will be tagged with that context if the user's utterance matches the intent. Adding an Input Context to an intent greatly reduces the chance that a user's utterance will be matched to that intent unless their conversation has been tagged with that context previously.
-
ON/OFF toggle: Switch the toggle on or off to activate or deactivate the intent.
-
Label (optional): Click the ellipses icon (…) and select Intent label to add a label to your intent. This is the term used to refer to the intent in the confirmation message sent to users following a match. For more information, refer to the "Intents Tab" section of Bots.
-
Save: Click Save changes to save the changes you have made to the intent.
Action parameters
In this section, you can configure the specific values that you would like the bot to look for and/or prompt for after matching a user's utterance with an intent. These values can range from contact information to geographic location to custom data types.
Example: Suppose you've built an intent for "Booking a Flight" and you now want to configure the information that your bot will extract from the user messages that trigger the intent. To do so, you would go to the Action section and create new values of the appropriate type, such as "Person (Name)," "Date Time," "Airport," and any other details required for booking a flight. Once these values are defined, your bot will know what information to look for in user messages, and what information to prompt for in the event that it isn't detected.
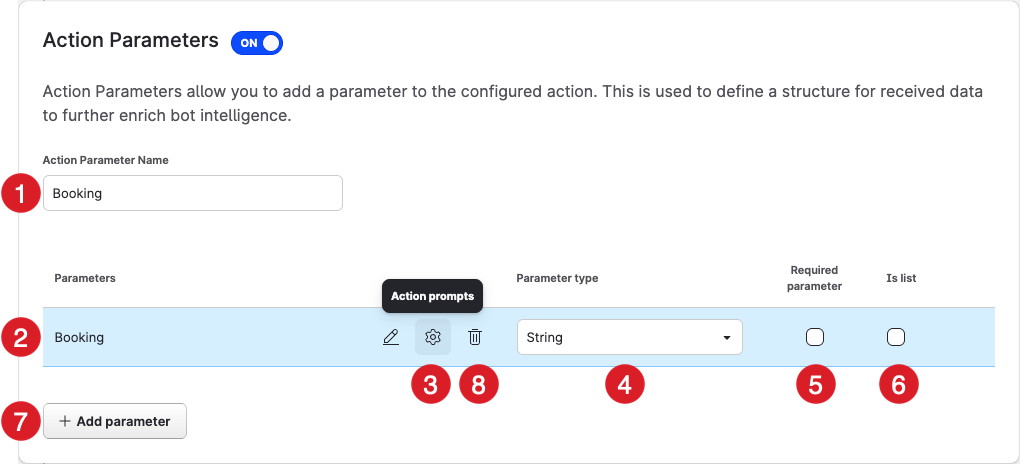
After you’ve switched the toggle on to enable action parameters, configure the following:
-
Action parameter name: Enter a new name for the action.
-
Parameter name: Enter a name for the value that the bot prompts the user for following an intent match.
-
Action prompts: Click the gear icon to open the parameter prompts window, where you can author the bot messages that prompt the user following an intent match. These messages should be authored prompting the user to specify whatever parameter is missing.
-
Parameter type: Select the type of value that the bot prompts the user for following an intent match. The following type categories are available:
-
String (default)
-
Date and time
-
Numbers
-
Amounts with units
-
Unit names
-
Geography
-
Contacts
-
Names
-
Music
-
Other
-
Note: For more information, refer to Data Types.
-
Required parameter: Tick this checkbox to require the bot to prompt the user for the selected value following an intent match. Otherwise, the bot will extract any value it detects in the user's message, without prompting the user if it detects no value. The parameter's value is then available in the temporary variable {{lastMessageIntent.parameters.[parameterName]}} until another intent is matched. For more information, refer to Variables.
-
Is list: Tick this checkbox to enable the bot to detect multiple parameters in the user's message.
Example: If a user sends a message reading, "I like blue, red, and pink," the bot will be able to store all of those color values if the "Is List" setting is enabled.
-
Add parameter: Click here to create a new value.
-
Delete: Click here to delete the selected action.
Exporting intents
You can still optionally export your intents to an intent engine like Emplifi Knowledge or Google DialogFlow. When you export intents, you are "training" the designated intent engine with all the sample phrases that you've added. How the intent engine breaks those phrases down and "learns" from them depends on which engine you use.
To export your intents:
-
From the menu at the top of the bot authoring page, click Sync intents.
-
Click Export.
-
From the pop-up list, select the intent handler that you would like to export the intents to or select Download.
-
Click OK if you are sure that you want to replace the already existing intents.
Importing intents
-
From the menu at the top of the bot authoring page, click Sync intents.
-
Click Import.
-
From the pop-up list, select the intent handler that you would like to import to your bot.
-
A new row containing the intent handler will appear in the dialog window. When the Percent Complete reaches 100, the intent handler is finished importing.
Mapping intents as conversation shortcuts
When authoring a bot conversation, you can create shortcuts in the conversation flow using intent matches. This allows you to direct users to a specific conversation flow after matching a certain intent, rather than just displaying a response.
-
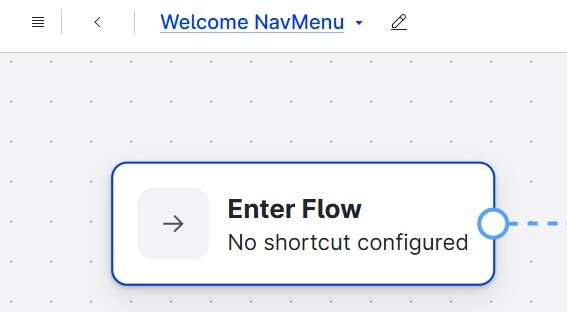
In the bot authoring area, click the Start Node for the conversation flow to bring up its Node Menu.
-
Click the Shortcut button. A dialog window appears.
-
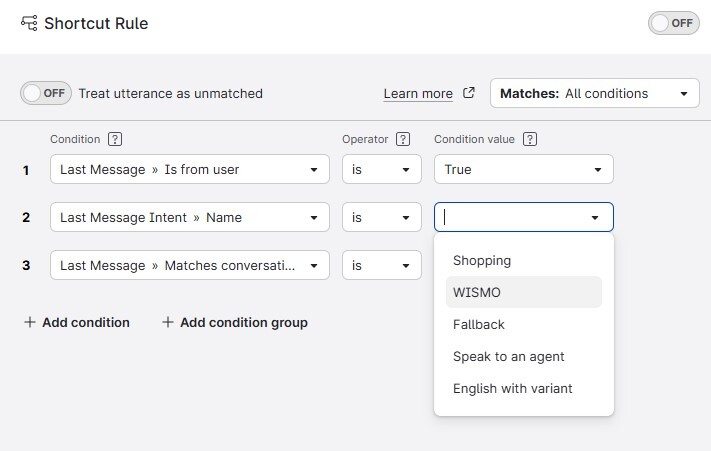
In the dialog window, specify the rules for the shortcut.
-
To map an intent, select the Name criterion under the "Last Message Intent" header in the left-hand drop-down, as well as the intent's name in the right-hand drop-down.
-