On the Bot Authoring page, you can create variables and add them to your bot. Variables are placeholders that you can use to store data in your system.
There are two types of variables:
-
Bot variables, which can be used in the conversation flows of the bot they were created in.
-
Flow variables, which can only be used in the conversation flow they were created in.
In addition to strings of letters, you can also store numbers, special characters, true/false values, and objects defined in JavaScript Object Notation (JSON).
Variables can be preset from external applications using an API integration with Emplifi Bot. They can also be modified (i.e. a value can be assigned to them and that value can be stored in your system) when a user reaches a particular node in a conversation flow or when a routing rule runs. You can find lists of defined variable modifications in a Node Settings window or a routing rule definition. For more information, see Conversation Flows and/or Routing Rules.
Authoring variables
Accessing the Bot authoring page
-
On the Bots page, find the card with the name of the bot that you want to author content for.
-
On the bot card, click the Authoring button.
Adding a new Bot variable
Bot variables are permanent variables that can be used in any of your bots' conversation flows.
-
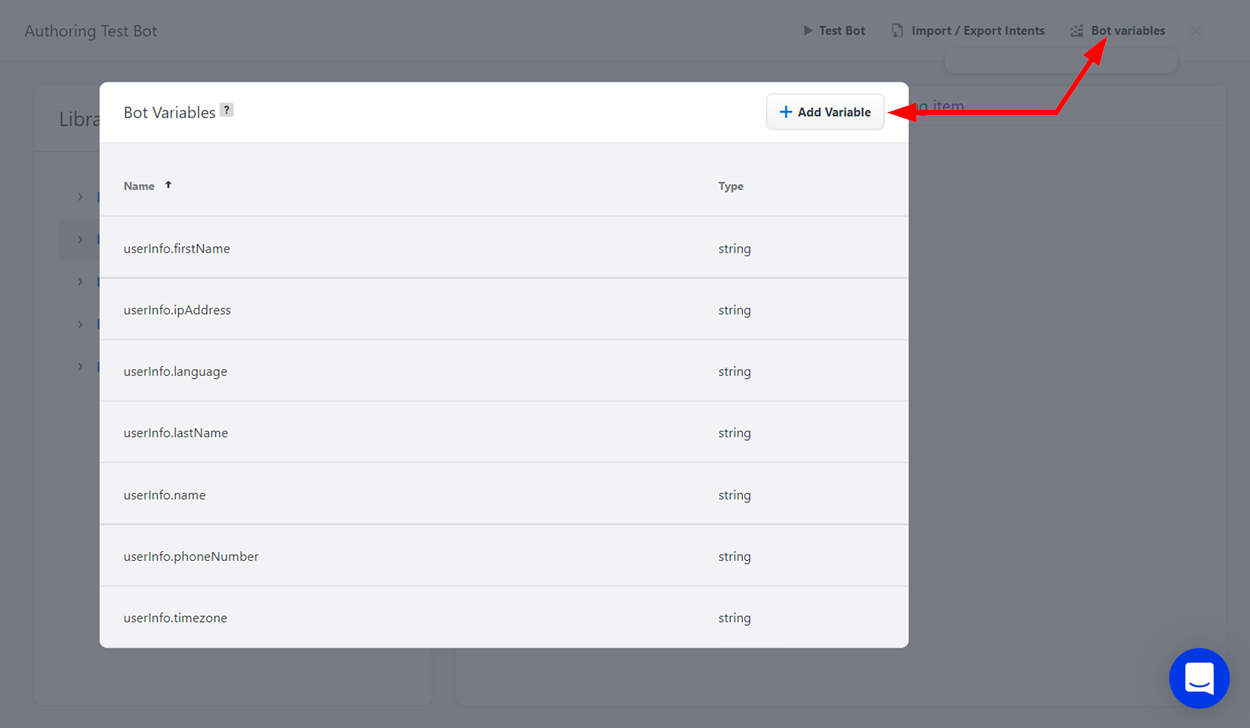
From the top banner of the Bot Authoring page, click the Bot Variables button. The Bot Variables dialog window displays.
-
From the dialog window, click the + Add Variable button.
-
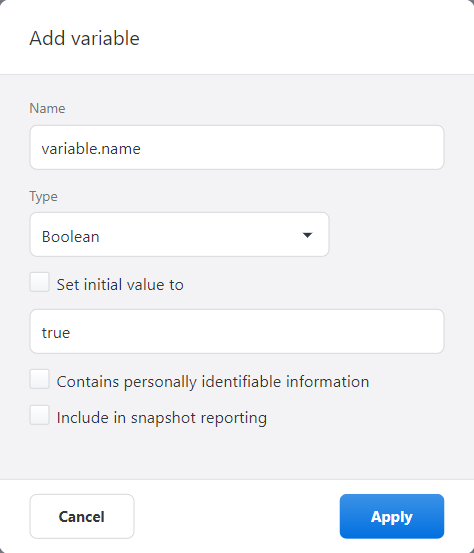
A pop-up window displays. Enter the appropriate information in the relevant fields.
-
Name: Click here to enter a new name for the variable. When you are finished typing, click Enter.
-
Type: Click here to choose the type of variable that you would like to add. Choose from five options:
-
Boolean
-
List
-
Number
-
Object
-
String
-
-
Set initial value to: Click here to give the variable a value that will be in effect prior to the user input providing a new one. The layout of this field depends on the type that you have chosen for the variable. If you chose:
-
Boolean: Enter either "true" or "false" in the text field.
-
List: Enter a list in the text field.
-
Number: Enter an integer value in the text field.
-
Object: Enter an object in JavaScript Object Notation (JSON) in the text field.
-
String: Enter letters, numbers, and/or special characters in the text field.
-
-
Check the box to the left to enable this setting.
-
Contains personally identifiable information: Check this box if the variable's value will consist of information that could identify the user.
-
Include in snapshot reporting: Check this box if a variable's value should be made available when viewing specific conversations on the Snapshot Analytics page. For more information, see Snapshot Analytics.
-
-
Click Apply to save the bot variable.
Adding a new flow variable
Flow variables are temporary variables that can only be used within the conversation flow they were created in.
-
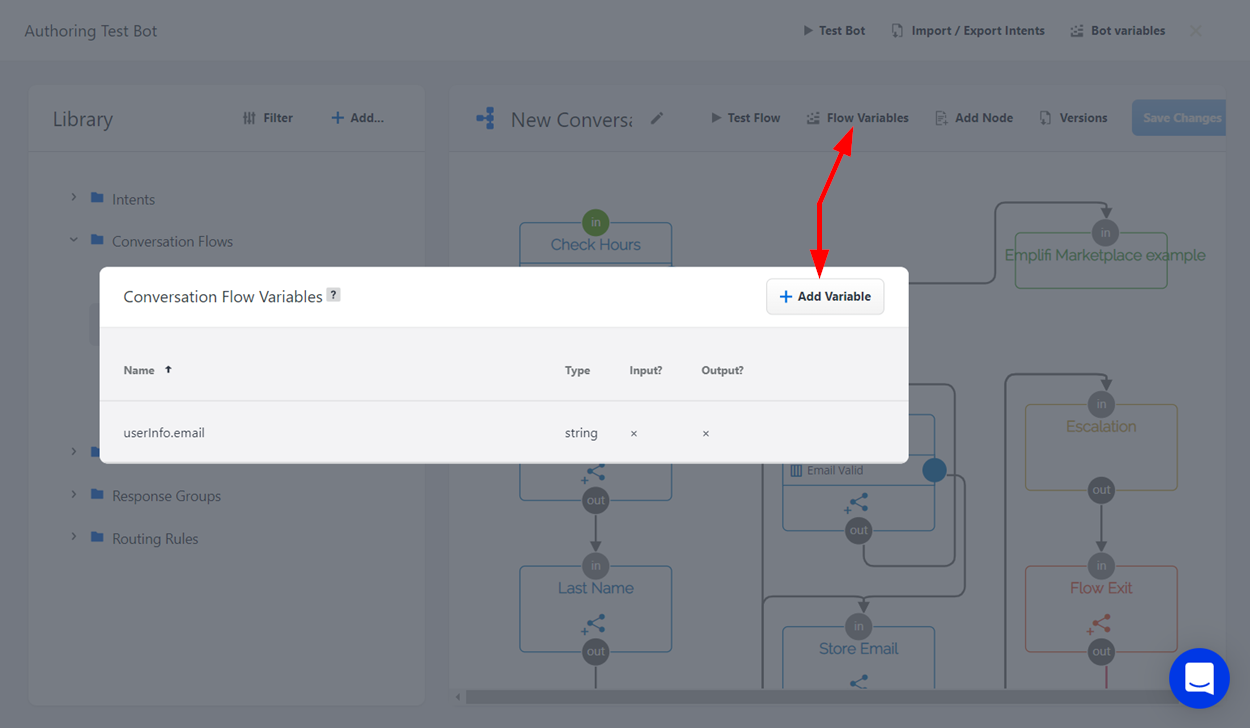
From the conversation flow toolbar, click the Flow Variables button. The Conversation Flow Variables dialog window displays.
-
From the dialog window, click the + Add Variable button.
-
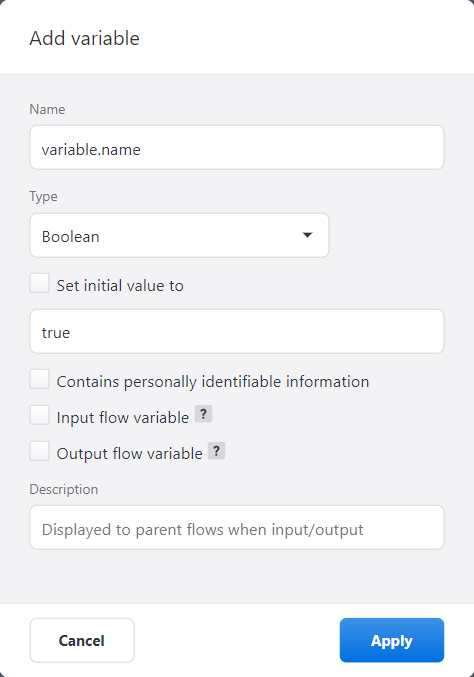
A pop-up window displays. Enter the appropriate information in the relevant fields.
-
Name: Click here to enter a new name for the variable. When you are finished typing, click Enter.
-
Type: Click here to choose the type of variable that you would like to add. Choose from five options:
-
Boolean
-
List
-
Number
-
Object
-
String
-
-
Set initial value to: Click here to give the variable a value that will be in effect prior to the user input providing a new one. The layout of this field depends on the type that you have chosen for the variable. If you chose:
-
Boolean: Enter either "true" or "false" in the text field.
-
List: Enter a list in the text field.
-
Number: Enter an integer value in the text field.
-
Object: Enter an object in JavaScript Object Notation (JSON) in the text field.
-
String: Enter letters, numbers, and/or special characters in the text field.
-
-
Check the box to the left to enable this setting.
-
Contains personally identifiable information: Check this box if the variable's value will consist of information that could identify the user.
-
Input flow variable: Check this box to require a flow that is using the current flow as a child flow to supply the variable's value on entering the current flow.
-
Output flow variable: Check this box to allow a flow that is using the current flow as a child flow to save the variable's value upon exiting the current flow.
-
Description: Click in the adjacent field to enter a description that will display to flows using the current flow as a child flow when the current flow is used.
-
-
Click Apply to save the flow variable.
Defining variable modifications
After creating a variable, you must define a variable modification associated with it, so that your bot knows when to save a value to it. You can configure your bot to do this in two ways: at a particular node of a conversation flow, or within a routing rule.
The Node method
-
In the appropriate conversation flow, find the Standard node where your bot will use the user's input to save a value to the variable. For more information about nodes and conversation flows, see Conversation Flows.
-
Click the Standard node to display the Node Menu above it, then click the Node Settings button.
-
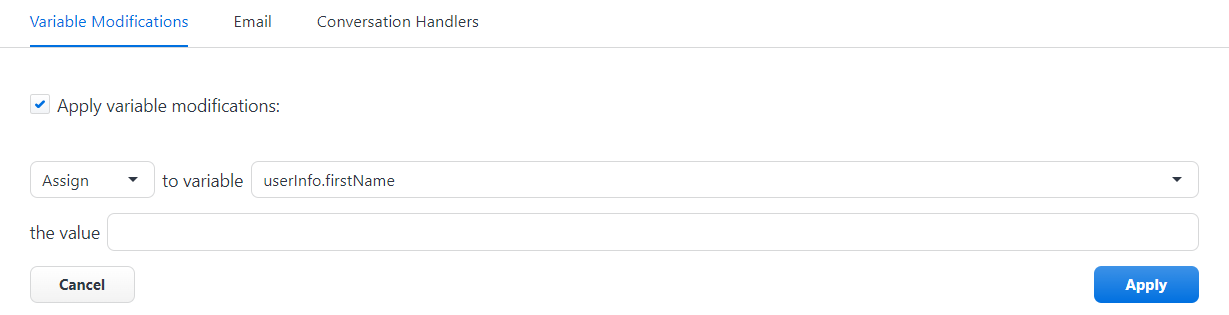
In the Node Settings dialog window, scroll down to the Variable Modifications section. Check the box next to Apply variable modifications.
After checking the box, the Variable Modifications area will darken, indicating that it has become available for editing. -
Click the Add button to create a new variable modification.
-
-
Using the drop-down list adjacent to "to variable", choose the variable you would like the user input to save to.
-
In "the value" field, enter the appropriate system variable.
There is a preexisting variable in your system named lastMessage.content, which represents the most recent message that the user has sent your bot. This can be entered here to assign the user input to the variable that you are currently modifying. -
Click Apply.
The Routing Rule method
-
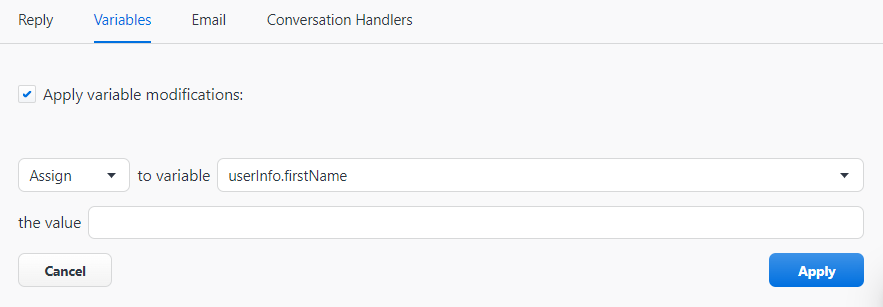
In the appropriate routing rule, scroll down to the bottom of the "...Do This" column and click the Variables tab.
-
Check the box next to Apply variable modifications.
After checking the box, the Variable Modifications area will darken, indicating that it has become available for editing. -
Click the + Add Modification button to create a new variable modification.
-
Using the drop-down list adjacent to "to variable", choose the variable you would like the user input to save to.
-
In "the value" field, enter the appropriate system variable.
There is a preexisting variable in your system named lastMessage.content, which represents the most recent message that the user has sent your bot. This can be entered here to assign the user input to the variable that you are currently modifying. -
Click Apply.