The Bot Authoring page allows you to configure every element of your bot's conversation information. You can add conversation flows, response groups, intents, variables, routing rules, and data types to your bot's Library, and you can create content within individual conversation flows.
Accessing the bot authoring page
-
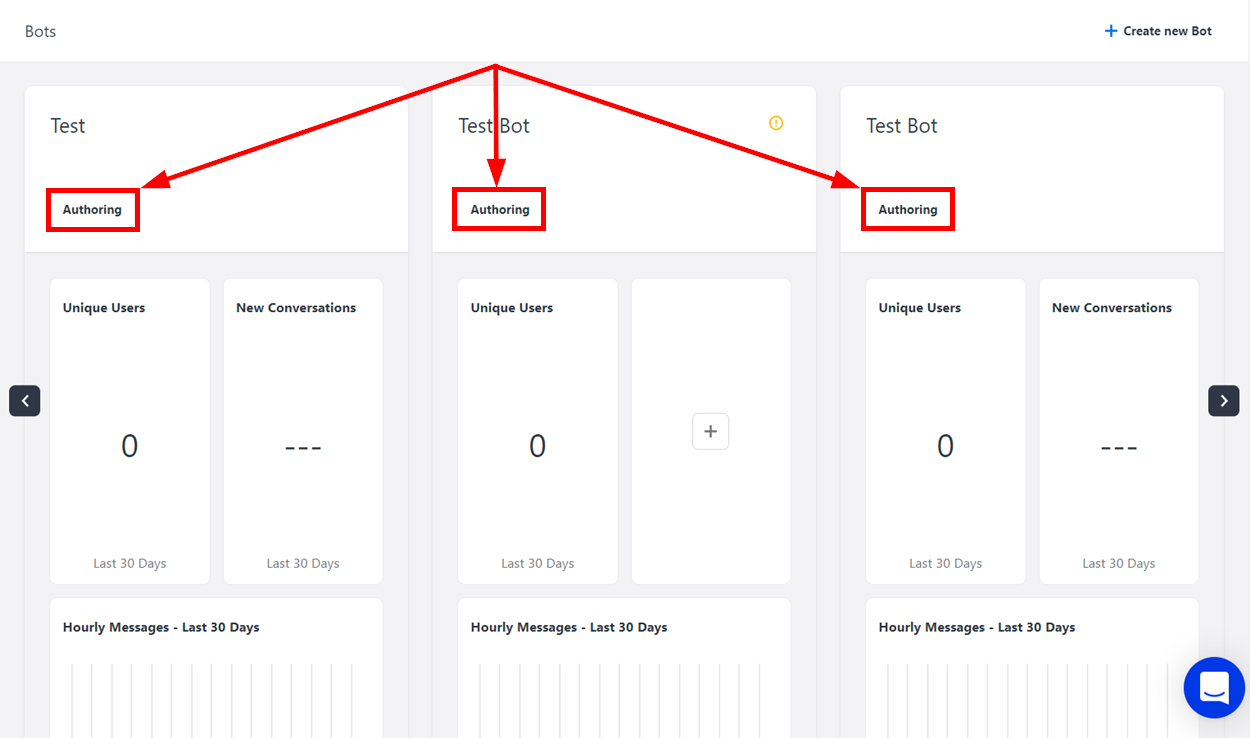
On the Bots page, find the card with the name of the bot that you want to author content for.
-
On the bot card, click the Authoring button.
Bot authoring page layout
General layout
|
Number |
Name |
Description |
|---|---|---|
|
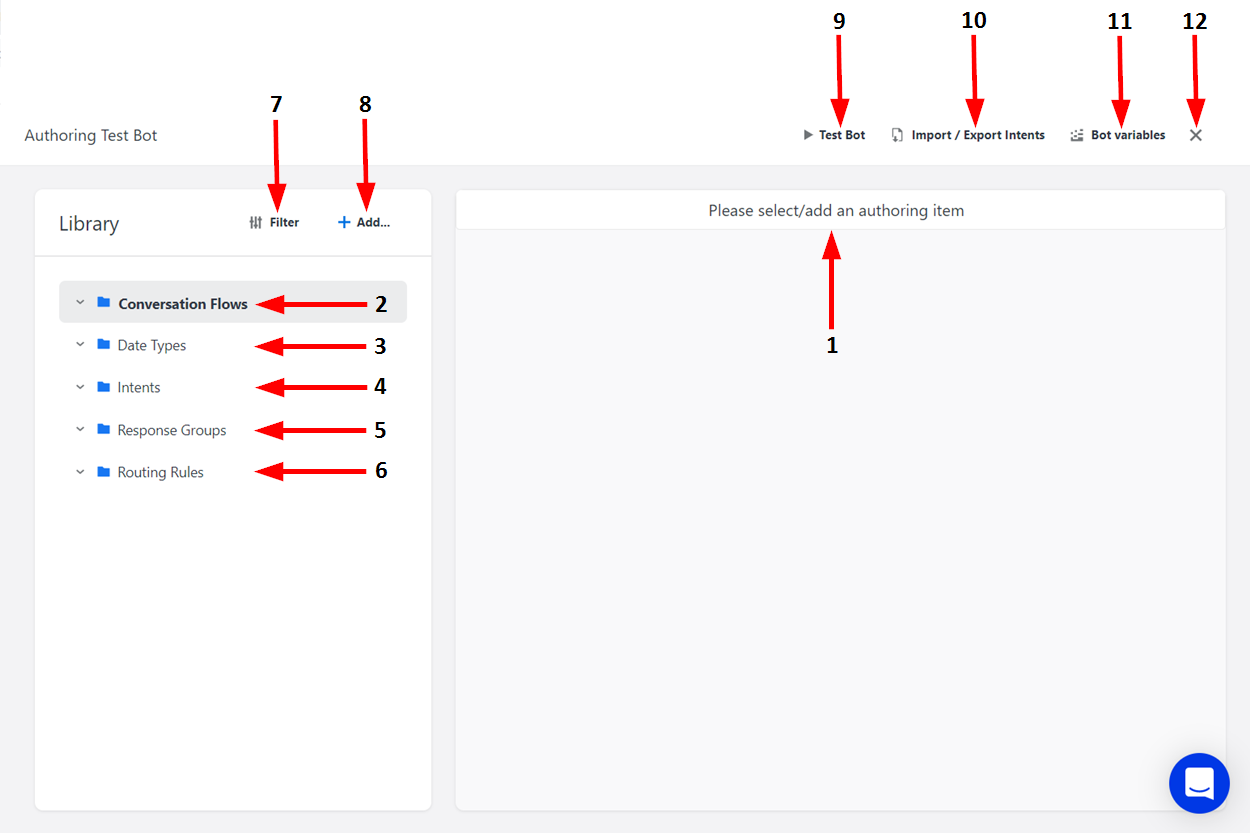
1 |
Authoring Area |
In this area, you can configure the items that you have selected from the Library. |
|
2 |
Conversation Flows |
This is the default folder to store conversation flows. For more information, see Conversation Flows. |
|
3 |
Data Types |
This is the default folder to store data types. Certain intent handlers have the ability to extract key data points from user questions. Data types represent a custom data point for the intent handler to look for and extract. For more information, see Data Types. |
|
4 |
Intents |
The default folder to store intents. Intents are predefined interpretations of user messages that trigger certain actions from the bot. When an intent is matched, the bot offers a configured response or routes the user to a configured flow. The Intents folder only contains intents that you have created, not those that you have imported. For more information, see Intents. |
|
5 |
Response Groups |
The default folder to store response groups. Response groups are groups of responses that the bot can give to the user. You can configure the bot to either provide the responses one after the other, or to select one at random. For more information, see Response Groups. |
|
6 |
Routing Rules |
The default folder to store routing rules. Routing rules define conditions that the bot is constantly checking for. If the conditions on a routing rule are matched at any time, the bot will immediately perform any of the actions associated with the rule (including transferring the user to a new flow, setting variables, changing handlers, etc.). For more information, see Routing Rules. |
|
7 |
Filter |
Click here to open the Filter menu, where you can search Library folders for items or filter items by folder. When you enter a node or intent name in the Search box, click the Apply button to run the search, highlight the node or intent, and close the Filter menu. |
|
8 |
Add |
Click here to add new elements or folders. |
|
9 |
Test Bot |
Click here to test features as you add them to your bot. Doing so opens up a dialog box where you can start a test conversation with the bot. |
|
10 |
Import/Export Intents |
Click here to import or export intents to or from your bot. For more information, see Intents. |
|
11 |
Bot Variables |
Click here to create variables for your bot. Variables allow you to store information gathered from the user. For more information, see Variables. |
|
12 |
Exit |
Click here to close the Bot Authoring page and return to the Bots page. |
Library
The Library is a storage area for all the elements that you can use to create conversations and responses between your bot and the user. There are several different types of folders that contain the different elements for authoring your bot.
You can click the Add button next to a folder name in the Library to add an element to that folder. The new element's settings will automatically appear in the Authoring Area.
There is also another Add button in the upper right corner of the Library. Elements added using this button will automatically be stored in the folder whose name matches the new element's type. For example, if there is a folder named "Routing Rules" in your Library, any new routing rules created using the upper Add button will be stored there. If no folder names match the new element's type, the element will be placed in the general Library level, rather than a folder.
|
Number |
Name |
Description |
|---|---|---|
|
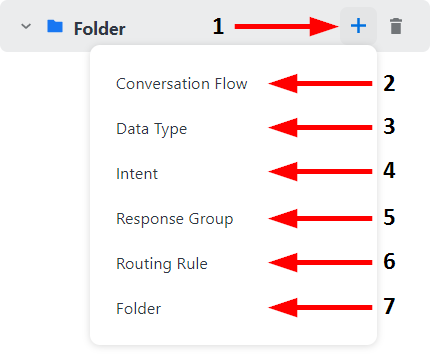
1 |
Add |
Click here to display the drop-down menu containing the elements available to add to the Authoring Area. |
|
2 |
Add Conversation Flow |
Click here to create a new conversation flow. |
|
3 |
Add Data Type |
Click here to create a new data type. |
|
4 |
Add Intent |
Click here to create a new intent. |
|
5 |
Add Response Group |
Click here to create a new response group. |
|
6 |
Add Routing Rule |
Click here to create a new routing rule. |
|
7 |
Add Folder |
Click here to create a new folder in the Library. |
Sharing authoring elements
You can share bot authoring elements between your companies in order to quickly and accurately replicate bot functions in the bots that belong to the other company. The elements that can be shared include conversation flows, data types, intents, response groups, and routing rules. To share an authoring element:
-
In the Library pane, hover your cursor over the element that you would like to share.
-
Click the Copy button. The Copy Element dialog window displays.
-
In the Copy Element dialog window, use the drop-down menus to select the Destination Company and Destination Bot to which the element will be copied, then use the text field to enter the new name of the copied element.
-
When you are finished, click the Copy to new [Element] button.
The option to share authoring elements between companies is only available to users who are in more than one company.