Skip table of contents

Bots

The Bots page is where you add, view, and author bots in the Emplifi Bot platform.
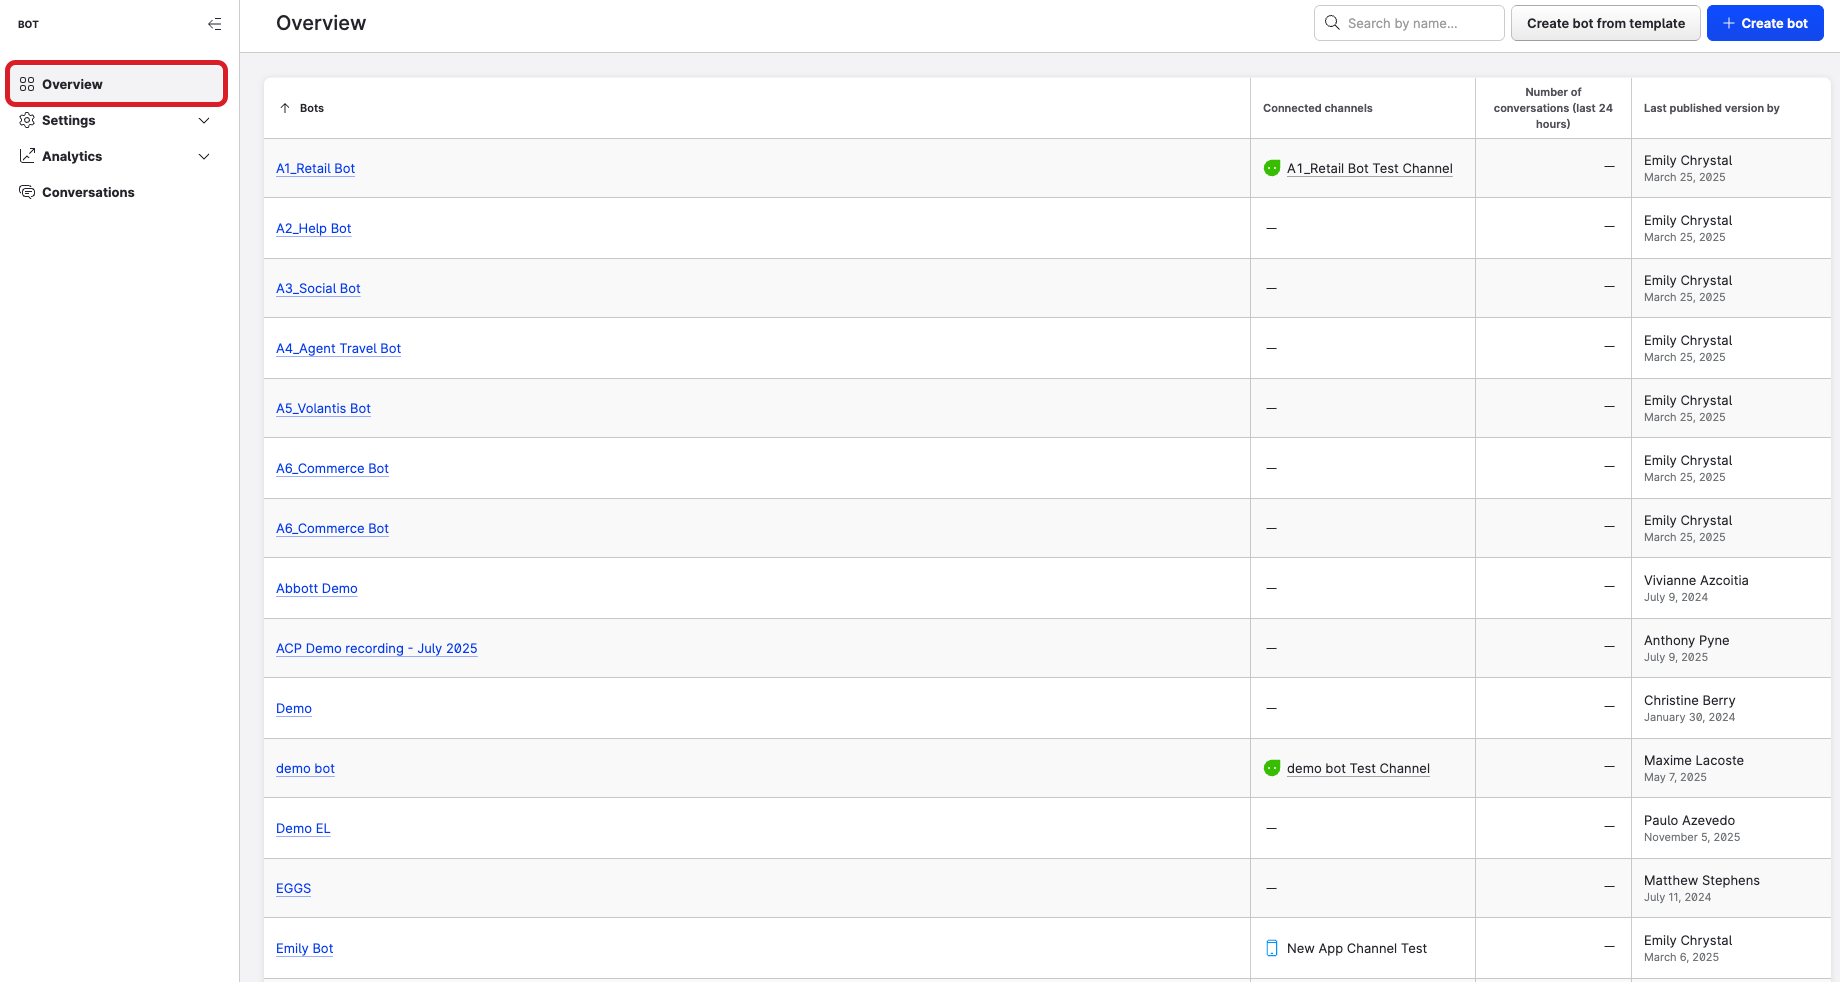
Accessing the Bots page

  • From the Application Bar, click Bots.

Bot configuration

Adding a new bot

  1. Click the + Create New Bot button in the upper right corner of the page. A drop-down menu will display.

  2. Enter the name for your bot in the text field.

  3. Click the Create Bot button. A new bot card containing the entered name appears.

Setting up a bot

  1. On the Bots page, find the card with the name of the newly-created bot. If you have several bots, at the bottom of the page you can scroll through the cards until you find your bot.

  2. Hover over the bot card to make additional buttons appear. Click the Settings button.

  3. The Bot Settings pop-up window appears.

Bot settings tab

Bot cards have six settings tabs, as shown above.

General tab

The General settings tab allows you to configure several essential features of your bot.

Settings

  • Variable Response Delay: Check this box to vary the time between multiple outgoing responses from your bot, based on the length of the last response.
    (info) You can use the slider below the checkbox to adjust the length of time between successive responses. Sliding it toward the end marked “Shorter” will decrease the interval, while sliding it toward the end marked “Longer” will increase the interval.

  • Insert conversation break after [xxx] minutes without user contact: Select the checkbox for the system to automatically generate conversation breaks in the conversation flow. Enter the number of minutes that a conversation is permitted to have no response before adding the conversation break. This is used for calculating the bot containment metrics.

  • Default Intent Handler: Select the handler for the intent engine that was set up in Company Settings. The intent handler analyzes user input and tries to match them to predefined intents.
    (info) This field is optional. If set to "None," then the bot uses only conversation flow logic and routing rules to make decisions. For more information, see Intents.

  • Default Fulfillment Handler: Select the fulfillment handler that the bot should use by default. If bot responses are stored in an external service, you can give the bot the ability to pull responses from that service by setting it as the fulfillment handler.

  • Default Conversation Flow: Select the conversation flow that the bot should use by default. The default flow will be used if the bot has no other option to give a response to the user's input. For more information, see Conversation Flows.

  • Delete Bot: To delete your bot, click Delete Bot, enter the bot's name in the dialog box that opens, and click the Delete button.
    (error) Your bot will be permanently deleted. This action cannot be undone.

Language & Time tab

The Language & Time tab allows you to configure the language in which the bot operates and the hours of operation for the live agents who manage the bot's escalated conversations.

Settings

  • Time Zone: Use the drop-down menu to set the time zone that you would like your bot to operate in.

  • Hours of Operation: Use the ON/OFF toggles and text fields corresponding to each day of the week to configure the times when your live agents are available to manage the bot's escalated conversations.

    • To add a new time interval to the selected day, click the Add button.

    • To copy the time intervals of the selected day to every day, click the Copy button.

  • Holidays: Click the + Add Holiday button to configure dates with altered hours of operation or dates when live agents are unavailable.

  • Languages: Click the Languages button to add additional languages for your bot to use.

Channels tab

The Channels settings tab allows you to set up channel-specific configurations.

Settings

  • Persistent Menu: This allows you to configure up to three persistent buttons that appear in a hamburger menu next to the message input box on webchat and Facebook channels. The buttons can be configured to send a specific payload to the bot in order to trigger a logic, or to take the user to a website.

    • To add an item to the persistent menu, click the + Add Action button. An item labeled "New Action" appears. To edit the item, click the Edit button next to its type. On the settings page that displays, you can configure the following settings:

      • Type: To have the item trigger an event in the bot, choose "Postback"; to have the item send the user to a website, choose "URL".

      • Title: Enter a name for the item.

      • Value: If you selected the "Postback" type, enter the text that triggers the event; if you selected the "URL" type, enter a URL address.

    • When you are finished, click Save.

  • Get Started: Enabling this feature displays the Get Started button for the webchat and Facebook channels. This is a simple way to ensure that users on these channels always pass a "Get Started" event to the bot as their first interaction, which makes it easier to create greeting/intro logic.

    • To enable this feature, select the "Enabled" checkbox. Hover over the adjacent Info button to view the platforms which support this feature.

    • To change the label, click on the text field and enter a new label. When you are finished, click outside the text field. Hover over the adjacent Info button to view the platforms on which this label will appear.

  • SMS Filtering: This allows you to filter out duplicate user messages that can occasionally occur when the user is sending SMS messages under poor network conditions.

    • To enable this feature, select the checkbox.

    • To configure this feature, use the drop-down menu to adjust which of the received messages that the bot processes as a user response, and use the text field to adjust the time range in milliseconds.

    • (warning) This feature is unavailable on the Social AI Chatbot interface.

  • SMS Stop Message: This allows you to provide users with the option to opt-out of further messages from your bot.

    • To configure this feature, use the upper text field to compose an opt-out message. To make the opt-out message recur regularly, select the adjacent checkbox and use the lower text field to set the interval (in days) between messages.

    • (warning) This feature is only available for bots operating on Bandwidth, Twilio, and Zipwhip.

    • (warning) This feature is unavailable on the Social AI Chatbot interface.

Versions tab

The Versions settings tab displays a history of your bot's previous versions, beginning with the Initial Version. When you click on a specific entry, you have several options.

Buttons

  • Publish: Click here to replace the current version of your bot with the version you have selected. A dialog window appears to verify that you want to publish the selected version. Click OK to publish.

  • Copy to New Bot: Click here to create a new bot from the selected version of your bot. Enter the name of the new bot in the dialog window that opens, then click Copy to New Bot.

  • Changes: Click here to view an in-depth history of the intent and data type changes that have been made to your bot. There are two columns on the dialog window that opens:

    • Path: Shows the type of path which was changed.

    • Status: Shows the type of change that was made to the corresponding path.

Layout tab

The Layout settings tab allows you to choose the layout for the front of the selected bot card.

After you choose from the available layout options, click the Exit button to return to the bot card. There, you can select the statistics you would like to have displayed on the customized layout by clicking the Add buttons and choosing from the list of options that appears.

The available statistics are:

  • Conversation Flow Visits

  • Conversation Snapshots

  • Intent Matches

  • Messages

  • New Conversations

  • Reactions

  • Returning Users

  • Unique Users

  • Unmatched Utterances

For more information about these statistics, see Bot Analytics and Intents Analytics.

Intents tab

The Intents settings tab allows you to configure your bot's intent confirmation and intent feedback features.

This tab is unavailable on the Social AI Chatbot interface.

Settings

  • Use Intent Confirmations: Select this checkbox to have your bot send a message following an intent match to confirm that the user's utterance was correctly matched with the intent.
    (info) In order for the bot to send an intent confirmation message, the intent match must fall within a certain confidence interval. For more information, see below.

  • Confidence: Use the text field to enter the maximum intent confidence score at which your bot will send an intent confirmation message to the user. The entered value must be between 0 and 1, and it must also be greater than the confidence score floor of your bot's intent engine.

    • (info) Every user utterance is assigned an intent confidence score, which indicates the level of certainty that the utterance matches an intent. Those utterances that score above the confidence score floor (usually around 0.5, although this varies for each intent engine) are considered an intent match. The closer a score is to the floor, the greater the chance that the match is actually incorrect. In such cases, it is necessary to prompt the user to confirm that the match is correct. The Confidence text field sets the upper confidence score boundary for these prompts. If intent confirmations are enabled and an intent confidence floor falls between the score floor and the entered value, the user will receive an intent confirmation message.

    • (info) To ensure that your bot only sends intent confirmations when necessary, it is recommended to set this value somewhere between 0.5 and 0.7.

  • Message: Use the text field to compose the confirmation message sent by the bot.
    (info) Note: The {{intentLabel}} variable will be replaced with the label associated with the matched intent in the message received by the user. For more information about intent labels, see Intents.

  • Yes Label: Use the text field to customize the label of the "Yes Intent Match" button.

  • No Label: Use the text field to customize the label of the "No Intent Match" button.

  • Allow Reactions on Intent Responses: Check this box to give the user the ability to react to bot responses that were sent due to an intent match. This allows you to gauge the accuracy and/or appropriateness of your intent responses.

  • Reactions on Response with display style: Check this box to configure the display style of the reaction options. There are three options available:

    • Embedded: The reaction options appear in a horizontal list next to the bot response.

    • Embedded Vertical: The reaction options appear in a vertical list next to the bot response.

    • Popup: A single reaction option appears next to the bot response. When the user click on it, the others appear in a pop-up menu.
      (info) The format of reactions can only be changed on the web channel.

  • Send User to Flow: This setting is an alternative to the reaction buttons above. Instead of allowing users to provide feedback by clicking reaction buttons, you can build a feedback conversation flow and use these options to direct them to that flow after an intent response is given.

    • Click None to display a drop-down menu with a list of available conversation flows within the bot. Select the feedback flow that you would like to send the user to.

    • In the text field, enter the number of seconds before the user is sent to the selected feedback flow.

    • Click Settings button to open the Reaction Translations dialog box. Here, you can define the text labels which are associated with each feedback flow and which represent different reactions.

User Access tab

The User Access tab allows an administrator to specify the users who have access to the selected bot. When permissions are restricted, this limits a user’s ability to view or edit a bot and any of its metrics, analytics, or conversations.

This tab is only visible to users with the Account Admin permission in Suite.

Settings

  • User Access: By default, the User Access toggle is disabled (OFF), meaning that there are no restrictions on which users can view or edit the bot (depending on other permissions). Clicking the User Access toggle to ON allows an administrator to add users to the list of who can access the selected bot.

  • + Add User: Click this button to add users to the list of those who have access to the selected bot. A Select User window will display for you to search for a specific user or to choose from the list. Click the Add button to give the user permission to view and edit the bot. Added users can later be removed.

Additional buttons

When you hover over a bot card, additional buttons will display along with the Settings button.

Icon

Name

Description

Add to Favorites

Click here to add this bot to your list of favorite bots. The favorited bot will appear at the beginning of the bots list.

Intent Suggestions

Click here to view the user messages that triggered an intent confirmation message from the bot. These messages are compiled into two categories:

  • User Approved, for intent matches confirmed as correct by the user.

  • User Rejected, for intent matches rejected as incorrect by the user.

From these categories, the user messages can be added to new/existing intents or ignored. To view the conversation featuring the selected user message, click Context. For more information, see Intents.

(info) The Intent Suggestions button only appears on bot cards with active intent suggestions. When all active suggestions have been handled, the button disappears from the bot card.

Test

Click here to test this bot. When you click the button, the bot card flips, allowing you to start a test conversation with the bot.

(info) Test conversations include unpublished changes to the bot.

Conversations

Click here to view a history of your bot's conversations with users. You can refine the history using the buttons on the top banner. For more information, see Conversations.

Changes

This button only appears when unpublished changes have been made to a bot.

Click here for the following options:

  • Publish: Click here to publish the most recent changes to your bot.

  • Undo Changes: Click here to undo the most recent changes to your bot.

  • View Changes: Click here to view a log of the changes to your bot.

JavaScript errors detected

Please note, these errors can depend on your browser setup.

If this problem persists, please contact our support.