The Company Exports page allows you to set up, schedule, and generate analytic reports that are emailed to specified company users on a regular basis. These reports can include data from all your company's bots, or from specific bots, conversation flows, or agent groups.
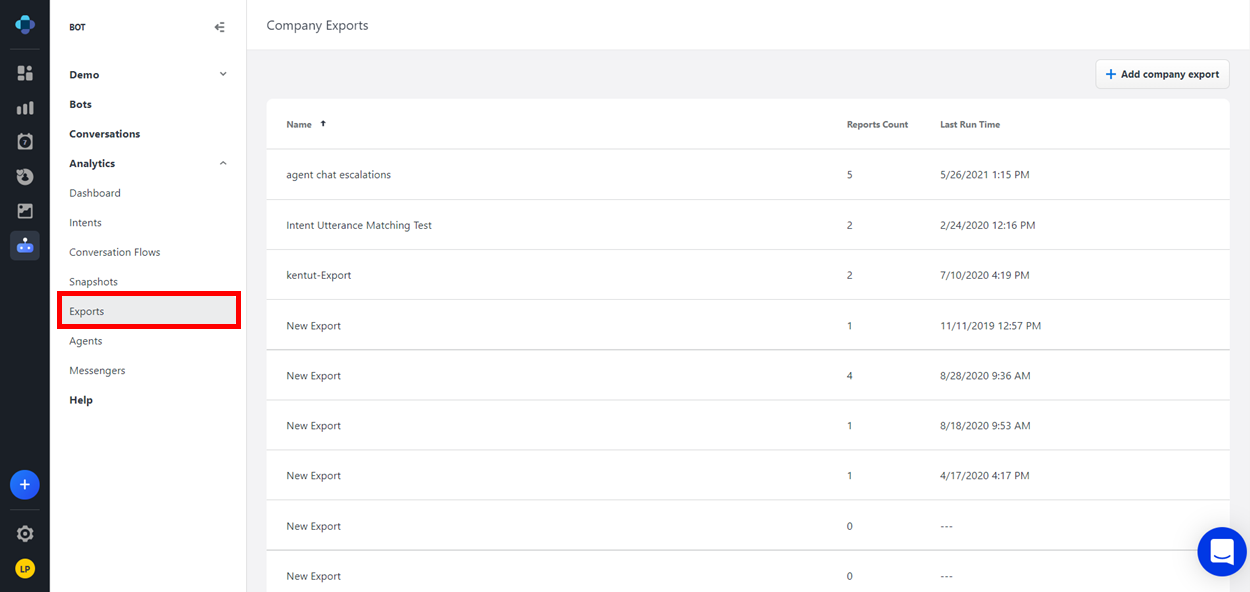
Accessing the Exports page
-
From the Application Bar, click Analytics.
-
Click Exports.
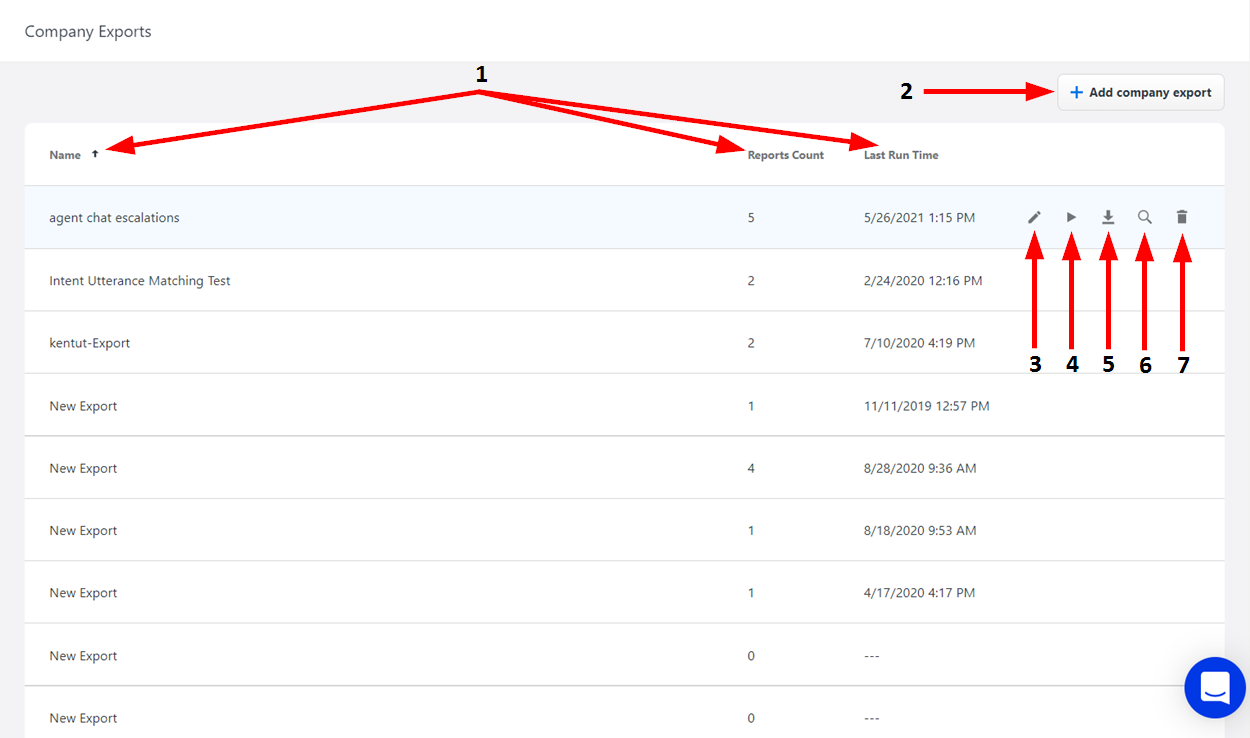
Exports Page layout
|
Number |
Name |
Description |
|---|---|---|
|
1 |
Sort By |
Click the bold words at the top of a column to sort all the export templates by the alphabetical or numerical order of that column's contents. The arrow that appears atop the selected column indicates whether the matches are sorted in ascending or descending order. |
|
2 |
Add Export Template |
Click here to add a new export template. |
|
3 |
Edit Export Template |
Click here to open the Export Template Settings window. For more information, see the "Configuring Export Templates" section below. |
|
4 |
Run Report Now |
Click here to generate a report for the selected export. |
|
5 |
Download Latest Report File |
Click here to download the export template's most recent report. |
|
6 |
View All Reports |
Click here to open a log of every report created within the selected export template. On this log, you can select individual reports to download or delete. |
|
7 |
Delete Export Template |
Click here to delete the export template. A dialog window will display to verify that you want to delete the export template. |
Configuring export templates
-
From the list of export templates, select the one that you would like to configure.
-
On the selected export template, click the Edit button. The Export Template Settings window opens.
-
In this window, you can customize various aspects of the export template.
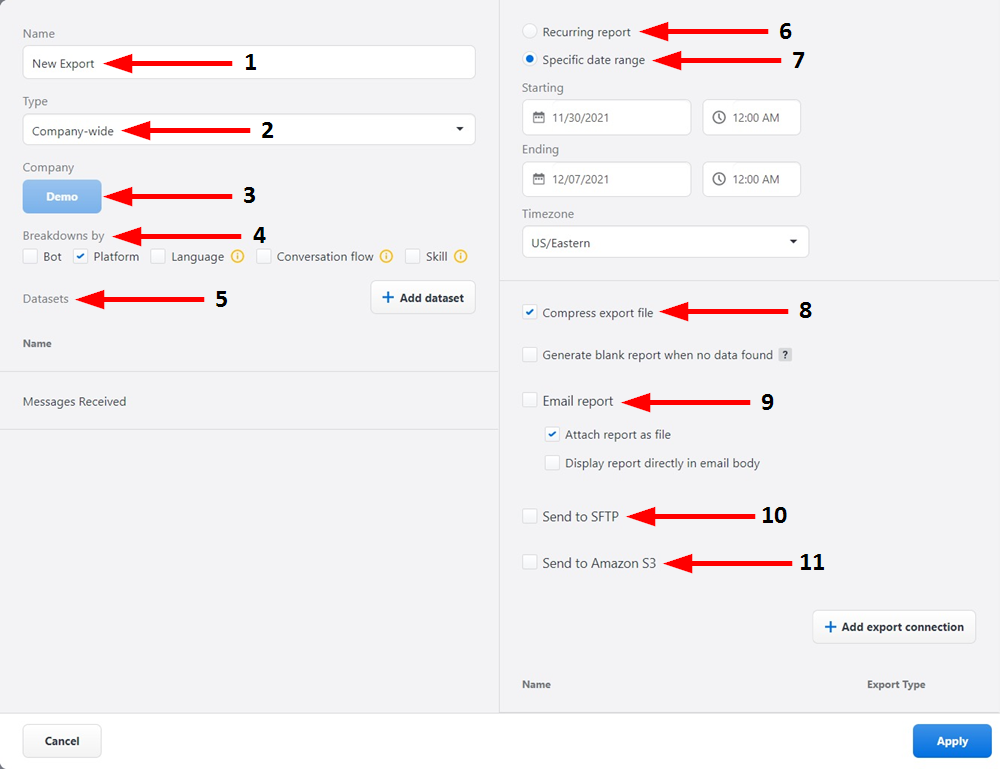
|
Number |
Name |
Description |
|---|---|---|
|
1 |
Name |
Click here to enter a new name for the export template. |
|
2 |
Type |
Click here to select the type of report generated by the export. The following options available:
|
|
3 |
Company / Bot / Flow / Group |
Click here to select the company, bot, conversation flow, or agent group included in the report generated by the export (depending on your selection of report type). |
|
4 |
Breakdowns |
Select these options to choose how the export's report data is characterized. The following options are available:
|
|
5 |
Datasets |
This section displays the specific sets of data that are included in the report generated by the export.
To add a new dataset to the report, click the + Add Dataset button, and then select an option from the pop-up menu. You can add multiple datasets to a single report. To delete a dataset from the report, select a dataset from the list and click the Delete button adjacent to it. |
|
6 |
Recurring Report |
Select this option to have reports generated on a regular, recurring basis. The following options are available to configure:
|
|
7 |
Specific Date Range |
Select this option to generate a report of data from a specific interval of time. The following options are available to configure:
|
|
8 |
Compress Export File |
Select this option to have reports downloaded as compressed ZIP files. De-select this option to have reports downloaded as uncompressed files. |
|
9 |
Email Report To: |
Select this option to have reports sent to specified recipients. To add a recipient, click the + Add Export Connection button and, on the dialog window that displays, select Email from the drop-down menu and type the desired recipient's email address in the text box that appears. When you are finished typing, click Enter on your keyboard to save the recipient. To delete a recipient, click the Remove button attached to the recipient's email address. The following options are also available:
|
|
10 |
Send to SFTP |
Select this option to have reports sent to a Secure File Transfer Protocol (SFTP) path. To add an SFTP path, click the + Add Export Connection button and, on the dialog window that displays, select SFTP from the drop-down menu and enter the SFTP path that you would like the reports sent to. When you are finished typing, click Enter on your keyboard to save the SFTP path. |
|
11 |
Send to Amazon S3 |
Select this option to have reports sent to Amazon S3. To add an Amazon S3 connection, click the + Add Export Connection button and, on the dialog window that displays, select Amazon S3 from the drop-down menu and enter the name of the S3 connection that you would like the reports sent to. When you are finished typing, click Enter on your keyboard to save the connection. |