Perform Operations on Multiple Care Cases at Once
To save time and effort, you can perform some operations on multiple Care cases at once instead of doing it one by one. Here is what you can do to more than one Care case simultaneously:
Assign to a Care agent.
Update a case field.
Change the status.
Delete from Care.
You can run only one operation on multiple cases at a time.
While one operation is in progress, you cannot start another operation on multiple cases. You have to wait until the first operation completes.
You do not have to be assigned to the cases to be able to perform these operations on them.
If you want to perform these operations on a single Care case, see the following articles:
Selecting the cases to be processed
One view at a time
You can select cases from only one view at a time. You cannot select multiple cases from multiple views. If the cases that you want to process appear in several different views, you can:
Process the cases in one view, then do the same in the next view, then in the next one, until you have all the cases processed.
Create a custom view that would contain only the cases that you want to process (see Create Case Views in Care).
Selecting cases in a view
To make your selection precise, use one of the following methods of selecting cases in a view:
Select the cases manually one by one.
This method works well when you have a relatively small number of cases to process.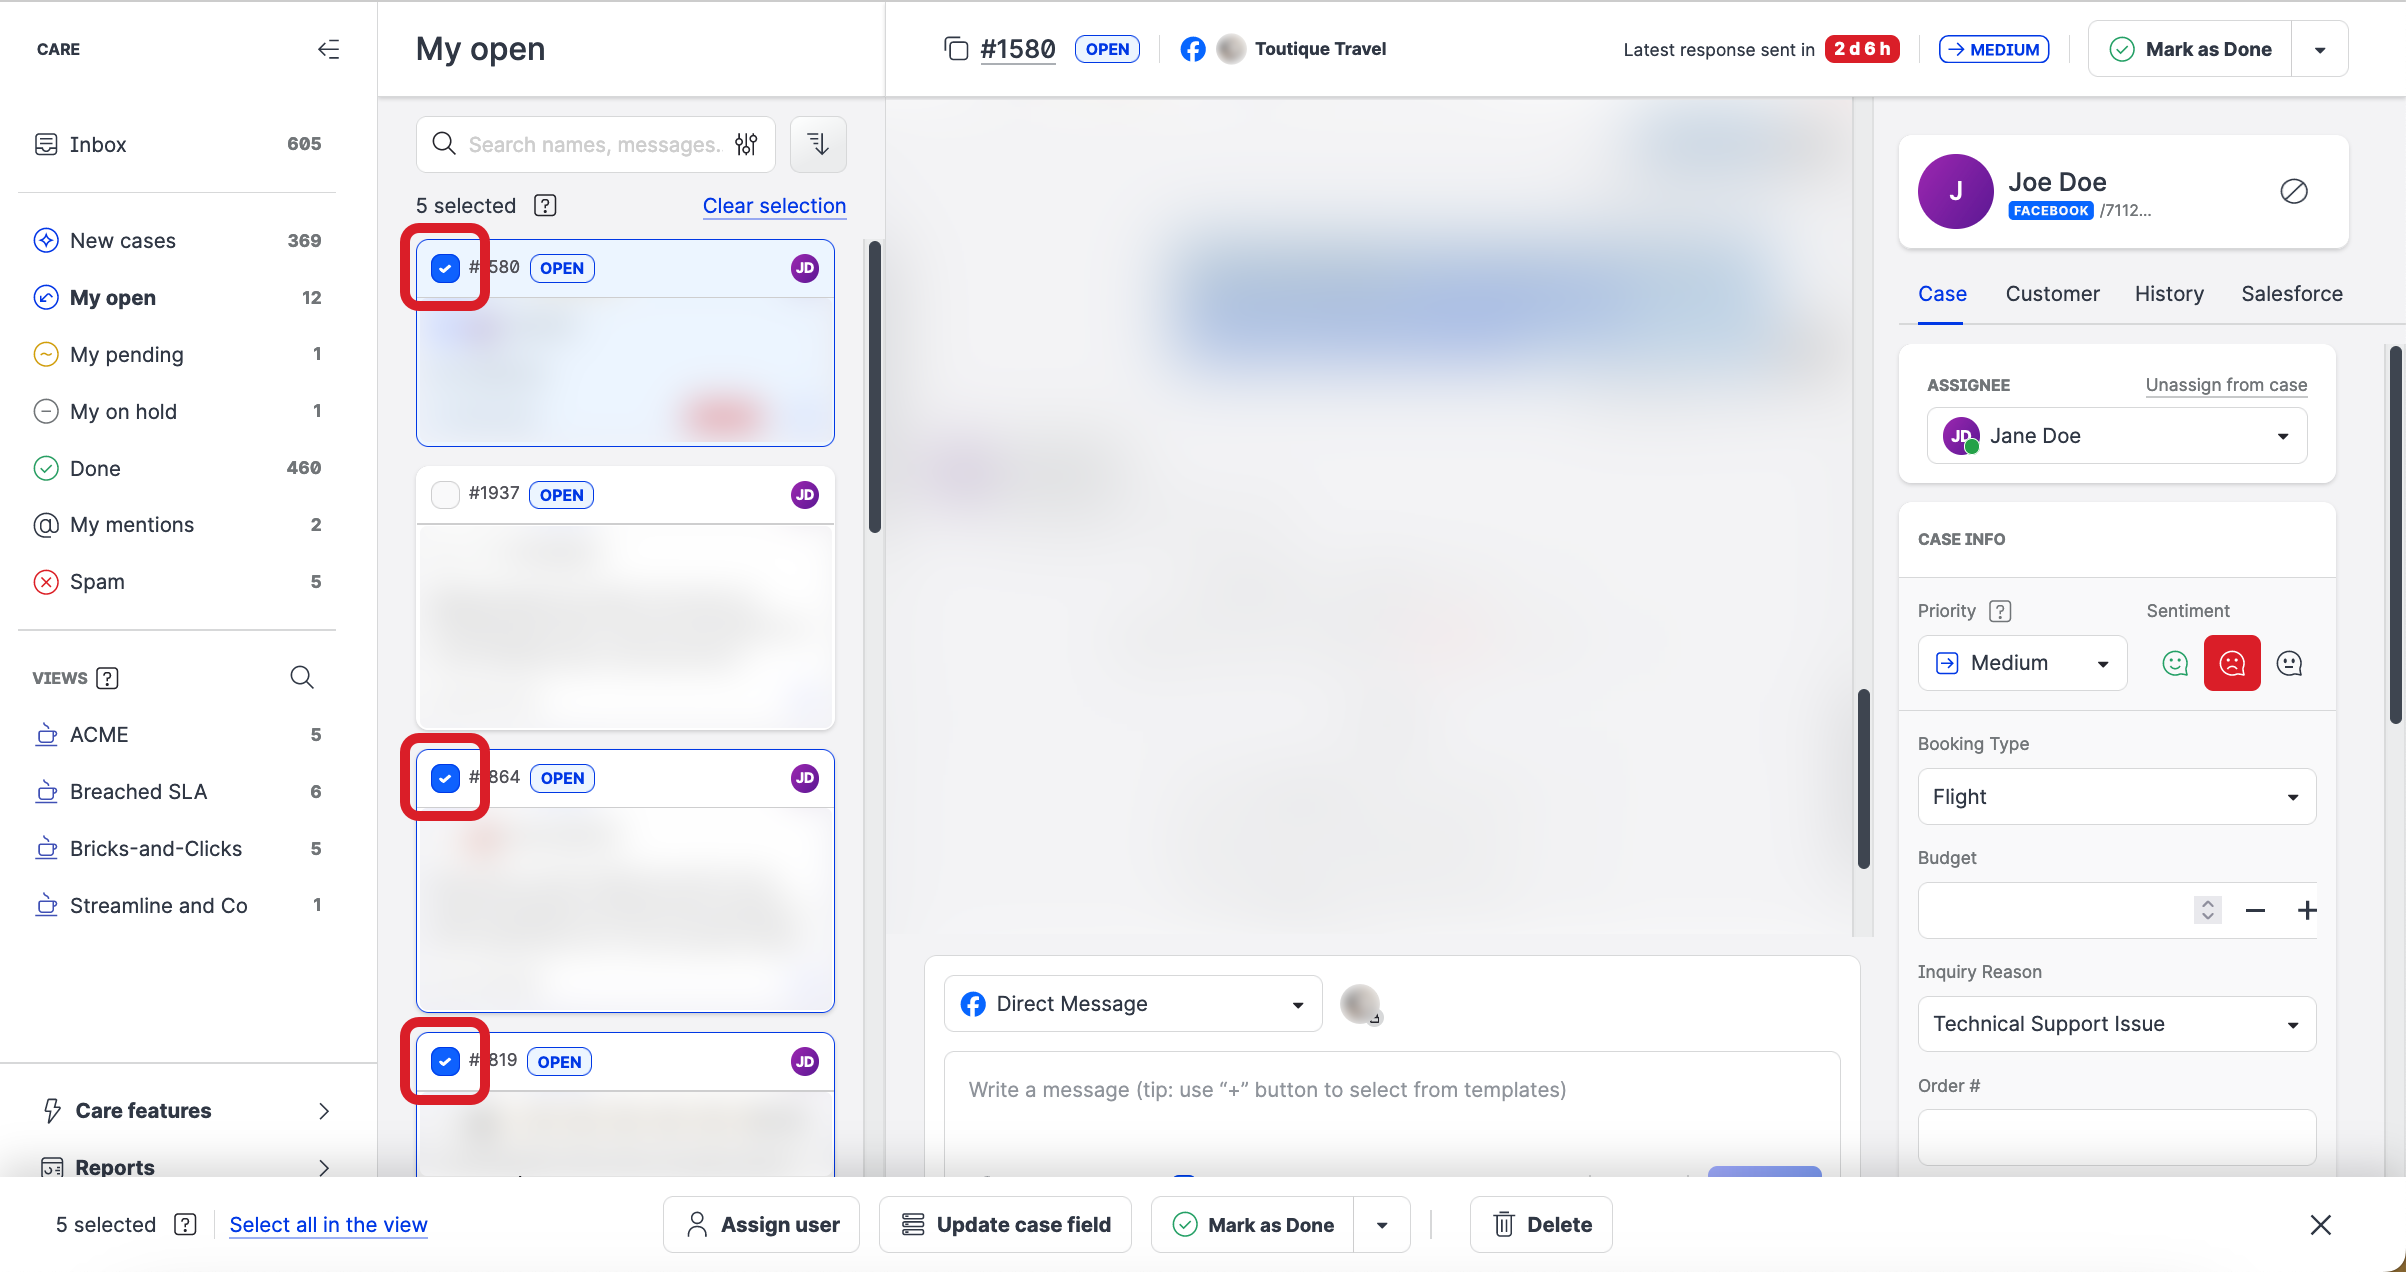
Select all the cases in the view.
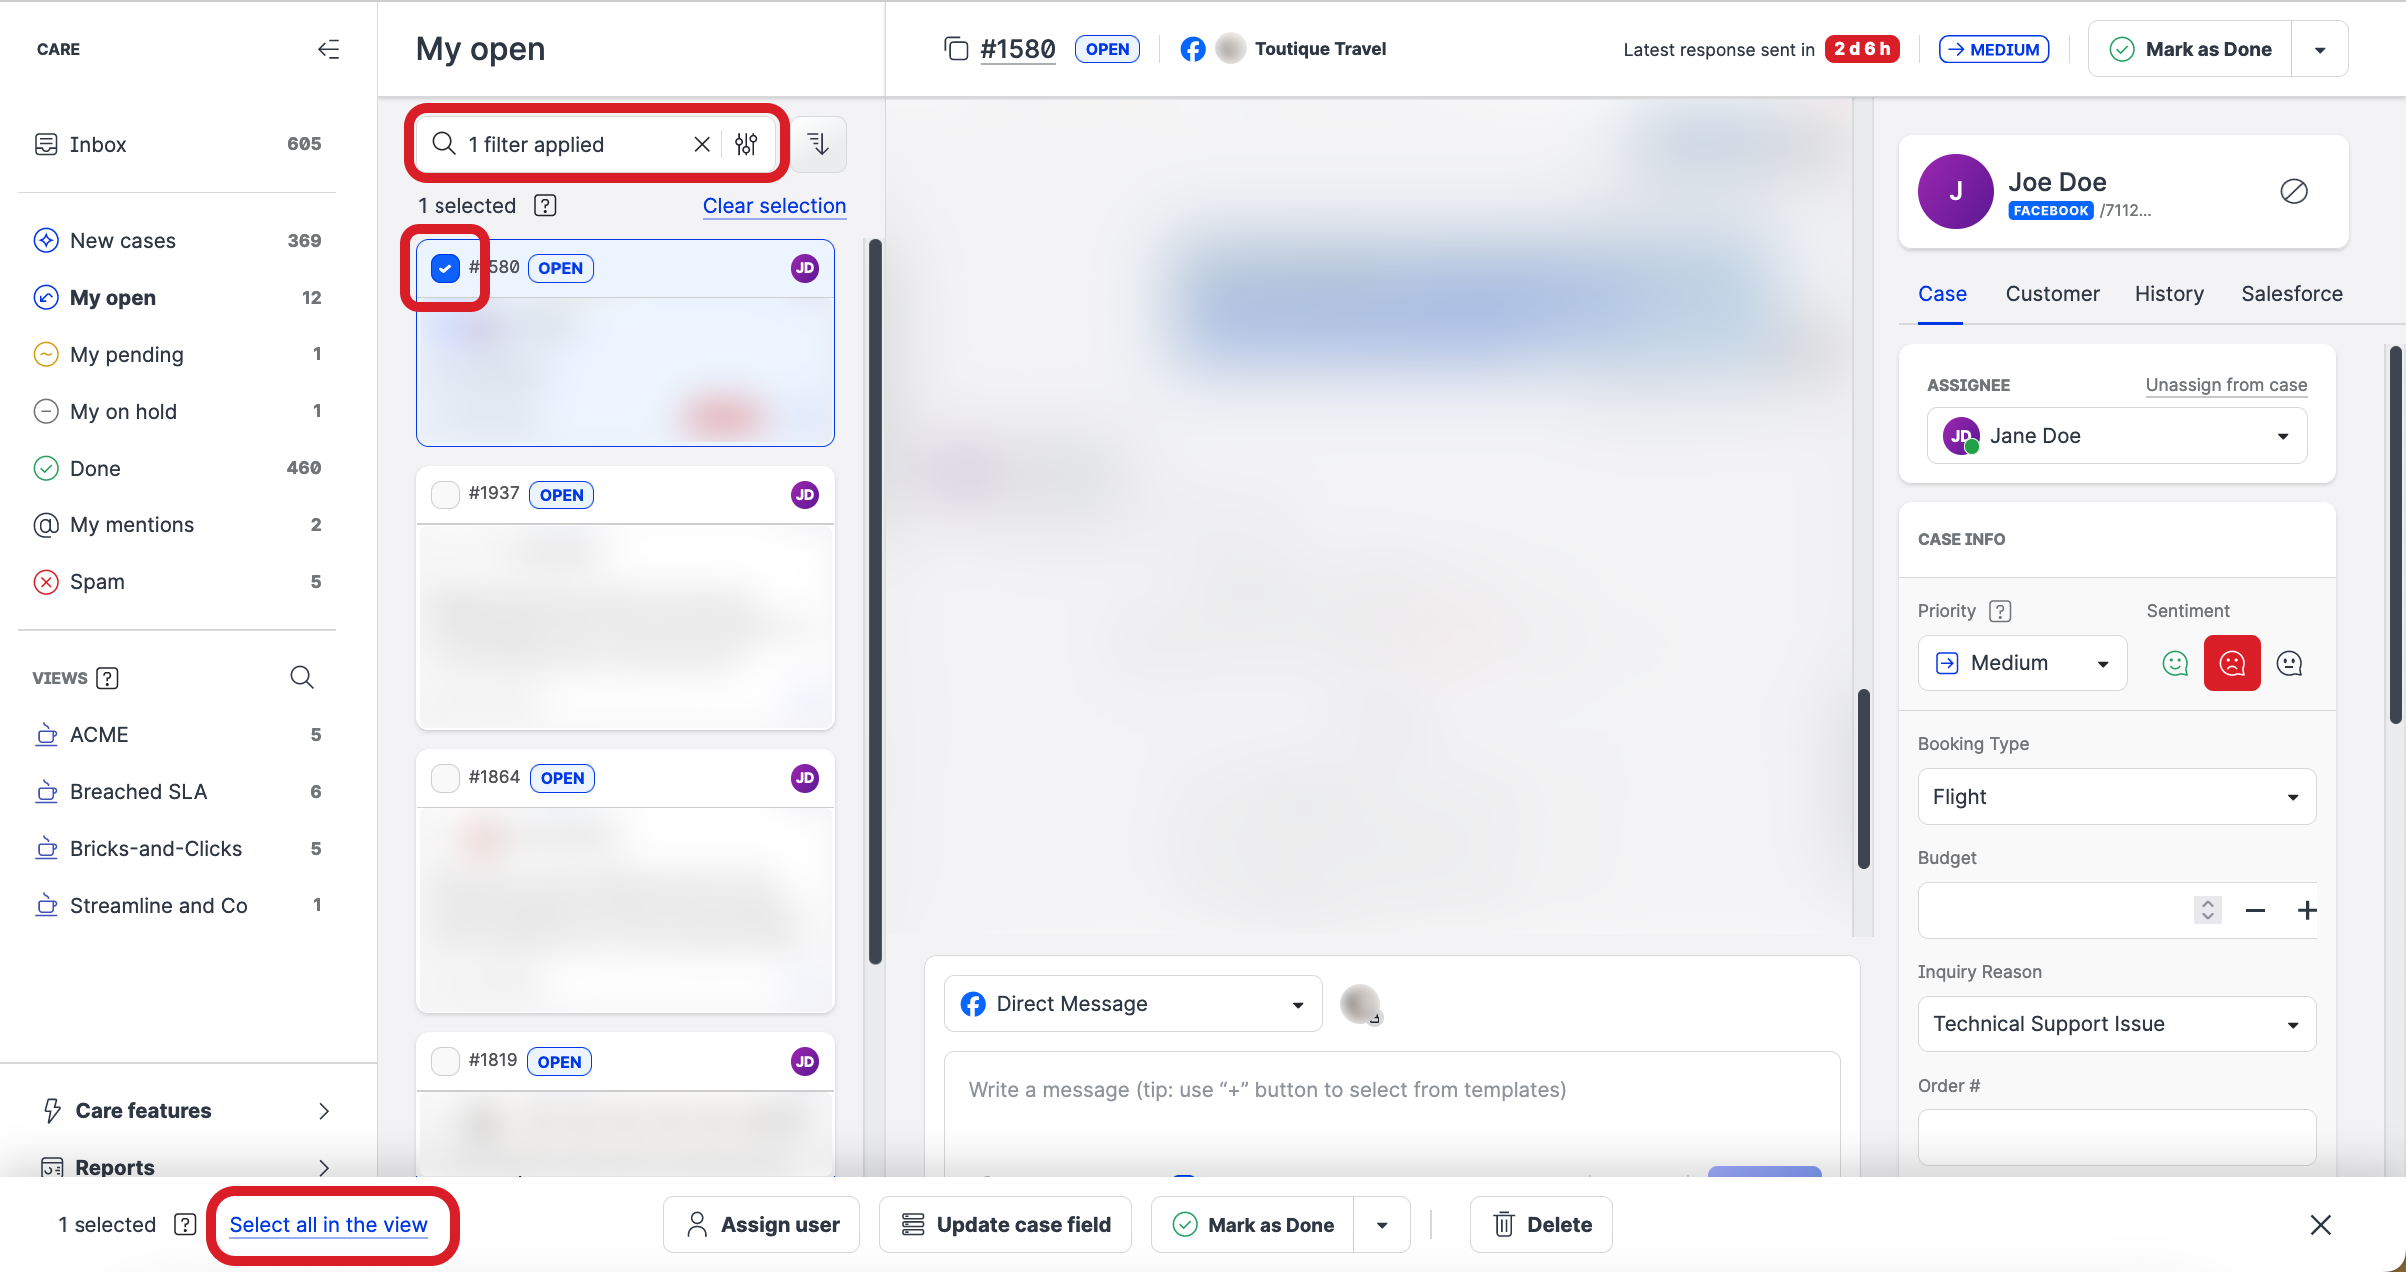
Select one case, and click Select all in the view on the bar with action buttons that appears at the bottom of the page.
This method works well when you have a large number of cases to process and the view contains only the cases to be processed. When using this method of selecting cases, you cannot de-select some of the cases in the view. With this method, you can select either all the cases in the view or none of them.
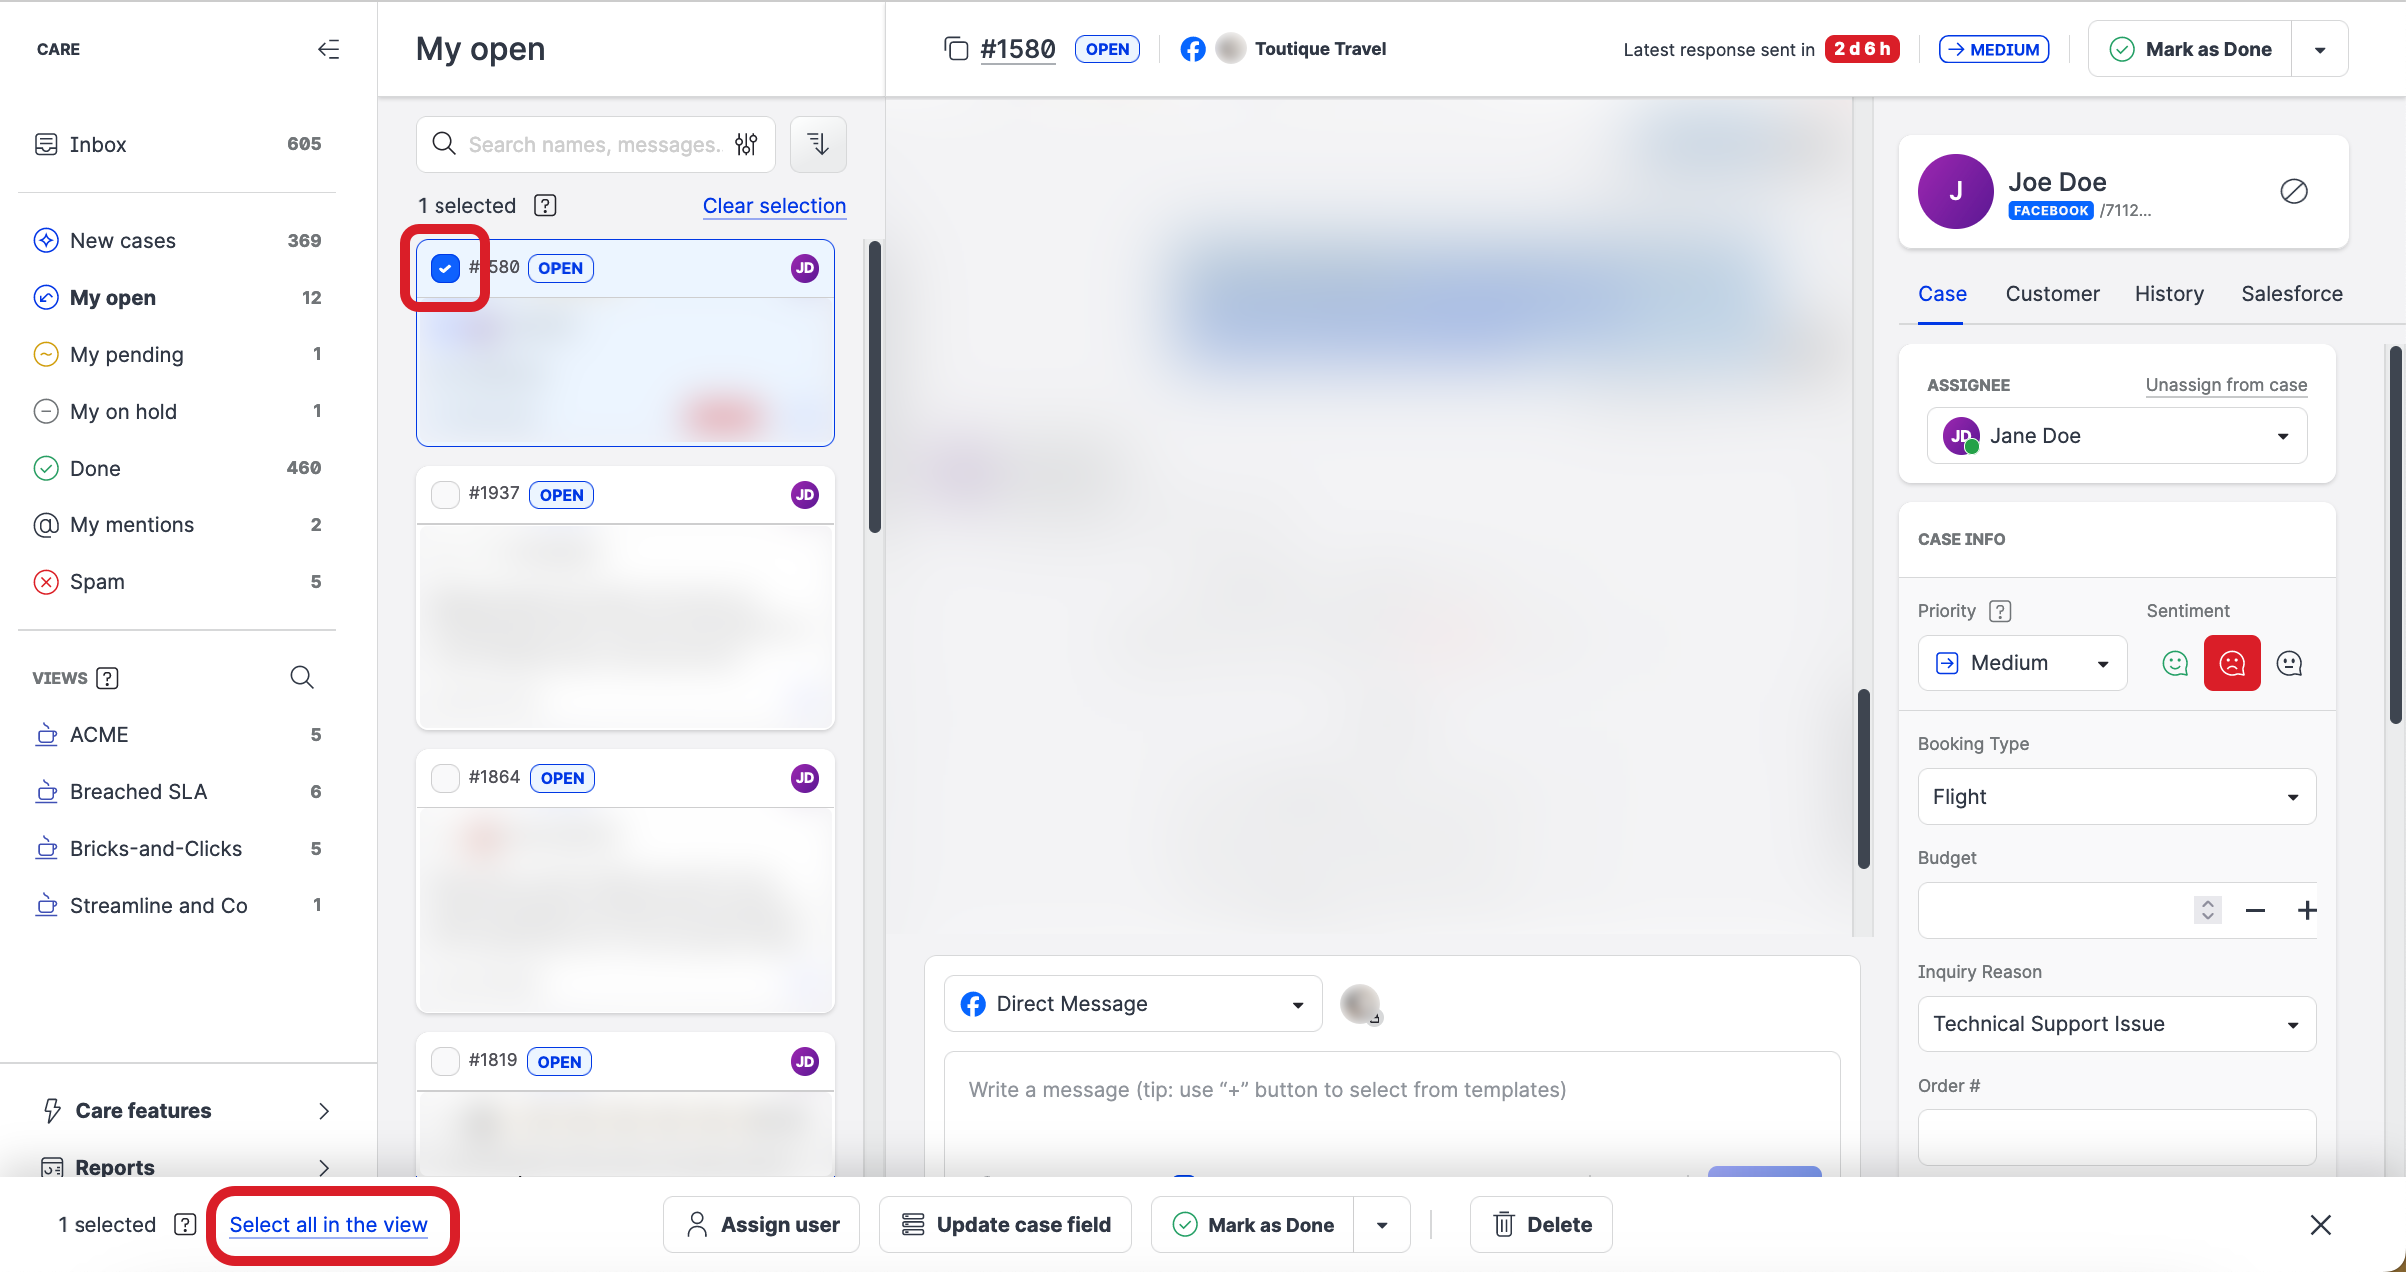
Apply filters to the view, and select all the cases in the view.
Filter the view to display only the cases that you want to process (see Use Standard Care Settings and Create Case Views in Care). If you have a list of case IDs, you can search for these IDs in the view to display only the cases from the list (see Search within Care).
Then, select one case, and click Select all in the view.
This method works well when you have a large number of cases to process but the view contains not only the cases to be processed but also the other cases that should not be touched. When using this method of selecting cases, you cannot de-select some of the cases in the view. With this method, you can select either all the filtered cases in the view or none of them.
Assign a Care user to multiple Care cases
You do not have to be assigned to the cases to be able to assign a Care user to them.
Processing multiple cases is going to take some time. How long it will take depends on the number of cases to process. Typically, it takes a few seconds; however, when a large number of cases is being processed, it may take longer than a few seconds to complete the operation.
While one operation is in progress, you cannot start another operation on multiple cases. You have to wait until the first operation completes.
Steps:
Go to the view that contains the cases you want to assign a Care agent to.
Select the cases to assign a Care agent to. To select the cases correctly, see “Selecting the cases to be processed” earlier in this article.
The bar with action buttons appears at the bottom of the page.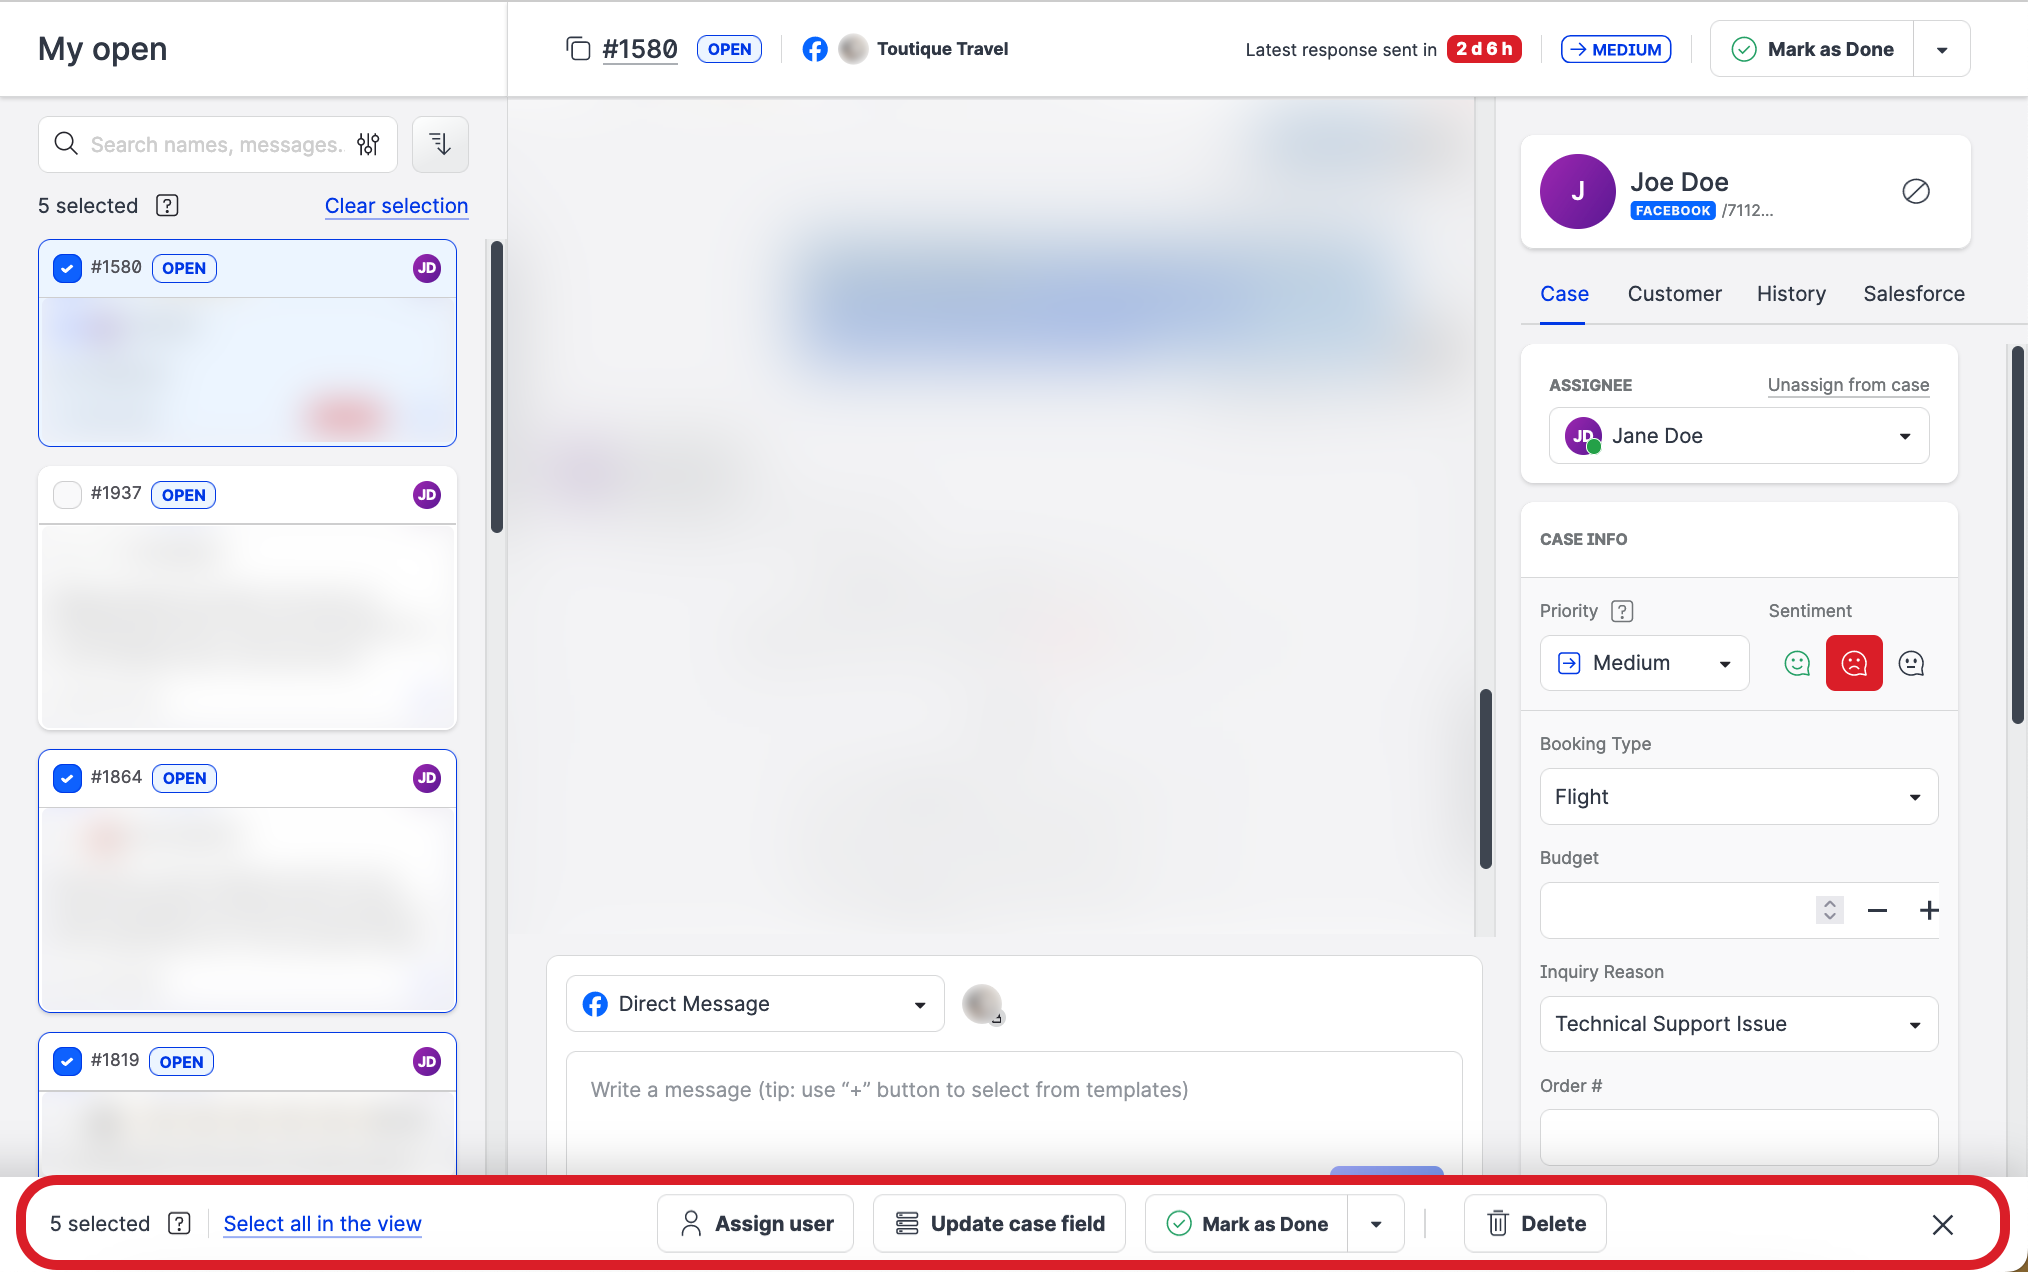
Click Assign user, and select the agent to assign the cases to.
You are asked whether to assign the agent to all the selected cases or only to those cases that currently have no user assigned.Choose one of the options, and click Change assignments.
The cases are assigned to the selected Care agent.
Update a case field in multiple Care cases
You do not have to be assigned to the cases to be able to update a case field in them.
For more information about case fields, see Create Case Fields in Care.
Processing multiple cases is going to take some time. How long it will take depends on the number of cases to process. Typically, it takes a few seconds; however, when a large number of cases is being processed, it may take longer than a few seconds to complete the operation.
While one operation is in progress, you cannot start another operation on multiple cases. You have to wait until the first operation completes.
Steps:
Go to the view that contains the cases you want to update a case field in.
Select the cases to update a case field in. To select the cases correctly, see “Selecting the cases to be processed” earlier in this article.
The bar with action buttons appears at the bottom of the page.
Click Update case field, and select the field to update.
Select or enter the new value of the field.
You are asked to choose from the following options:Set the field to the new value in all the selected cases.
Set the field to the new value only in those cases where this field is empty (not filled in).
(If you are updating a multi-select field) Add the new field values to the values that are currently set in the cases.
Choose one of the options, and click Update case fields.
The field is updated in the cases.
Change the status of multiple Care cases
You do not have to be assigned to the cases to be able to change their status.
Processing multiple cases is going to take some time. How long it will take depends on the number of cases to process. Typically, it takes a few seconds; however, when a large number of cases is being processed, it may take longer than a few seconds to complete the operation.
While one operation is in progress, you cannot start another operation on multiple cases. You have to wait until the first operation completes.
Steps:
Go to the view that contains the cases whose status you want to change.
Select the cases to change the status of. To select the cases correctly, see “Selecting the cases to be processed” earlier in this article.
The bar with action buttons appears at the bottom of the page.
Do one of the following:
If you want to mark the cases as done, click Mark as Done.
 If there are case fields in your Emplifi account that are set as recommended and any of them are not filled in in the cases you want to mark as done, you are advised to fill in these fields first. To proceed with marking the cases as done regardless of the recommended fields, click Mark cases as Done. For more information about case fields, see Create Case Fields in Care.
The cases are marked as done.If you want to set the case status to any other status, click the status selector, and select the status that you want to set for the cases.
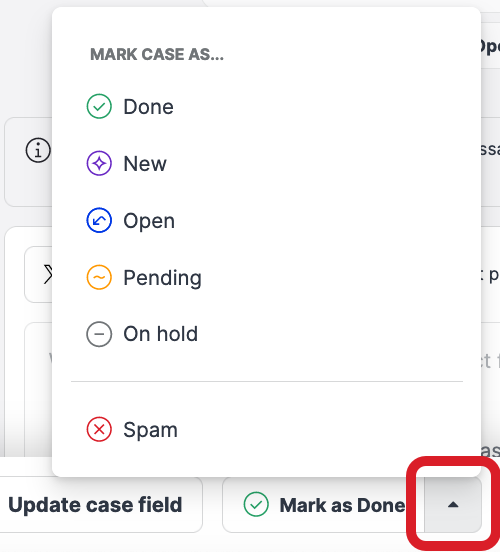
The cases are switched to the selected status.
Delete multiple Care cases
Deleting a Care case is permanent.
Once a case is deleted, you cannot restore it.
You do not have to be assigned to the cases to be able to delete them.
Deleting a Care case only deletes the case from Care. It does not delete any messages that are part of the case from the native platform.
Deleting a Care case does not delete or in any way impact the Community message from which the case was escalated to Care.
Processing multiple cases is going to take some time. How long it will take depends on the number of cases to process. Typically, it takes a few seconds; however, when a large number of cases is being processed, it may take longer than a few seconds to complete the operation.
While one operation is in progress, you cannot start another operation on multiple cases. You have to wait until the first operation completes.
Steps:
Go to the view that contains the cases you want to delete.
Select the cases to delete. To select the cases correctly, see “Selecting the cases to be processed” earlier in this article.
The bar with action buttons appears at the bottom of the page.
Click Delete.
You are asked to confirm the deletion.Click Delete cases.
The cases are deleted.
