This article is for users with the Manage views permission in Care part of their Account role. For more information about Care permissions, see Set up Care permissions).
In Care, a case view is a set of conditions that help you organize individual cases. You can control visibility, agents' assignments, and filters to sort out your escalated cases.
For agents, views work as a secondary layer for organizing cases — sorting by language, topic, SLA status, or priority. Which cases an agent can see in the first place is determined by their profile permissions (see Set up Care permissions). Within those cases, views let agents filter and prioritize their work. For example, you can create a view that displays escalations from a specific world region about a specific product from Facebook and TikTok to an agent who lives in a convenient timezone.
Case Views are no longer the primary mechanism for controlling which cases a user can see. Profile permissions now serve as the primary access layer — users only see cases from profiles they have permission to access. Case Views remain available as a productivity tool for further sorting and filtering within that accessible set.
The number of cases in a view that is displayed next to each view is automatically refreshed once in a few minutes. Only the number of cases in the view that you are currently in gets refreshed in real time.
Therefore, it may happen that after you updated a case in one view and it got moved to a different view, the number of cases in that other view does not get refreshed immediately.
To see the up-to-date number of cases in a view, switch to that view.
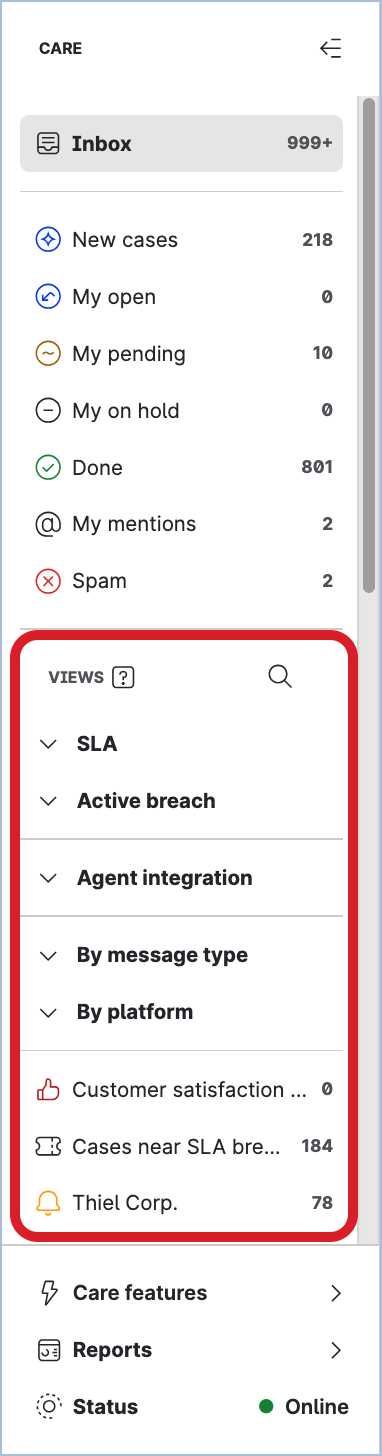
You can organize the case views into groups (see “Organize case views in the Care main menu” further in this article).
Create a case view from scratch
Steps:
-
Go to Settings -> Care -> Views.
-
Click +Create view.
The new view panel slides out. -
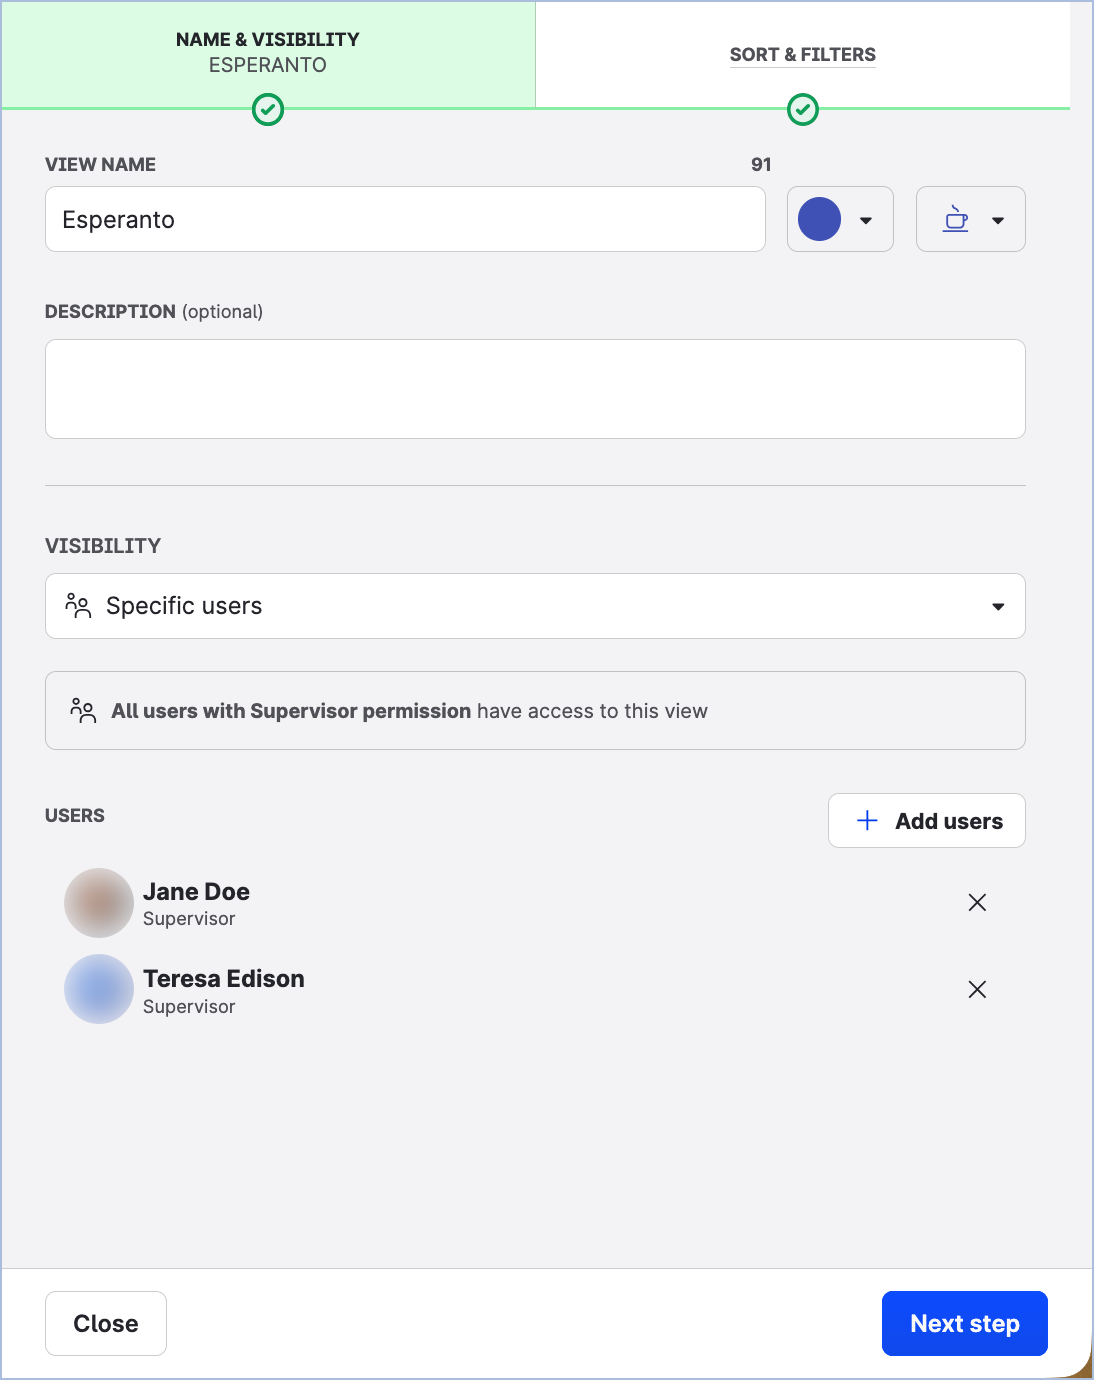
Enter the name of the view.
-
(Optional) Customize the color and the icon that the view will be marked with in Care.
-
(Optional) Add the description for the view.
-
In the Visibility section, specify who should be able to view the cases in the view: anyone with access to Care (global visibility) or only specific users/user groups.
If you allow a user group to view the cases in the view (see Organize Users into User Groups), be aware of the following implications:
-
All users in the user group can view the cases in the view.
-
Adding a new user to the user group at any time later automatically grants the user access to the view.
-
Removing a user from the user group at any time later revokes the user's access to the view.
-
Deleting the user group revokes access to the view for the users who were members of the user group.
-
-
Click Next step.
-
Specify how the cases should be sorted in the view.
Sorting from the oldest to the newest is the default.
When later using the view in Care, Care users can temporarily change the sorting of the cases in the view or apply additional filters to adjust the view to their individual needs (see “Change the sorting in a view” and “Apply additional filters to a view“ further in this article).
-
(Optional) Set up filters for the view (see “Available view filters“ further in this article).
-
Once done, click Create.
The case view is created and appears at the end of the list of the views.
The view is disabled by default and is not visible in Care. -
To enable the view and make it visible in Care, toggle the switch in the Status column to ON.
The view is enabled and visible in Care.
Available view filters
Care comes with multiple standard filters.
Case properties
The following case properties are available as filters:
-
Message text
-
Channel
-
Platform
-
Assigned users
-
Mentioned users
-
Case status
-
Language
-
Sentiment
-
Message type
All filters except for the message text can be used with the is or is not function, for example:
-
PlatformisFacebook -
Case statusis notOn hold
The relationship between multiple filters is AND.
Message text
Enter the keywords that Care should search for in the messages.
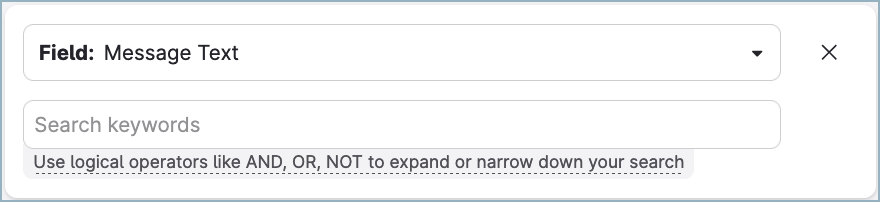
Keywords are not case-sensitive. sunglasses, SUNGLASSES, and Sunglasses are treated as the same keyword.
Use the logical operators and special characters to expand or narrow down your search.
Logical operators must be entered in UPPERCASE.
-
AND→ conjunction
Entersunscreen AND spfto search for the messages where both words “sunscreen” and “spf” appear. -
OR-> disjunction
Entersunscreen OR spfto search for the messages that:-
Contain the word “sunscreen” but do not contain the word “spf”
-
Contain the word “spf” but do not contain the word “sunscreen”
-
Contain both words “sunscreen” and “spf”
-
-
NOTor-(dash) -> negation
Enterapple NOT macintoshto search for the messages where the word “apple” appears except for the messages that contain both words “apple” and “macintosh”. -
""(quotation marks) → exact match
Enter“vintage keyboard“to search for the messages where the exact phrase “vintage keyboard“ appears. The messages that contain both words “vintage” and “keyboard” but not in this exact order will not appear in the search results. -
*(asterisk) → any number of characters at the end of a search term
Entersummer*to search for the messages containing the words that start with “summer”, such as “summer”, “summervibes”, “summertime”, and similar. -
()(parentheses) → search precedence
Use in combination with the other logical operators to specify in which order the search terms should be processed. The terms enclosed in parentheses are processed first.-
If you enter
(white OR red) AND wine, the search first locates all the messages that contain either the word “white” or the word “red”. Then, it narrows down the results by searching through the located messages to find only those that also contain the word “wine”. -
If you enter
white OR (red AND wine), the search first locates all the messages that contain both words “red” and “wine”. Then, it searches for the messages that contain the word “white”. The search results will contain the results from both these searches.
-
You can combine the logical operators to create more complex search queries, for example:
(((white OR red) AND wine) OR cheese) AND tast* AND "made in Italy" NOT "made in France"
Channel
Select one or more owned profiles the cases in the view must originate from.
For more information about owned profiles, see Add a Profile as Owned (Private) or Public.

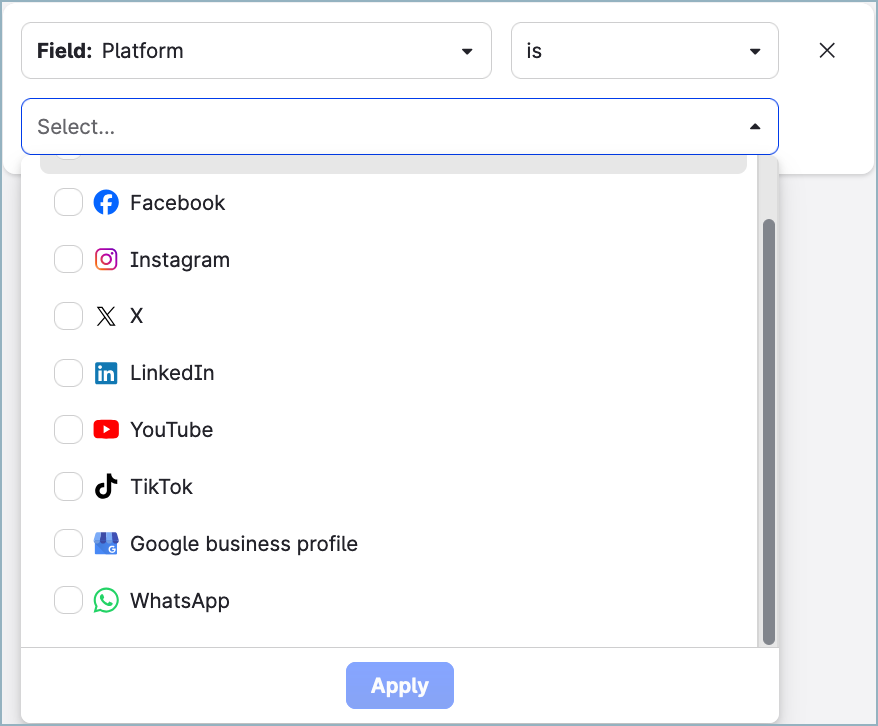
Platform
Select one or more social media platforms or review platforms the cases in the view must originate from.
Ensure that you select the platforms that matches your selection in the “Channel” filter.
For example, if you select a LinkedIn profile in the “Channel” filter and then choose X (formerly Twitter) as a platform, the created view displays zero cases.
Assigned users
Select one or more users/user groups the cases in the view must be assigned to.
The Current user option dynamically resolves to the currently logged-in user. Use it to create one shared view with cases assigned to the current user instead of creating multiple views for each individual Care user.
For more information, see Assign a Care Case to a Care Agent and Organize Users into User Groups.

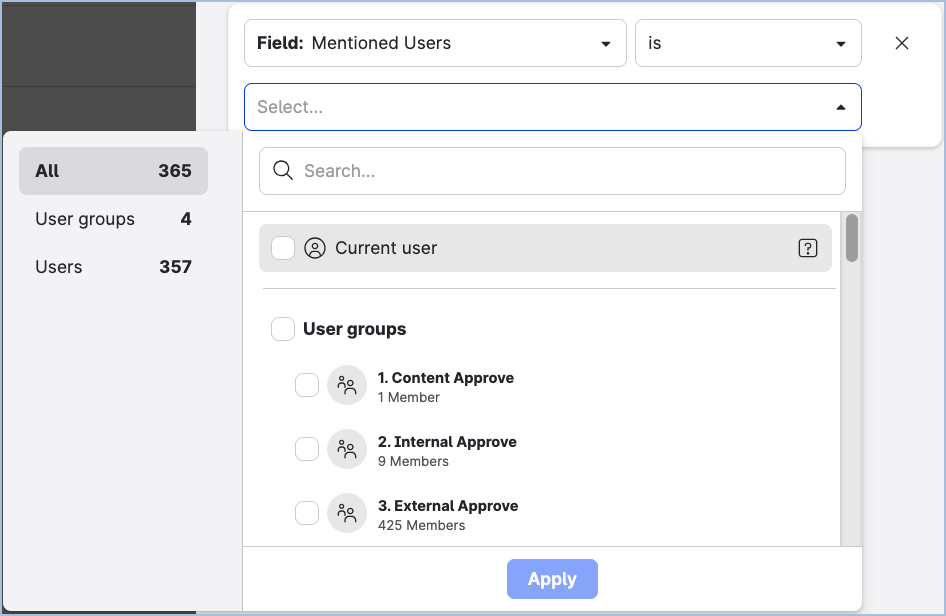
Mentioned users
Select one or more users/user groups that must be mentioned in the cases in the view.
-
When a specific user is selected as the value of this filter, the view shows both the cases where this user is mentioned directly and the cases where a user group including this user is mentioned.
-
When a user group is selected as the value of this filter, the view shows the cases where this user group is mentioned. The cases where the individual users included in this user group are mentioned directly will not appear in this view.
The Current user option dynamically resolves to the currently logged-in user. Use it to create one shared view with cases mentioning the current user instead of creating multiple views for each individual Care user.
Case status
Select one or more statuses the cases in the view must have.
For more information about case statuses, see Change the Status of a Care Case.
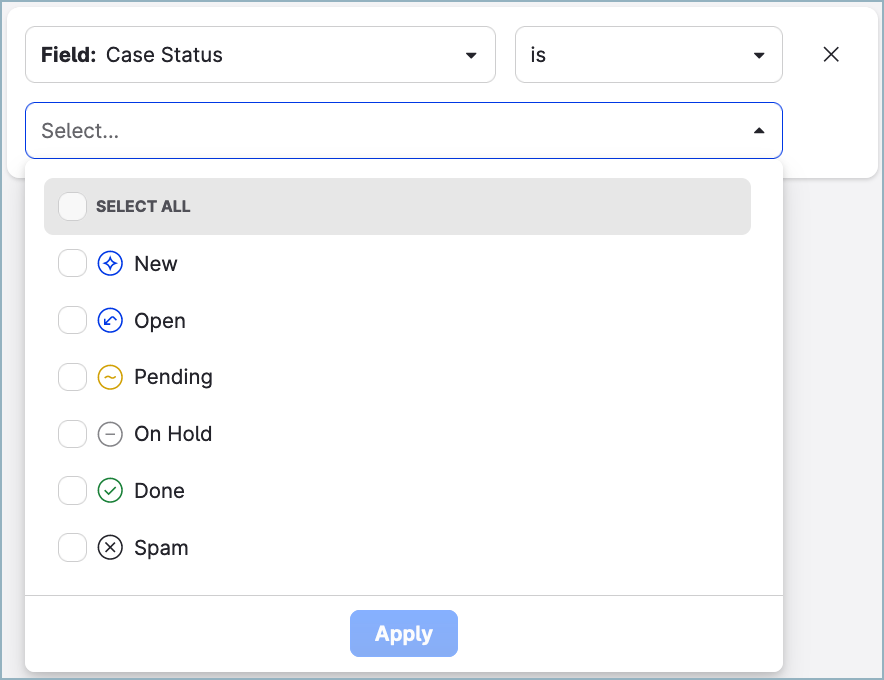
Combine the “Case status” filter with the “Assigned users” filter to quickly review the workload and progress of individual agents.
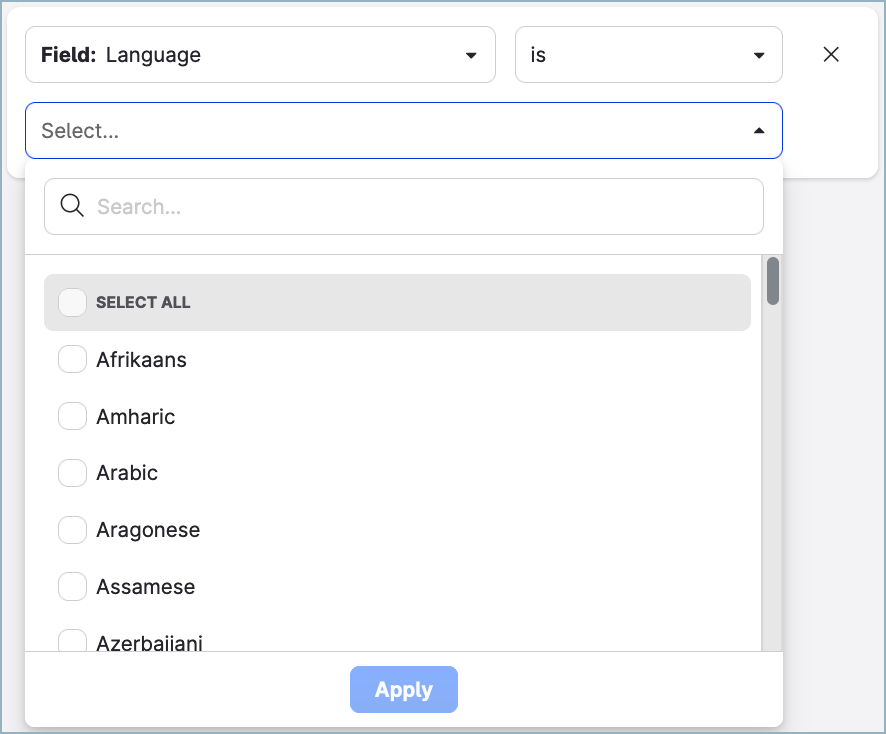
Language
Select one or more languages the cases in the view must be written in.
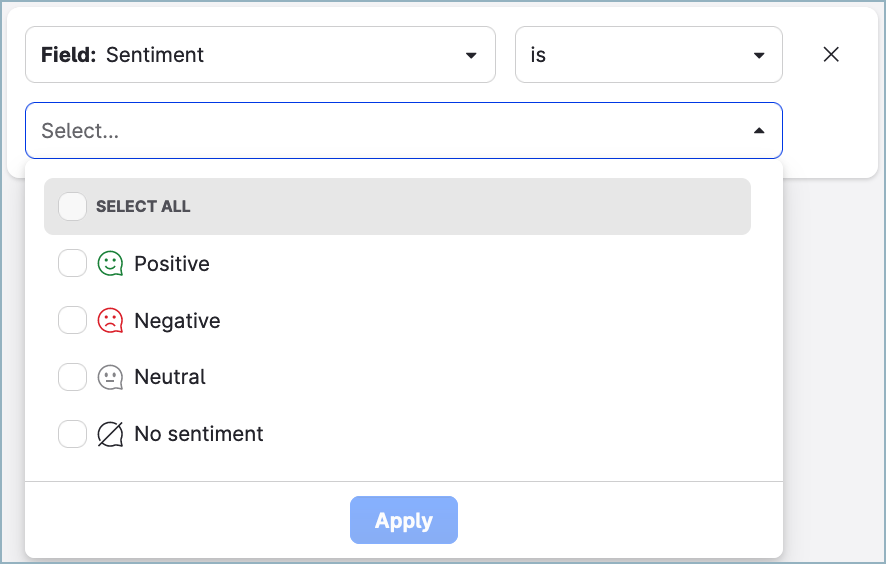
Sentiment
Select one or more sentiments the cases in the view must be assigned.
Message type
Select one or more message types the cases in the view must contain.
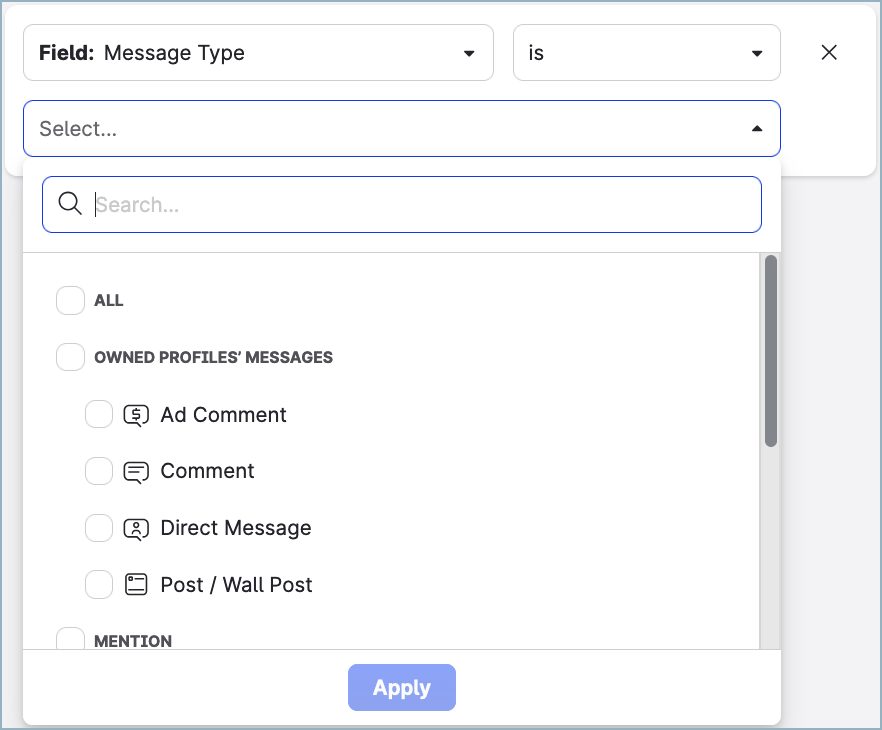
The message types are those that are determined in Community (comments, direct messages, and so on; for more information, see Community Inbox Filters).
SLA
The following SLA-related properties are available as filters:
-
Milestone breached and not yet completed
-
Milestone completed with a breach
-
Priority
For more information about SLA (service-level agreement), see Set Up a Service-level Agreement (SLA) in Care.
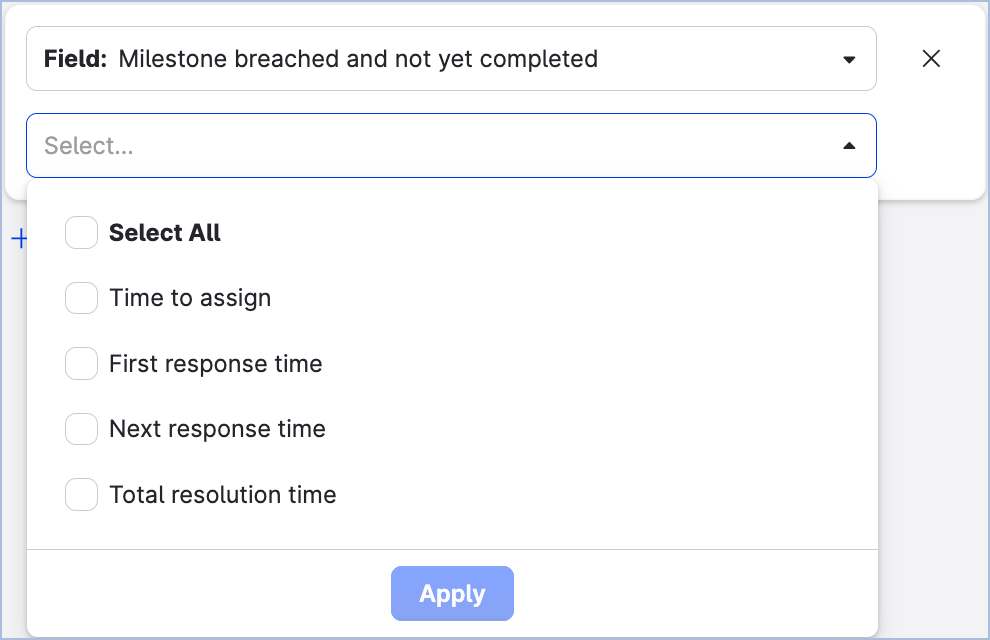
Milestone breached and not yet completed
Select one or more SLA policy milestones that were breached in the cases but have not yet been completed. Use this filter to find cases that need an immediate action.
For example, a case will appear under this filter if it is waiting for a first response and the defined first response time has already passed.
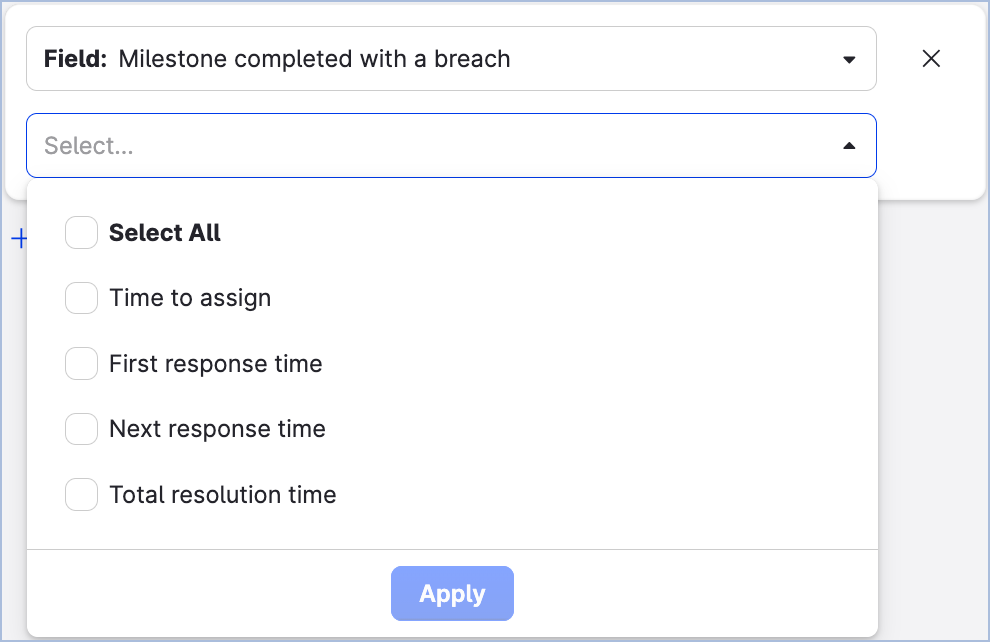
Milestone completed with a breach
Select one or more SLA policy milestones that were completed and ended in a breached state.
In other words, this filter lists all the cases where at least one milestone was not met. Use this filter for post-mortems and reporting.
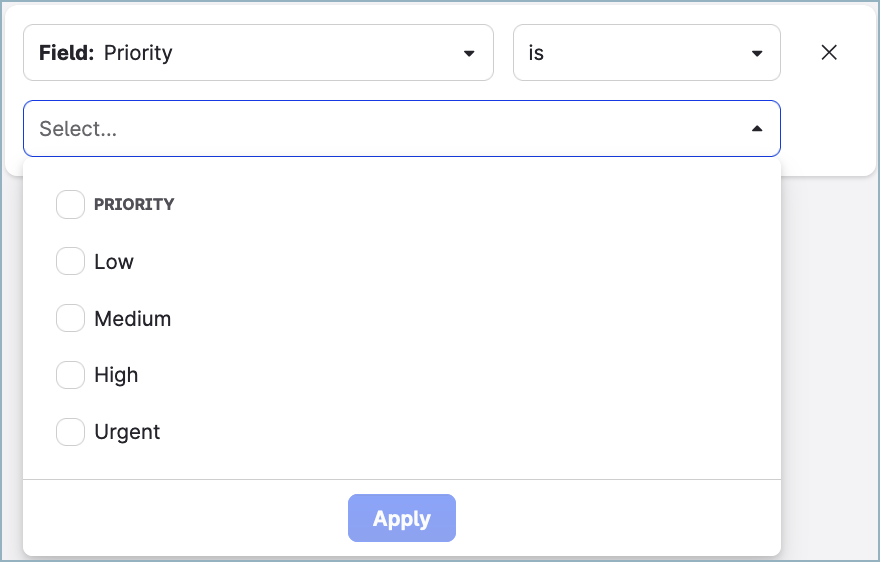
Priority
Select one or more priorities the cases in the view must be assigned.
For more information about case priorities, see Change the Priority of a Care Case.
Case fields
Select one or more case fields from the list of available fields (see Create Case Views in Care).
Create a case view by duplicating an existing view
Steps:
-
Go to Settings -> Care -> Views.
-
Hover over the case view that you want to duplicate, click the ellipsis menu (…), and then click Duplicate.

The view panel pre-populated with the details of the duplicated view slides out.
-
(Optional) Update the name of the view, the color and the icon that the view will be marked with in Care, and the view description.
-
In the Visibility section, specify who should be able to view the cases in the view: anyone with access to Care (global visibility) or only specific users/user groups.
-
All users in the user group can view the cases in the view.
-
Adding a new user to the user group at any time later automatically grants the user access to the view.
-
Removing a user from the user group at any time later revokes the user's access to the view.
-
Deleting the user group revokes access to the view for the users who were members of the user group.
-
-
Click Next step.
-
Specify how the cases should be sorted in the view.
-
(Optional) Set up filters for the view (see “Available view filters“ earlier in this article).
-
Once done, click Create.
The case view is created and appears at the end of the list of the views.
The view is disabled by default and is not visible in Care. -
To enable the view and make it visible in Care, toggle the switch in the Status column to ON.
The view is enabled and visible in Care.
Organize case views in the Care main menu
As you create more views, you may need to organize them into groups and order the groups and the views as you need. This allows you to create a clear hierarchy of case views in the left panel, and helps you and other Care users quickly locate the views that they need preventing them from wasting time scrolling through multiple views and getting frustrated.
You can organize views into groups by any criteria: groups for specific Care agents, groups related to a specific geographic region, platform, profile, and so on.
You can also add dividers to visually separate logical blocks of case views or view groups.
A view can be included in one view group only. A view does not have to be included in any view group at all.
A view group is visible in Care only when it is enabled and it includes at least one enabled case view.
Users with the Manage views permission can see:
-
All enabled view groups (provided that at least one view is enabled in a group)
-
The enabled views inside each of the groups
-
The enabled views without a group assigned
Users without Manage views permission can see:
-
The enabled view groups that contain views shared with them (provided that at least one shared view is enabled in a group)
-
The enabled views shared with them without a group assigned
Steps:
-
Go to Settings -> Care -> Views.
-
Click +Create group.
The new view group panel slides out. -
Enter the name of the group.
-
Click Create group.
The view group is created and appears at the end of the list of the views.
The view group is by default set to be visible in Care. As soon as you add at least one enabled case view to the group, the group will become visible in Care. -
Repeat Steps 2-4 to create as many view groups as you need.
-
Add case views to the groups:
-
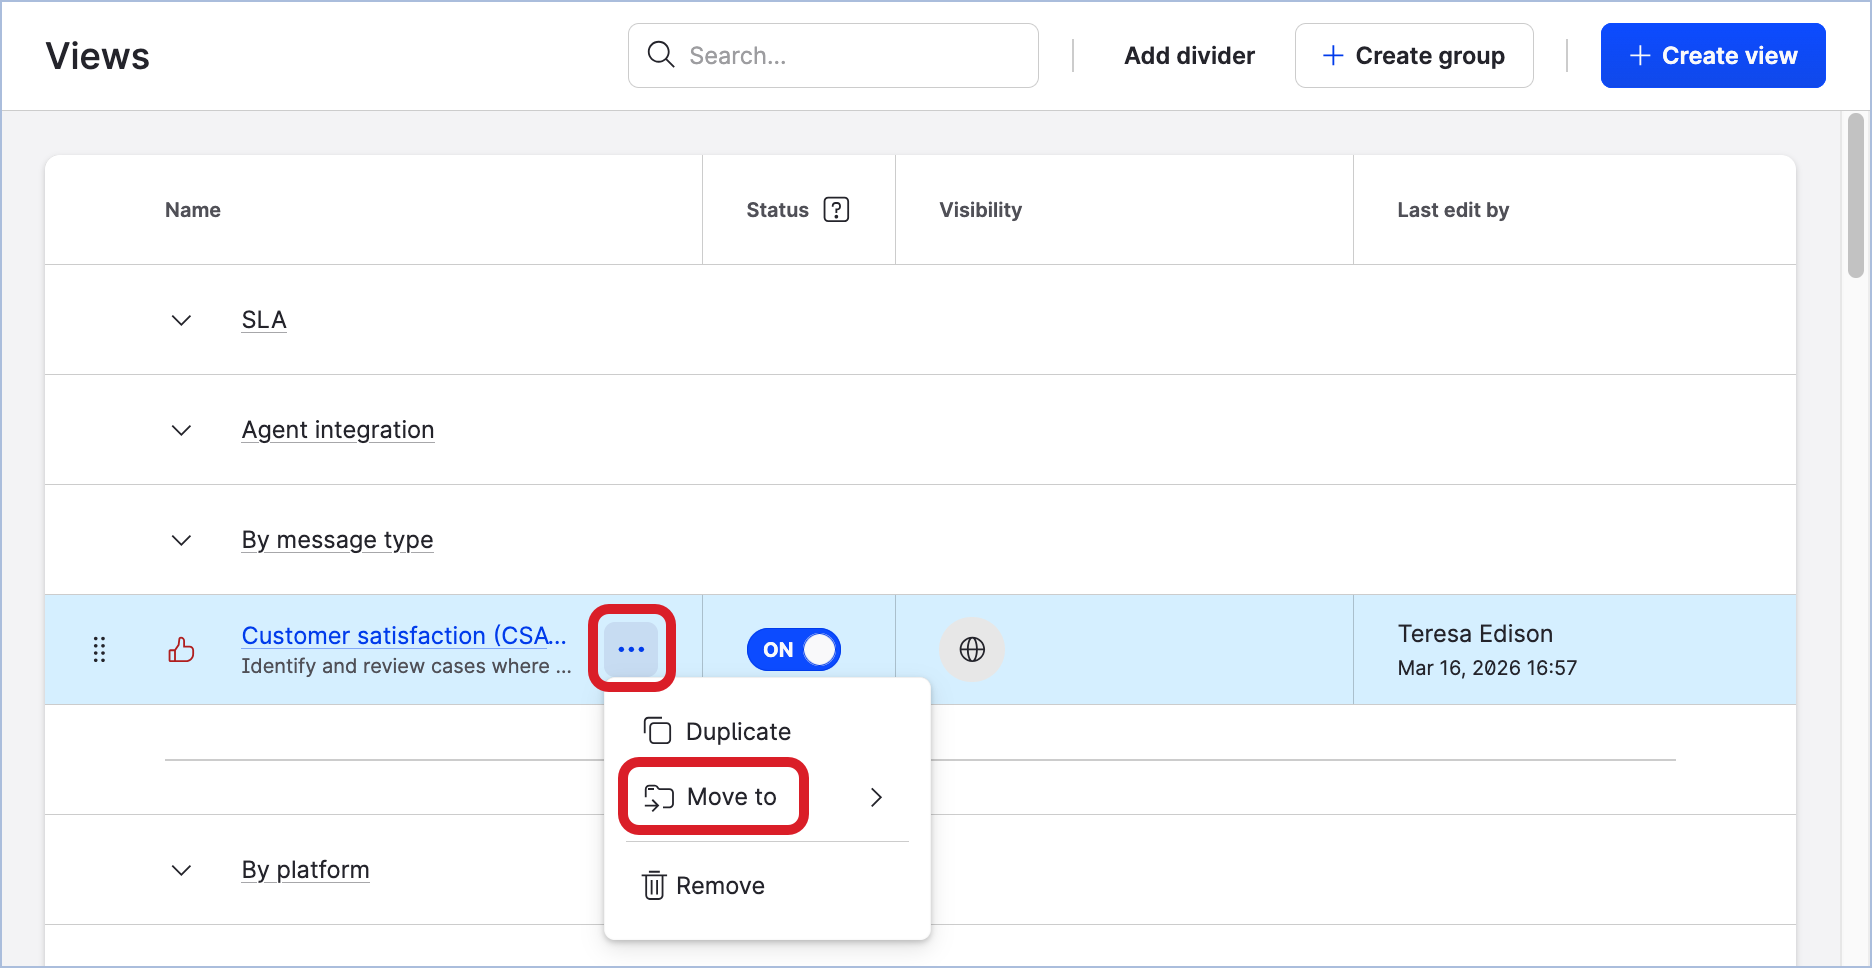
Hover over a case view, click the ellipsis menu (…), click Move to, and then select the group to move the view to.
or
-
Hover over the left corner of a case view, and drag and drop the view to under the group where you want to add the view to.
The following image shows moving the Customer satisfaction (CSAT) Analysis case view to the Agent integration view group.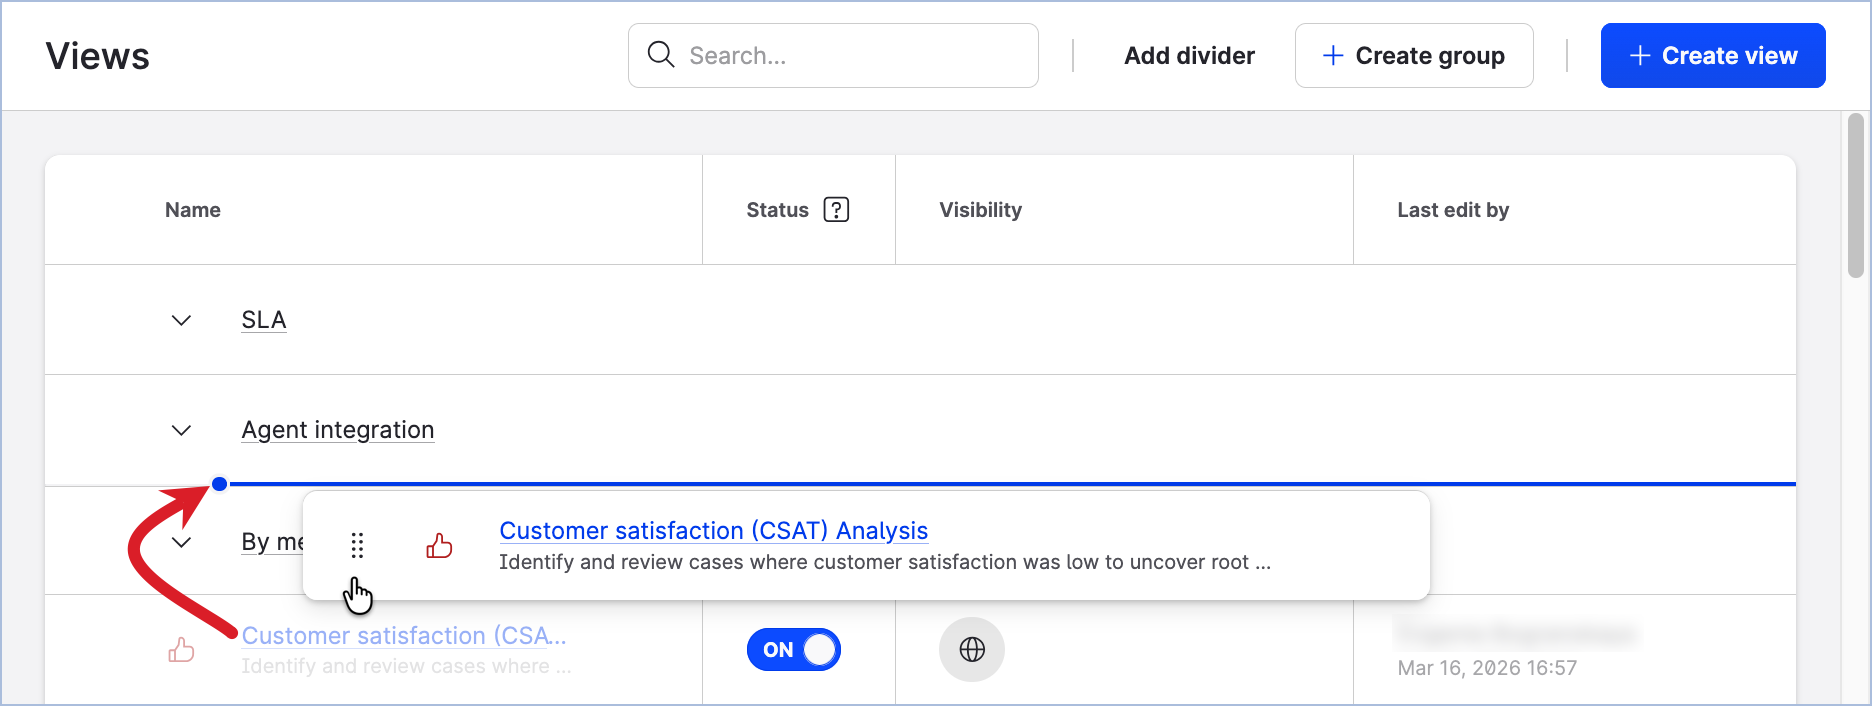
-
-
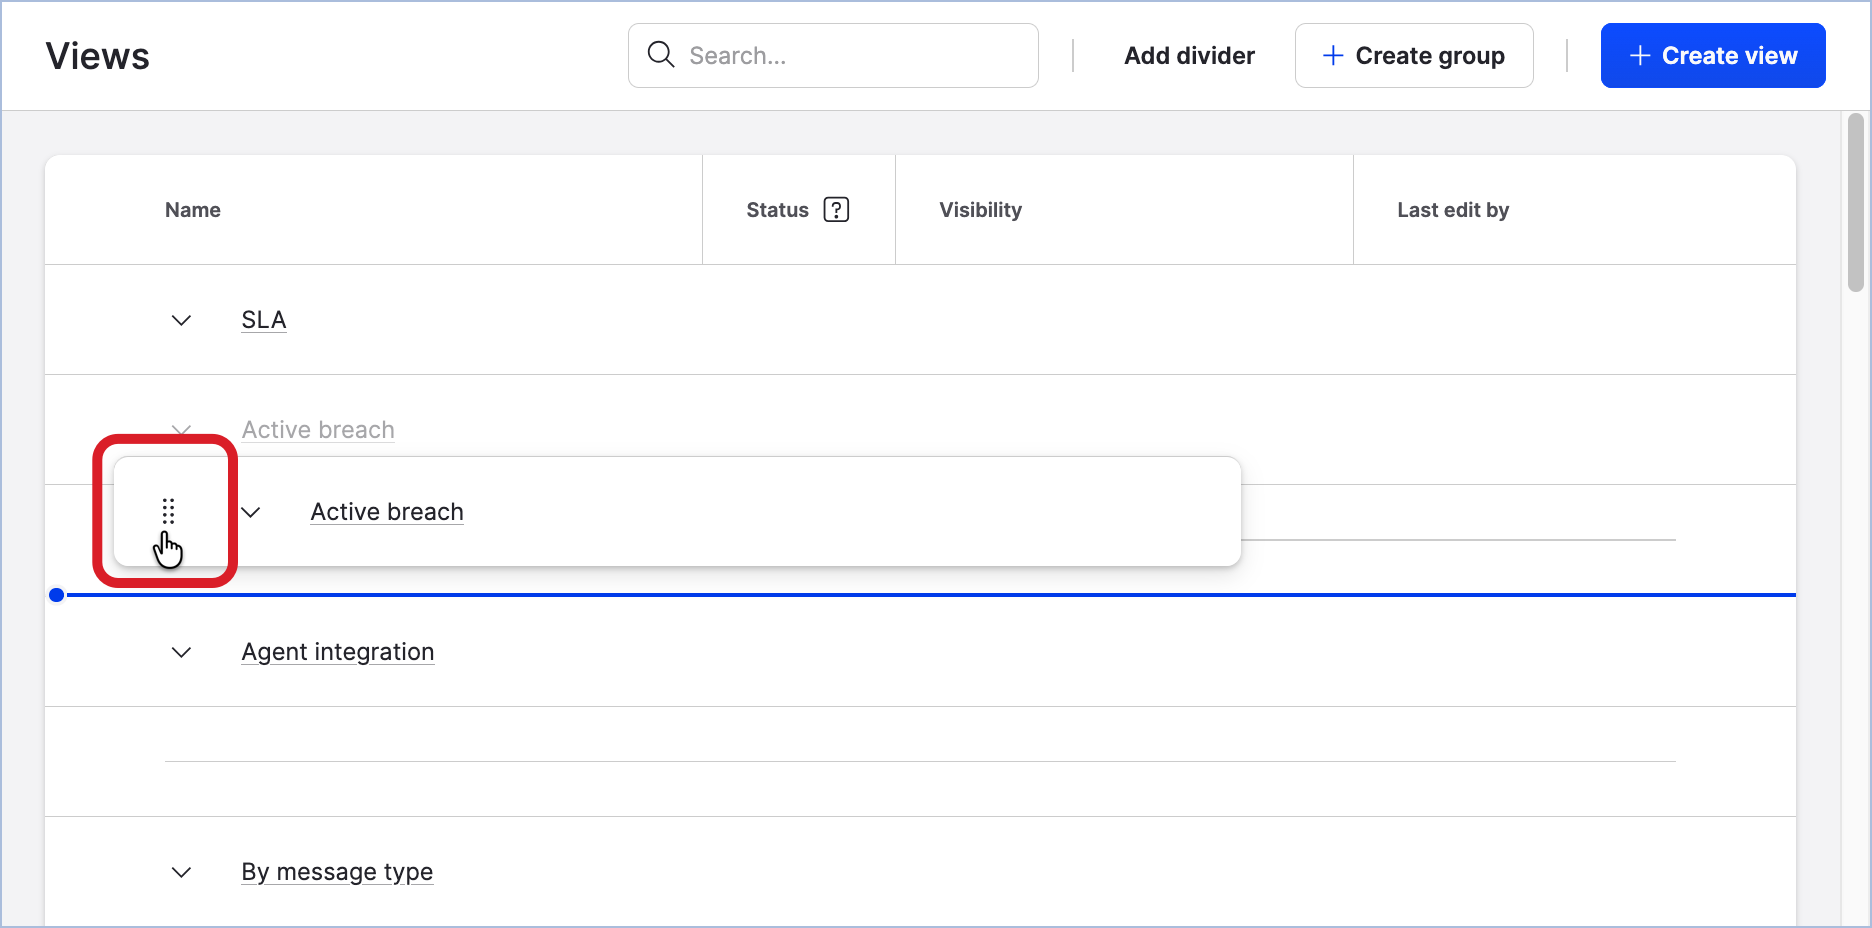
Reorder the groups: hover over the left corner of the group, and drag and drop the group to the new position.
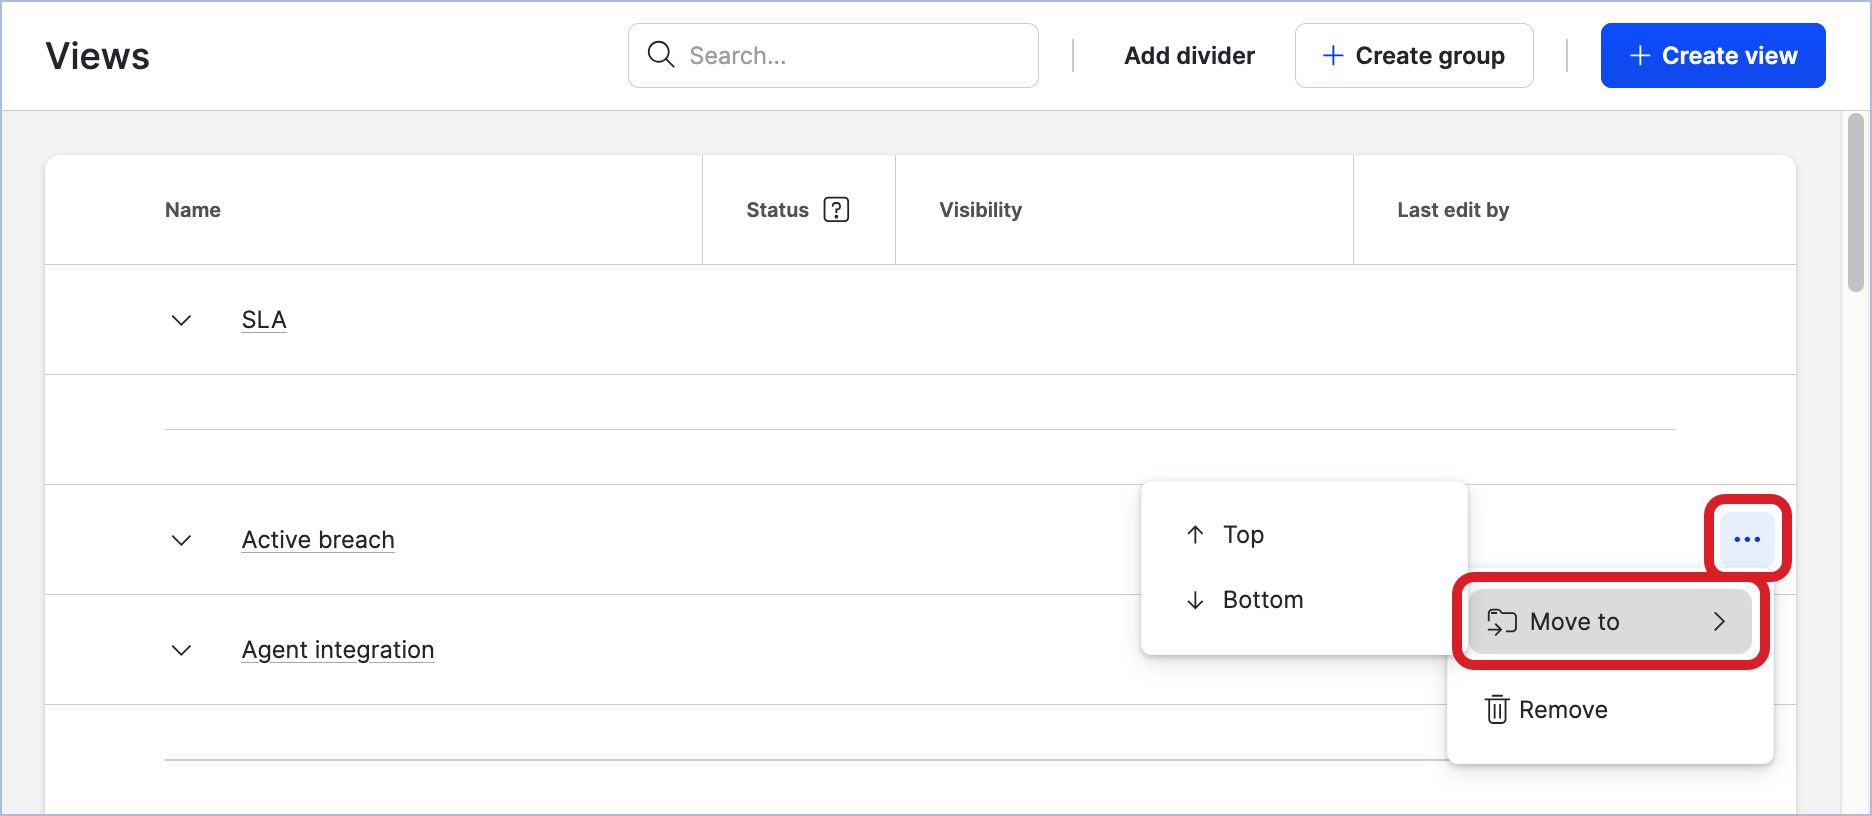
To quickly move a group to the very top or very bottom of the list of the views, hover over the group, click the ellipsis menu (…), click Move to, and then select Top or Bottom.
-
Reorder the case views inside a view group: hover over the left corner of a view, and drag and drop it to the new position within the group.
-
Reorder the case views that are not included in any group: hover over the left corner of a view, and drag and drop it to the new position within the list of the views.
-
(Optional) Add dividers.
-
Click Add divider.
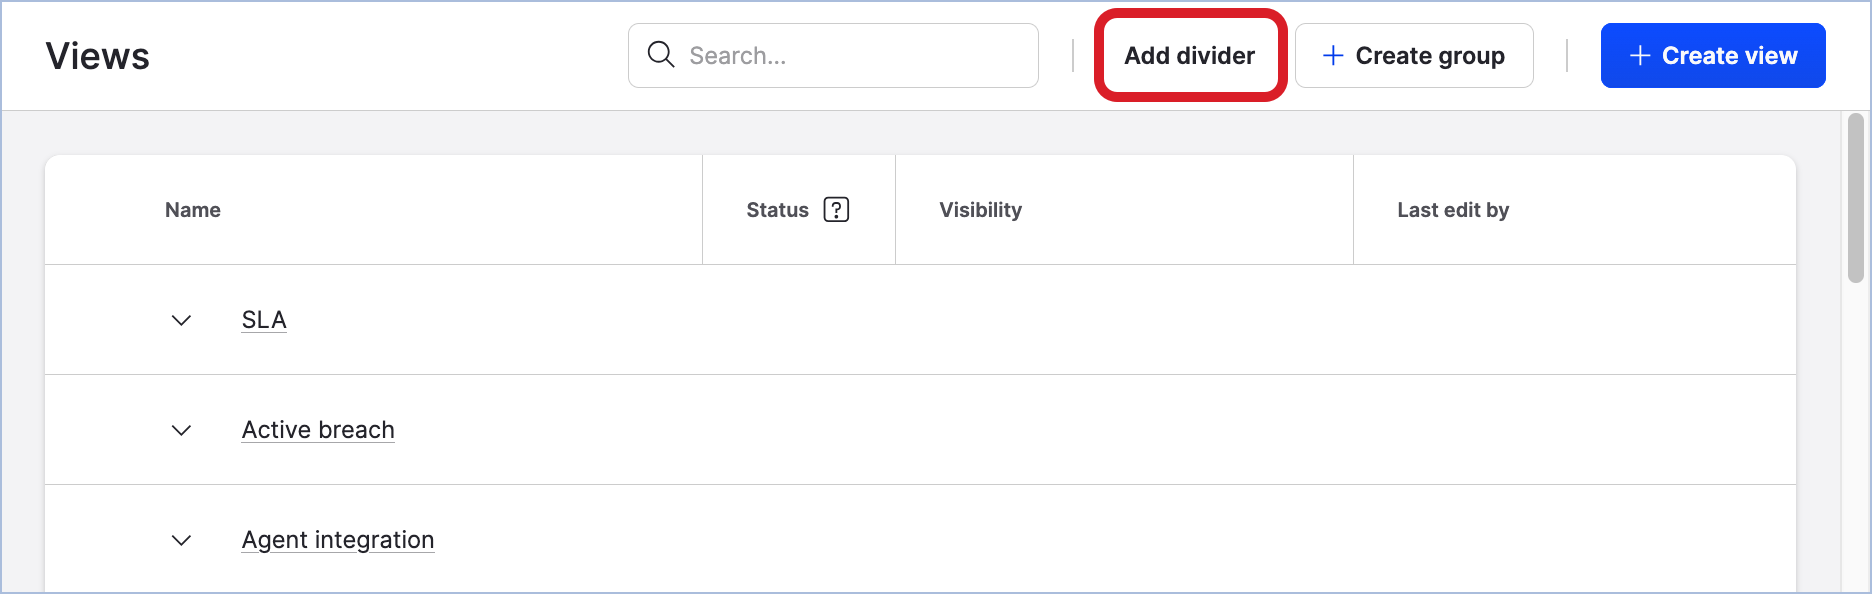
A divider is created and appears at the end of the list of the views.
-
Hover over the left corner of the divider, and drag and drop it to the new position within the list of the views.
-
Rename a group
Steps:
-
Go to Settings -> Care -> Views.
-
Hover over the view group that you want to rename, and click the pencil icon.
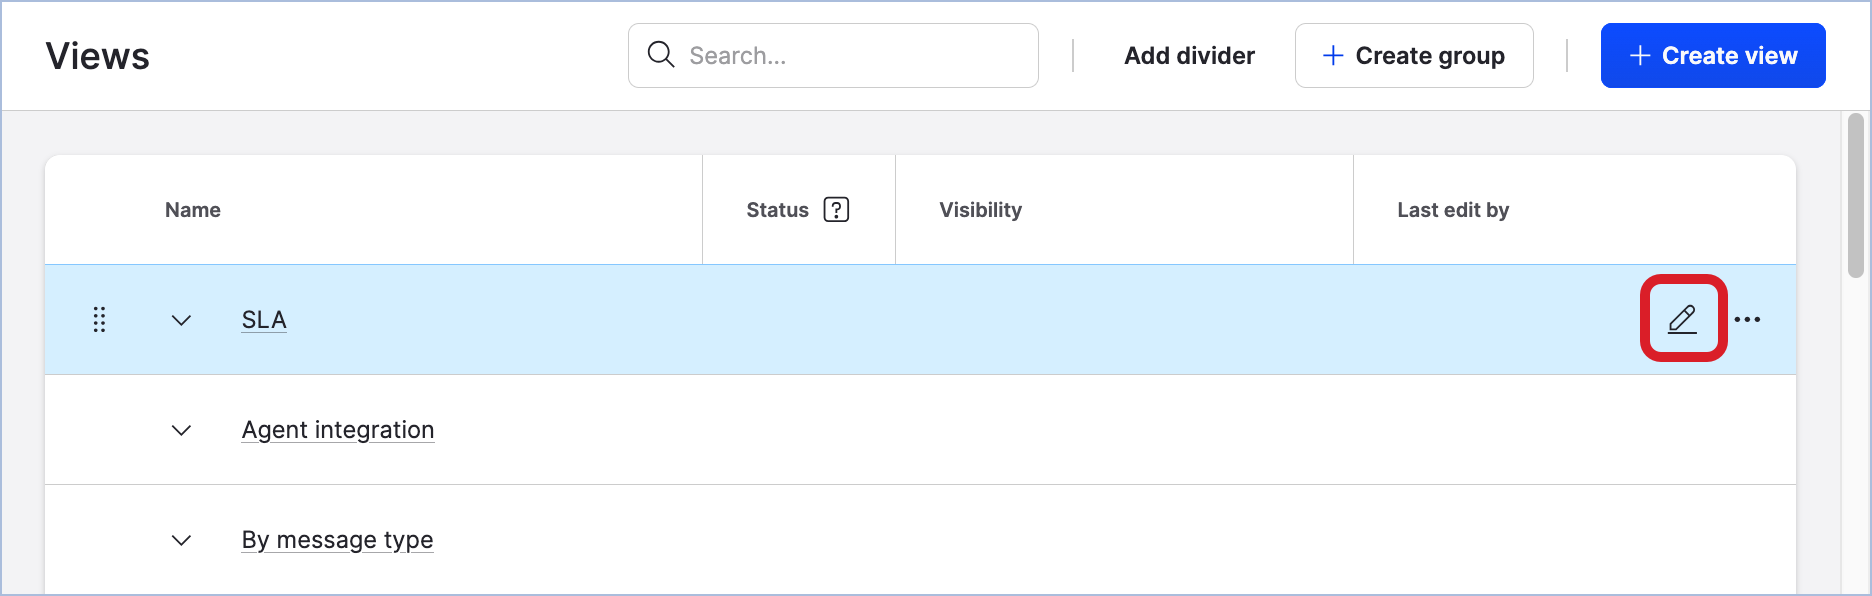
The view group panel slides out.
-
Rename the group, and click Save.
The view group panel closes.
The view group is renamed.
Delete a view group
Deleting a view group does not delete the views that the view group includes. The views from the deleted group are moved to the end of the list of the views.
Steps:
-
Go to Settings -> Care -> Views.
-
Hover over the view group that you want to delete, click the ellipsis menu (…), and then click Remove.
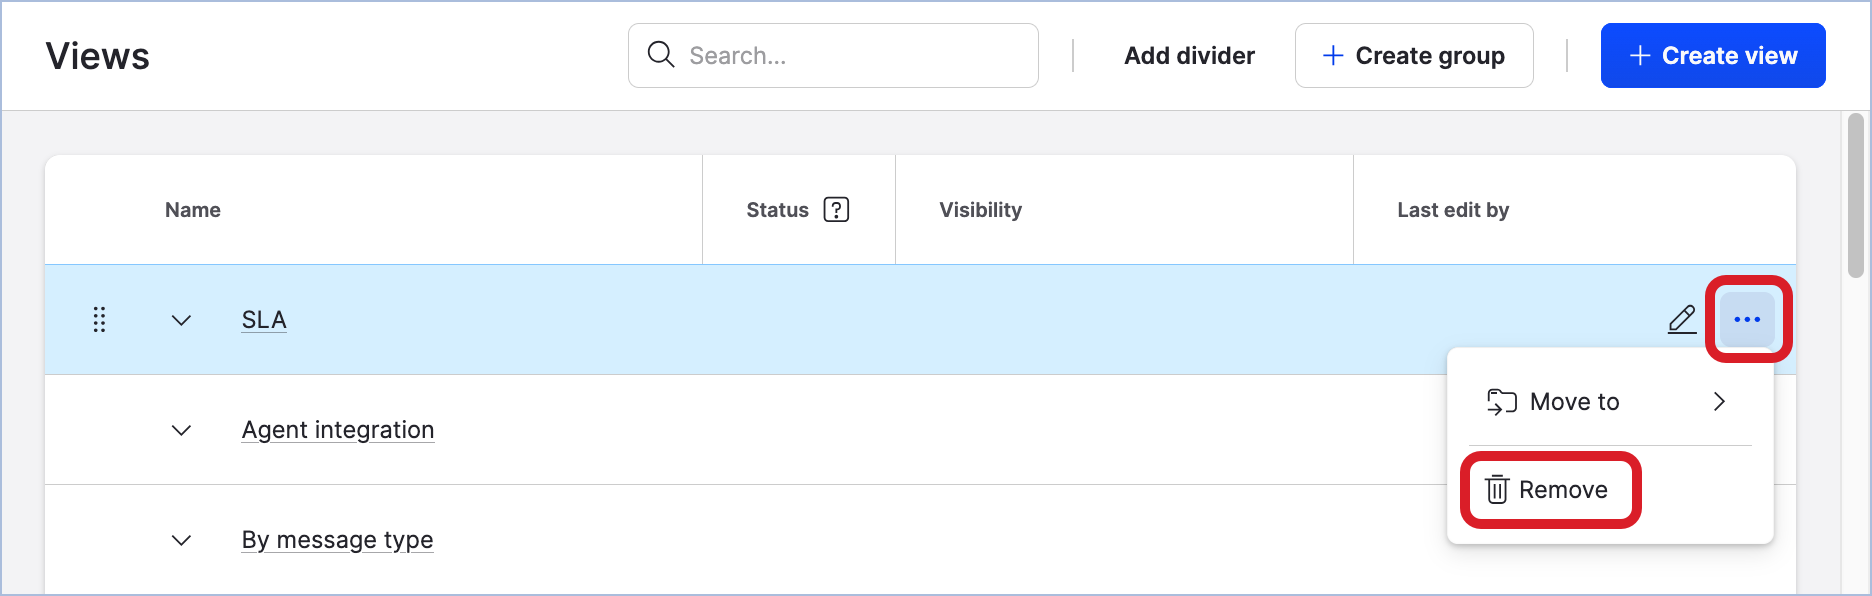
-
Confirm the deletion.
The view group is deleted.
The views from the group are moved to the end of the list of the views.
Delete a divider
Steps:
-
Go to Settings -> Care -> Views.
-
Hover over the divider that you want to delete, and click the trash can icon that appears.
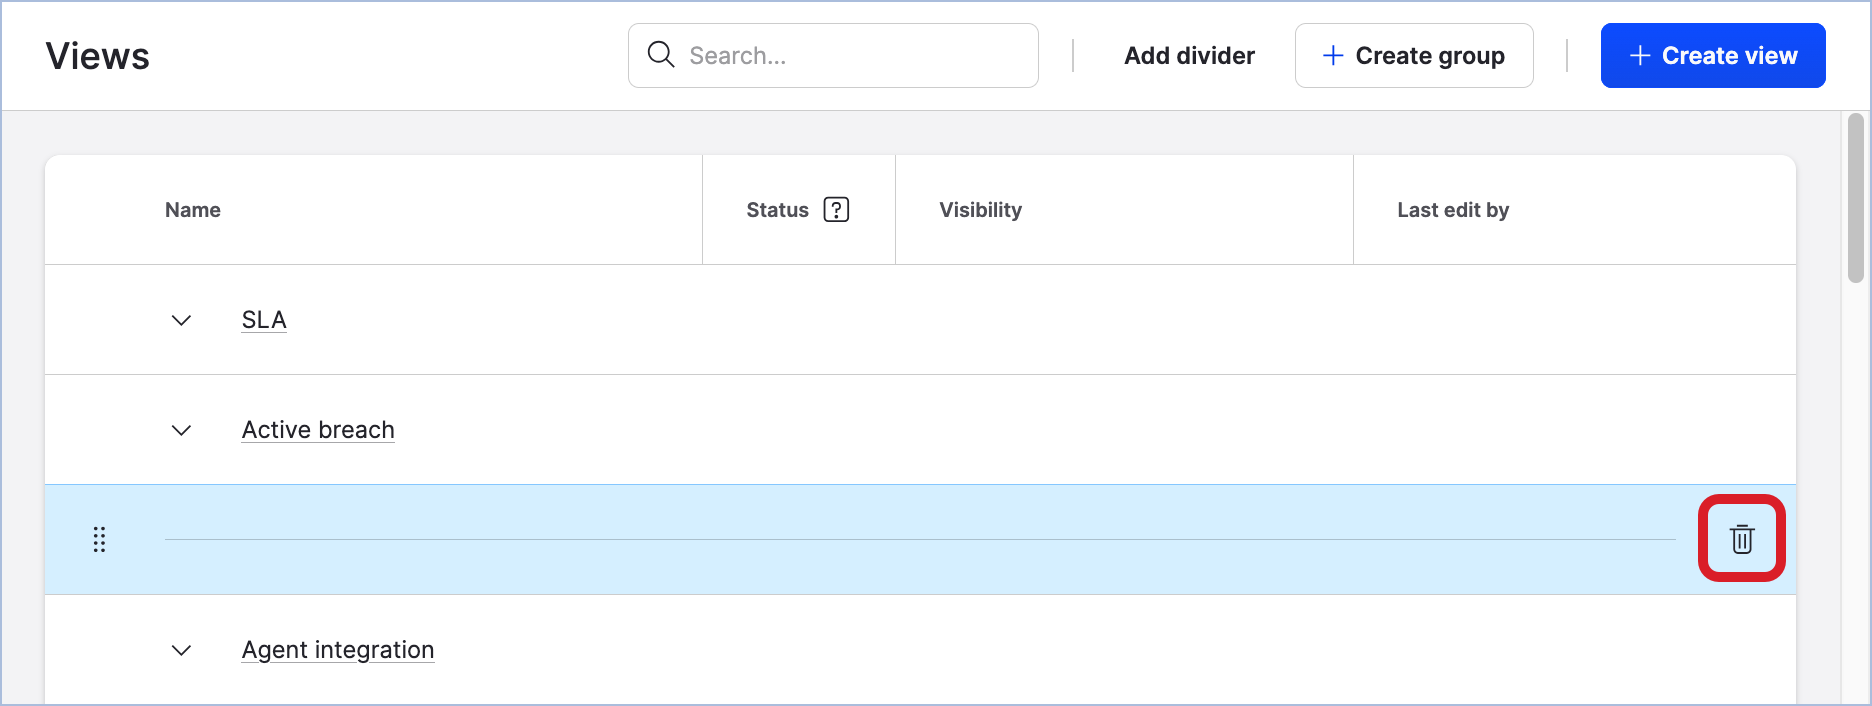
The divider is deleted.
Change the sorting in a view
When using a view in Care, you can temporarily change the sorting of the cases in the view to adjust it to your individual needs.
The sorting that you set up in a view is preserved while you are working in the view. Switching to a different view will reset the sorting to the default one.
To change the sorting of the cases, click the sort button to the right of the search field and the filter button:
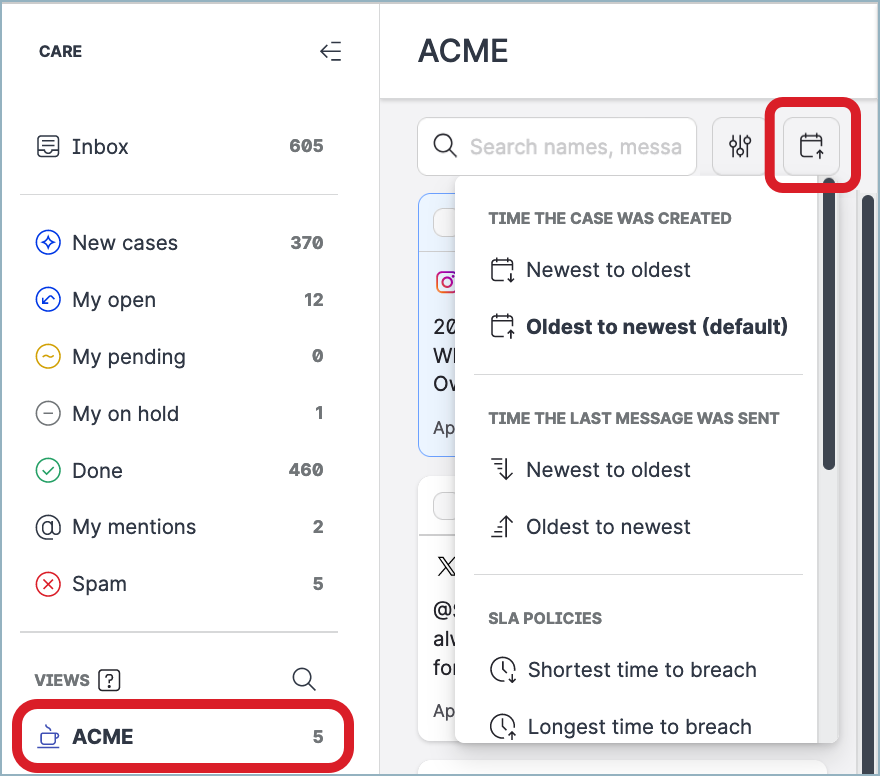
You can sort the cases in a view by the following criteria:
-
By the time a case was created (oldest/newest)
-
By the time the last message was posted to a case (oldest/newest)
-
By the time left until the SLA policy assigned to a case will be breached (shortest/longest)
-
By the priority of a case (highest/lowest)
Apply additional filters to a view
When using a view in Care, you can temporarily apply additional filters to the view to adjust it to your individual needs.
The filters that you set up in a view are preserved while you are working in the view. Switching to a different view will clear the filters that you applied.
To apply additional filters, click the filter button next to the search field:
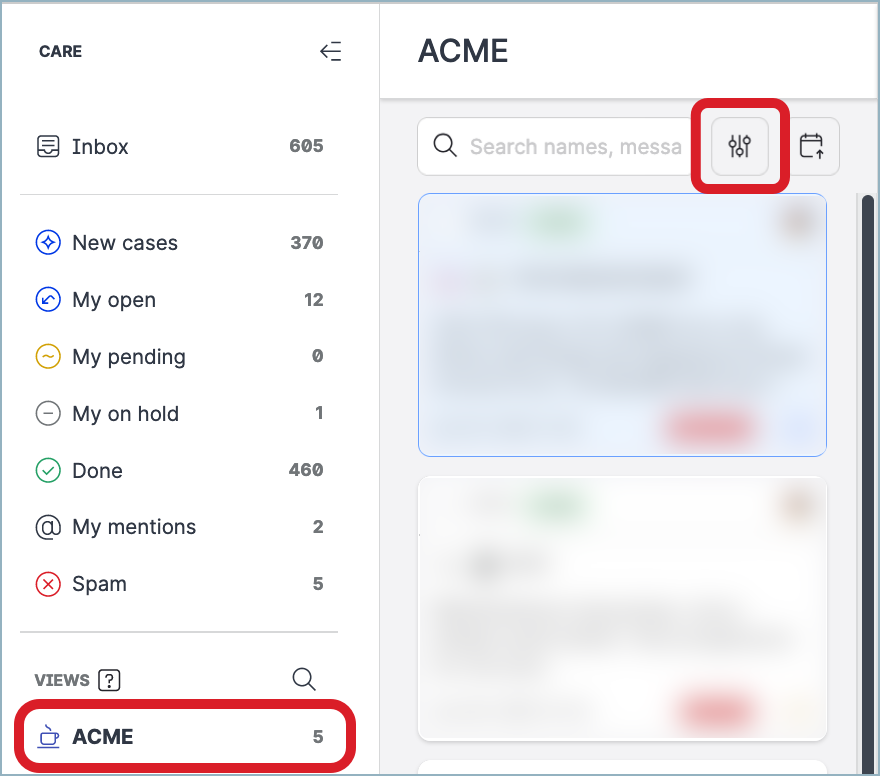
In the dialog that pops up, set up the filters, and click Filter.
Delete a case view
Deleting a view does not delete the view group that the view is included in.
Steps:
-
Go to Settings -> Care -> Views.
-
Hover over the case view that you want to delete, click the ellipsis menu (…), and then click Remove.
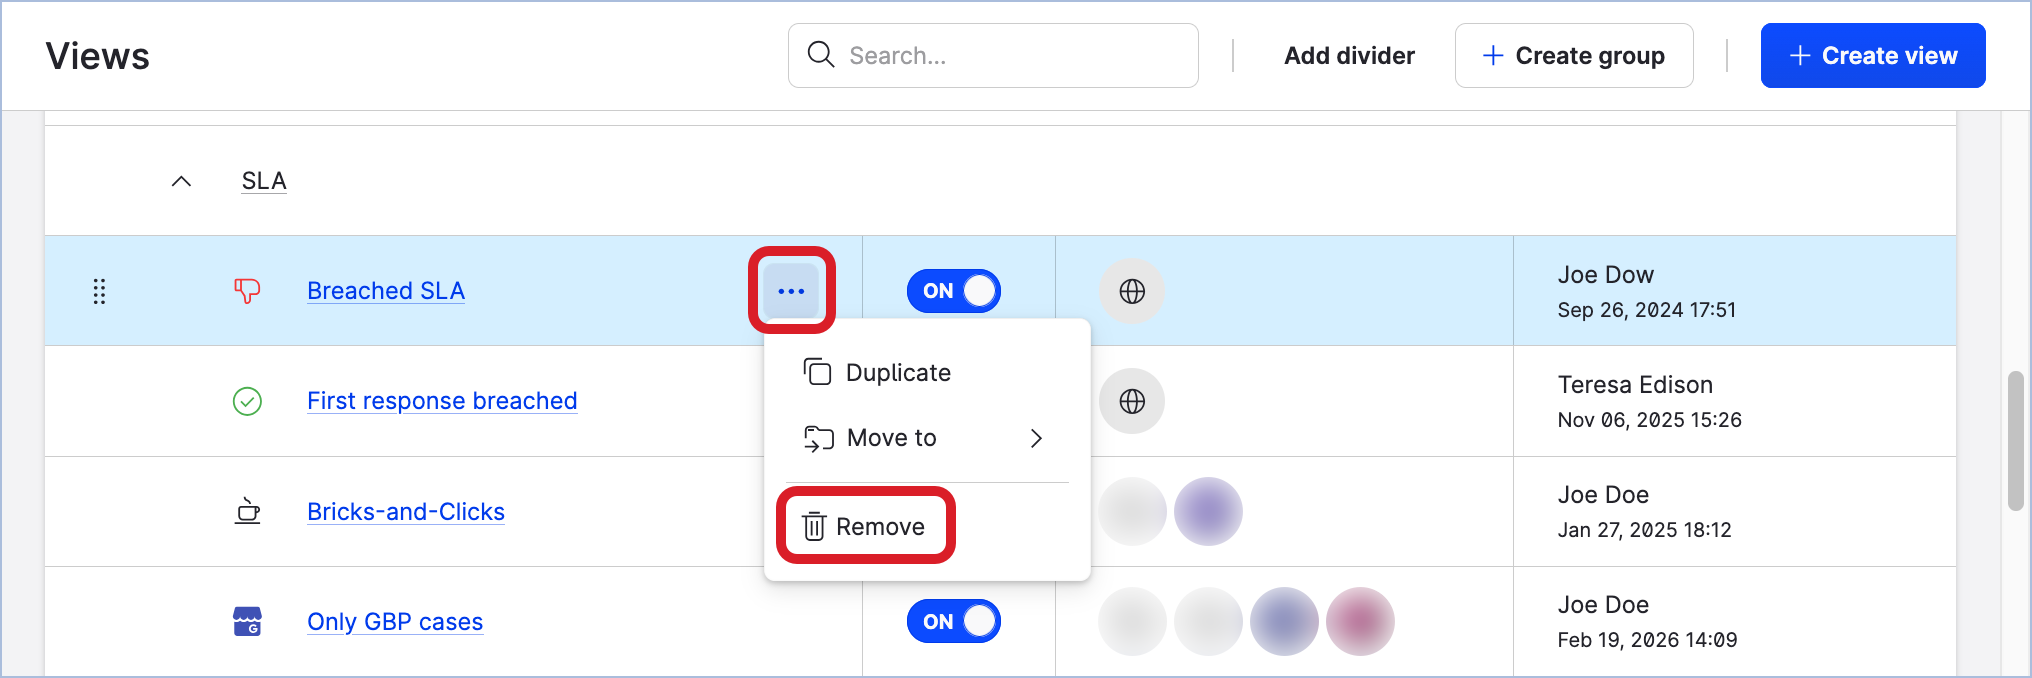
-
Confirm the deletion.
The view is deleted.
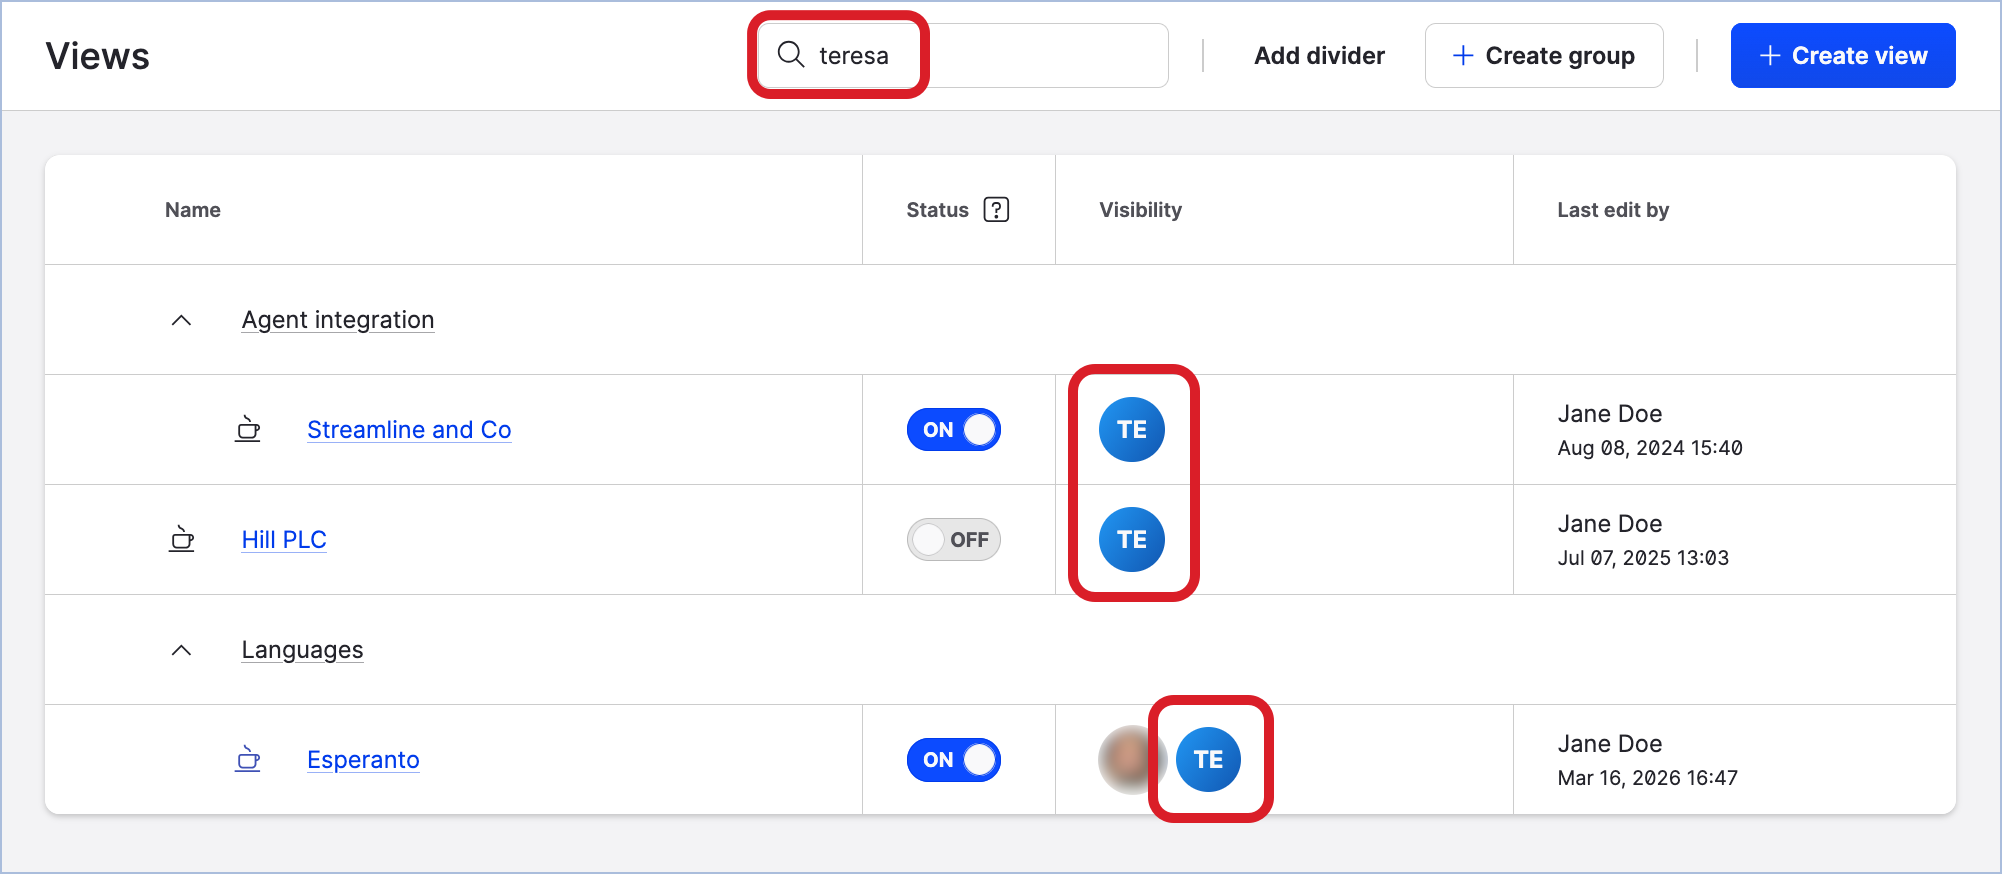
Find out what case views a Care user can access
To understand what scope of Care cases a specific user can see and work on, filter out the case views that this user can access in Care.
Steps:
-
Go to Settings -> Care -> Views.
-
Enter the name of the user in the search field.
The list of views is updated as you type to show only the views that the user can access.-
-
-
-
-