This article is for users with the Manage case fields permission. For more information about Care permissions, see Set up Care permissions).
Case fields allow you to define cases in a way that matches, for example, your specific product lines, social media outlet, priority, or region.
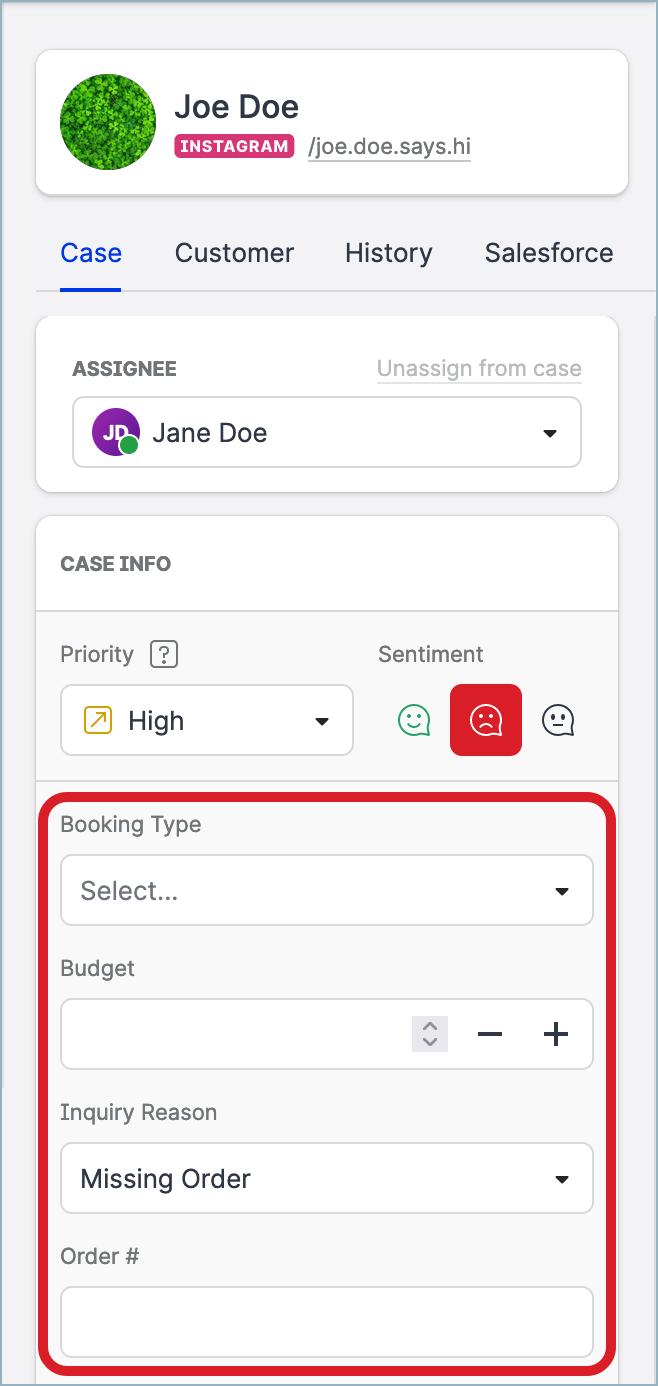
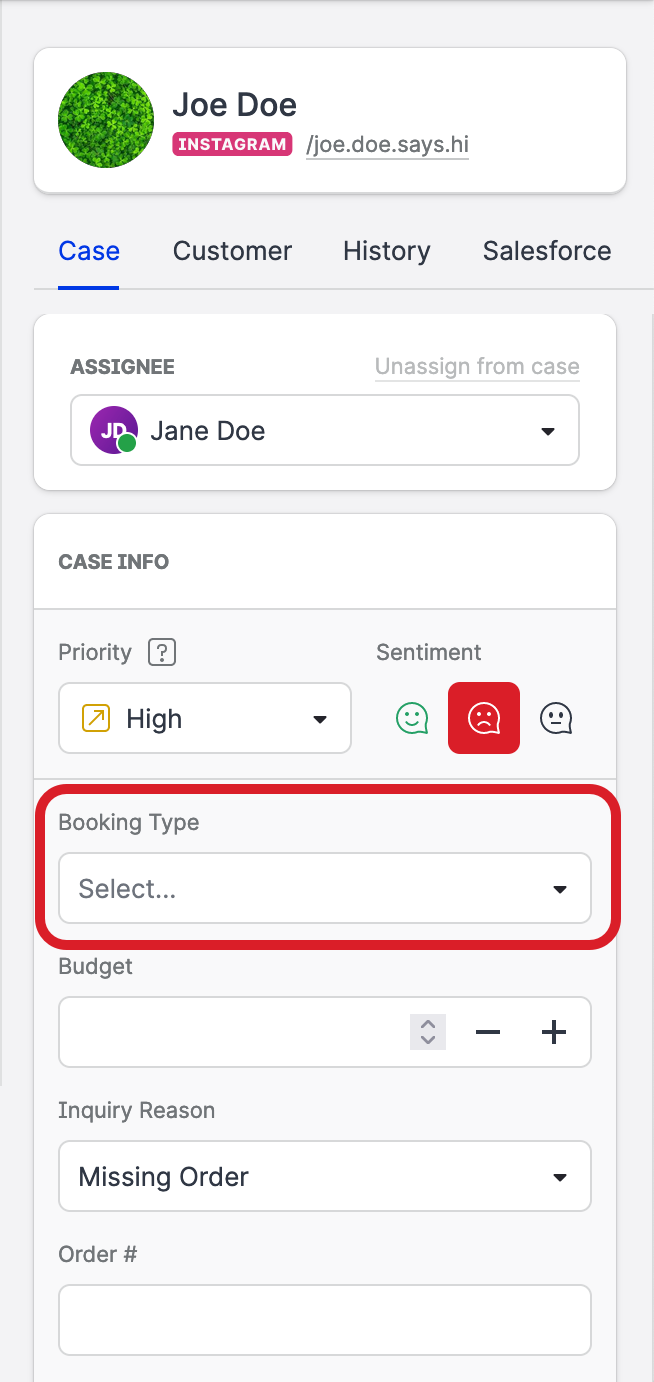
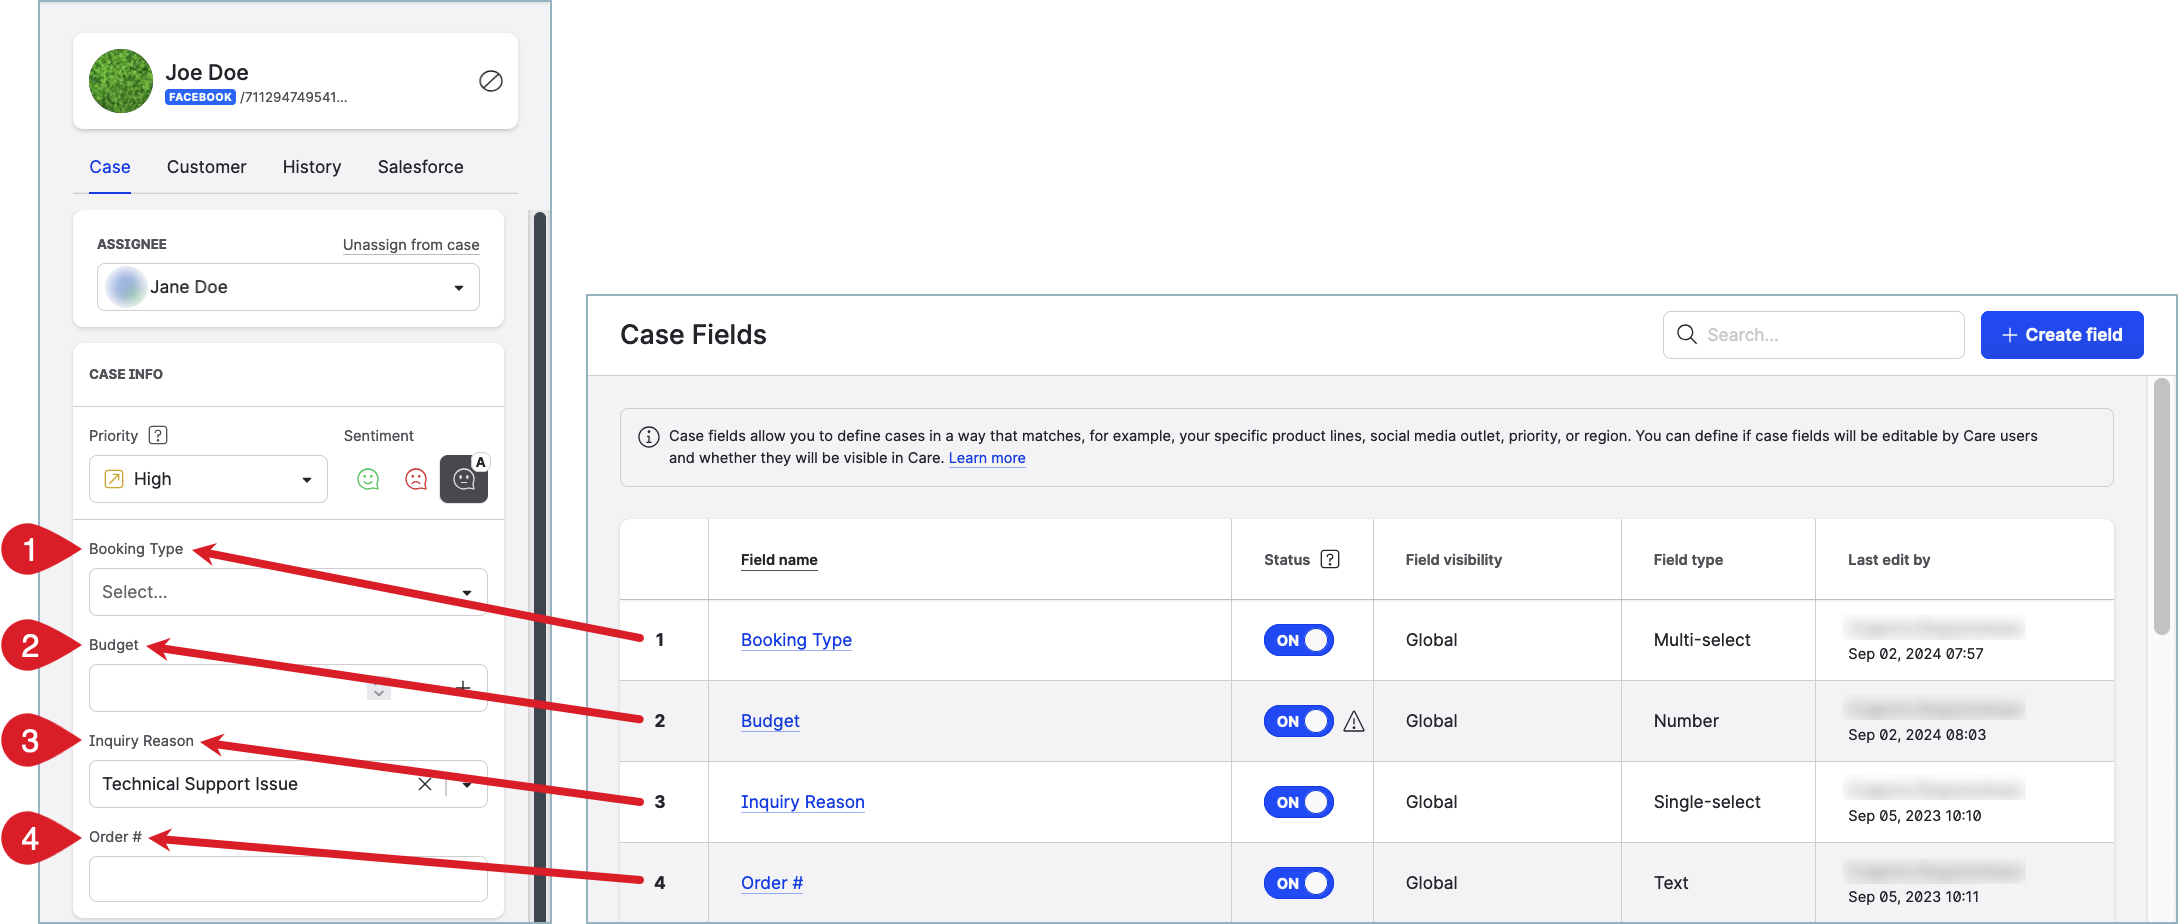
The fields that you define will be available on the Case tab of the case property panel (see Work with Care Cases):
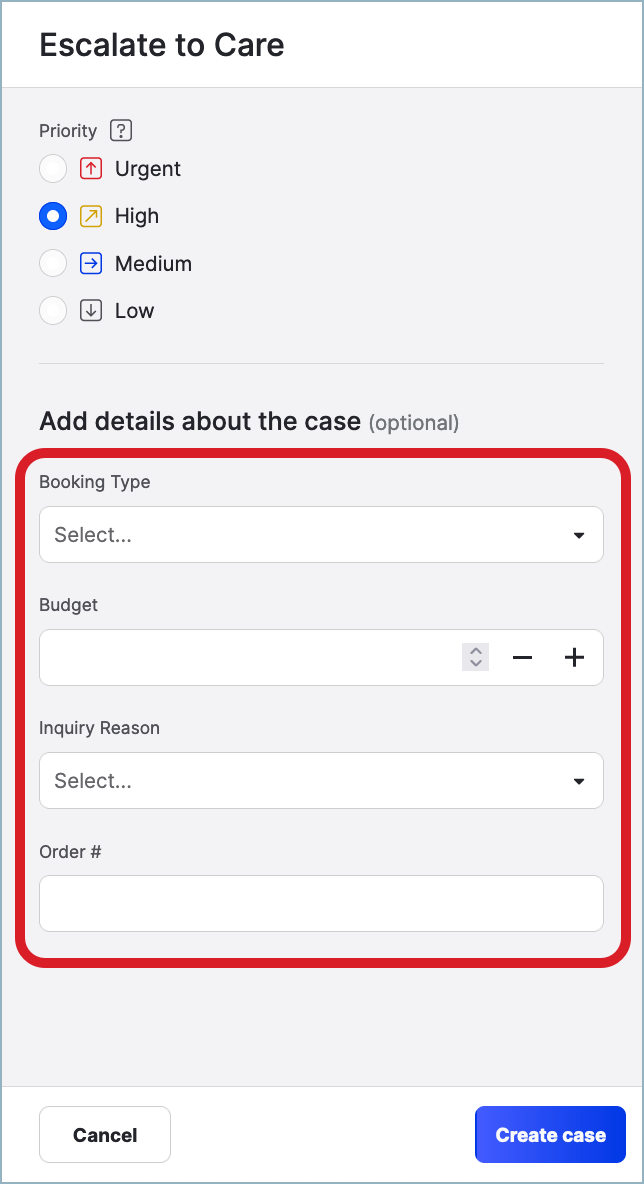
The fields will also be available on the panel for escalating from Community to Care (see Escalate a Community Message to Care):
You can also use the case fields to filter Care views (see Create Case Views in Care).
Case field properties
Types of case fields
Depending on what values a case field accepts, case fields can be of the following types:
-
Single-select
You can select only one value from the possible values defined for a case field.
Example: The country where the customer is currently located -
Multi-select
You can select one or more values from the possible values defined for a case field.
Example: The products in the customer’s order -
Text
You can type in any text as the value of a case field.
Example: The first name -
Number
You can type in a number (up to 9 digits) as the value of a case field.
Example: The payment amount -
Date
You can select a date as the value of a case field. Date ranges are not allowed.
Example: The shipment date
Visibility of case fields
Depending on whether Care users can see a case field on the case property panel and edit the field value, case fields can be of the following levels of visibility:
-
Global
Any Care user can see and update this case field. -
Read-only
Any Care user can see this case field but cannot edit it.
The value of the field to display is derived from the Care case metadata.
Read-only fields can be used for providing a Care agent with additional information about the case. -
Hidden
Hidden fields are used only for Care automation and are not visible in Care.
For more information about Care automation and what can be automated, contact your Customer Success Manager.
Create a case field from scratch
Steps:
-
Go to Settings -> Care -> Case fields.
-
Click + Create field.
The field panel slides out.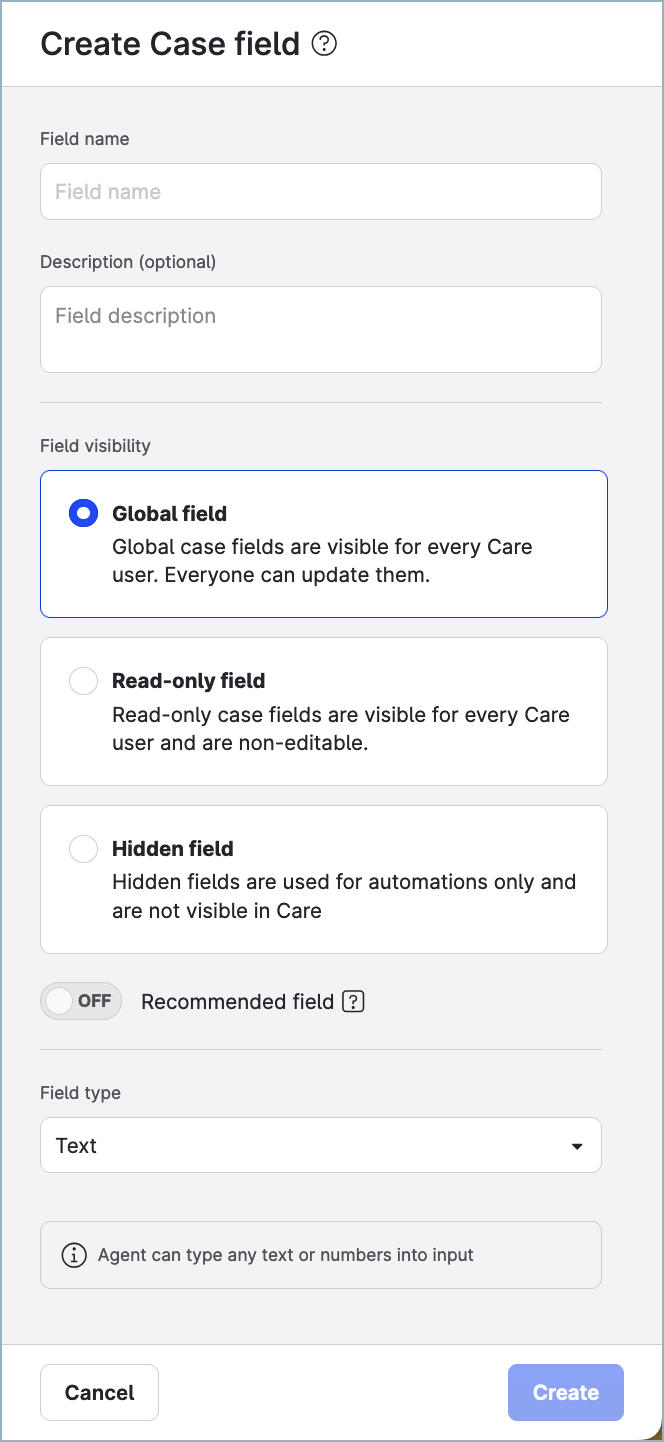
-
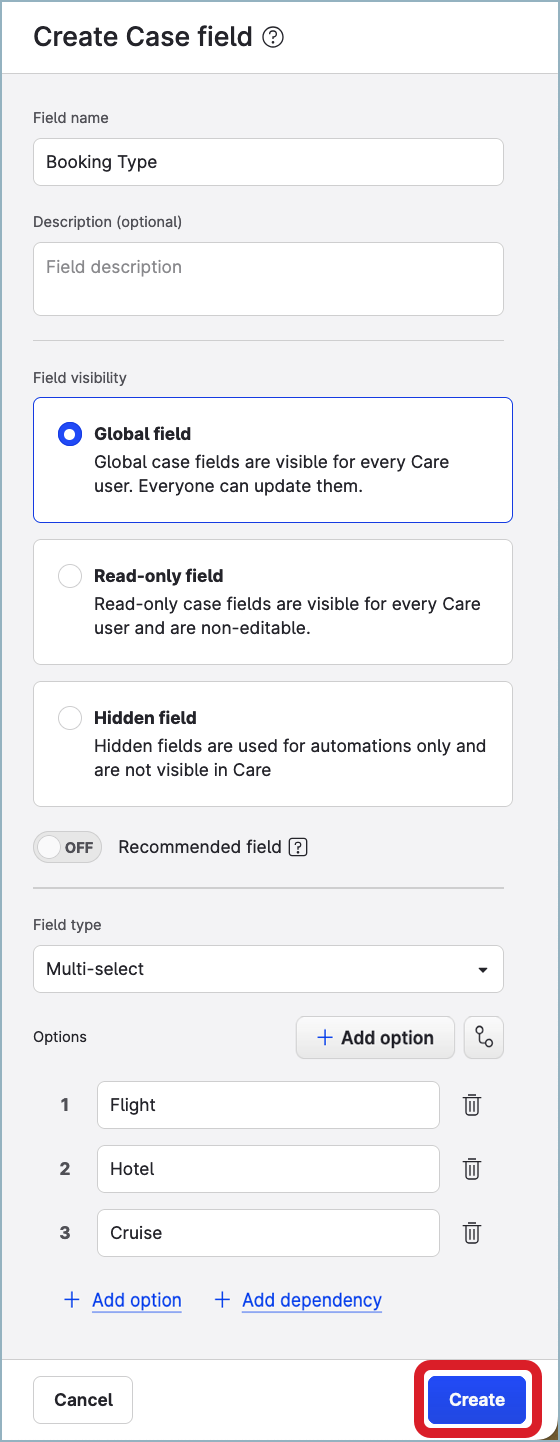
Enter the name of the case field.
-
(Optional) Add the description for the case field.
-
Choose the visibility of the case field.
-
(Only for case fields with visibility set to “Global”) If you want the case field to be marked as recommended on the case property panel in Care, toggle the switch next to the Recommended field option to ON.
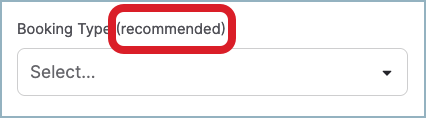
Doneand any of recommended case fields in the case are not filled in, you will be advised to fill in these fields first (see Change the Status of a Care Case). -
Select the type of the case field.
-
If you selected Single-select or Multi-select as the field type, provide available values that a Care user can set the case field to.
-
Once done, click Create.
The case field is created and is automatically placed at the end of the list of the existing case fields. The field status is set to OFF (the field is disabled and does not appear on the case property panel in Care).
-
(Optional) Move the case field within the list to make the case fields appear in the right location on the case property panel (see “Reorder the case fields” further in this article).
-
To show the new field on the case property panel, toggle the switch in the Status column to ON.
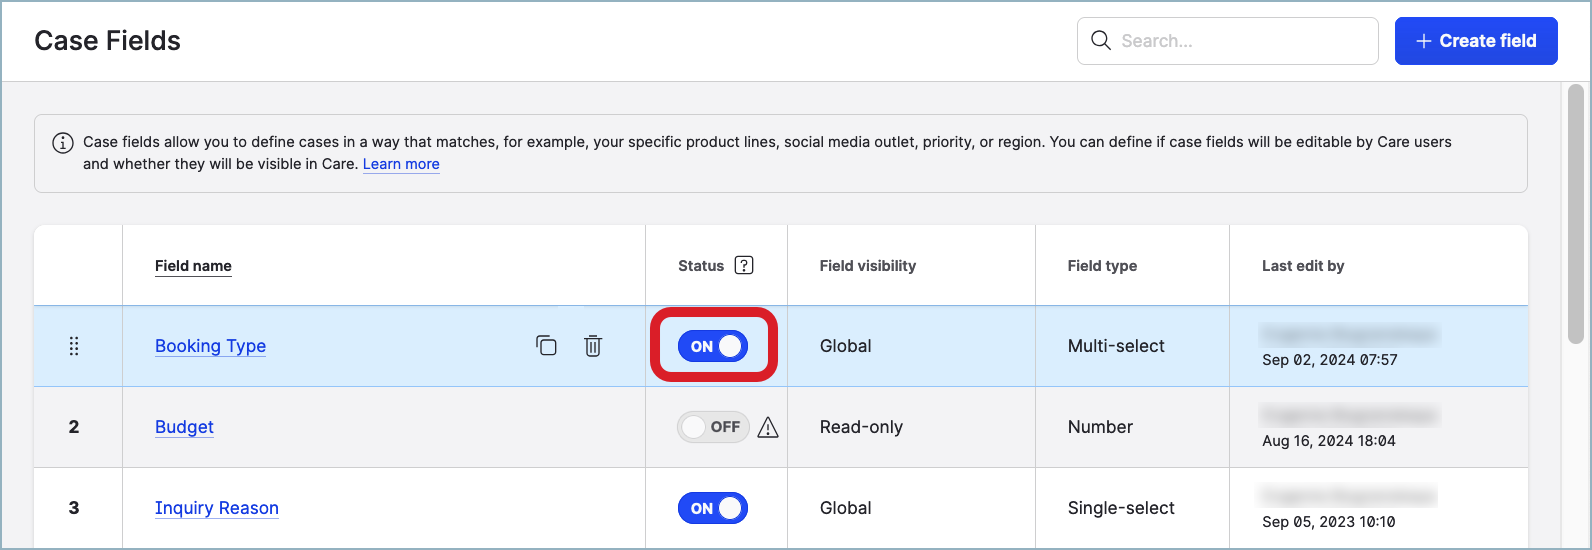
The case field is enabled and appears on the case property panel in Care.
Create a case field by duplicating an existing field
Steps:
-
Go to Settings -> Care -> Case fields.
-
Hover over the case field that you want to duplicate, and click Duplicate case field.
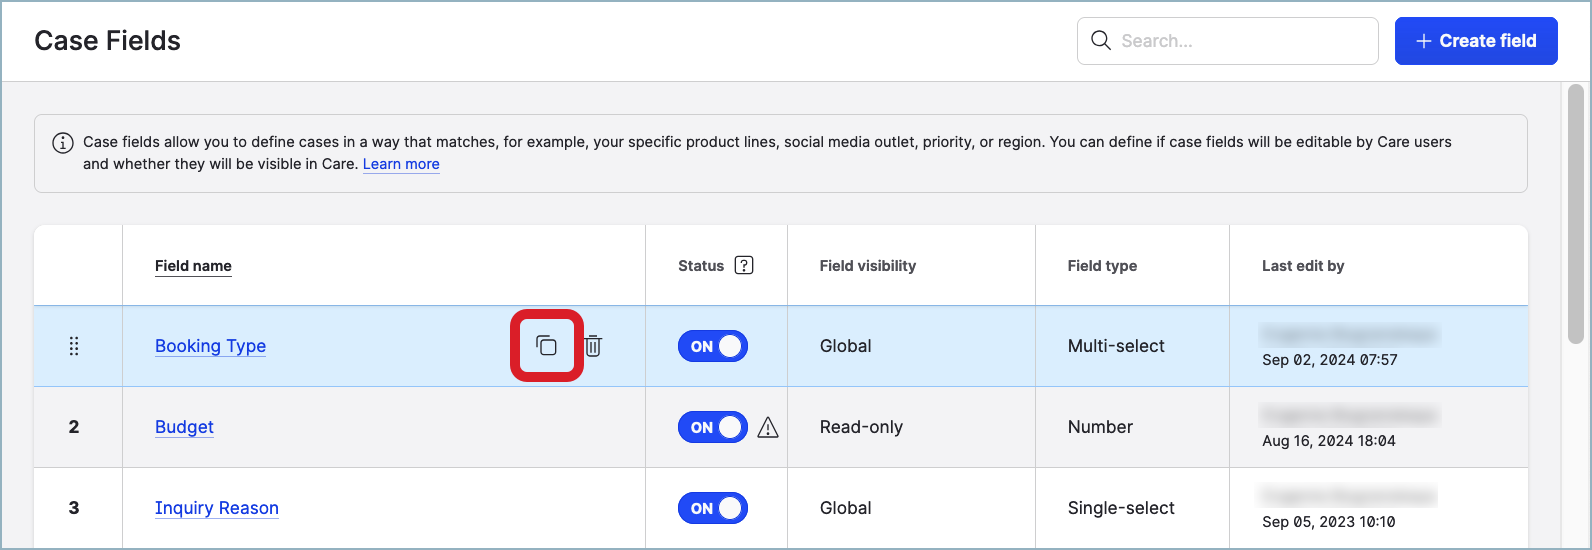
A new duplicate case field is created and appears in the list of the fields. The field status is set to OFF (the field is disabled and does not appear on the case property panel in Care).
The new field gets the same name as the original field plus the- copysuffix. For example, if you duplicated the field “Booking Type”, the new field will be titled “Booking Type - copy”.
The field panel pre-populated with the details of the duplicated field slides out. -
(Optional) Update the name of the field.
-
Add or edit the description for the case field.
-
(Only for case fields with visibility set to “Global”) If you want the case field to be marked as recommended on the case property panel in Care, toggle the switch next to the Recommended field option to ON.
Doneand any of recommended case fields in the case are not filled in, you will be advised to fill in these fields first (see Change the Status of a Care Case). -
If the duplicated field is of the Single-select or Multi-select type, review and update the available values that a Care user can set the case field to.
-
Once done, click Save.
The case field is saved. -
(Optional) Move the case field within the list to make the case fields appear in the right location on the case property panel (see “Reorder the case fields” further in this article).
-
To show the new field on the case property panel, toggle the switch in the Status column to ON.
The case field is enabled and appears on the case property panel in Care.
Show a case field on the case property panel
Only enabled case fields appear on the case property panel in Care.
To show a case field on the case property panel, enable the field.
Steps:
-
Go to Settings -> Care -> Case fields.
-
Locate the case field that you want to appear on the case property panel.
-
Toggle the switch in the Status column to ON for this field.
The case field is enabled and appears on the case property panel in Care.
-
(Optional) Move the case field within the list to make the case fields appear in the right location on the case property panel (see “Reorder the case fields” further in this article).
To hide a case field from the case property panel, toggle the switch in the Status column to OFF for this field.
Reorder the case fields
The enabled case fields appear on the case property panel in the order in which the case fields are listed on the Case Fields page.
A newly created case field is automatically placed at the end of the list of the existing fields on the Case fields page. As you create more case fields, make sure that their order is according to your business requirements and is exactly as you want the case fields to appear on the case property panel in Care.
Steps:
-
Go to Settings -> Care -> Case fields.
-
Locate the case field that you want to move to a different position.
-
Hover over the number of the case field, then drag and drop the field to the new position.

The case field is moved to the new position in the list.
-
Keep moving the case fields within the list until the order is according to your business requirements.
Update a case field
To avoid reporting and sorting inconsistencies:
-
You cannot change the type of the field (for example, from “Number” to “Multi-select”).
-
You cannot remove an option from single-select and multi-select case fields that is used as a filter in a case view.
Steps:
-
Go to Settings -> Care -> Case fields.
-
Click the case field that you want to update.
The field panel slides out. -
Edit the field details as needed.
-
-
-
-
Once done, click Save.
The case field is updated.
Delete a case field
You cannot delete a case field that is used as a filter in a case view.
Steps:
-
Go to Settings -> Care -> Case fields.
-
Hover over the case field that you want to delete, and click the trash can icon that appears.
-
Confirm the deletion.
The case field is deleted.