Post a reply to a message
When you can and cannot post a reply
For you to be able to reply to a Community message, your profile role for the profile on whose behalf you want to reply must have the “Create, Publish” or “Create, Publish, Approve” level of access in Community. In other words, for the profile on whose behalf you want to reply to the message, you must be assigned a default or custom profile role with the “Create, Publish” or “Create, Publish, Approve” permission set under “Community” (see Profile Roles and Activate Profiles for Community and Set Up Profile Roles).
The option to reply to a Community message may not be available depending on the platform and its API limitations, the type or the age of the content, and so on. For more information, see Reply Options and Limitations in Community Messages.
You do not have to be assigned to the message to be able to reply to it.
What you can post as a reply
When you reply to a message, your options are determined by the type of the message that you are responding to and the platform.
Depending on the type of the message and the platform, certain limitations may apply to your reply options. For more information, see Reply Options and Limitations in Community Messages.
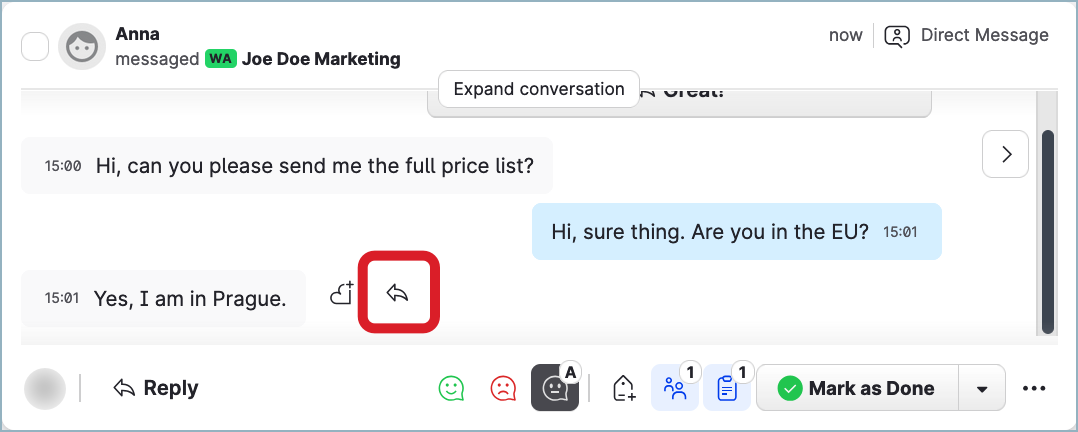
When posting a reply to a thread of WhatsApp messages, you can choose a specific message in the thread to reply to.
Compose a reply manually
Steps:
-
In the message that you want to reply to, click Reply.
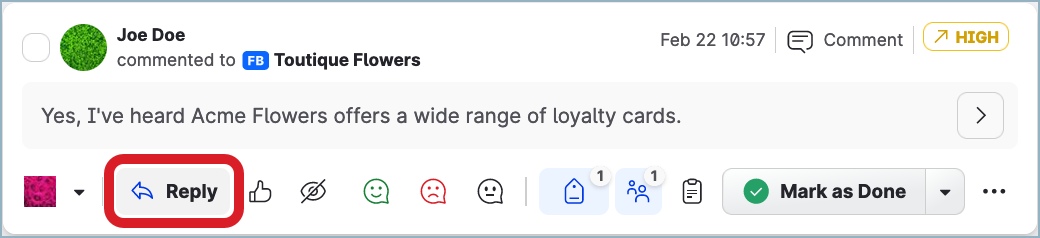
The text box opens.
-
Type a message in the text box.
You can add an emoji or attach an asset (for example, a photo) to the message. You can also use answer templates to insert frequently used standard phrases such as
Hello! Thank you for your message. How can I help you today?(see Set Up Answer Templates for Community).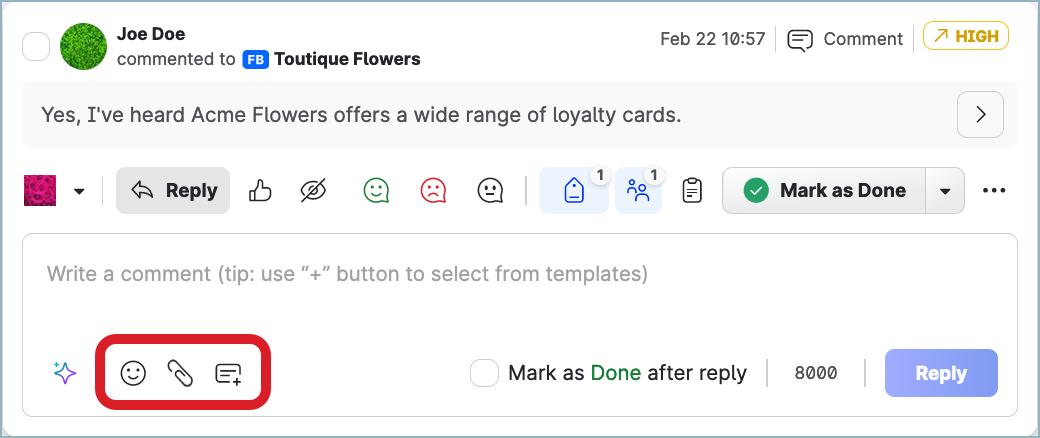
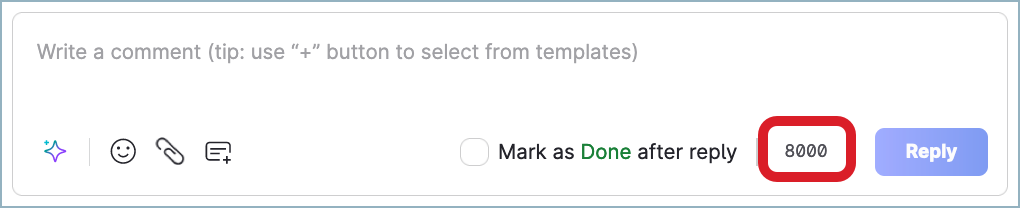
When composing the reply, check the maximum number of characters that you can use. For more information about the character number limitations of different platforms, see Reply Options and Limitations in Community Messages.
-
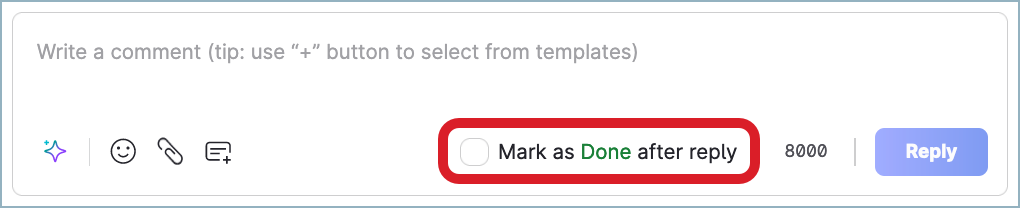
(Optional) Set the message to be marked as done after posting the reply.
-
Click Reply.
The reply is posted to the Community message.
Compose a reply using the AI reply assistant
You can use the AI reply assistant, an artificial intelligence tool, to quickly write replies. The AI reply assistant helps you create a reply based on a text prompt and modify it per your instructions.
AI reply assistant options
The AI reply assistant offers the following options:
-
Rephrase
-
Make longer
-
Make longer & add context
-
Make shorter
-
Simplify
-
Change tone
-
Empathetic
-
Friendly
-
Persuasive
-
Professional
-
-
Translate to
To generate the first version of the reply, all the options except for “Make longer & add context” use the text prompt that you enter in the text box. The “Make longer & add context” option uses the text prompt that you enter in the text box as well as the messages in the conversation in the Community message.
When generating the second and all the subsequent versions of the reply, all the options also include the previous generated versions of the reply in the processing.
Automatic language detection and supported languages
The AI reply assistant can detect the language of the text that you submitted as a reply draft.
For the best results, we recommend that you use full diacritics of the particular language (accents, stress signs, umlauts, and so on). For example, when typing in French, type hôtel and très instead of hotel and tres.
If the AI reply assistant detected the language incorrectly, you can manually change it to the correct one.
The AI reply assistant supports the following languages:
-
Arabic
-
Catalan
-
Chinese
-
Croatian
-
Czech
-
Danish
-
Dutch
-
English
-
Estonian
-
Finnish
-
French
-
German
-
Greek
-
Hungarian
-
Indonesian
-
Italian
-
Japanese
-
Korean
-
Norwegian
-
Polish
-
Portuguese
-
Portuguese (BR)
-
Romanian
-
Russian
-
Slovak
-
Slovenian
-
Spanish
-
Spanish (LATAM)
-
Swedish
-
Turkish
Usage guidelines and policies
Human moderation is necessary when using the AI reply assistant. The decision to use and/or modify the AI-generated content is yours.
The AI reply assistant is an artificial intelligence tool. While highly autonomous and constantly learning, some members of your audience may find its messages inappropriate and, ultimately, damaging to your brand.
You cannot use the AI reply assistant to generate the following types of content:
-
Hate
-
Harassment
-
Violence
-
Self-harm
-
Sexual
-
Political
-
Spam
-
Deception
-
Malware
If you prompt the AI reply assistant to generate such content, it may not generate content at all or generate content that you do not expect.
Use the AI reply assistant to compose a reply
Steps:
-
In the message that you want to reply to, click Reply.
The text box opens.
-
Type in a draft in the text box.
It can be a few words or few sentences.
Hello! Thank you for your message. How can I help you today?(see Set Up Answer Templates for Community).
-
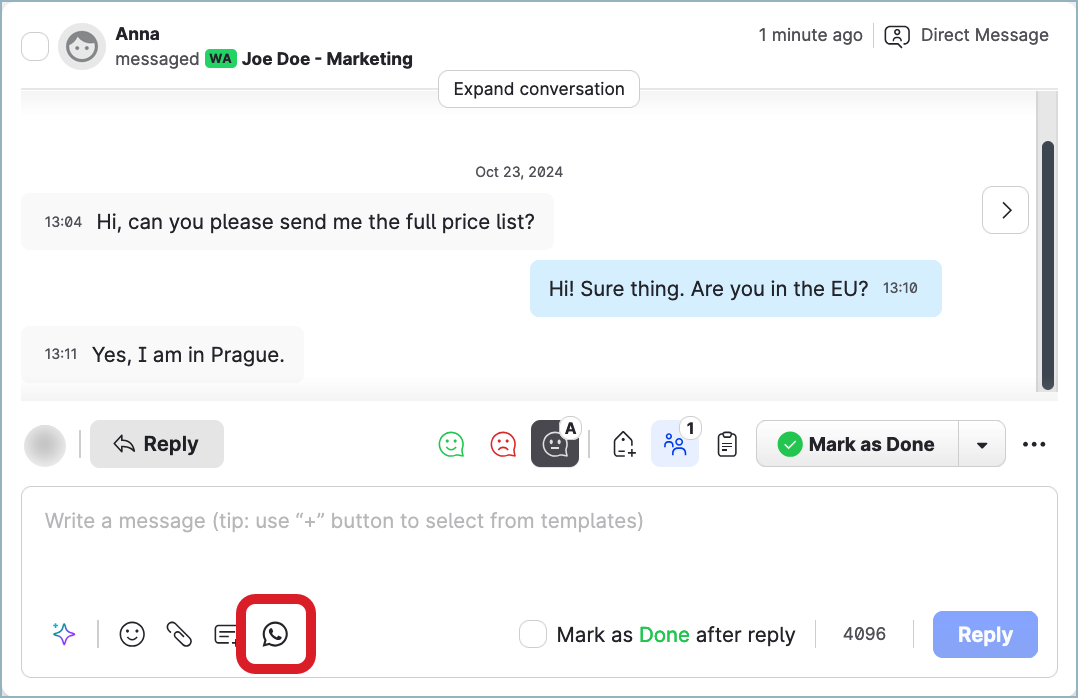
Click the AI reply assistant icon, and select one of the available options (see “AI reply assistant options” earlier in this article).
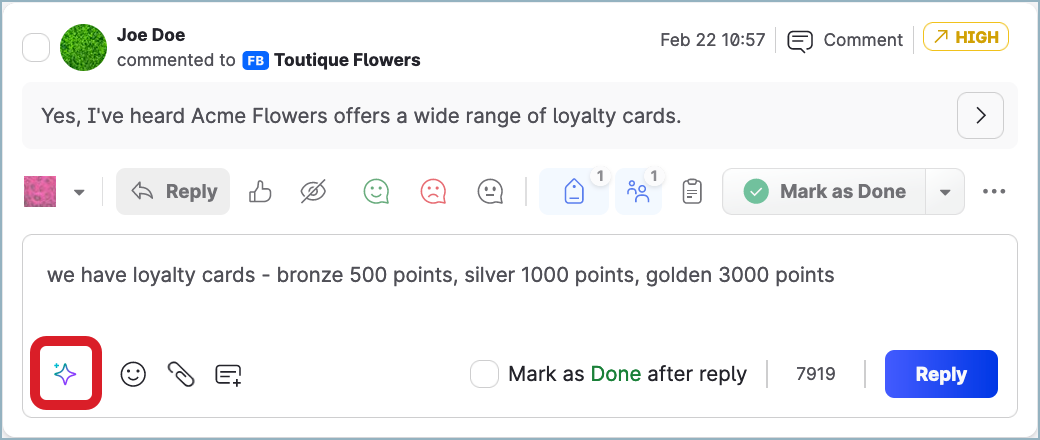
The AI reply assistant generates the reply and opens it in a separate pop-up dialog.
-
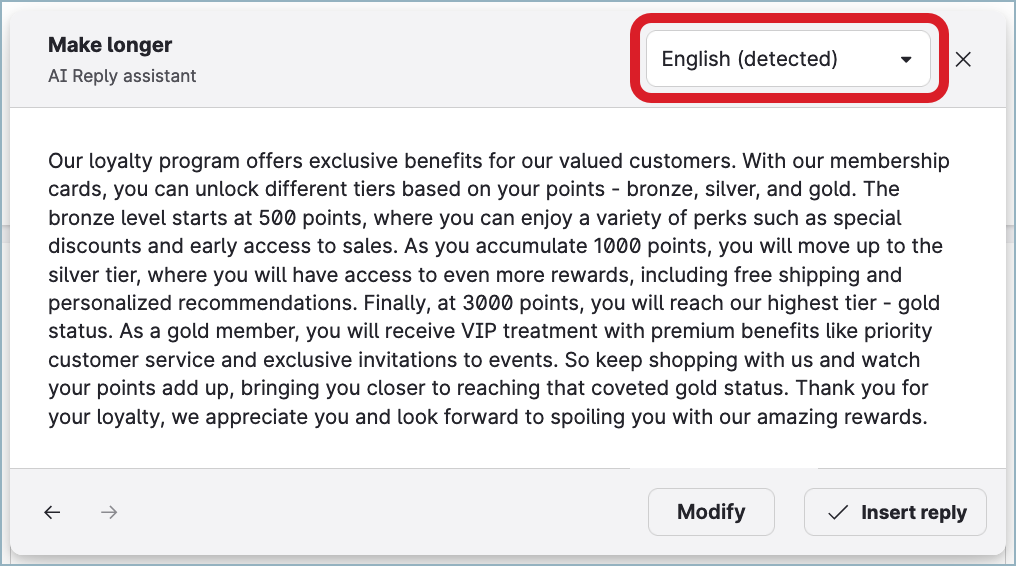
If the AI reply assistant detected the language incorrectly, you can manually change it to the correct one. You can find the list of the languages that the AI reply assistant supports earlier in this article.
-
If the AI reply assistant could not detect the language of the submitted text, it sets it to the language that you chose as preferred (see Enable Translations in Community), and you can change it manually, if needed.
The language dropdown is available only if you have the translation feature enabled in Community (see Enable Translations in Community).
-
-
To change the text, click Modify, and select one of the available options.
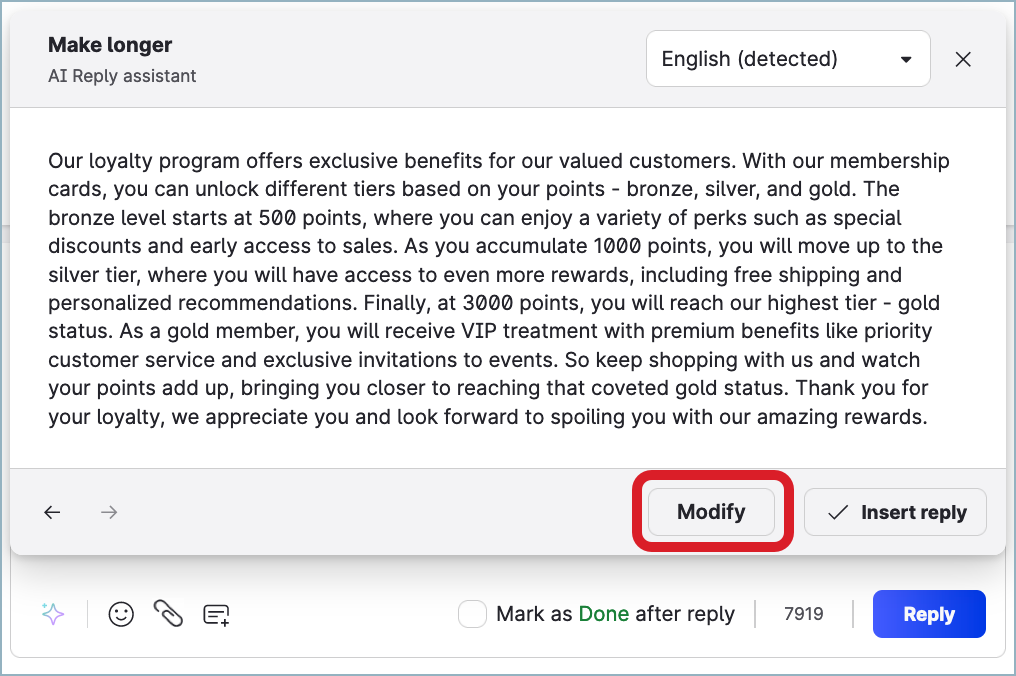
The AI reply assistant modifies the text accordingly.
-
Continue tweaking the text until it is up to your expectations.
At any point, you can go to a previous version of the modified text or return to a later version. The pop-up dialog keeps up to 10 latest versions of the text.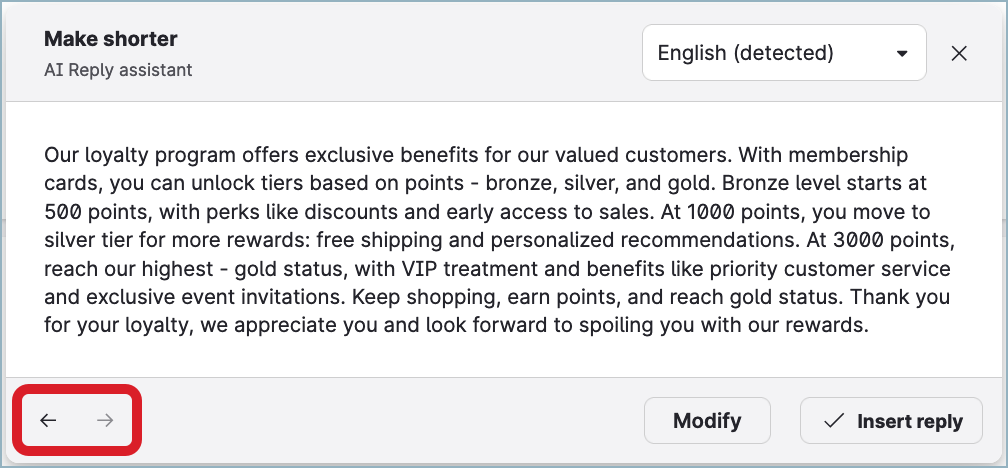
-
Once you are satisfied with the text, click Insert reply.
The text is inserted into the text box.
The reply is not yet posted to the Community message.
-
(Optional) Edit the text in the text box manually, if needed.
-
(Optional) Set the message to be marked as done after posting the reply.
-
Click Reply.
The reply is posted to the Community message.
Edit a sent reply
Editing a sent reply is supported only for replies to Facebook comments and Google Business reviews.
Edit a reply to a Facebook comment
Steps:
-
Go to the Sent feed.
-
Find the reply, click the ellipsis menu, and click Edit reply.
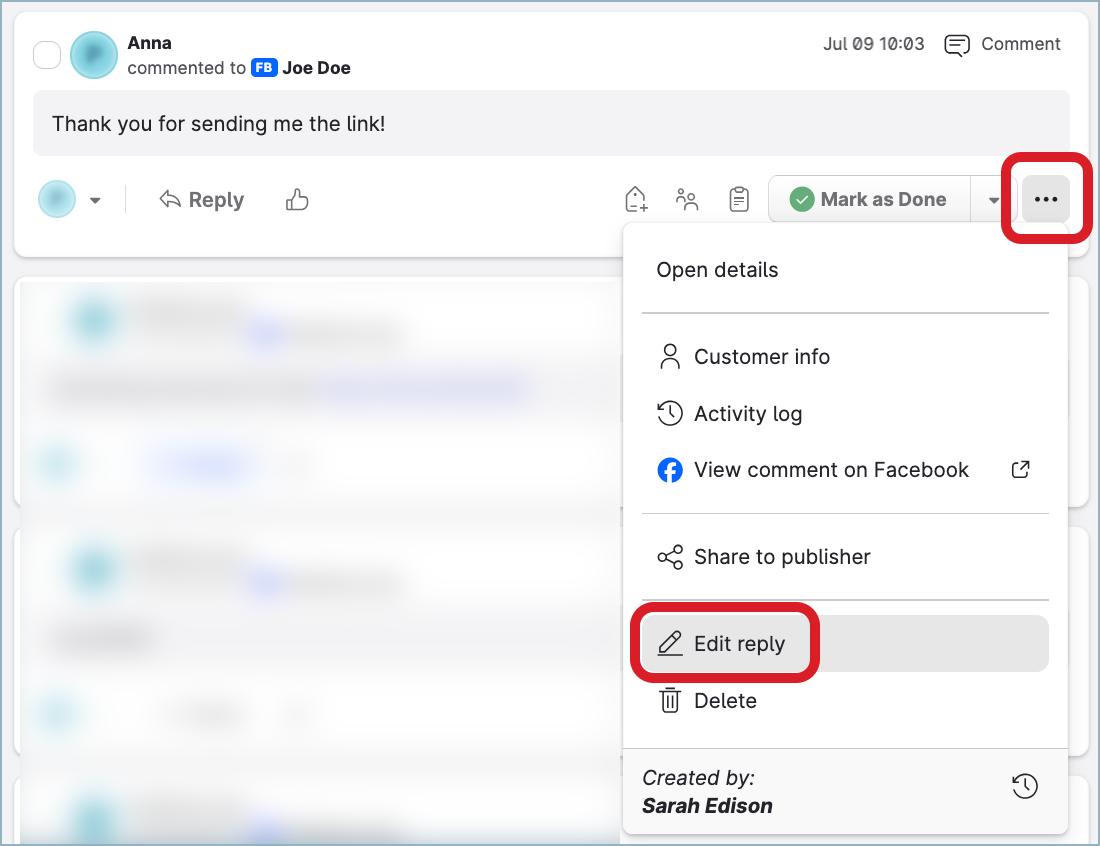
The reply text opens for editing.
-
Edit the reply, and click Update reply.
The reply is updated in Community and on the native platform (Facebook).
Editing a reply to a Facebook comment is disabled in the following cases:
-
Your profile role for the profile on whose behalf the reply was initially posted has a different level of access in Community than “Create, Publish” or “Create, Publish, Approve”.
For you to be able to edit the reply, your profile role for that profile must have the “Create, Publish” or “Create, Publish, Approve” level of access in Community. In other words, you must be assigned a default or custom profile role with the “Create, Publish” or “Create, Publish, Approve” permission set under “Community” (see Profile Roles and Activate Profiles for Community and Set Up Profile Roles) for this profile. -
The reply is part of a Care case (the Community message containing the reply was escalated to Care; see Escalate a Community Message to Care).
-
The reply was deleted from the native platform (Facebook).
-
The reply was posted 90 or more days ago.
-
The reply was not posted via Community.
-
The reply contains a GIF file.
Edit a reply to a Google Business review
Steps:
-
Go to the Sent feed.
-
Find the reply, and click Edit reply.
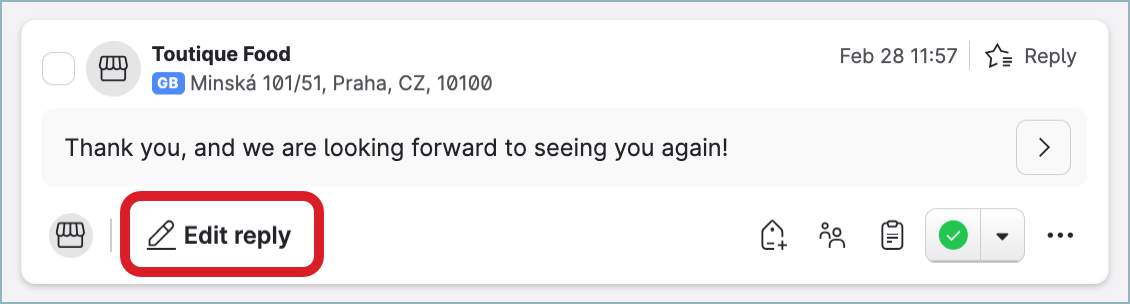
The reply text opens for editing.
-
Edit the reply, and click Update reply.
The reply is updated in Community and on the native platform (Google Business).
Editing a reply to a Google Business review is disabled in the following cases:
-
Your profile role for the profile on whose behalf the reply was initially posted has a different level of access in Community than “Create, Publish” or “Create, Publish, Approve”.
For you to be able to edit the reply, your profile role for that profile must have the “Create, Publish” or “Create, Publish, Approve” level of access in Community. In other words, you must be assigned a default or custom profile role with the “Create, Publish” or “Create, Publish, Approve” permission set under “Community” (see Profile Roles and Activate Profiles for Community and Set Up Profile Roles) for this profile. -
The reply is part of a Care case (the Community message containing the reply was escalated to Care; see Escalate a Community Message to Care).
-
The reply was deleted from the native platform (Google Business).
-
The reply was posted 90 or more days ago.
Troubleshoot a failed reply
Sometimes, delivering a reply fails. This can happen for various reasons, for example, an issue with the Internet connection, an issue with a third-party API, the profile connection getting expired, the platform rejecting the reply, and so on.
In this case, your reply will not be delivered, and you will see an error message instead. To find out more about the error and why the reply delivery failed, check the Publishing problems feed.
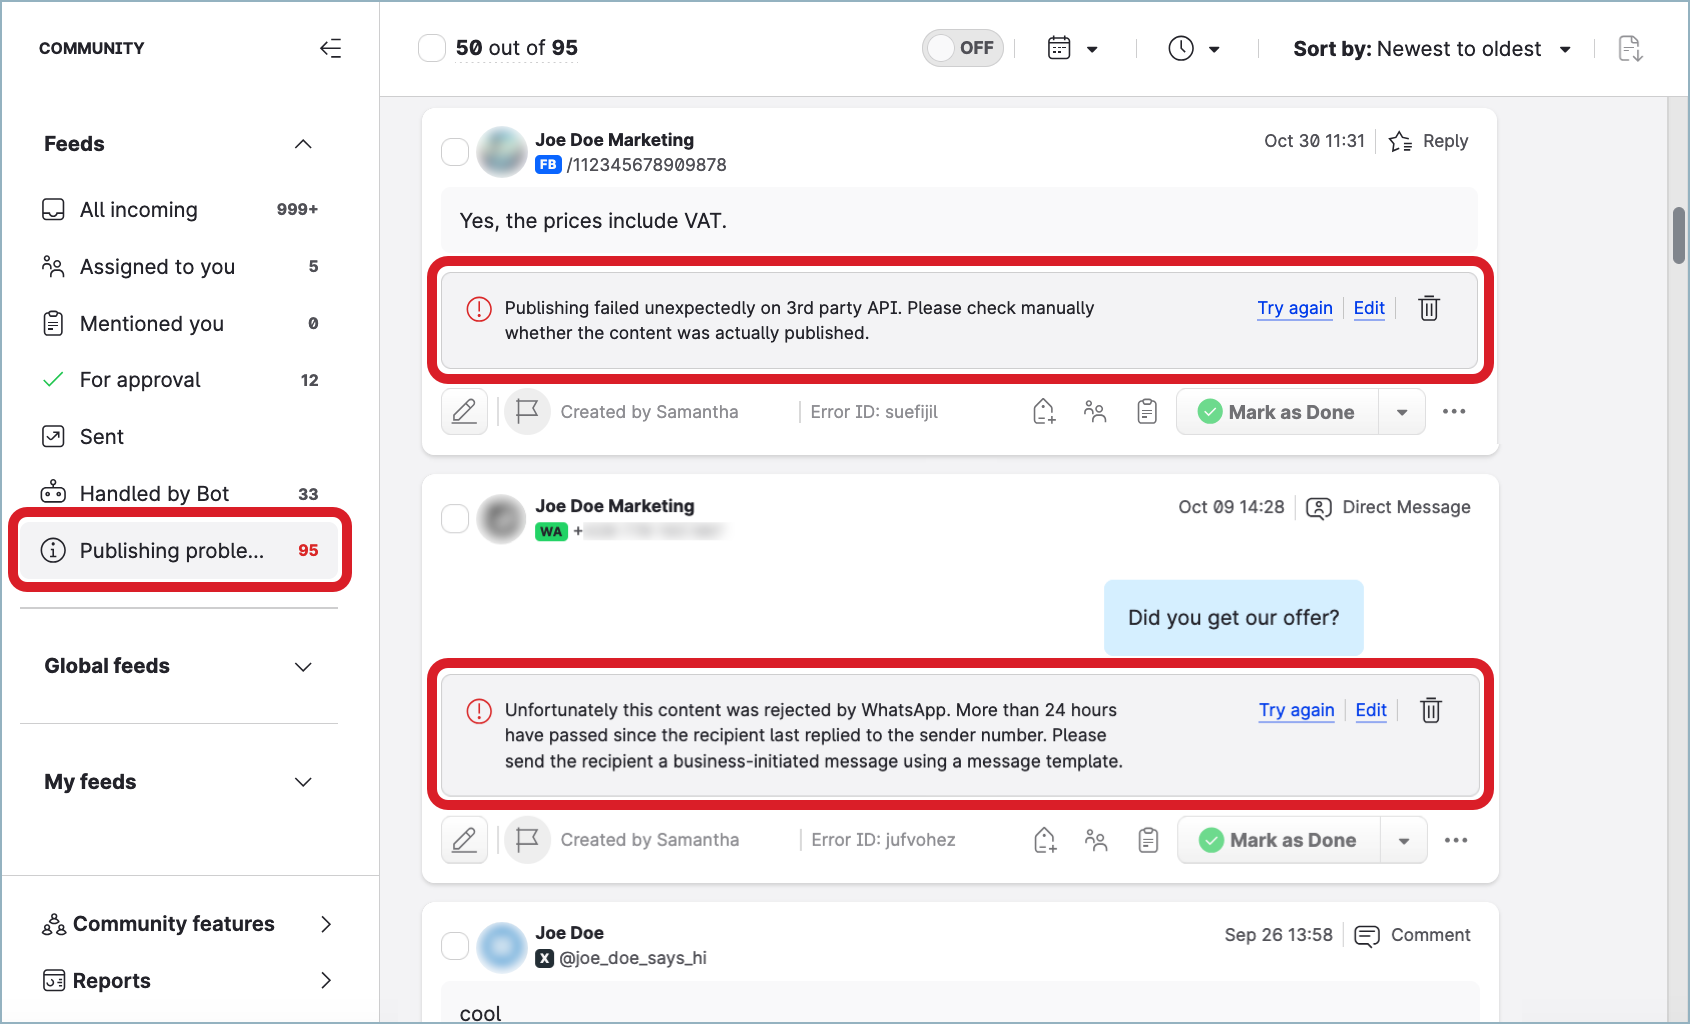
For each failed reply, you can edit the reply and try re-sending it or you can delete it.
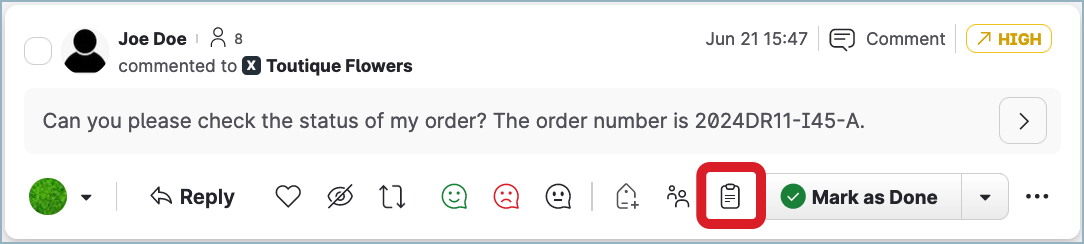
Add an internal note to a message
Add an internal note to a message with information about the message or tagging another Community user. Internal notes are visible only to Community users and not shared with customers.
To see all the messages where other Community users tagged you, use the “Mentioned you” default feed (see Community Inbox). You can also set up a notification to get informed when someone tags you in an internal note (see Get Notified about Relevant Actions in Community).
React to the conversation in a message
You do not have to be assigned to a Community message to be able to react to the conversation in the message.
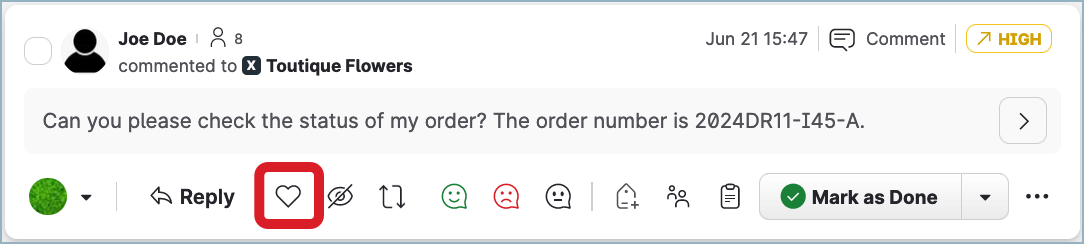
Like a message
Quickly react to a customer's message without compiling a text response.
Supported platforms: Facebook, LinkedIn, TikTok, X (formerly Twitter)
Profile role and permission needed
To be able to like/unlike a message within the conversation, your profile role for the profile on whose behalf you want to like/unlike the message must have the “Like/Favorite/+1” permission enabled. In other words, for the profile on whose behalf you want to like/unlike the message, you must be assigned a default or custom profile role with the “Like/Favorite/+1” permission enabled under “Community” (see Profile Roles).
Option availability
The option of liking a message may not be available depending on the type of the content.
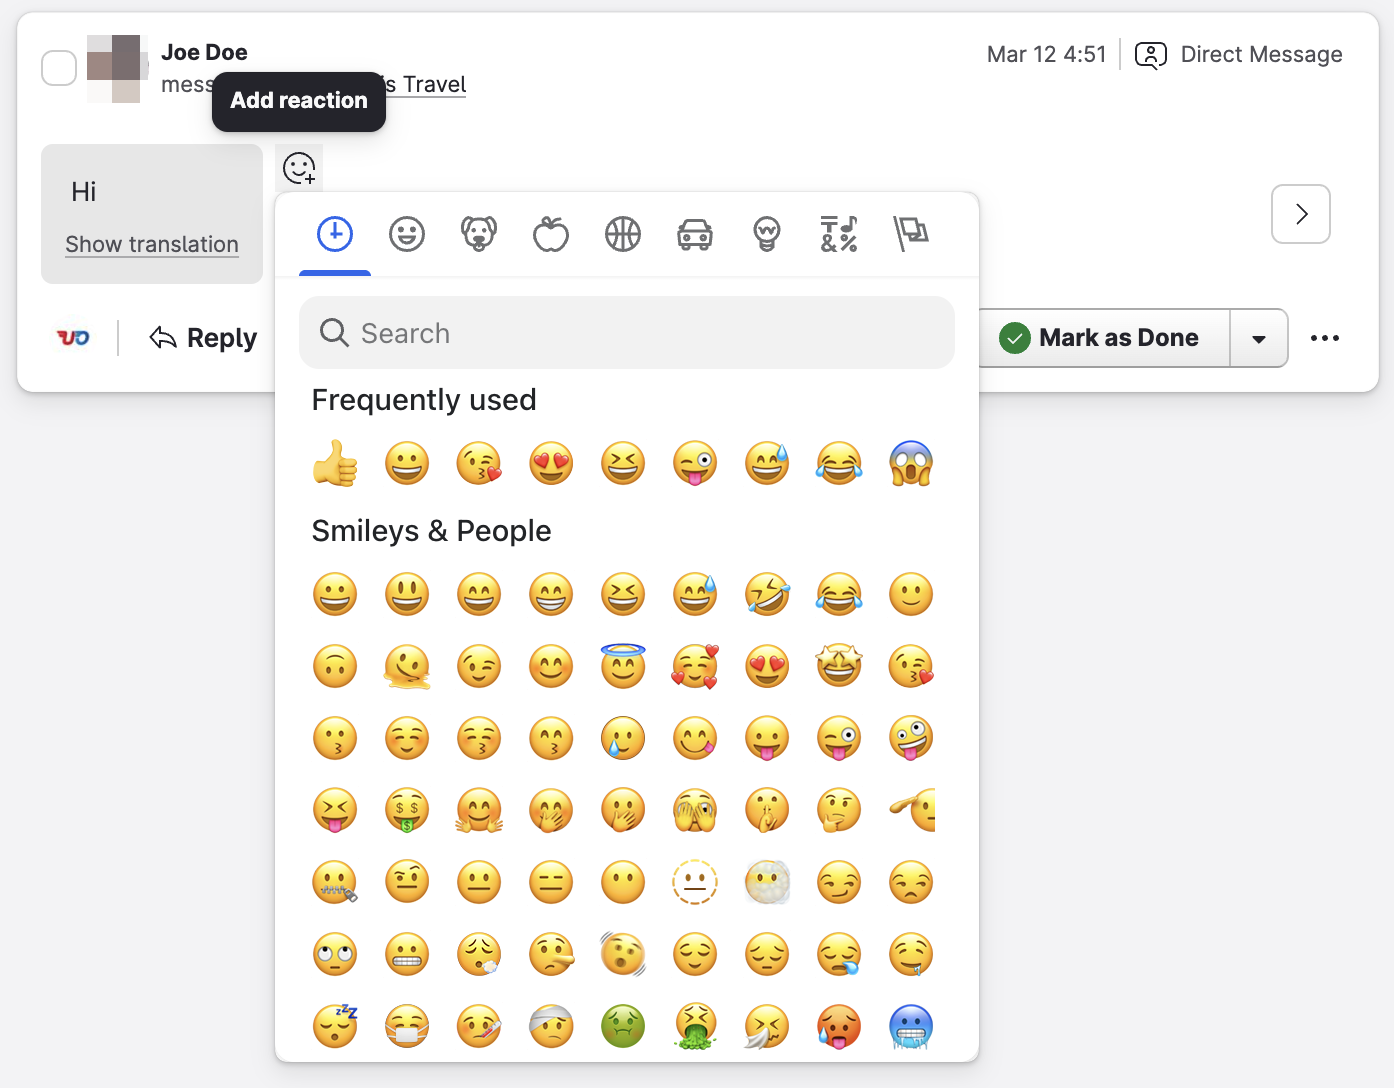
React to a direct message with an emoji
React to an individual direct message with an emoji.
Supported platforms: WhatsApp, Instagram
Profile role and permission needed
To be able to react to a direct message with an emoji, your profile role for the profile on whose behalf you want to react must have the “Like/Favorite/+1” permission enabled. In other words, for the profile on whose behalf you want to react, you must be assigned a default or custom profile role with the “Like/Favorite/+1” permission enabled under “Community” (see Profile Roles).
Message types
Depending on the platform, you can react to the following types of messages:
-
WhatsApp — Direct messages (a standard set of six emojis)
-
Instagram — Direct messages, Mentions: Stories (DM) (a broader range of emoji options)
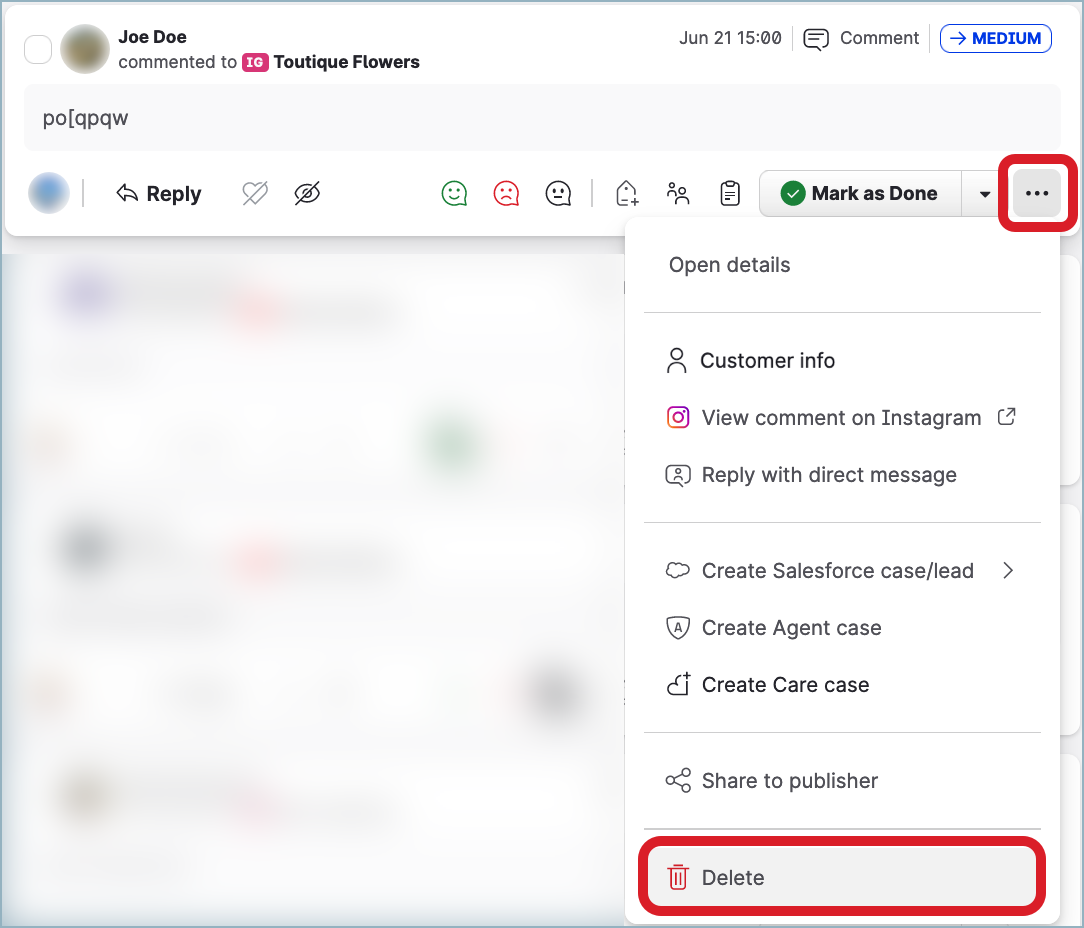
Delete a message
Delete unwanted user-generated content such as spam or sensitive information from the native platform. A Community message with deleted content is marked as Deleted (see Understand the Actions and Buttons of a Community Message). No social interaction is available with this content on the native platform.
Supported platforms: Facebook (wall posts and comments only), Instagram (comments only), LinkedIn
Profile role and permission needed
To be able to delete a message from within the conversation, your profile role for the profile on whose behalf you want to delete the message must have the “Delete” permission enabled. In other words, for the profile on whose behalf you want to delete the message, you must be assigned a default or custom profile role with the “Delete” permission enabled under “Community” (see Profile Roles).
Direct messages
You cannot delete direct messages.
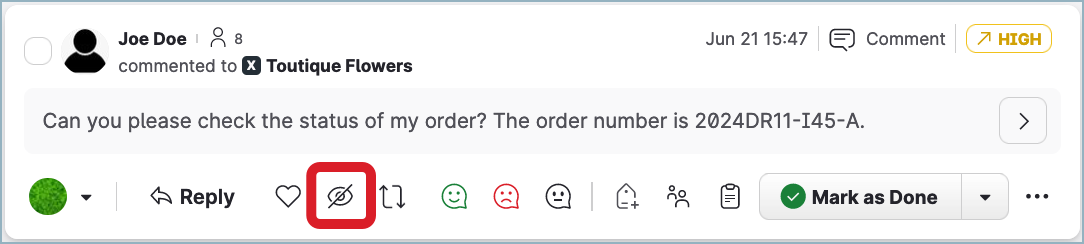
Hide a comment under a post
Hide a comment under a post.
When you hide a comment, it is no longer visible to any users on the native platform except for you (as the owner of the account) and the author of the message. The author is not informed about hiding the comment and can post replies to the comment; however, the replies will not be visible on the native platform.
A Community message with hidden content is marked as Hidden (see Understand the Actions and Buttons of a Community Message).
Supported platforms: Facebook, Instagram, TikTok, X (formerly Twitter), YouTube
Profile role and permission needed
To be able to hide/un-hide a comment, your profile role for the profile on whose behalf you want to hide/un-hide the comment must have the “Hide” permission enabled. In other words, for the profile on whose behalf you want to hide/un-hide the comment, you must be assigned a default or custom profile role with the “Hide” permission enabled under “Community” (see Profile Roles).
Things to be aware of
-
You cannot reply to hidden comments.
-
You cannot hide direct messages.
-
Hiding a comment on YouTube is permanent. Once a comment is hidden, you cannot un-hide it.
-
A hidden comment on Instagram may still be accessible by its direct URL, but it is not visible in the list of the post comments to the users who are browsing the post and its comments on Instagram.
Block a customer
Block a customer who spams, frequently violates your brand’s guidelines, or posts offensive content.
Supported platforms: Facebook (public comments only), YouTube
-
On Facebook, the block option blocks the customer on the Facebook page and hides their comments.
-
On YouTube, the block option hides comments and replies from the customer. The customer is not informed about hiding their content and can still see your content and can post replies to the hidden comment. However, the replies will not be visible on YouTube.

Profile role and permission needed
To be able to block a customer, your profile role for the profile on whose behalf you want to block the customer must have the “Block Users (Facebook, YouTube)” permission enabled. In other words, for the profile on whose behalf you want to block the customer, you must be assigned a default or custom profile role with the “Block Users (Facebook, YouTube)” permission enabled under “Community” (see Profile Roles).
Things to be aware of
-
You cannot unblock a blocked customer from Community. You have to do it on the native platform (Facebook, YouTube).
-
Community does not indicate that a customer is blocked and allows for blocking the same customer more that once. Blocking an already blocked customer does not unblock the customer or have any other effect on the block settings.
Follow a customer
Start following a customer on X (formerly Twitter). Following a customer allows them to send you direct messages.
Supported platforms: X (formerly Twitter)
Steps:
-
Click the ellipsis menu (…), and then click Customer info.
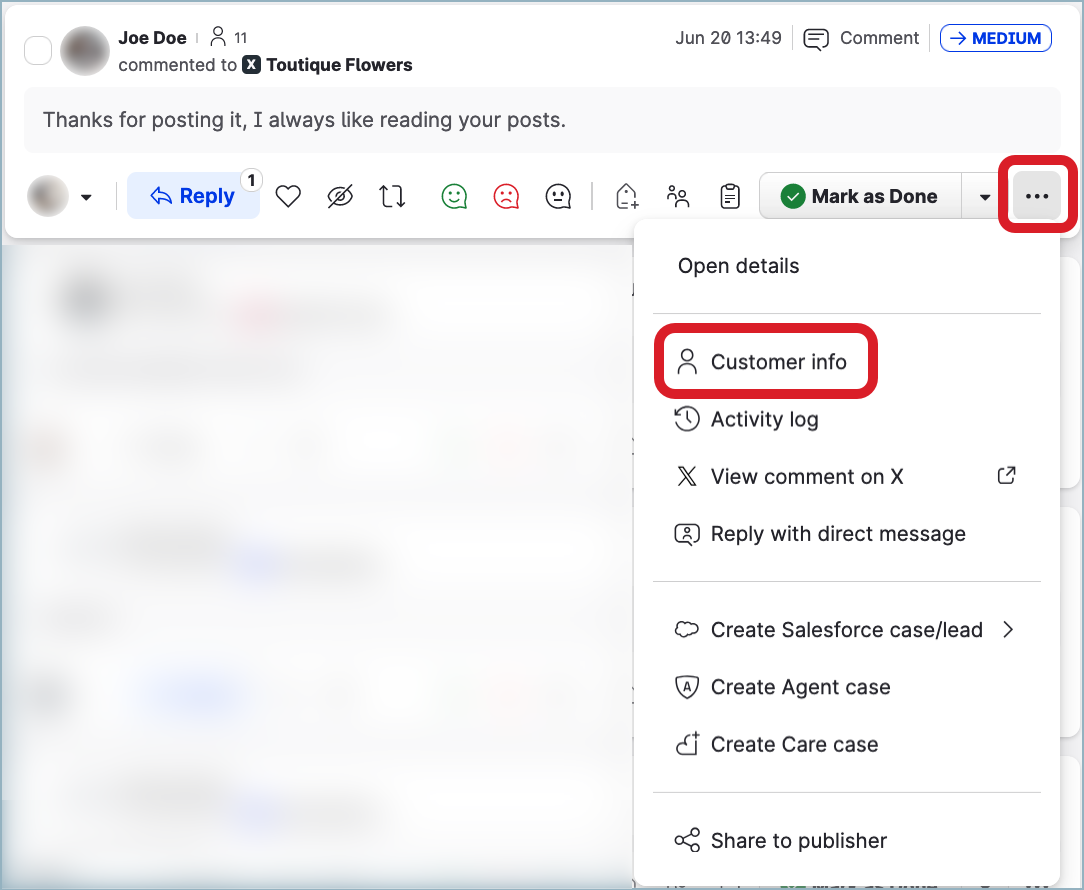
The customer info panel slides out.
-
Depending on whether the profile on whose behalf you communicate with the customer and the content of the Community message (like, reply, and so on) has been selected for the Community message, do one of the following:
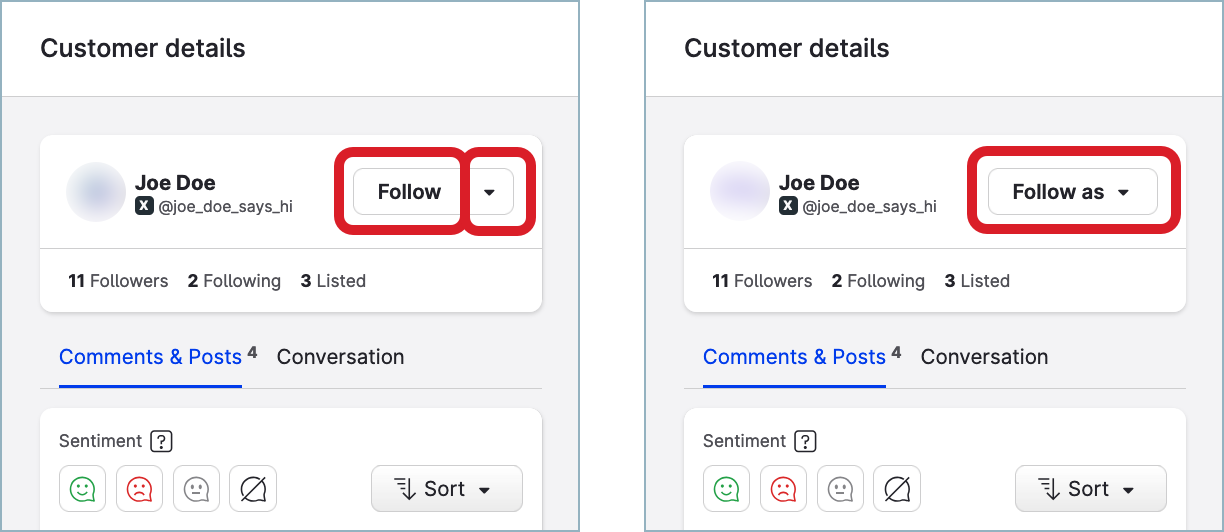
-
If the profile has been selected and you want to start following the customer on behalf of this profile, click Follow.
-
If the profile has been selected but you want to start following the customer on behalf of a different profile, click the arrow next to Follow to select the profile on whose behalf you want to start following the customer, then click Follow.
-
If the profile has not been selected, click Follow as to select the profile on whose behalf you want to start following the customer, then click Follow.
-
Profile role and permission needed
To be able to follow/unfollow a customer, your profile role for the profile on whose behalf you want to start following or unfollow the customer must have the “Follow (X)” permission enabled. In other words, for the profile on whose behalf you want to start following or unfollow the customer, you must be assigned a default or custom profile role with the “Follow (X)” permission enabled under “Community” (see Profile Roles).
How to unfollow a customer
To unfollow a customer that you started following earlier, click the ellipsis menu (…), and then click Customer info. On the customer info panel that slides out, click Unfollow.
Once you unfollow the customer, they no longer can send you direct messages.
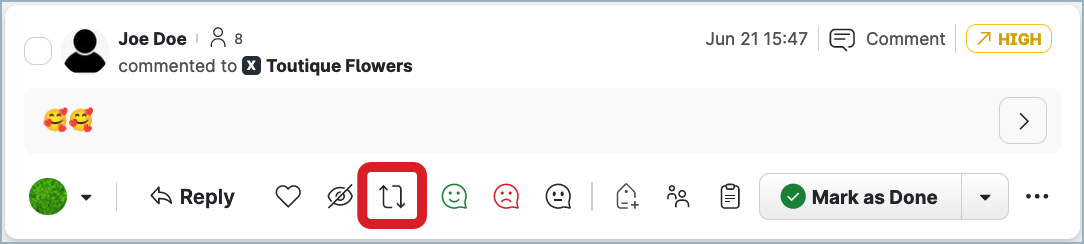
Repost content
Repost the content immediately or schedule the repost.
Supported platforms: X (formerly Twitter)
Profile role and permission needed
To be able to repost the content, your profile role for the profile on whose behalf you want to repost the content must have the “Repost (X)” permission enabled. In other words, for the profile on whose behalf you want to repost the content, you must be assigned a default or custom profile role with the “Repost (X)” permission enabled under “Community” (see Profile Roles).
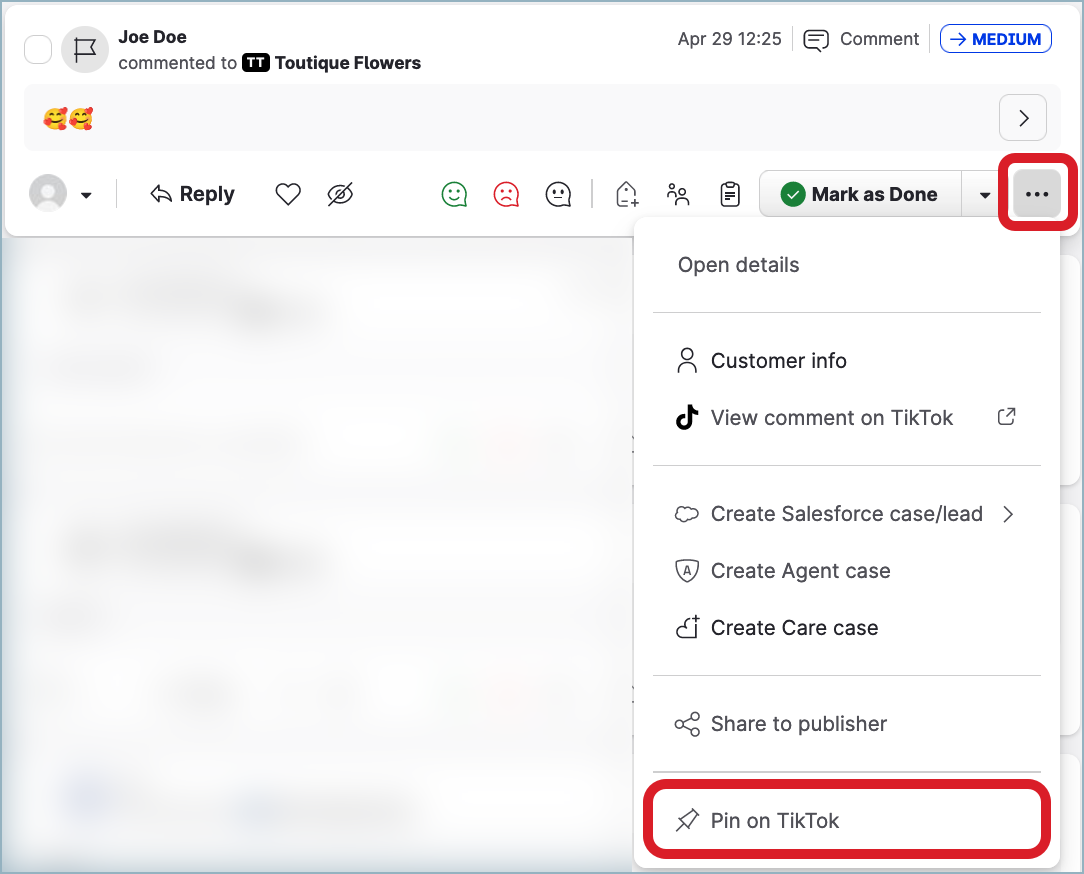
Pin content
Pin the content on TikTok.
Supported platforms: TikTok
Profile role and permission needed
To be able to pin/unpin content on TikTok, your profile role for the profile on whose behalf you want to pin/unpin the content must have the “Pin” permission enabled. In other words, for the profile on whose behalf you want to pin/unpin the content, you must be assigned a default or custom profile role with the “Pin” permission enabled under “Community” (see Profile Roles).