Community Inbox organizes your account feeds into a neat folder-like structure that you can customize to boost your social media interactions with your fans and customers.
Glossary
-
Community Manager
A user of the Emplifi platform who interacts with your followers in the Community feeds. -
Follower
A user of the page or profile that the Community Manager deals with on the Emplifi platform. In other words, it can be your user, your customer, or your fan.
Prerequisites
For more information, see Get Started with Community.
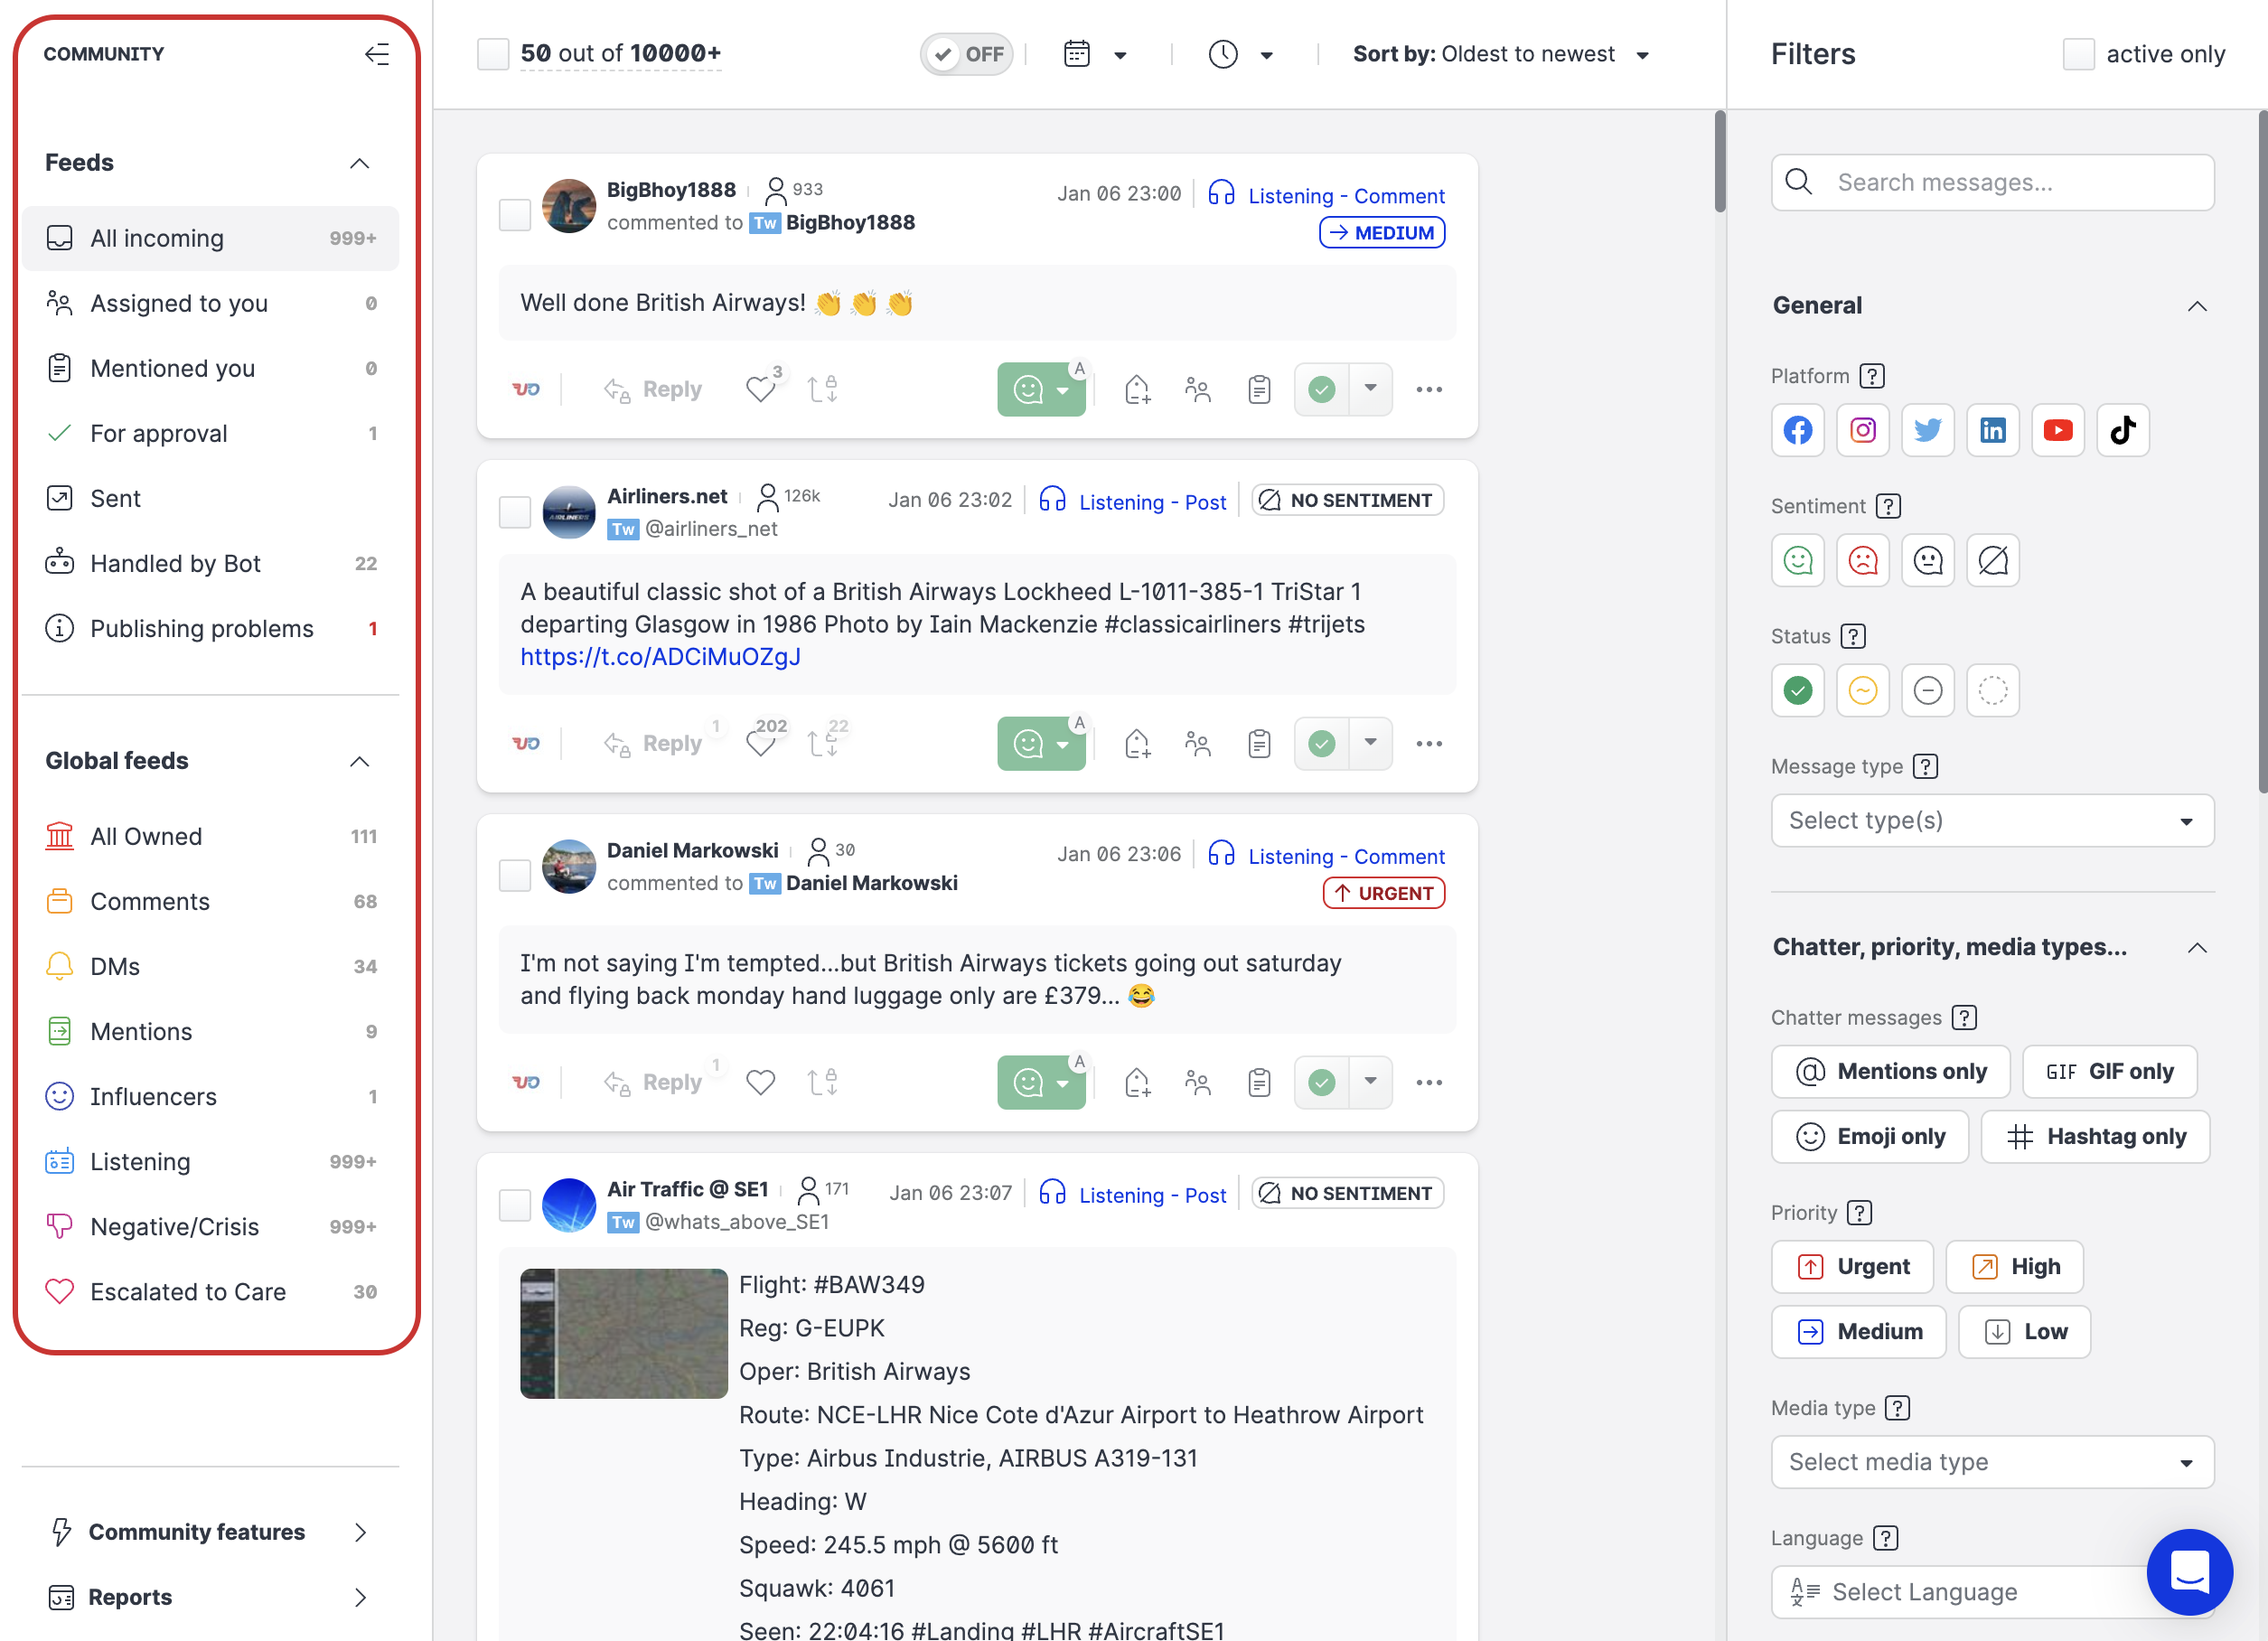
Feeds
A feed is a preset or custom entity that lists Community message based on certain criteria. These criteria are sometimes static (Incoming, Sent), sometimes dynamically depending on how you, a Community Manager, set up and combined the filters (for information, see Set Up Filters in Community Feeds).
Preset feeds
-
All Incoming
All the incoming messages for any kind of message type. -
Assigned to you
All the incoming messages that have been assigned to you. -
Mentioned you
All the incoming messages where you mentioned in the chat (internal notes). -
For approval
All the outgoing messages that are waiting for the Community Manager’s approval to be published. -
Sent
All the outgoing messages that have already been successfully published, including the "outgoing" posts of the profiles. -
Publishing problems
All the outgoing messages that cannot be published due to some platform problem and possible solutions.
Custom feeds
You can set up custom feeds as global, for your entire Emplifi account, or as private feeds visible only to you.
A custom feed is essentially a specific configuration of filters that you can easily save as a feed (see “Save a filter as a feed” in Set Up Filters in Community Feeds).
-
Global feeds
A custom feed visible to the entire account and editable only by enabled Community Managers. -
My feeds
A custom feed is visible and editable only to the Community Manager who created it.
Managing feeds
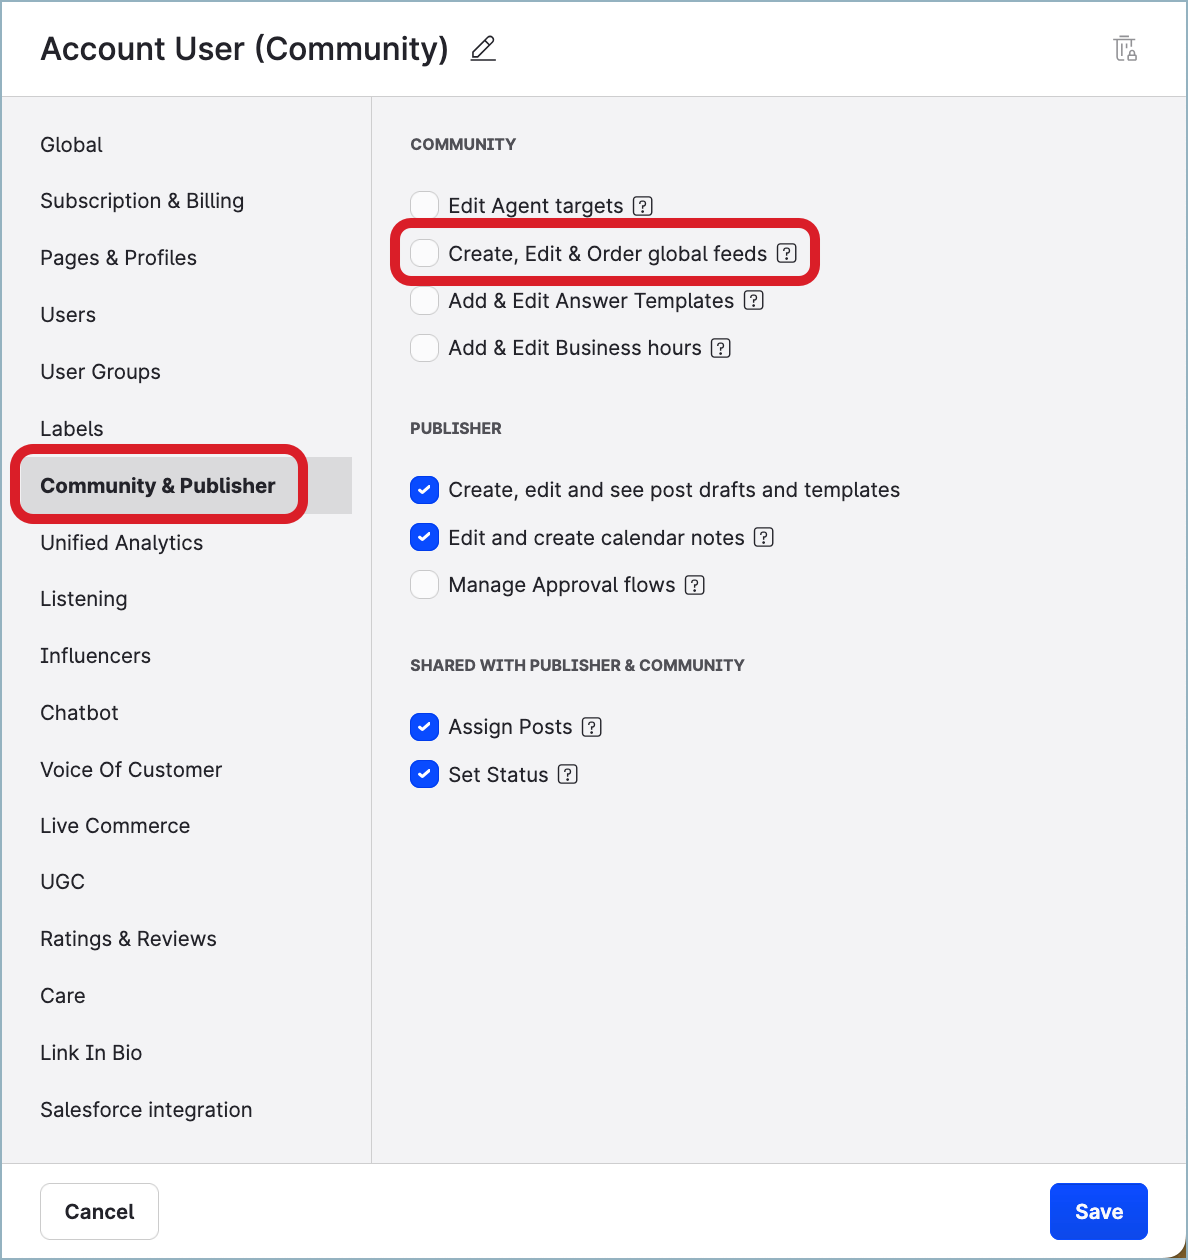
Only authorized Community Managers can manage global feeds. To enable a Community Manager to manage global feeds, add the appropriate permission to their account role.
To check a user’s account role, see “Find out what account role a user has” in Account Roles.
Steps:
-
Go to Settings -> Roles & permissions.
The Account roles screen opens listing the existing account roles. -
Find and click the account role that you want to assign the Community feed privileges to.
The role permission panel slides out. -
Click Community & Publisher, and select the checkbox Create, Edit & Order global feeds.
-
Click Save.
The role is saved with the defined permission. The changes in permissions take effect immediately.
To sum up, Community Managers can do the following:
-
Create feeds.
-
Name feeds.
-
Edit feeds.
-
Duplicate feeds.
-
Delete feeds.
-
Set feeds to private or global, if:
-
The Community Manager is authorized to create global feeds (has the “Create, Edit & Order global feeds” permission granted as described above), AND
-
The Community Manager (for private feeds) or the account (for global feeds) have not reached the quota limit (check the limitations section below).
-
Feed limitations
Maximum amount of custom feeds:
-
Each Community Manager can save up to 15 private feeds (in “My feeds”).
Once you reach the limit, you can no longer create a new feed until you delete another feed of the same type. -
Each account can have up to 30 global feeds.
Only authorized Community Managers can manage global feeds.
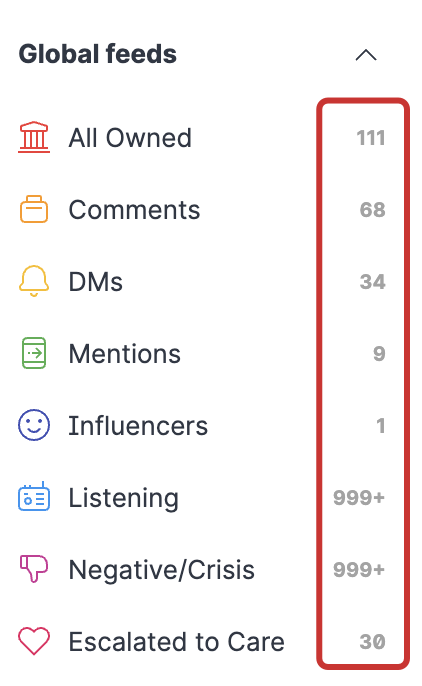
Feed counter update
The counter is the number next to the feed name. It counts the number of messages according to the filter applied to the feed and the global filters.
-
The counter of the inactive feeds is automatically updated every 45-60s.
-
The counter of the active feed is updated real-time.
Global Inbox settings
Global settings are settings that apply on top of any feed or filter selection. For this reason, they cannot be saved as the setting of a custom feed.
These settings are stored by Community for each Community Manager. Each Community Manager can have a different set of the global settings based on which settings are applied.
The global settings overwrite feed filters.
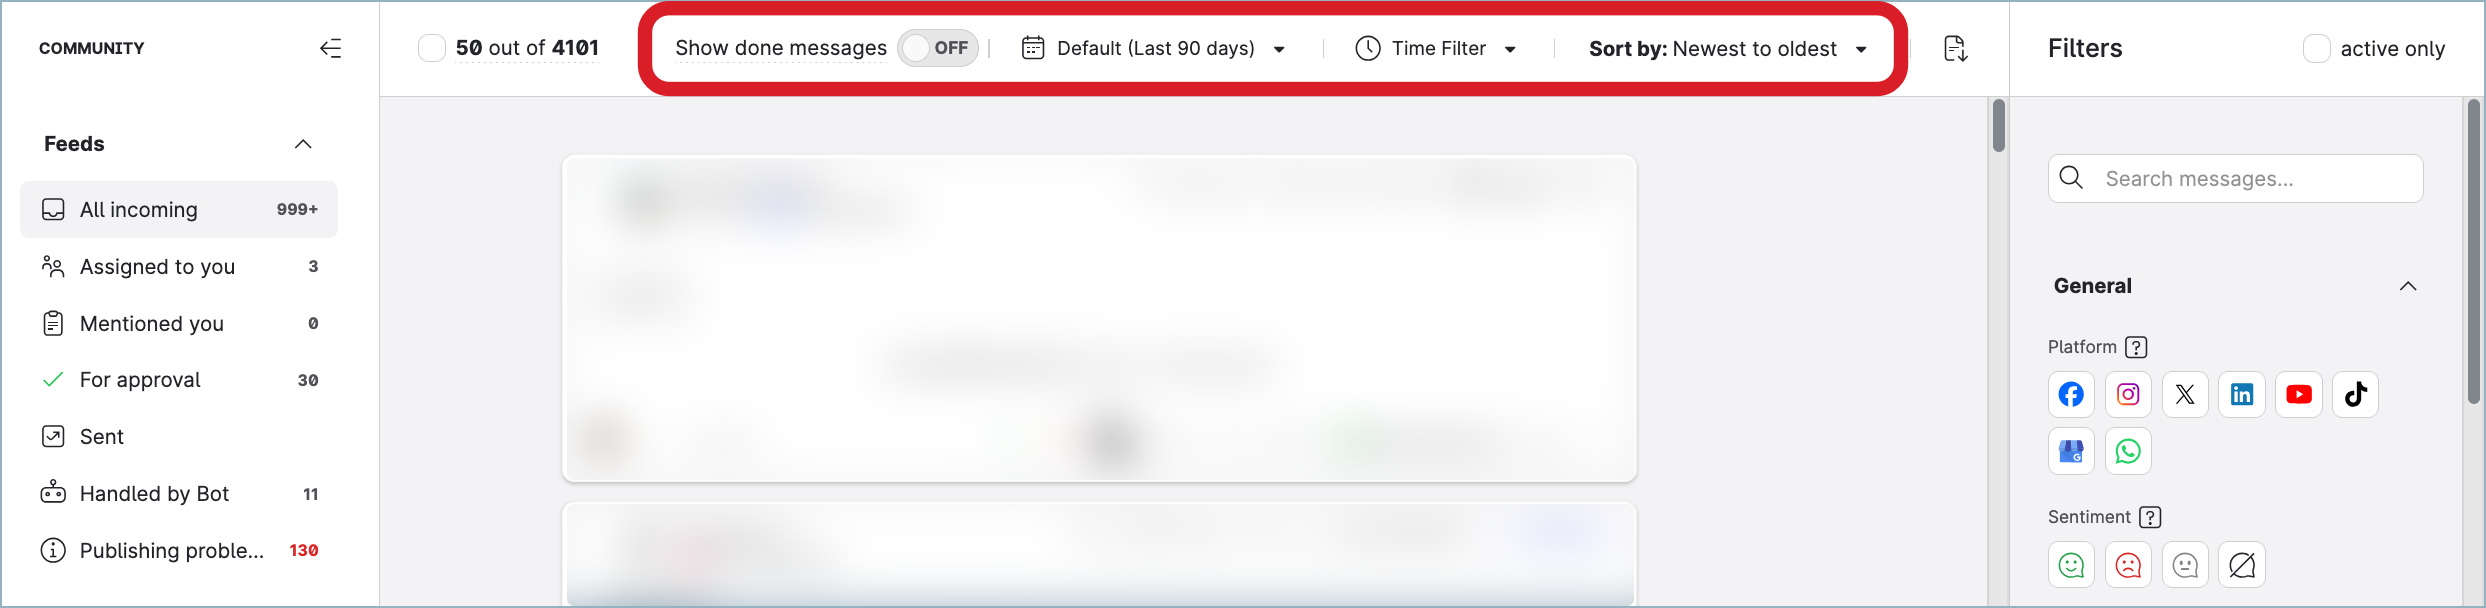
Display done messages
The Show done messages toggle allows you to display or hide all the messages whose status is set to Done. By default, the toggle is set to OFF (that is, the messages marked as Done are hidden).
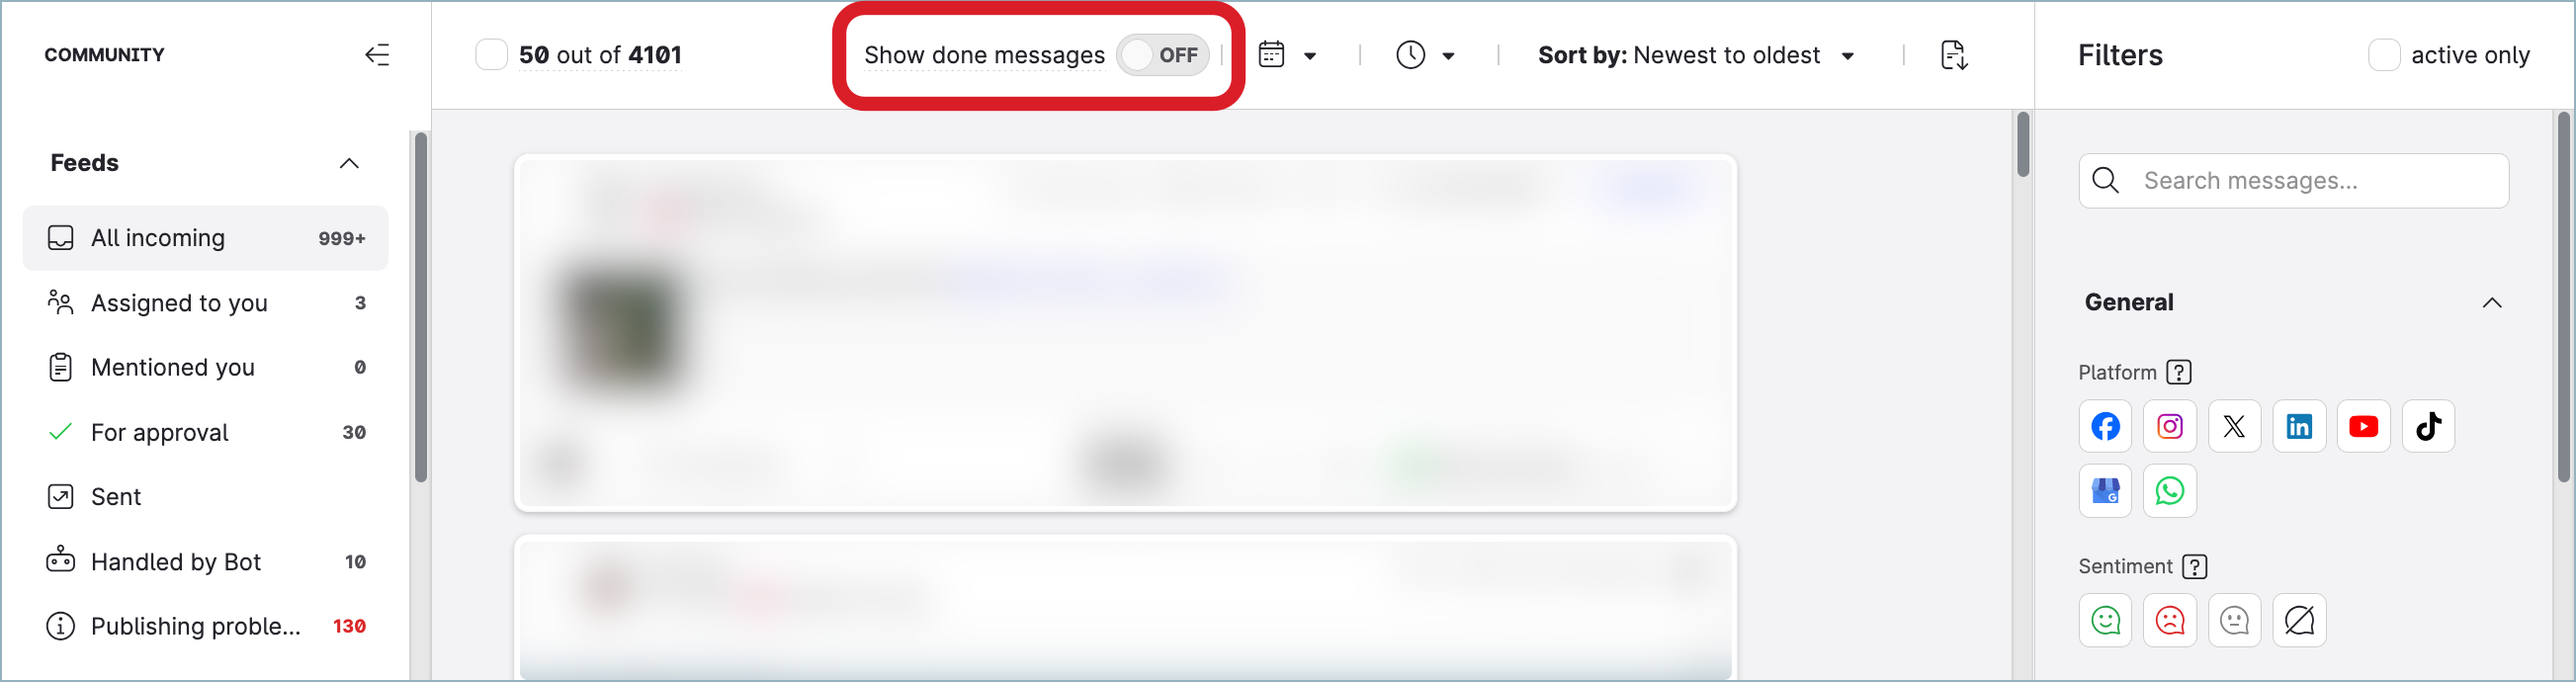
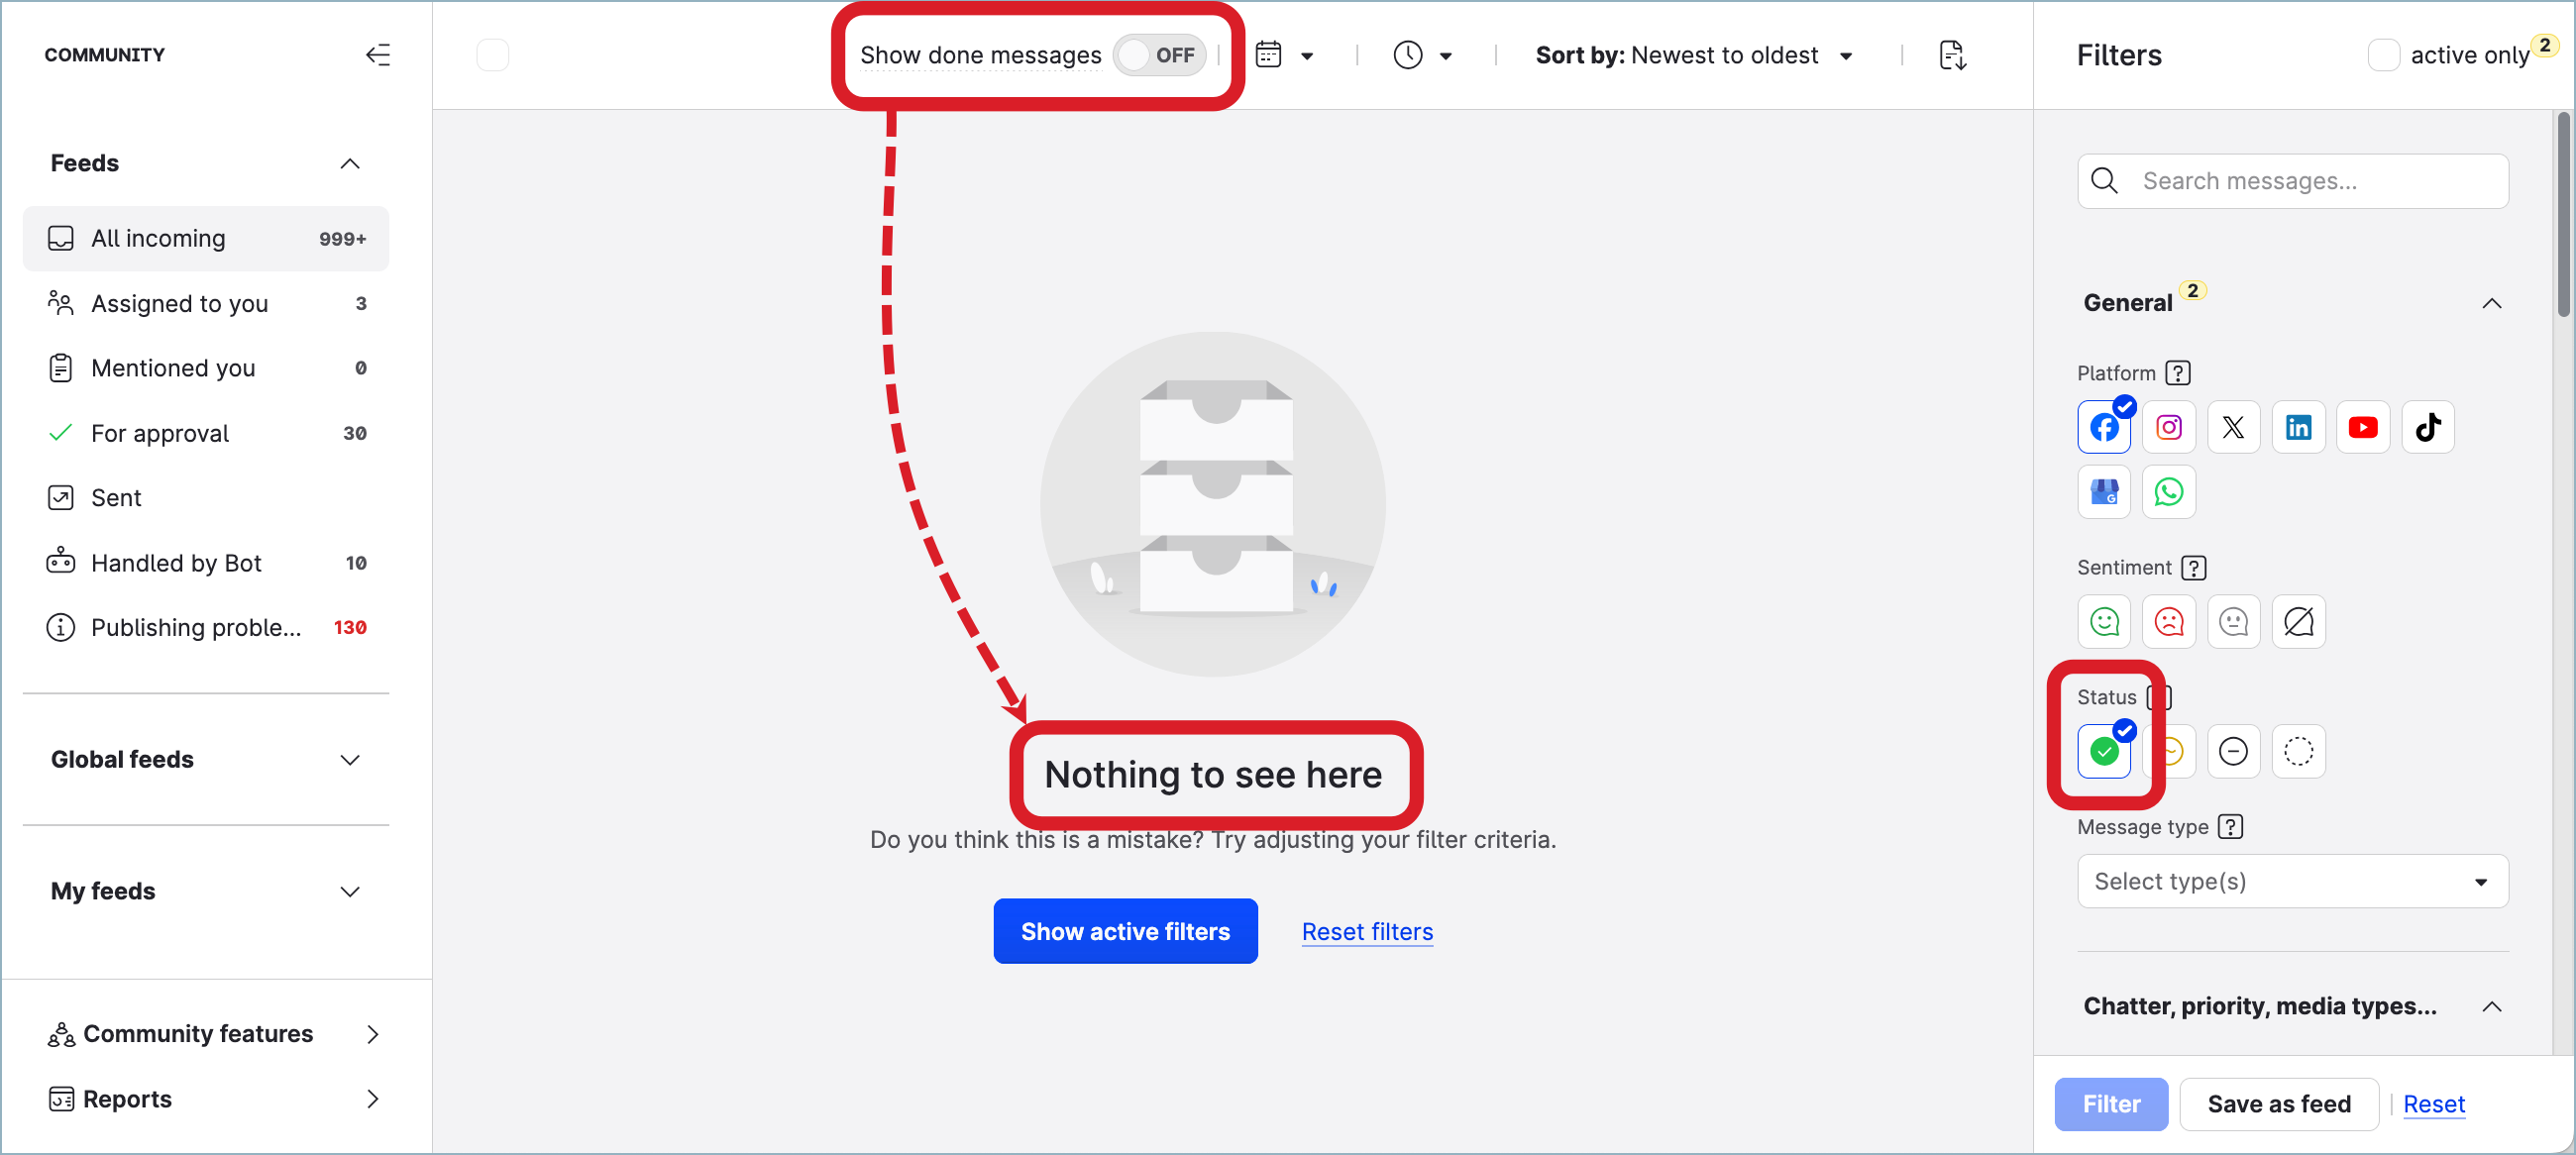
Because the Show done messages toggle is a global setting, setting it to OFF hides the messages marked as Done in all Community feeds, both preset and custom, regardless of any filters by message status they may have.
If a feed is filtered by message status to show messages with the status of Done and the Show done messages toggle is set to OFF, the feed will not return any message. The Show done messages toggle set to hide Done messages overrides the feed-level filter set to show Done messages.
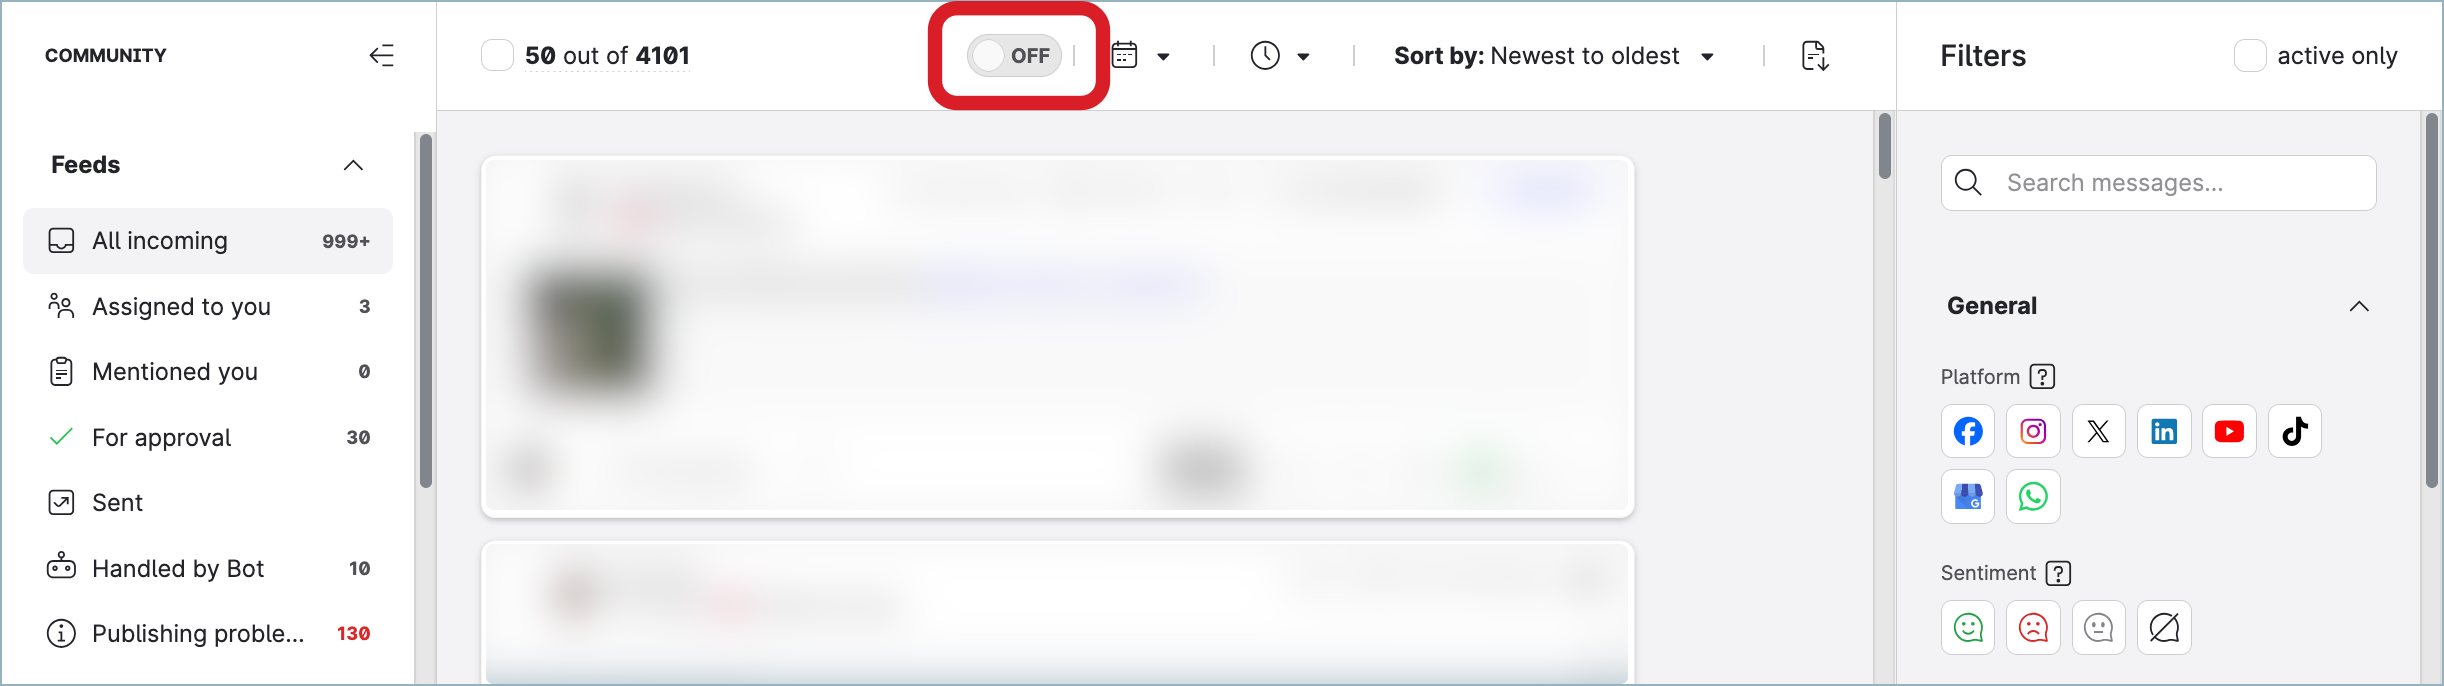
Based on the width of your browser window and the zoom level, the toggle may appear without the text description.
Select the date and time range
Date selector
As a Community Manager, use the date selector to limit the number of days included in the results.
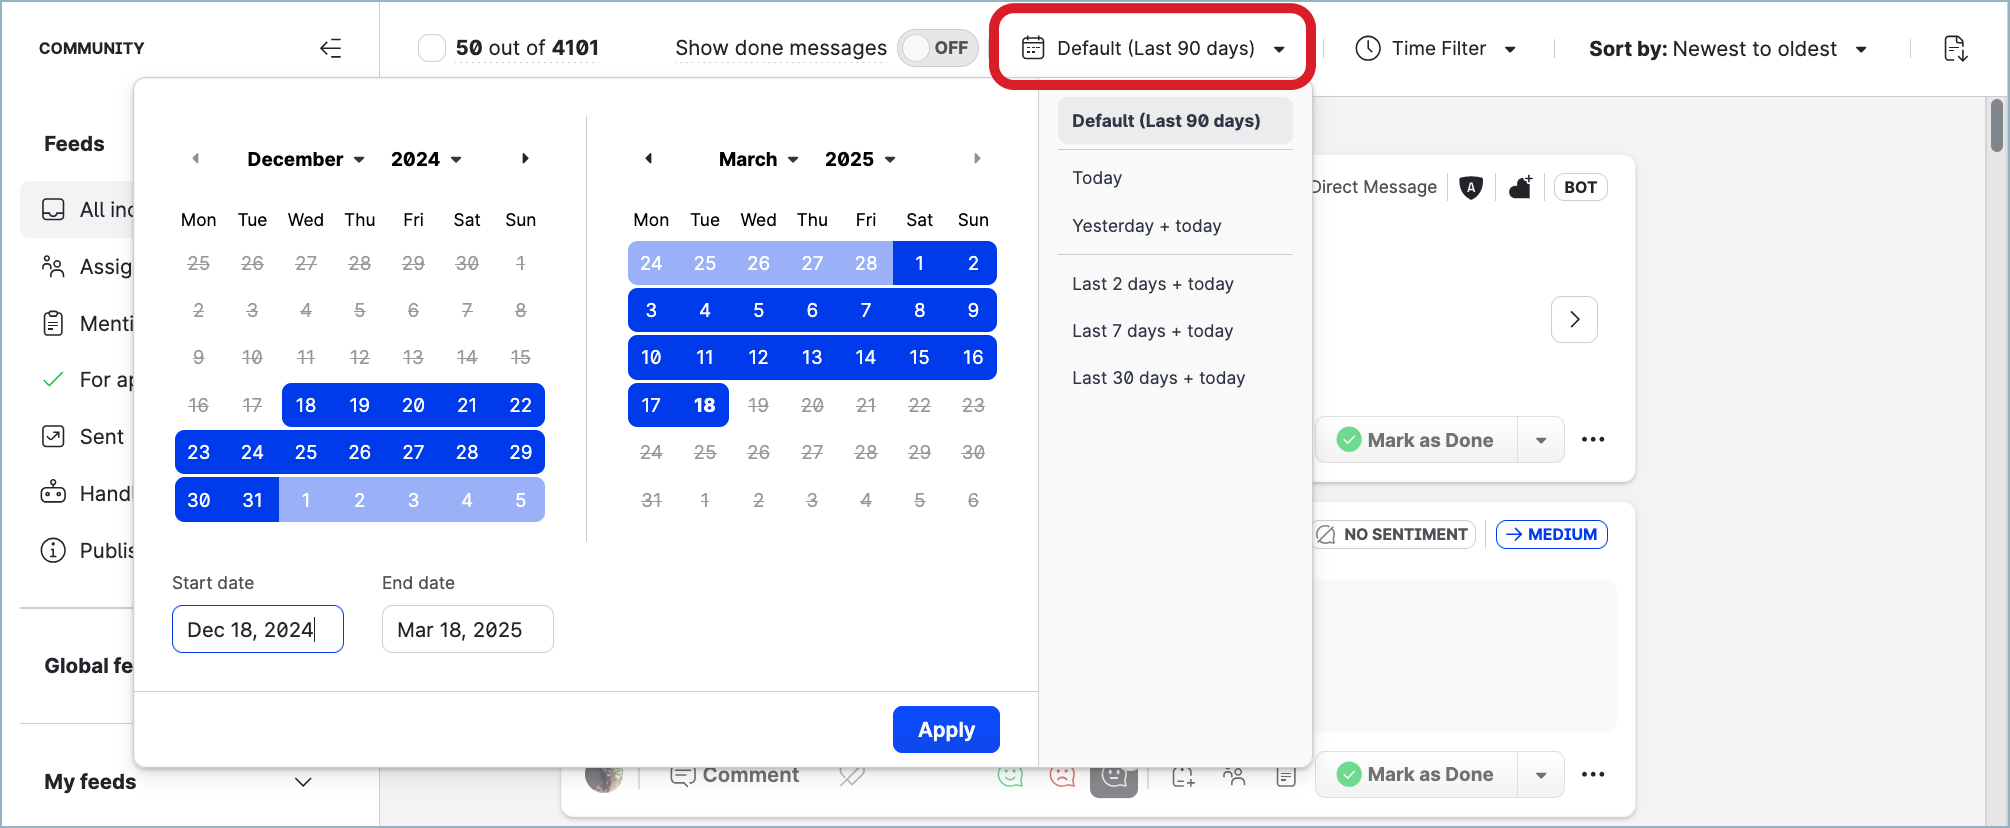
You can select:
-
Static date range
Select the start date and the end date to define the time period. -
Running date range
Select one of the presets to display a running date range that updates every day (for example, Last 7 days + today).
The default Last 90 days corresponds to the maximum amount of data available in Community.
The date filters start at 00:00 and end at 23:59.
Time selector
The time selector allows you to specify the period within a day to narrow down the results further.
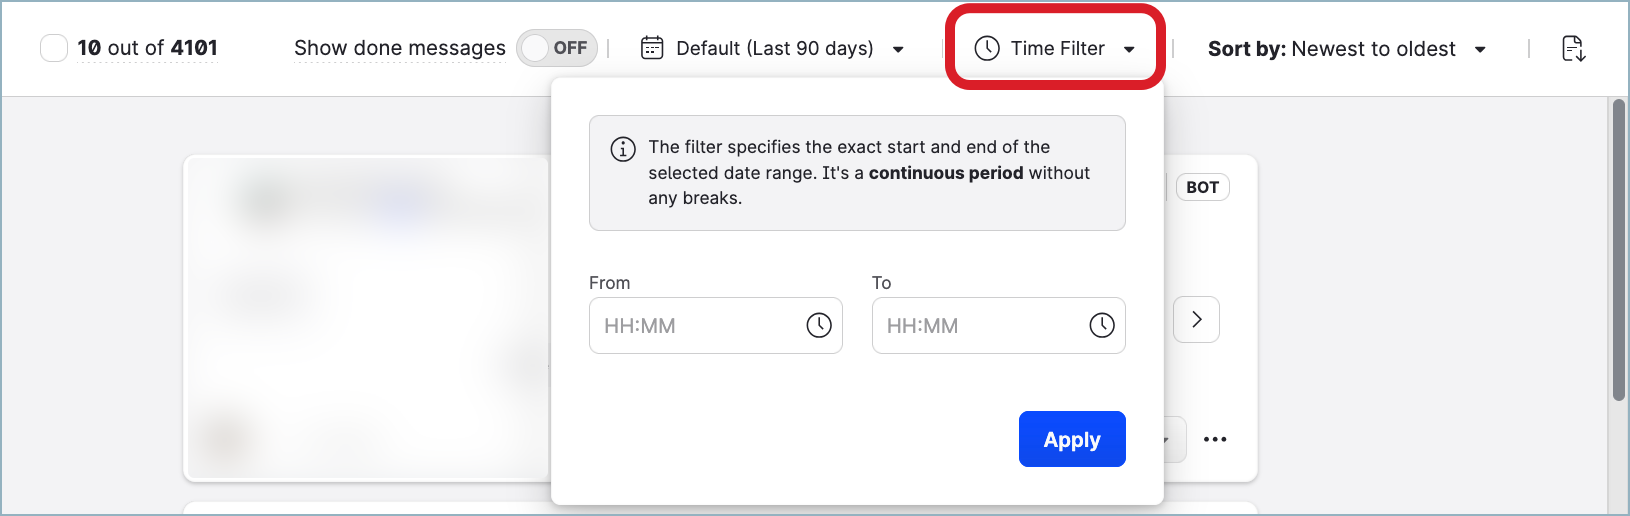
How the date selector and time selector work together
The period set in the time selector is applied to the continuous period specified in the date selector. The period is not applied to each individual day withing the date range.
-
The time set in From of the time selector specifies the time on the date in Start date of the date selector.
-
The time set in To of the time selector specifies the time on the date in End date of the date selector.
Example: Imagine the following setup:
-
Your date range is set from September 15, 2025, to September 30, 2025.
-
Your time range is set from 10.00 to 19.00.

The final period for which the messages should be shown is from 10.00 on September 15, 2025, till 19.00 on September 30, 2025.
How direct messages are filtered
For direct messages, the results are presented not as individual messages but as whole conversations where at least one direct message falls within the selected time range.
Therefore, you may also see messages that do not match the selected time range, but they still appear in the results because they belong to a conversation where some other message falls within the time range.
Sort by criteria
By default, the messages are sorted by date ascending. In other words, it shows the oldest first.
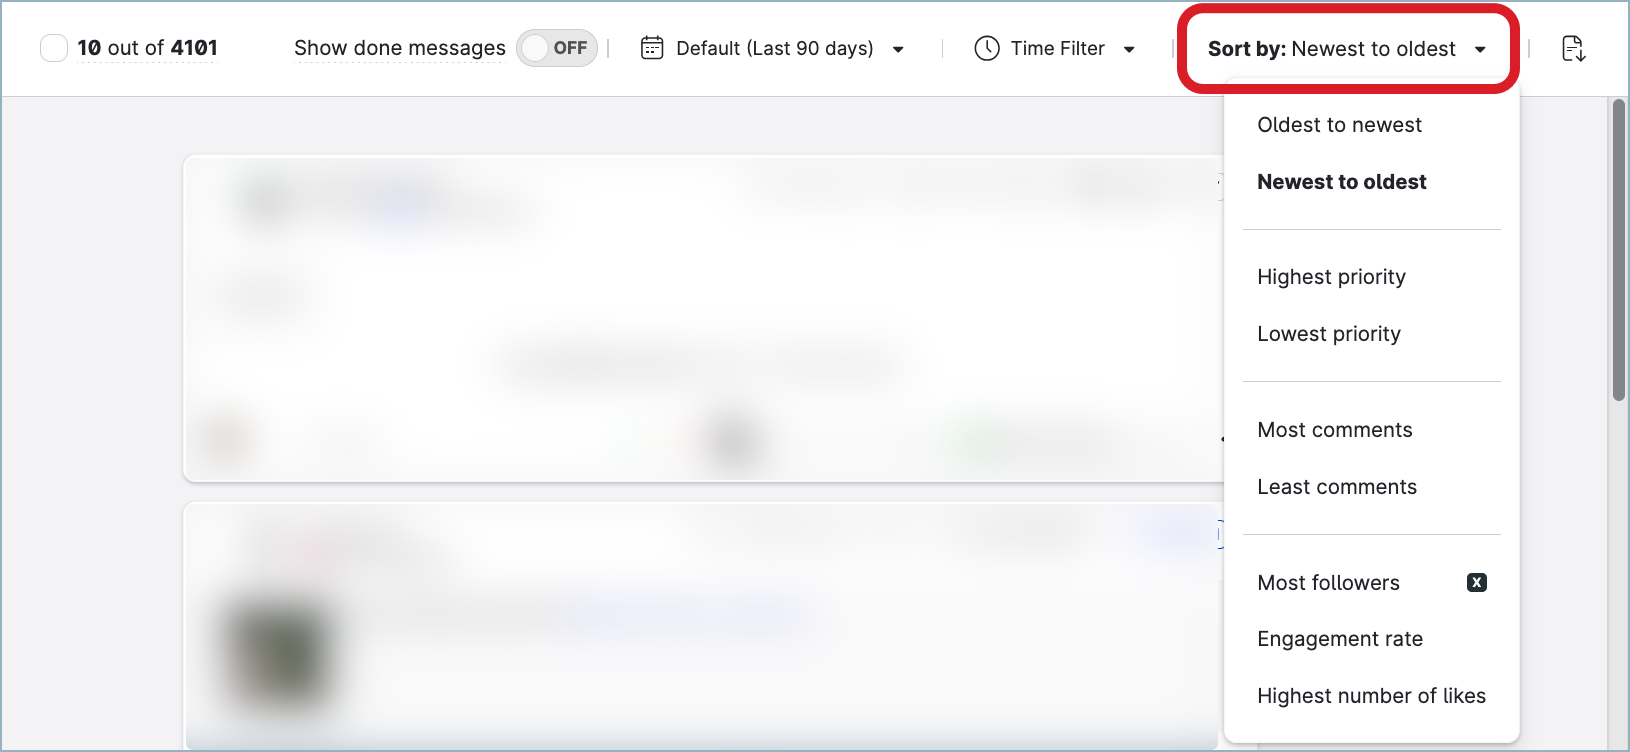
You can change it and sort by:
-
Date
-
Priority
-
Number of comments
-
Number of followers (X (formerly Twitter) only)
-
Engagement rate
-
Number of likes
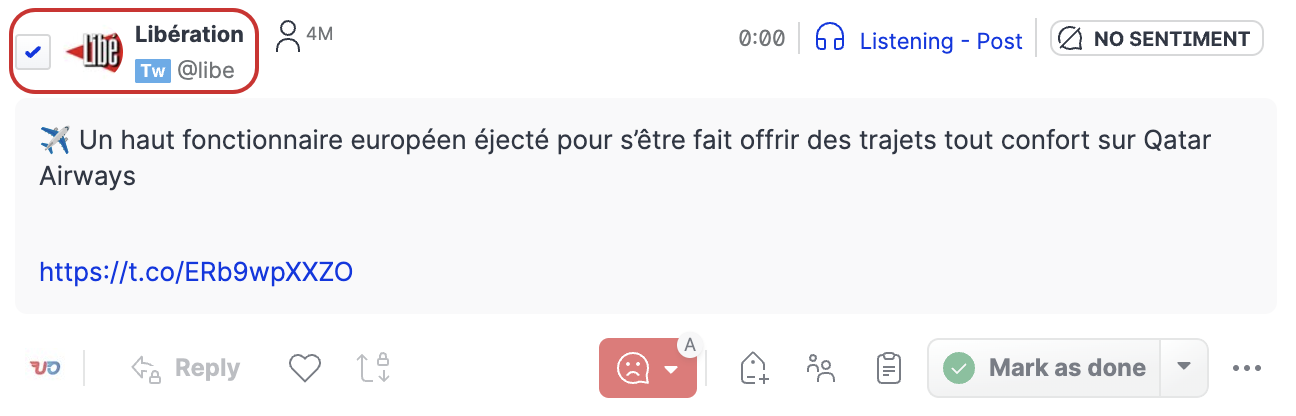
Multi-selection and bulk operation
Multi-selection allows Community Managers to select multiple messages to apply bulk actions.
In any Feed, simply tick the checkbox with the message display counter.

Once checked, a bar will appear at the bottom of the Community Inbox with the bulk operation options.

Options:
-
number of selected items
Only 50 results are loaded by default. Click Select all n to select all messages in the selected feed.
-
select the sentiment
-
apply labels
-
assign the messages to specific community managers
-
add internal notes
-
change the status of the selected messages
Result limitations
Only the first 50 results are loaded and selected by default. When you scroll to the end of the loaded messages, the system loads 50 more results. Those messages will not be selected. Either select them manually or click Select all n.
This limitation is in place to avoid impacting the global performance of Community Inbox.
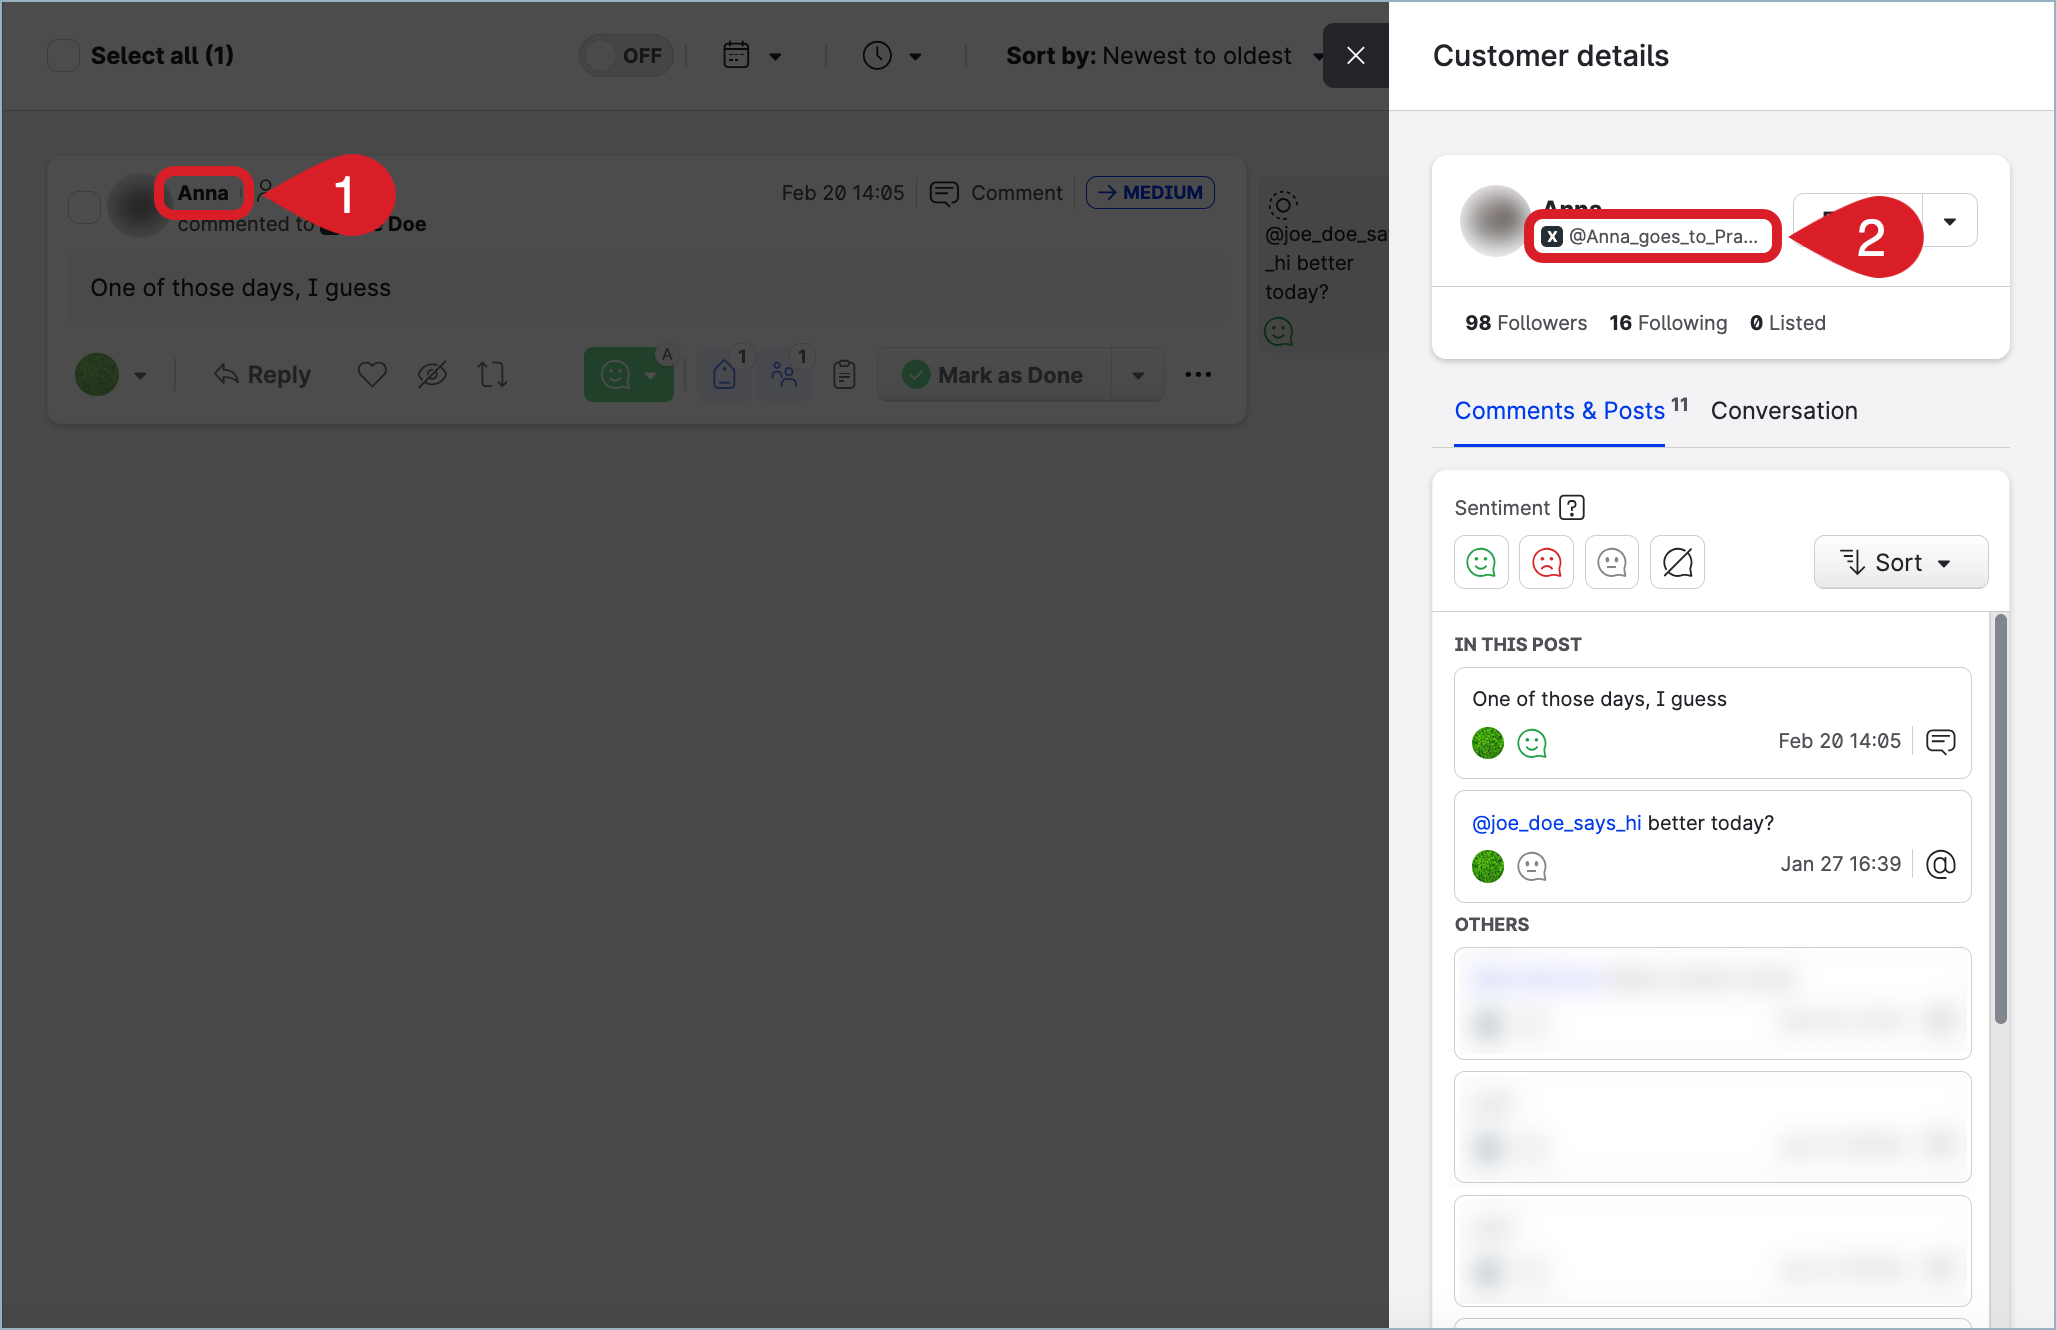
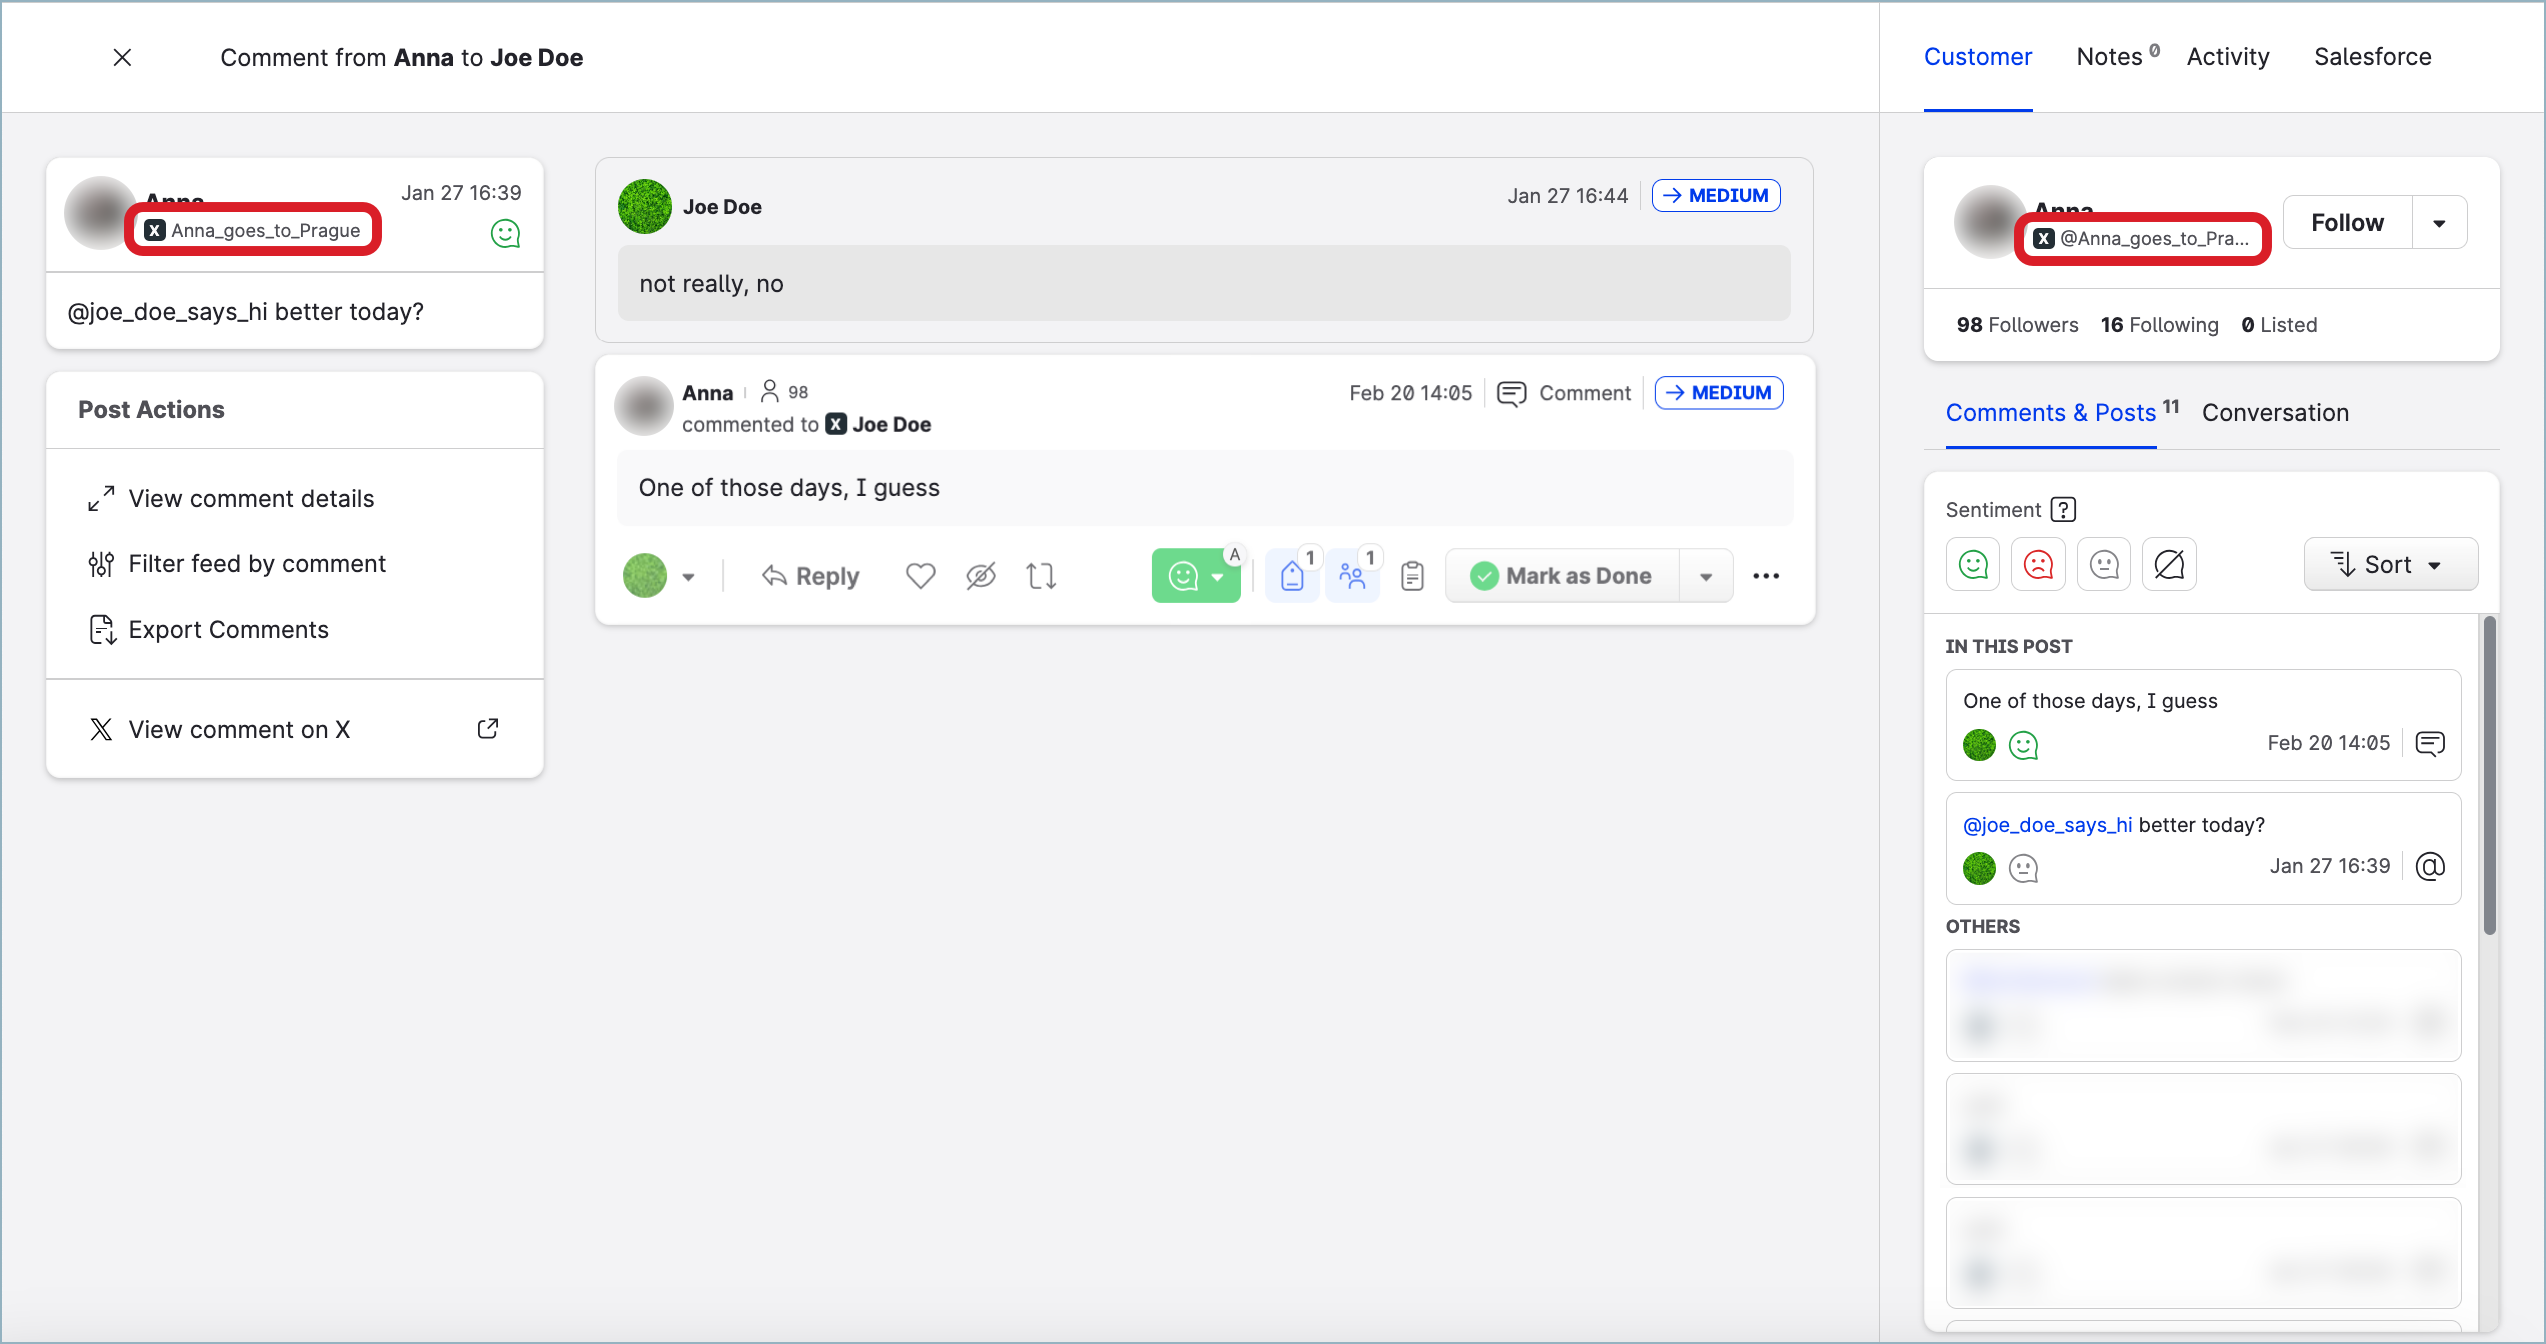
Open the customer’s page on the native platform
To see the customer’s page on the native social media platform, click the customer’s name in the message to open a side panel on the right. Then, click the customer’s handle under their name on the panel to open the customer’s page in a new browser tab.
Due to API limitations, links to the customer’s page behind the handle are disabled for the following platforms:
-
WhatsApp
-
Google Business
-
Facebook (users only; the links for pages are enabled)
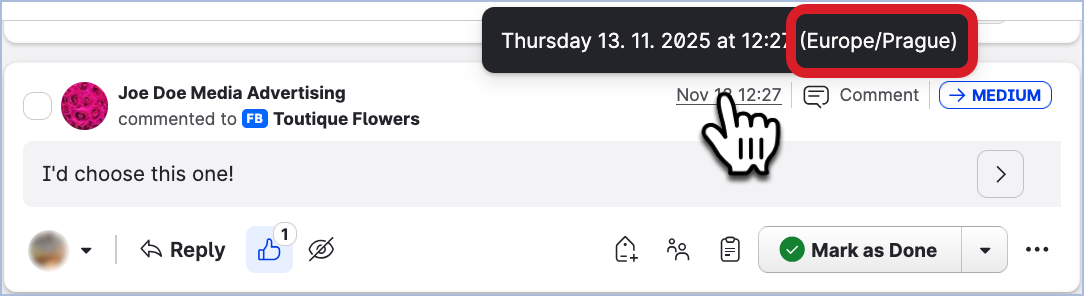
Message timestamp and timezone
A message has a timestamp showing when the post/comment was published or the direct message was sent.
Hover over it to see the full date, time, and the timezone. The displayed timezone is the timezone that you (as the user who is currently logged in to the Emplifi account) have set in Settings → Personal settings (see Personal Locale Setting).
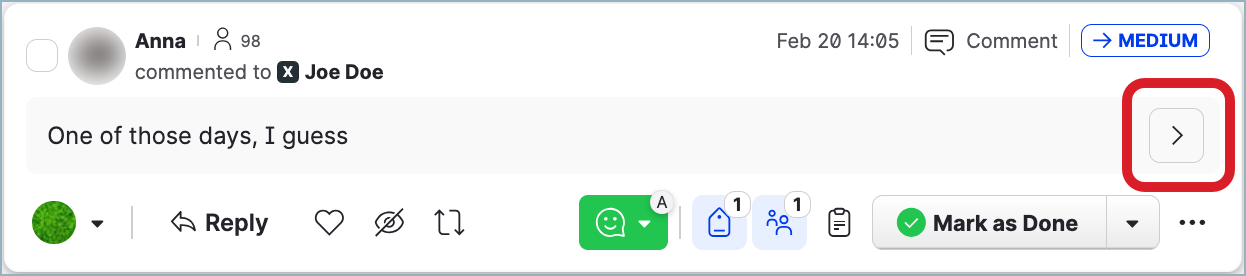
Message details
To display details of a message, hover over the message, and click the details arrow that appears on the right.
Alternatively, click the ellipsis menu in the message, and click Open details.
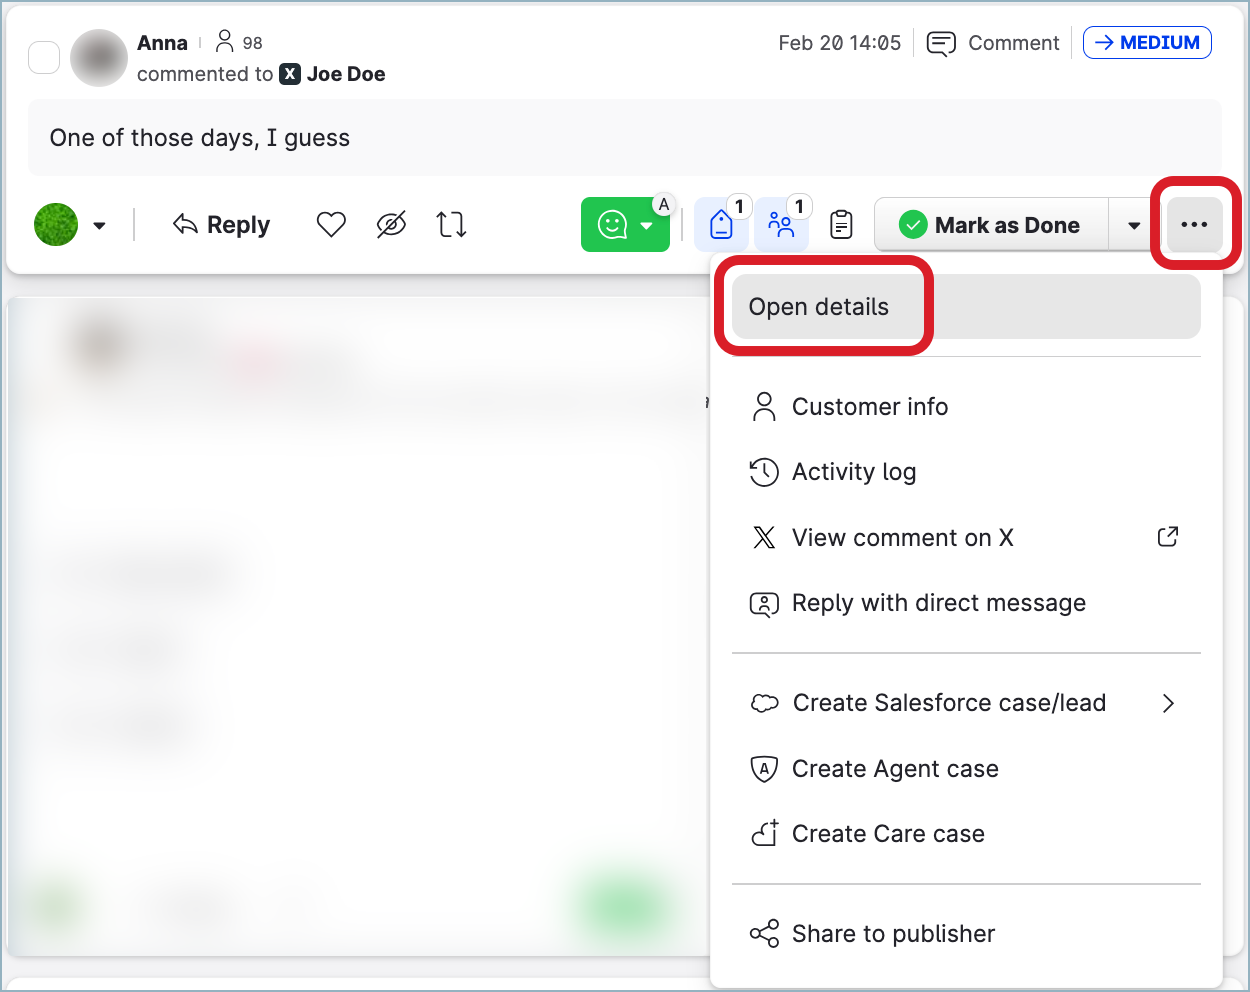
If the arrow does not appear and the Open details menu option is hidden, it means that there are no details related to the message.
The details page and information it provides differ from message to message.
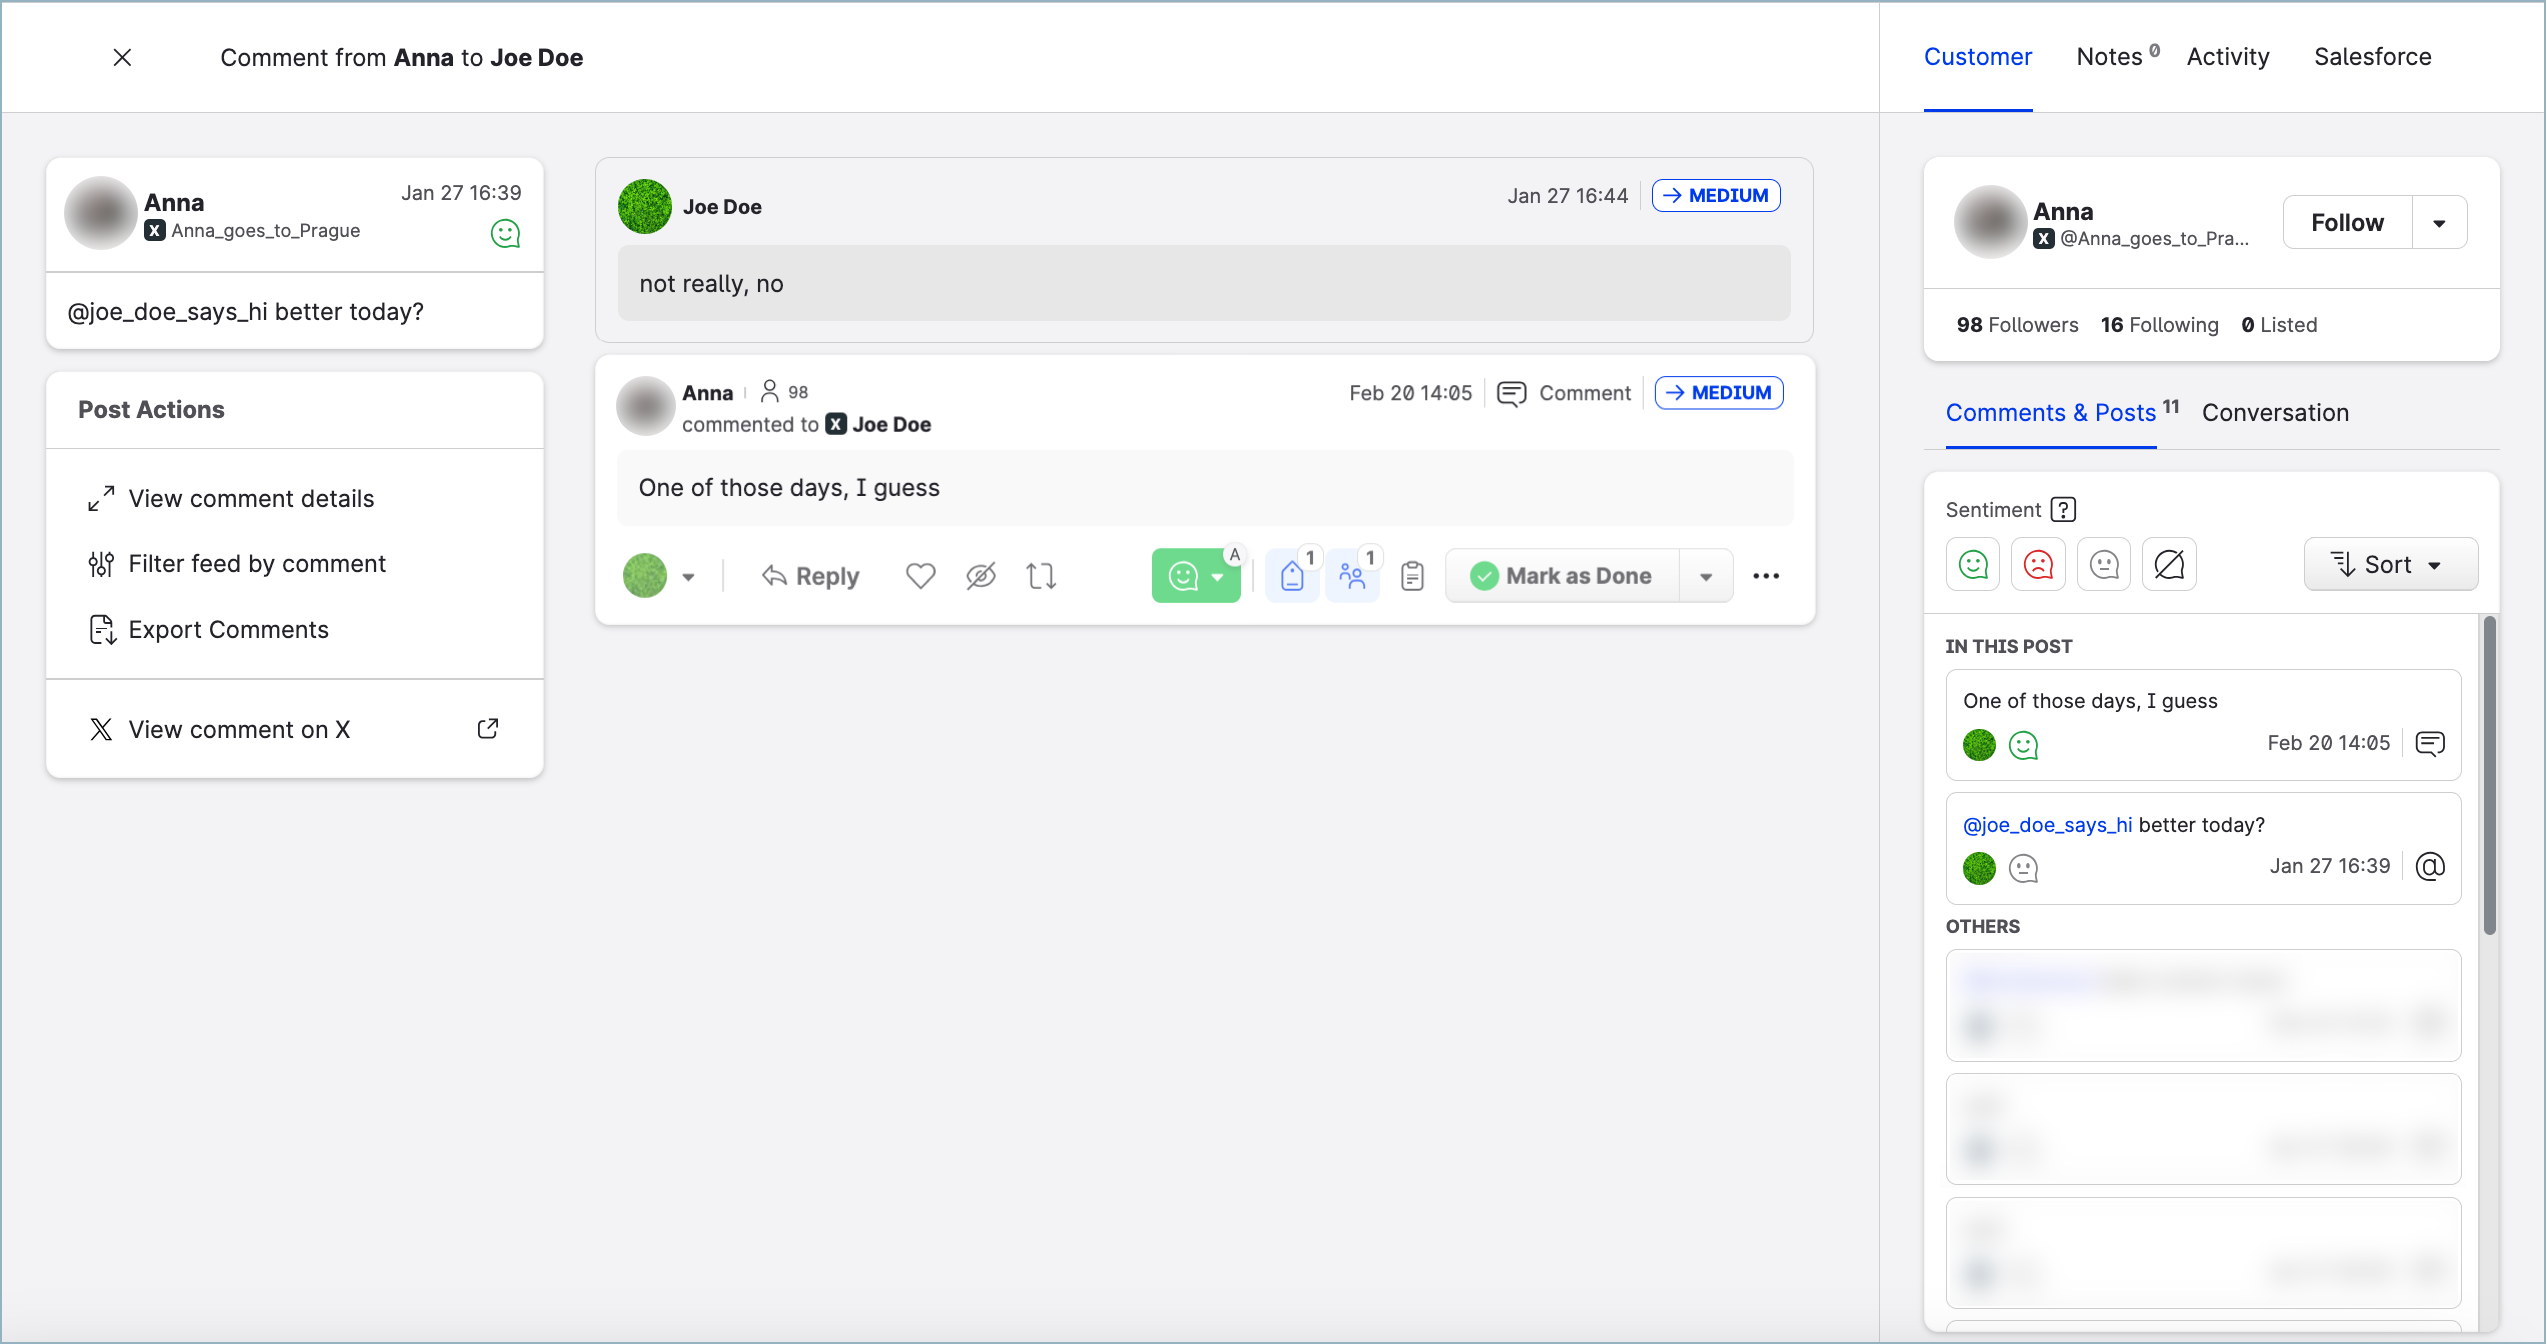
To open the customer’s page on the native social media platform from the details page, click the customer’s handle under their name.
Due to API limitations, links to the customer’s page behind the handle are disabled for the following platforms:
-
WhatsApp
-
Google Business
-
Facebook (users only; the links for pages are enabled)
Parent post
For some types of Community messages such as comments, ad comments, and mention comments, a preview of the parent post appears next to a message.
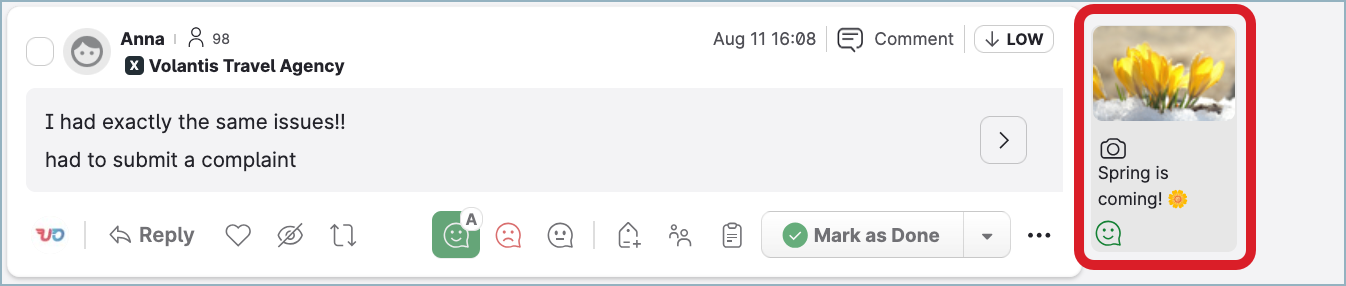
Hover over the parent post preview to see the options to open the parent post on the native platform or to use the parent post as a filter(see further in this article).
Sometimes, the parent post preview is not available.

This may happen in the following cases:
-
The parent post does not belong to any of your owned profiles. It was published by a public profile and was not downloaded to Community.
For more information about owned and public profiles, see Add a Profile as Owned (Private) or Public. -
You are not assigned to the profile that the parent post belongs to.
For more information about assigning profiles to users, see Set Up Visibility of a Profile. -
The parent post contains an unsupported type of content (for example, a cover photo).
Filter messages by specific posts
As a community manager, you may want to filter and display comments by a specific message or messages.
You can combine post-based filtering with any of the main filters. For more information, see Set Up Filters in Community Feeds.
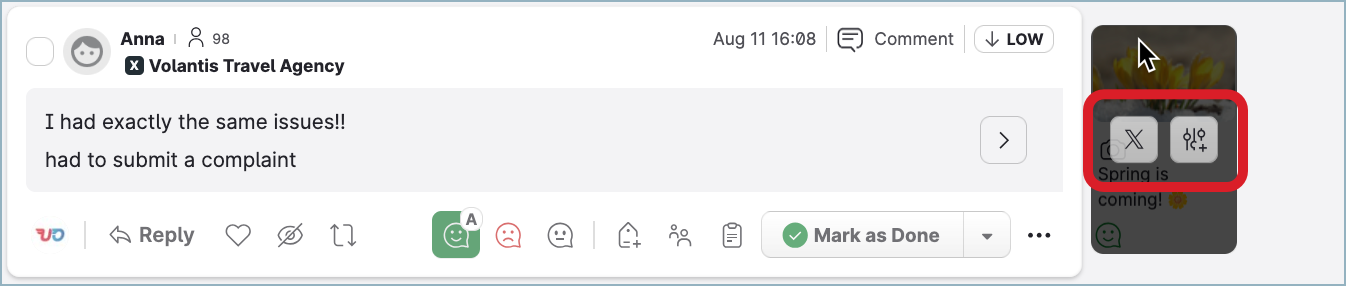
Filter by parent posts
The parent post filter is available in the preview field that appears next to parent posts in the feed.

To filter by one parent post only:
-
Hover the mouse over the parent post preview, next to a comment in the feed.
-
Click Use post as filter.
Use your posts as a filter
You can easily find and display incoming messages related to a specific post (or posts) that you published using your profiles.
For example, you want to display all messages that are related to the posts you ran as a part of a specific campaign.
Steps:
-
Go to your Sent feed.
-
Select one or most posts.
A bar with a few options will appear at the bottom of your window.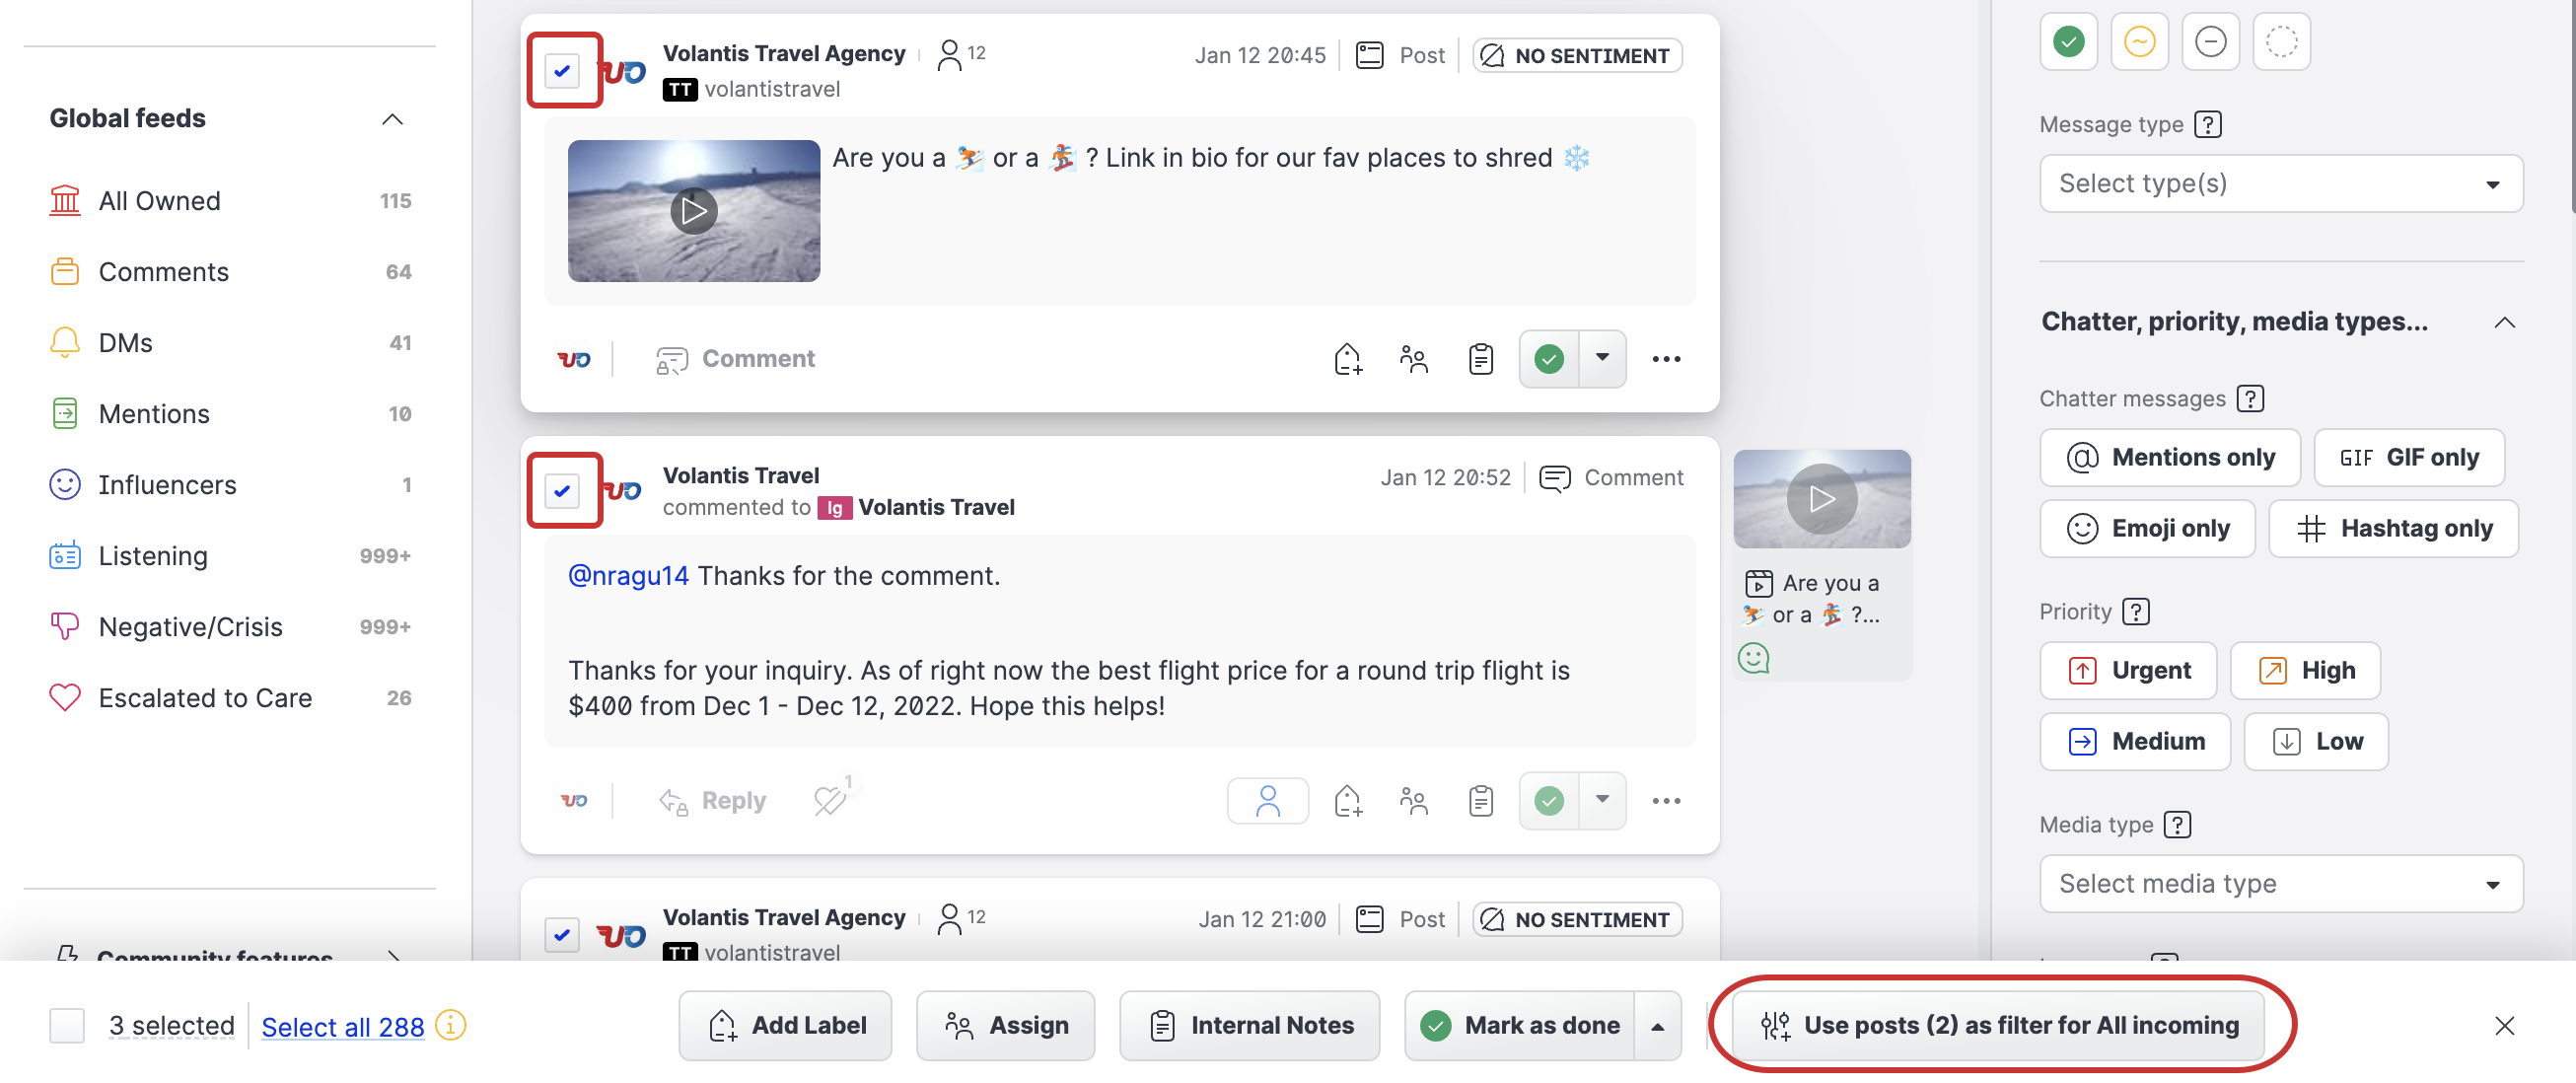
-
Click Use posts as filter for All Incoming.
The “All incoming” feed displays with the filtered messages.
More resources
For all the other information about Community in general, consult the other articles about Community:
Community Inbox in Emplifi Learning