After setting up and saving your collection settings, your collected content will land in your album's inbox.
General Workflow
Follow these steps for a general curation workflow:
All of these actions aside from choosing Approve or Deny for content can also be done from the Approved and Deleted section of an album.
-
Go to Curation → Albums and select an album.
-
Click Inbox in the top left corner of your album dashboard.
-
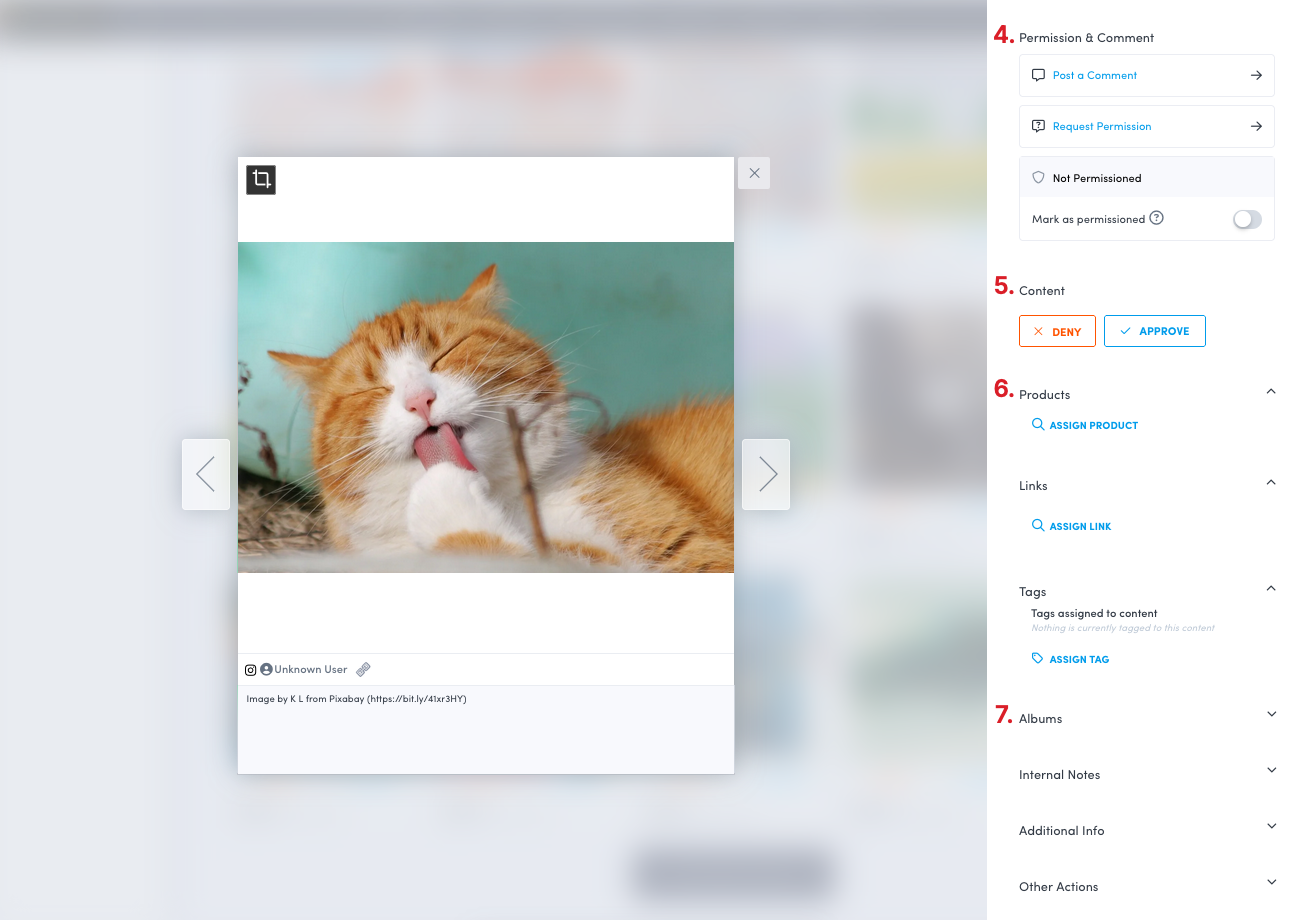
Click on a piece of content to open the asset details screen.
-
Request permission if you do not already have permission to use the content. To ask for permission, click Request Permission. To learn more, see Send Permission Requests and Permission Request and Comment Best Practices.
-
Approve or Deny the content:
-
Denied content moves to the denied folder. You can always move denied content back to your album inbox.
-
Approved content moves to the approved section and cannot be unapproved. If needed, delete the content instead (which moves the content to the deleted section of the album).
-
-
If you have added products in Emplifi UGC, click Assign Product and choose the product(s) you want to add to the content. To learn more, see Tag a Product in a Piece of Content in an Album.
No products to add? You can instead add a link (also known as a call-to-action or CTA) to instead drive customers to a specific landing page, category page, or gallery. To learn more, see Add a link (call-to-action) to content.
-
To copy a piece of content into other albums, click the Albums dropdown, then click Copy content to another album. Select the albums where you’d like the piece of content to exist and click Apply.
-
Finally you may want to include other things within your curation workflow. Here's a list of what else to consider:
-
Adding Internal Notes
The multi-select tool can streamline many tasks (assigning products, requesting permission, copying content, etc.), but multi-select is not available for assigning links.
Assign a link (call-to-action) to content
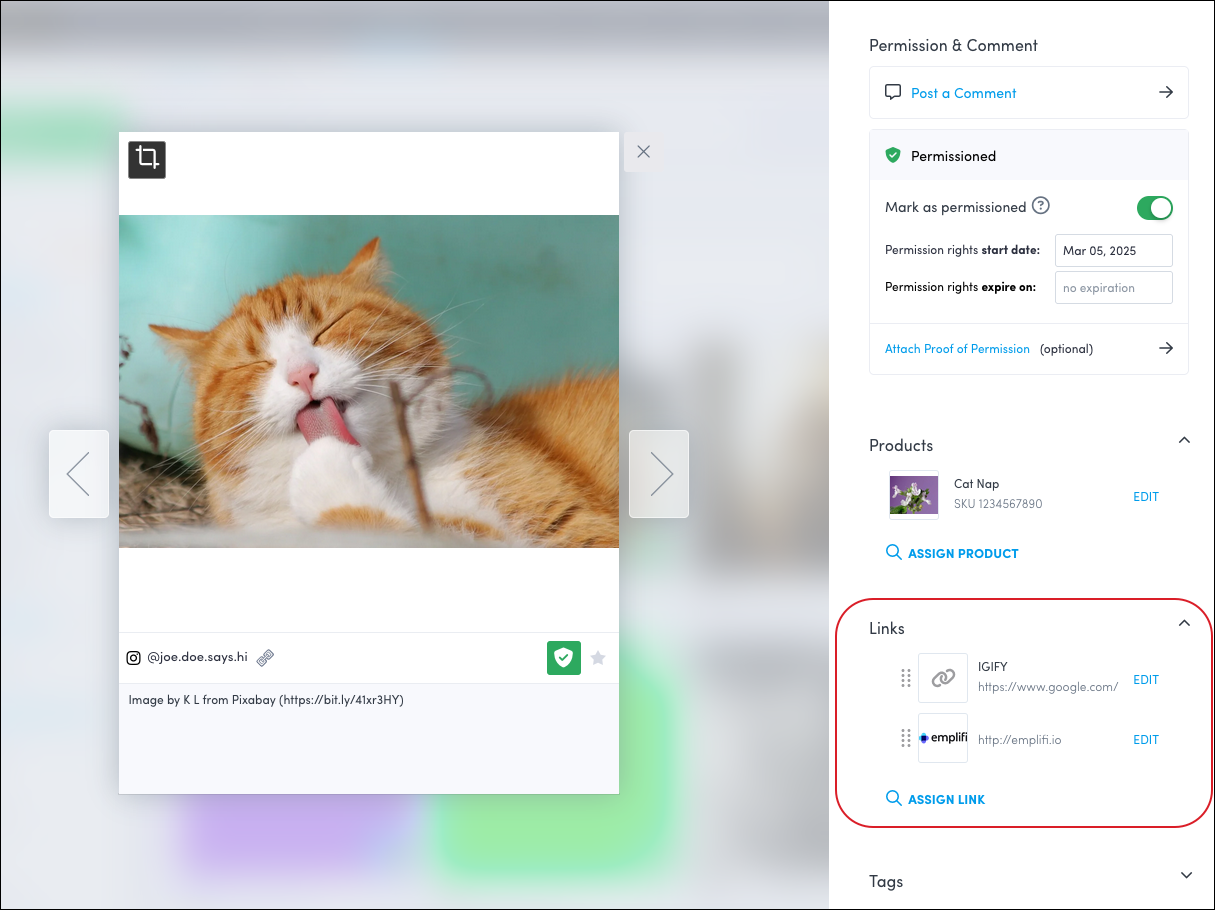
Instead of tagging only products, you can assign one or more links (CTAs) to an asset. You can also reorder the links, with the top link being the first link shown to your customers.
Links you add are also affected by the Link behavior option you selected for the galleries where the content will be displayed. To learn more, see Gallery Link.
Add a New Link to an Asset
Steps:
-
In the asset details screen, click Assign Link.
-
In the panel that opens, click New Link.
-
Fill in the following fields:
-
URL (required)
The address of the site that you want to direct shoppers to when they click the CTA button. The URL must include a valid network protocol (for example,http://). -
Button Text (required)
The text that appears inside the CTA button. -
Title (optional)
The text that appears directly above the CTA button. -
Image (optional)
The address to an image file. The image appears in your gallery above the title and CTA button.
-
-
Click Save.
-
The link is now saved to your organization’s link list and added to the selected asset.
Once a link is created, it is saved to shared list across your organization for easy reuse.
Add an Existing Link to an Asset
Steps:
-
In the asset details screen, click Assign Link.
-
In the Link panel that opens, click a link tile to immediately assign the link to your content.
-
Click Close to return to the asset details screen.
You can edit an existing link, and updates will automatically apply to all assets that use the link. Or, you can save your edits as a new link that is immediately assigned to your asset and available for use with other assets.
Delete a Link from a Single Asset
Steps:
-
In the asset details screen, hover over the link.
-
Click the X icon next to the link.
-
The link will be removed from this asset only.
Delete a Link from the Links List
Deleting a link from the links list will permanently remove it from all associated assets.
Steps:
-
Open any asset that does not currently use the link (or first remove the link from the asset you’re viewing).
-
Click Assign Link.
-
In the Links list, hover over the link you wish to delete.
-
Click the trash can icon.
-
If the link is used by any other assets, a warning will appear informing you that deleting the link will remove it from all assets where it is in use.
-
Confirm deletion to proceed.
Access the Links List
The shared links list contains all of the saved links (calls-to-action) in your organization
The shared link list does not include links attached to the asset from which you accessed the list. To see these links, return to the asset details screen.
Steps:
-
Open any asset in your album (ideally one that does not already use the link you want to manage).
-
Click Assign Link in the asset details panel.
-
The panel that opens displays the links list, which includes all links that have been created in your account.
-
From here, you can:
-
Browse existing links
-
Open, edit, or delete a link (by hovering over it)
-
-
You can also click New Link to create a new link.
-