Business hours are the hours when your Community or Care team is available and able to respond to your fans’ messages (for example, Monday to Friday from 8.00 till 17.00 Prague time). The Community or Care users are expected to interact with the customers within business hours, and their replies are not expected outside of the business hours.
Business hours are tied to a specific timezone and can respect holidays or time periods when the Community or Care team is off work. This sets clear customer expectations and ensures consistent service throughout your profiles and timezones, especially if your teams spread across multiple regions.
Business hours can be assigned to users and profiles.
If your Community or Care team is on duty 24/7 or you are not interested in considering business hours in calculating the response time, you do not need to set business hours.
Community: Response time analysis
Business hours can affect how the response time metrics used by some Dashboard widgets for Community (or example, Direct messages response time, Agents' performance, or Response time) are calculated.
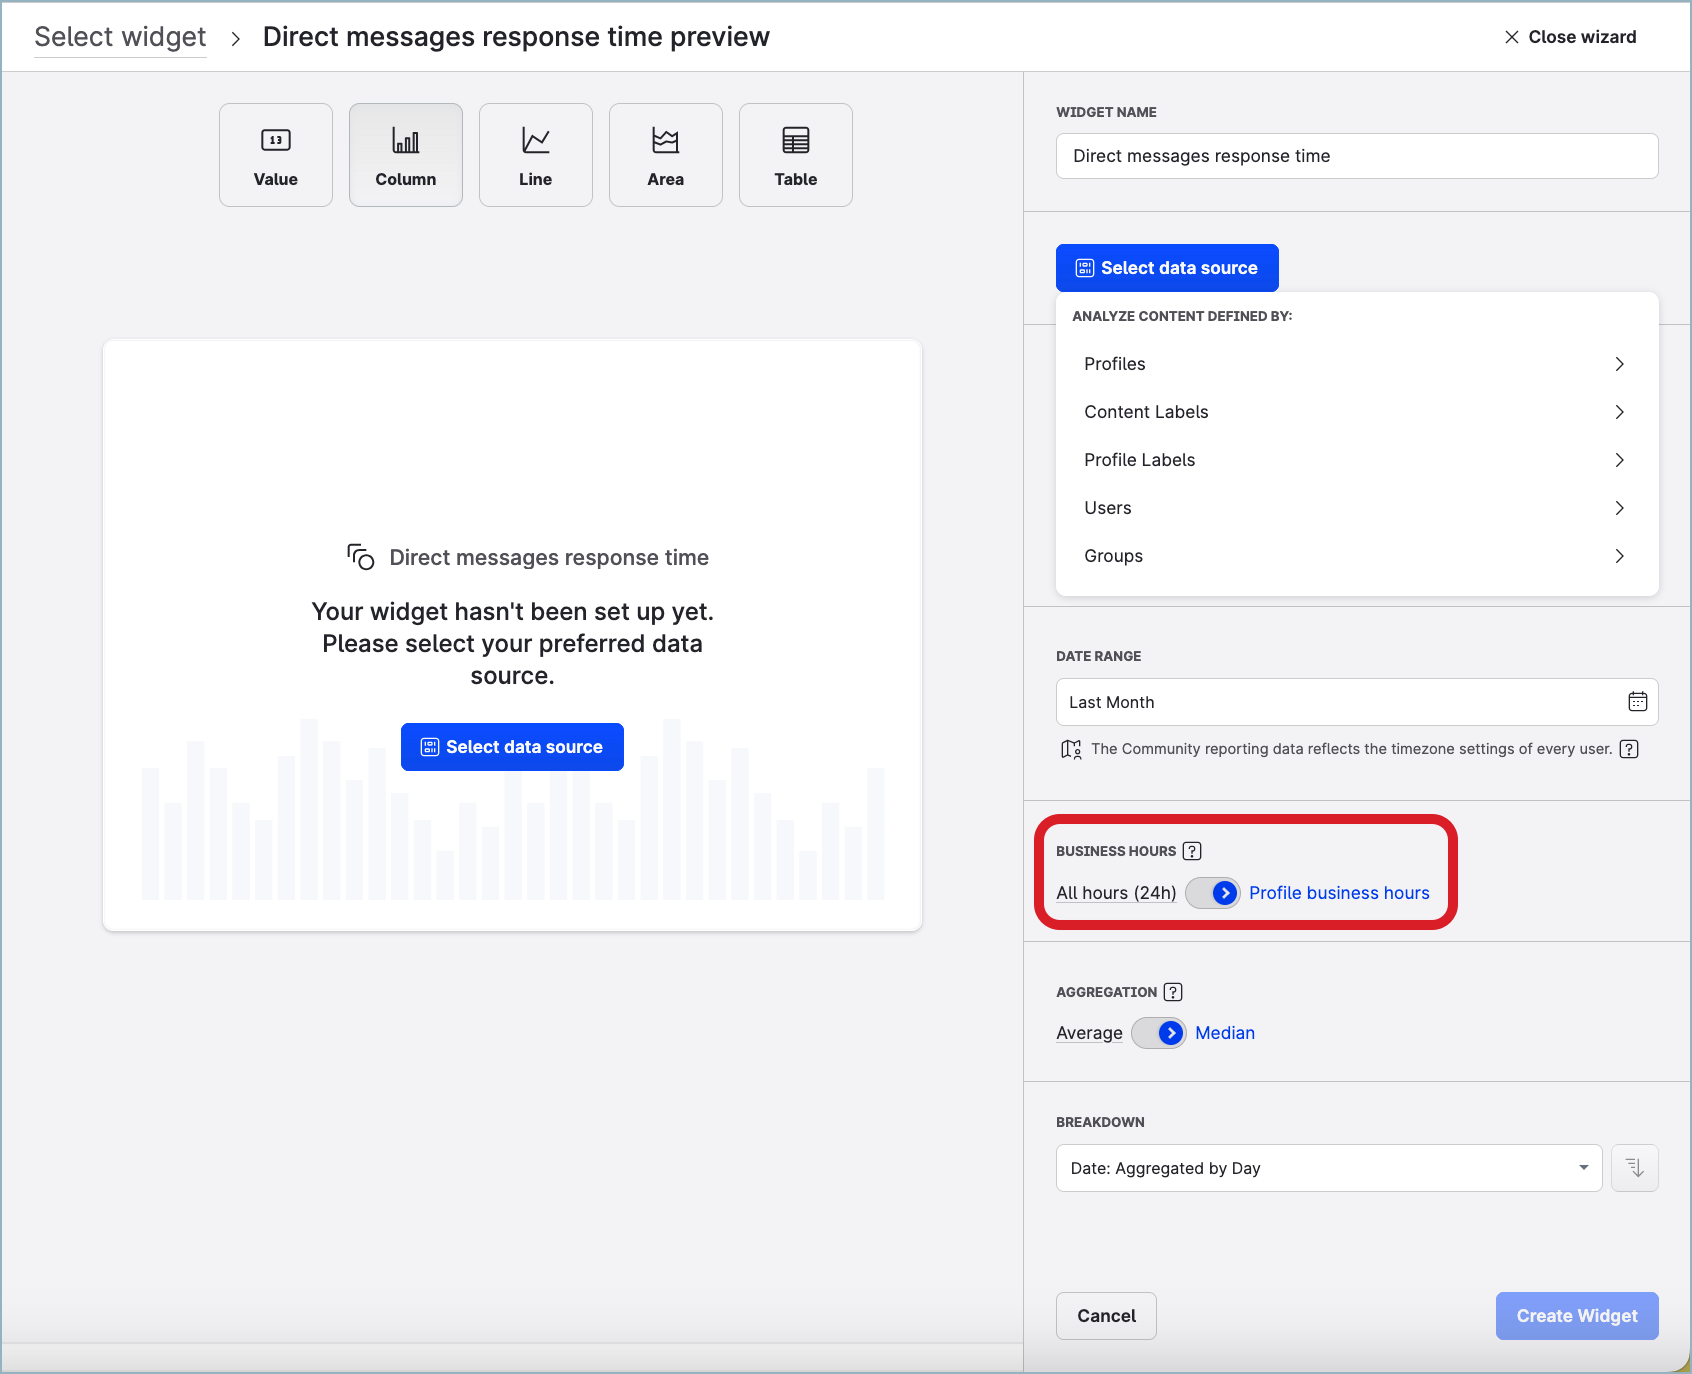
The Community widgets work only with business hours that are assigned to profiles.
By default, a profile has no predefined business hours, and team availability for the profile is considered to be 24/7. Setting business hours helps you get more accurate response time data for the profile.
-
If your team is not available 24/7 and the profile does not have business hours assigned, the values for response time metrics might be much higher than expected because customers could be sending messages at night or during holidays or weekends.
-
If the profile has business hours assigned and a message to this profile arrives to Community outside of the business hours, the response time metrics will not be increased.
For more information about analyzing the response time, see Analyze Performance of Your Community Operations.
Care: SLA policies and team performance
SLA policies
SLA policies can be set to run nonstop or only during the business hours. If an SLA policy is configured to run only during the business hours, its milestone timers will be running during the business hours and will pause outside of the business hours and on holidays if any exists.
You can set an SLA policy to run during the business hours of either profiles or Care agents.
Analytics on individual SLA policies (specifically, time-based metrics such as completion time, breached time, and achieved time) dynamically reflect the operational hours of an SLA policy.
For more information about SLA policies, see Set Up an SLA in Care. For more information about analyzing SLA data, see Use Unified Analytics to Analyze Performance of Your Care Operations.
Team performance
If your Care team is not on duty 24/7, consider assigning business hours to the members of the Care team and to the profiles that they work with in Care. This will help you accurately assess the performance of individual Care agents.
For more information about analyzing efficiency of Care users, see Use Unified Analytics to Analyze Performance of Your Care Operations.
Set up business hours
Create business hours from scratch
To be able to create business hours from scratch, you must be an Account Admin or have a custom account role with the “Add & Edit Business hours” permission under the Community & Publisher section (see Account Roles).
Steps:
-
Go to Settings -> Business hours.
-
Click +Create business hours.
The dialog for creating new business hours pops up.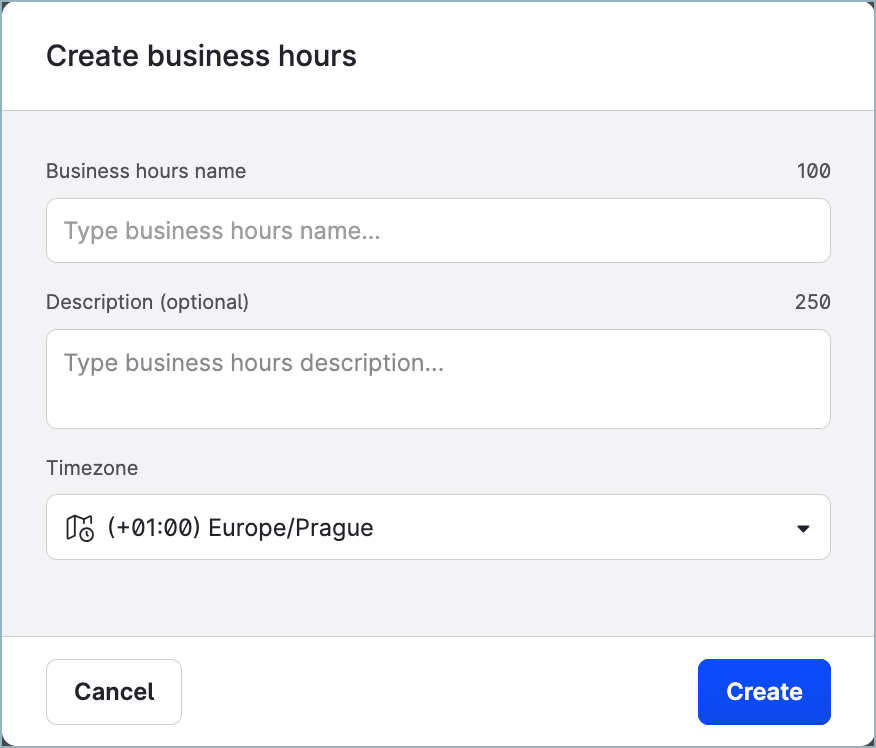
-
Enter the name of the business hours.
-
(Optional) Enter the description of the business hours.
-
In the Timezone dropdown, select the timezone where your business hours are observed.
-
Click Create.
The dialog closes. New business hours are created and appear in the list of the business hours.
The business hours panel slides out. The days of the week from Monday through Sunday appear. The days from Monday to Friday are enabled with the business hours set to from 9.00 till 17.00.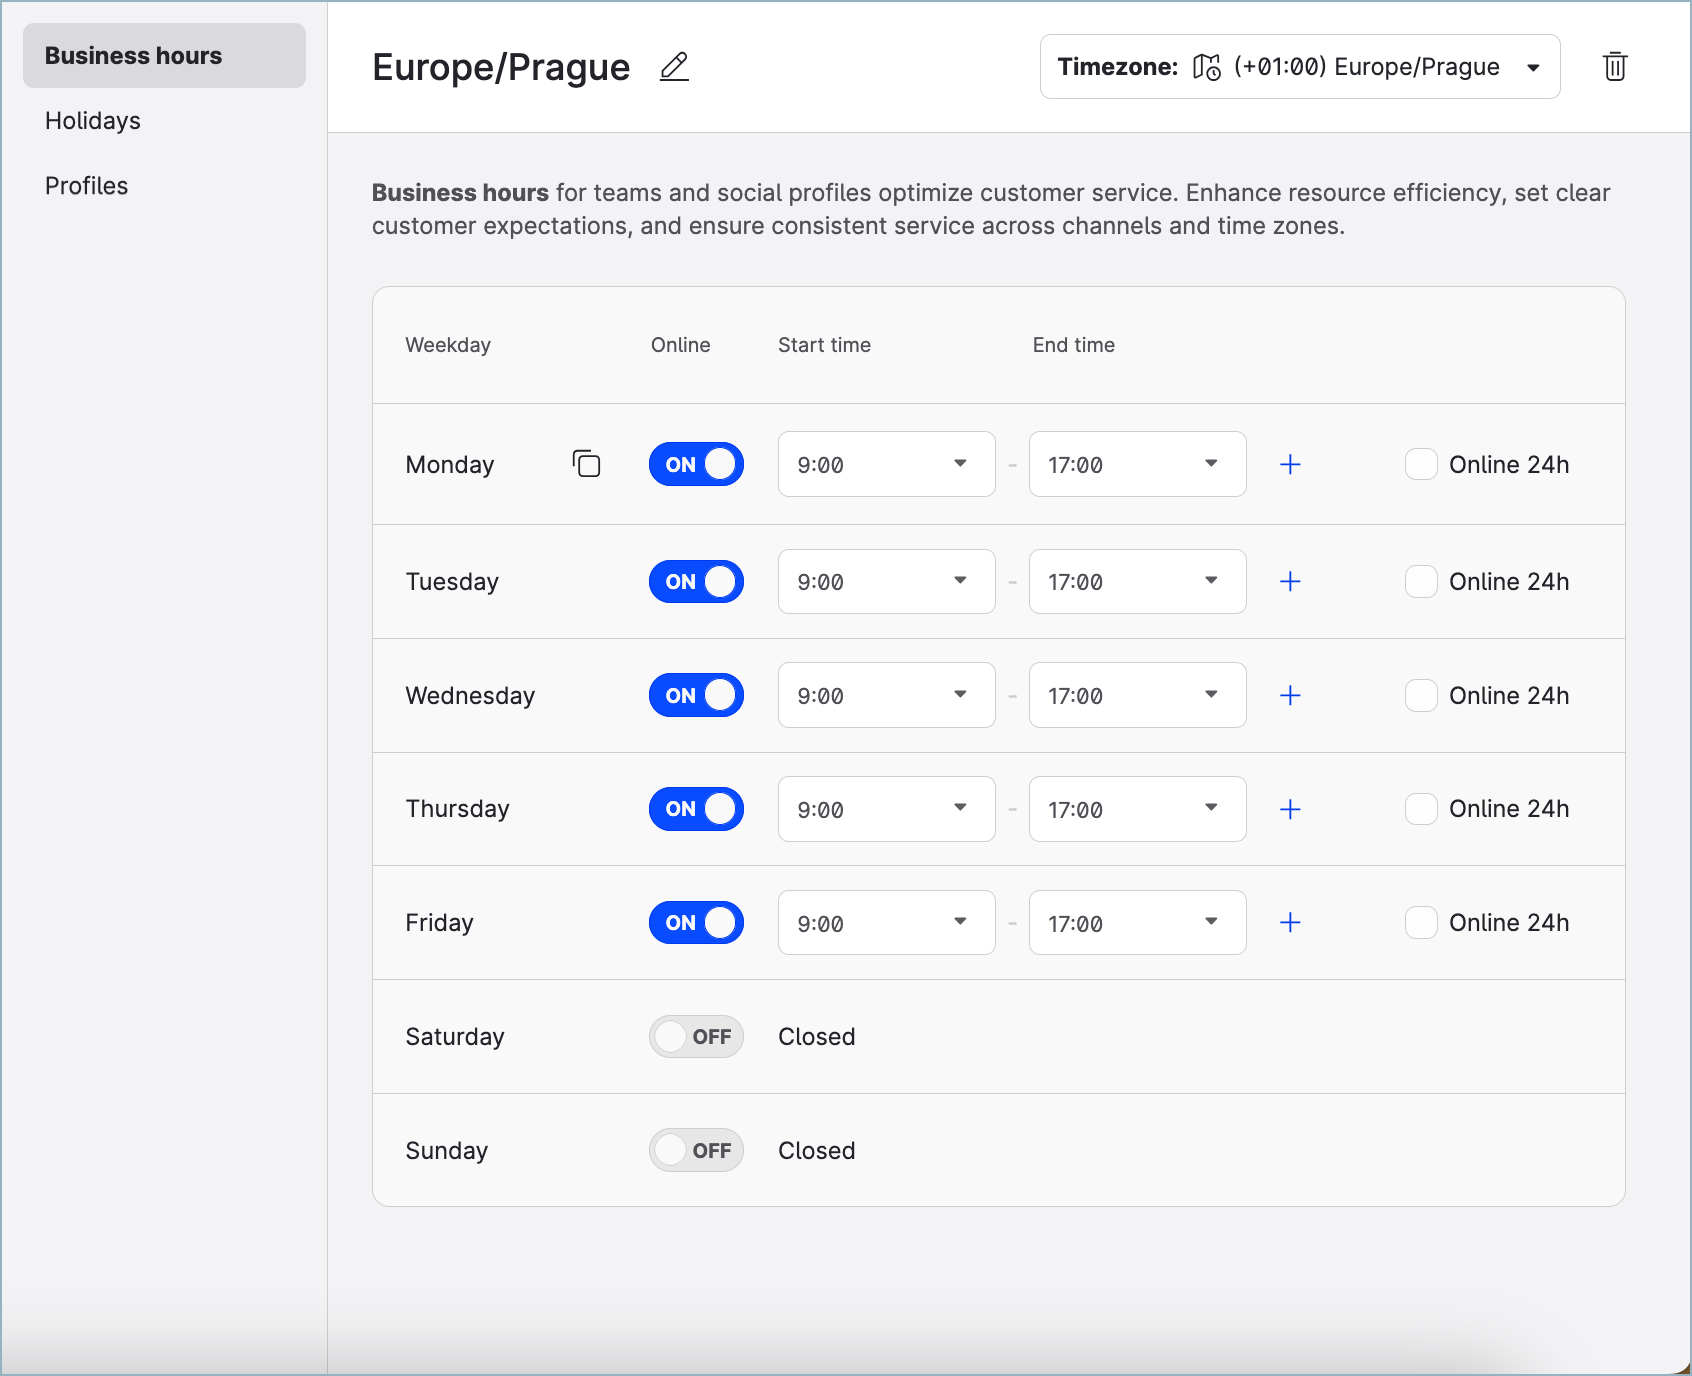
-
Update the schedule as needed. The changes are applied and automatically saved as you make them.
-
If your company is closed on some days of the week, disable these days.
-
For each working day, set the start time and the end time of the business hours.
-
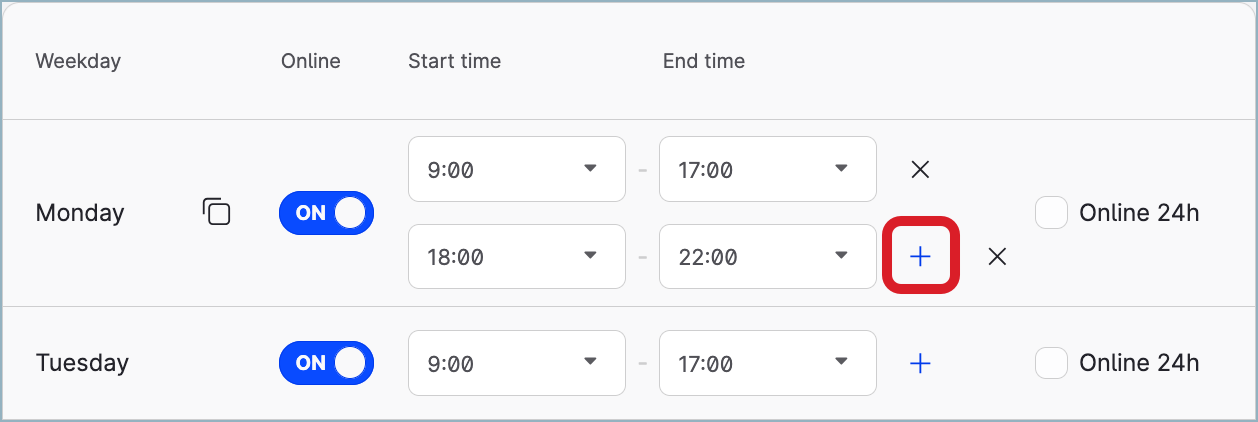
To set up more than one time slot within the same day, click the plus icon to add a time slot. The time slots within one day must not overlap.
-
If your company is open 24 hours a day on some days of the week, select the Online 24h checkbox for these days.
This sets the schedule for these days to “from 0:00 till 24:00”. -
If the business hours are the same for every working day of the week, set up the hours only for Monday and click the copy icon to populate the same hours to all the other working days of the week.

-
-
To add a holiday, click the Holidays tab, and click +Add holiday.
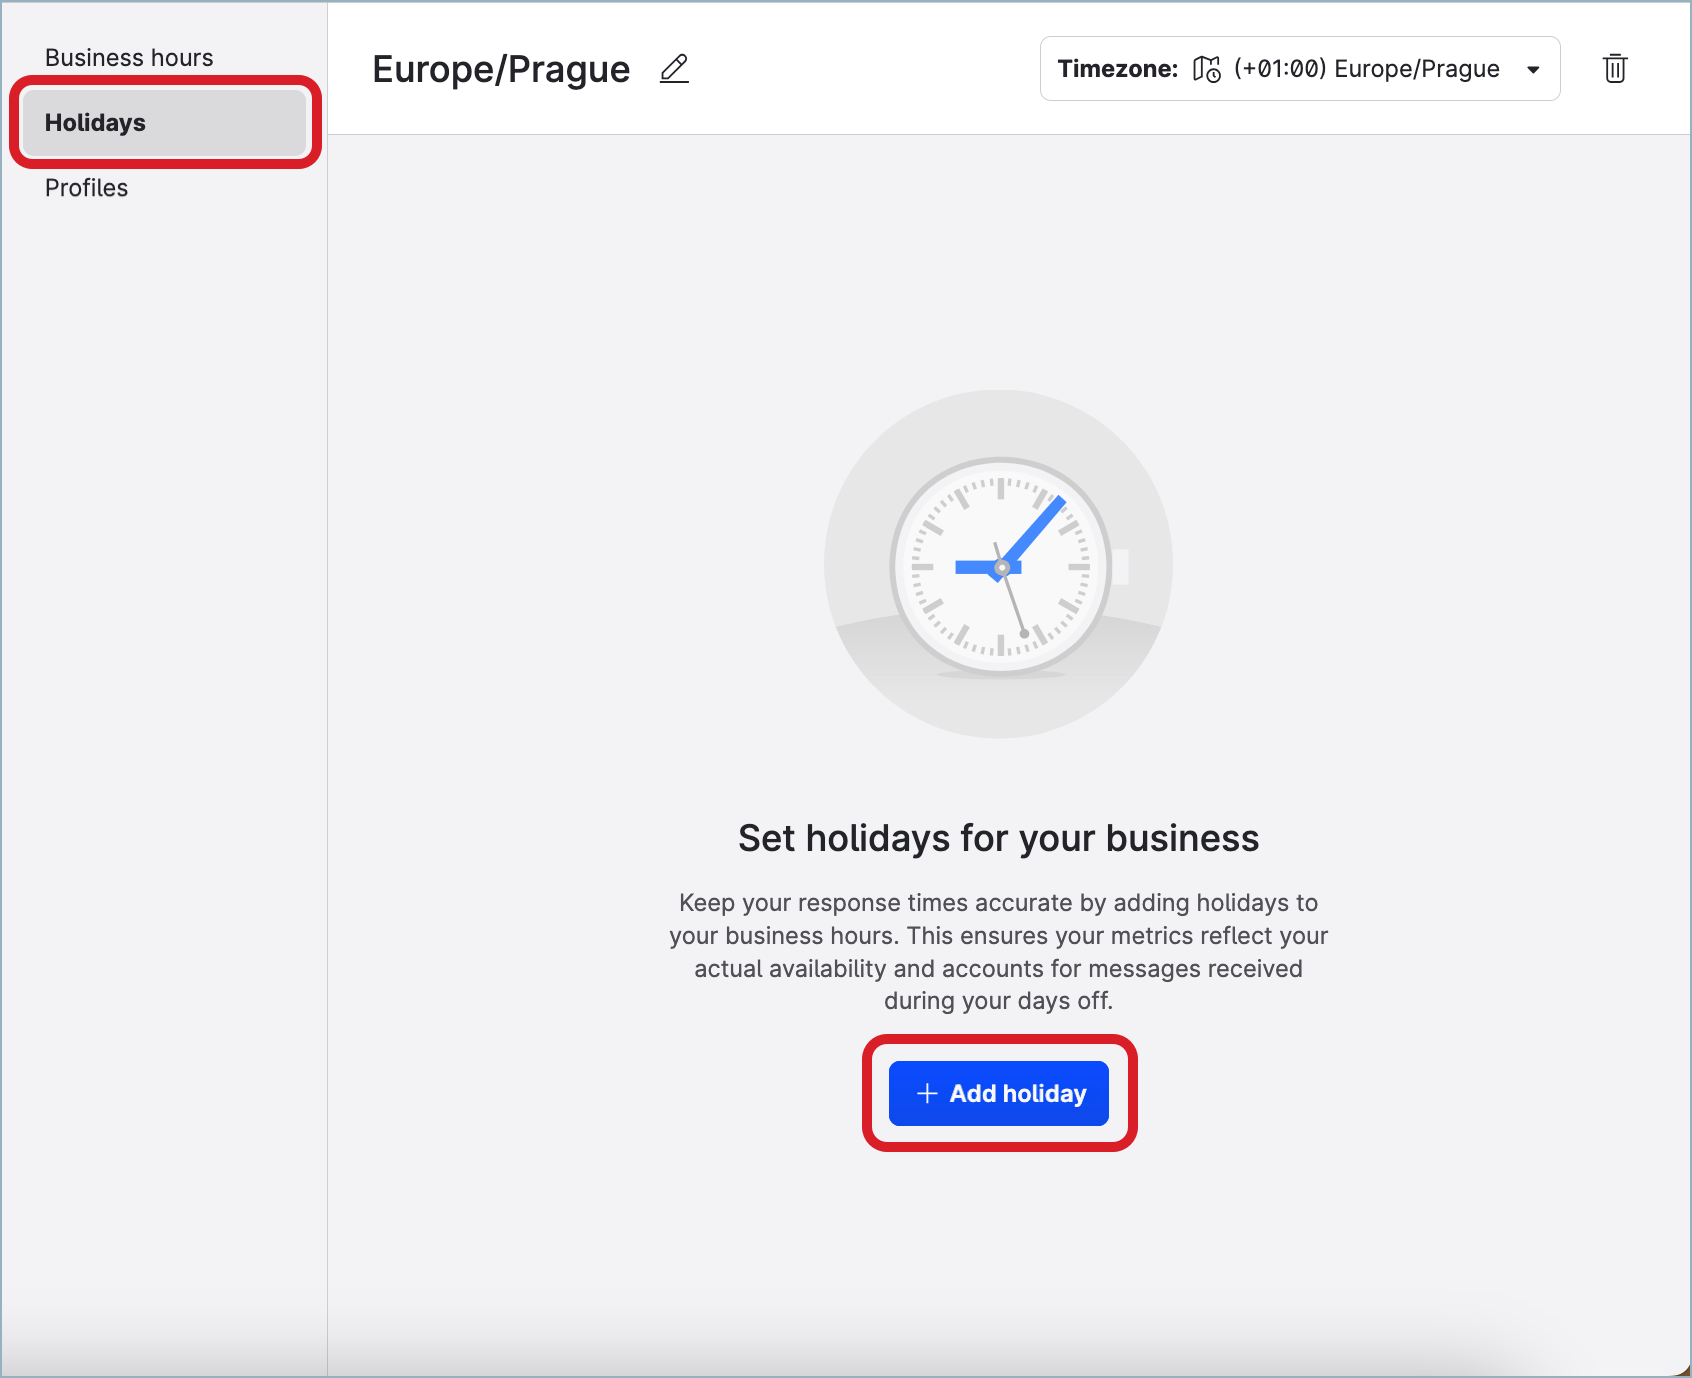
The dialog for creating a new holiday pops up.
-
Enter the name of the holiday, and select the holiday date.
-
If the holiday occurs annually, toggle the switch next to the Repeated yearly option to ON.
-
Do one of the following:
-
If you need to create only this one holiday, click Save.
The dialog closes. The holiday is saved. -
If you need to create several holidays in a row, click Add & next.
The holiday is saved. The dialog remains open, and the fields are cleared so you can fill them in for the next holiday to create.
-
-
Once done, close the business hours panel.
To assign the business hours to profiles, see Assign Business Hours to Profiles. To assign the business hours to users, see Assign Business Hours to Users.
Create business hours by duplicating existing business hours
To be able to create business hours by duplicating existing business hours, you must be an Account Admin or have a custom account role with the “Add & Edit Business hours” permission under the Community & Publisher section (see Account Roles).
Steps:
-
Go to Settings -> Business hours.
-
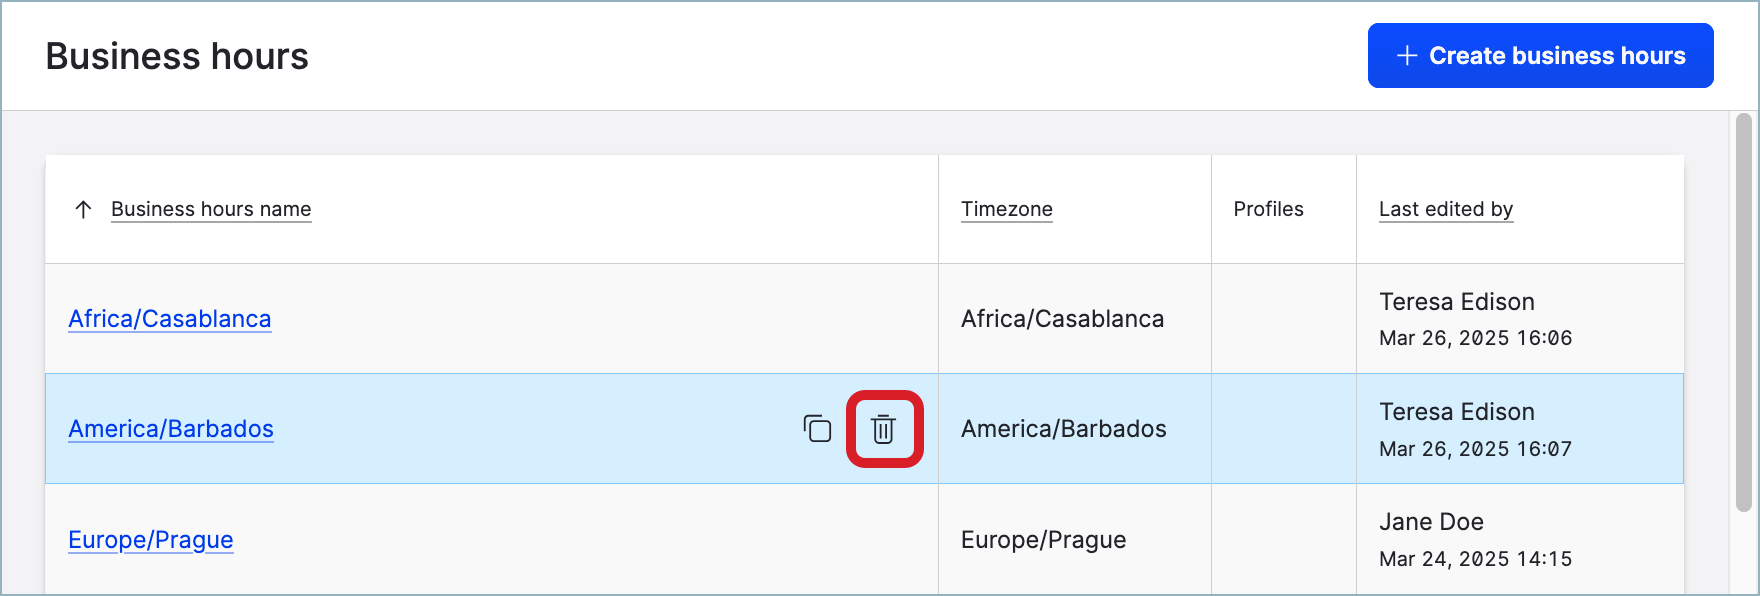
Hover over the business hours that you want to duplicate, and click the copy icon.

New duplicate business hours are created and appear in the list of the business hours.
The new business hours get the same name as the original business hours plus the- copysuffix. For example, if you duplicated the business hours “America/Barbados”, the new profile role will be titled “America/Barbados - copy”. -
Click the newly created business hours.
The business hours panel slides out. -
Click the pencil icon next to the placeholder business hours name.

The dialog for editing the new business hours pops up.
-
Rename the business hours.
-
(Optional) Update the description of the business hours and its timezone.
-
Click Save.
The dialog closes. The business hours are updated. -
Update the schedule as needed. The changes are applied and automatically saved as you make them.
-
If your company is closed on some days of the week, disable these days.
-
For each working day, set the start time and the end time of the business hours.
-
To set up more than one time slot within the same day, click the plus icon to add a time slot. The time slots within one day must not overlap.
-
If your company is open 24 hours a day on some days of the week, select the Online 24h checkbox for these days.
This sets the schedule for these days to “from 0:00 till 24:00”. -
If the business hours are the same for every working day of the week, set up the hours only for Monday and click the copy icon to populate the same hours to all the other working days of the week.
-
-
Click the Holidays tab, and review the holidays.
-
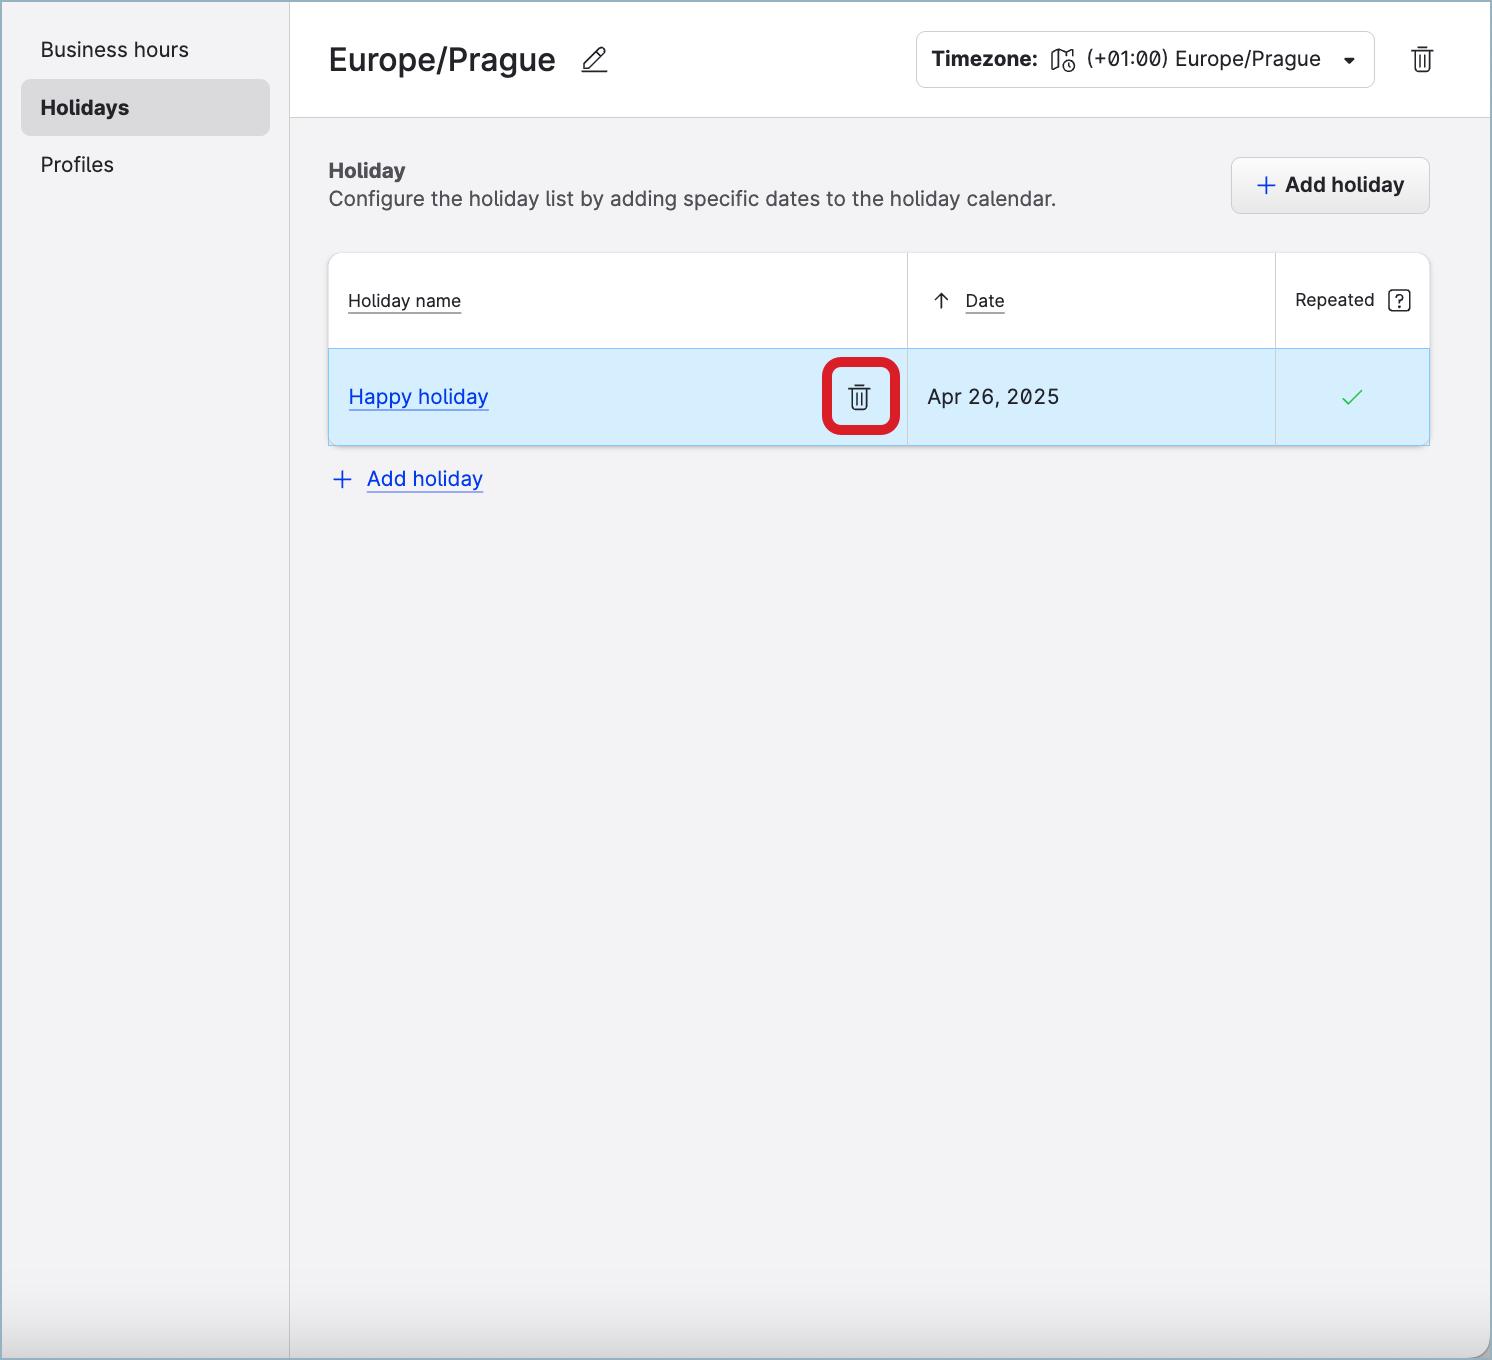
If you want to delete a holiday:
-
Hover over the holiday you want to delete, and click the trash can icon that appears.
-
Confirm the deletion.
The holiday is deleted.
-
-
If you want to add a holiday:
-
Click +Add holiday.

The dialog for creating a new holiday pops up.
-
Enter the name of the holiday, and select the holiday date.
-
If the holiday occurs annually, toggle the switch next to the Repeated yearly option to ON.
-
Do one of the following:
-
If you need to create only this one holiday, click Save.
The dialog closes. The holiday is saved. -
If you need to create several holidays in a row, click Add & next.
The holiday is saved. The dialog remains open, and the fields are cleared so you can fill them in for the next holiday to create.
-
-
-
Once done, close the business hours panel.
To assign the business hours to profiles, see Assign Business Hours to Profiles. To assign the business hours to users, see Assign Business Hours to Users.
Update the name and description of business hours
This section describes how to update the name of business hours and optionally change their description. If you need to update the schedule, timezone, or holidays in business hours, see “Update the schedule, timezone, or holidays in business hours” further in this article.
Renaming business hours and updating their description do not affect the business hours schedule and the profiles and the users that these business hours are assigned to.
To be able to update business hours, you must be an Account Admin or have a custom account role with the “Add & Edit Business hours” permission under the Community & Publisher section (see Account Roles).
Steps:
-
Go to Settings -> Business hours.
-
Click the business hours that you want to update.
The business hours panel slides out. -
Click the pencil icon next to the business hours name.
The dialog for editing the business hours pops up.
-
Rename the business hours.
-
(Optional) Update the description of the business hours.
-
Click Save.
The dialog closes. The changes that you made are saved. -
Close the business hours panel.
Update the schedule, timezone, or holidays in business hours
Updating the schedule, timezone, or holidays in business hours will be applied to all the profiles and the users that the business hours are assigned to.
No data recalculation retrospectively
Updating the schedule, timezone, or holidays in business hours are not applied to the profile and user data retrospectively. When you update the schedule, timezone, or holidays in business hours, the past profile and user data will not be recalculated.
To be able to update business hours, you must be an Account Admin or have a custom account role with the “Add & Edit Business hours” permission under the Community & Publisher section (see Account Roles).
Steps:
-
Go to Settings -> Business hours.
-
Click the business hours that you want to update.
The business hours panel slides out. -
To update the timezone, select the new timezone in the Timezone dropdown.
The change is applied and saved automatically. -
Update the schedule as needed. The changes are applied and automatically saved as you make them.
-
If your company is closed on some days of the week, disable these days.
-
For each working day, set the start time and the end time of the business hours.
-
To set up more than one time slot within the same day, click the plus icon to add a time slot. The time slots within one day must not overlap.
-
If your company is open 24 hours a day on some days of the week, select the Online 24h checkbox for these days.
This sets the schedule for these days to “from 0:00 till 24:00”. -
If the business hours are the same for every working day of the week, set up the hours only for Monday and click the copy icon to populate the same hours to all the other working days of the week.
-
-
To update the holidays, click the Holidays tab.
-
If you want to delete a holiday:
-
Hover over the holiday you want to delete, and click the trash can icon that appears.
-
Confirm the deletion.
The holiday is deleted.
-
-
If you want to add a holiday:
-
Click +Add holiday.
The dialog for creating a new holiday pops up.
-
Enter the name of the holiday, and select the holiday date.
-
If the holiday occurs annually, toggle the switch next to the Repeated yearly option to ON.
-
Do one of the following:
-
If you need to create only this one holiday, click Save.
The dialog closes. The holiday is saved. -
If you need to create several holidays in a row, click Add & next.
The holiday is saved. The dialog remains open, and the fields are cleared so you can fill them in for the next holiday to create.
-
-
-
Once done, close the business hours panel.
Delete business hours
When you delete business hours, they will be unassigned from all the profiles and users that the business hours are assigned to. It will affect the response time metrics that you may be tracking for Community operations, the SLA policies set up in Care and configured to run during profile or user business hours, and metrics reflecting the performance of individual Care users.
No data recalculation retrospectively
Deleting business hours are not applied to the profile and user data retrospectively. When you delete business hours, the past profile and user data will not be recalculated.
To be able to delete business hours, you must be an Account Admin or have a custom account role with the “Add & Edit Business hours” permission under the Community & Publisher section (see Account Roles).
Steps:
-
Go to Settings -> Business hours.
-
Hover over the business hours that you want to delete, and click the trash can icon that appears.
-
Confirm the deletion.
The business hours are deleted.
Assign business hours to profiles
See Assign Business Hours to Profiles.