You can configure Care to automatically unassign cases from Care agents once the agents' status switches to “Away” or “Offline”. This helps you ensure that cases continue to be handled by Care agents who are currently available, preventing delays in processing the cases, and helps avoid extra work of unassigning cases manually.
This article is for users with the Manage Care workflows permission in Care. For more information about Care permissions, see Set up Care permissions.
How it works
When an agent switches their status to “Away” or “Offline” (depending on how you configure it; see further in this article), all of the Care cases assigned to this agent (except the cases in the status of Spam or Done) are automatically unassigned. The status of the unassigned cases changes to New. The cases return to the pool of unassigned cases where other agents can pick them up manually, or supervisors can assign the cases to the available agents, or the cases can get automatically assigned to the available agents if you configured automated case assignment in Care (see Automatically Assign Cases in Care).
For more information about agent statuses, see Control Your Online Presence and Status in Care.
Steps:
-
Go to Settings -> Care -> Workflows.
-
Toggle the switch next to the Unassign cases automatically option to ON.
The option for configuring criteria for unassigning cases appears.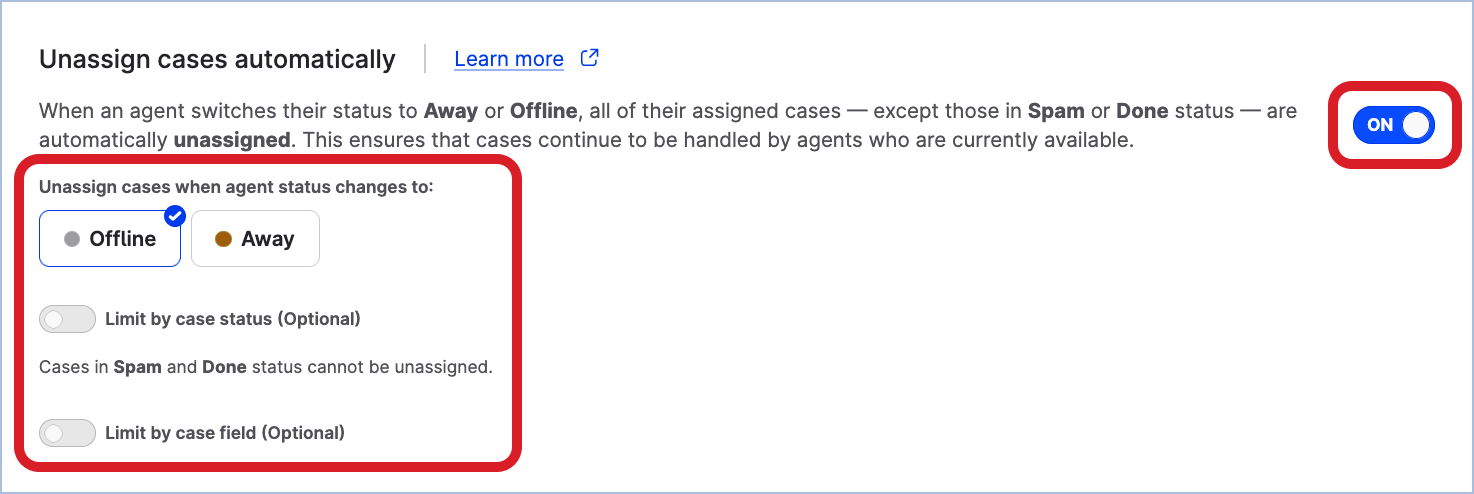
-
Select the agent status that triggers the cases to be unassigned.
When an agent changes their status to the one of those you selected, the cases will be automatically unassigned from this agent.
Depending on your business processes, you can select “Offline”, or “Away”, or both. -
If you want to narrow down the cases to be unassigned by case status, toggle the switch next to the Limit by case status (Optional) section to ON.

The section for selecting case statuses appears.
For more information about case statuses, see Change the Status of a Care Case.
-
Select the statuses of the cases to be unassigned.
When an agent changes their status to one of the statuses that you configured at Step 3, only the cases with the statuses that you select at this step will be automatically unassigned from this agent.
Depending on your business processes, you can select one or more case statuses. For example, you may want to unassign the cases in the status ofOpenorPending, but the cases in the status ofOn holdcan remain assigned to the agent.
SpamorDonecannot be unassigned. -
If you want to narrow down the cases to be unassigned by case field, toggle the switch next to the Limit by case field (Optional) section to ON.
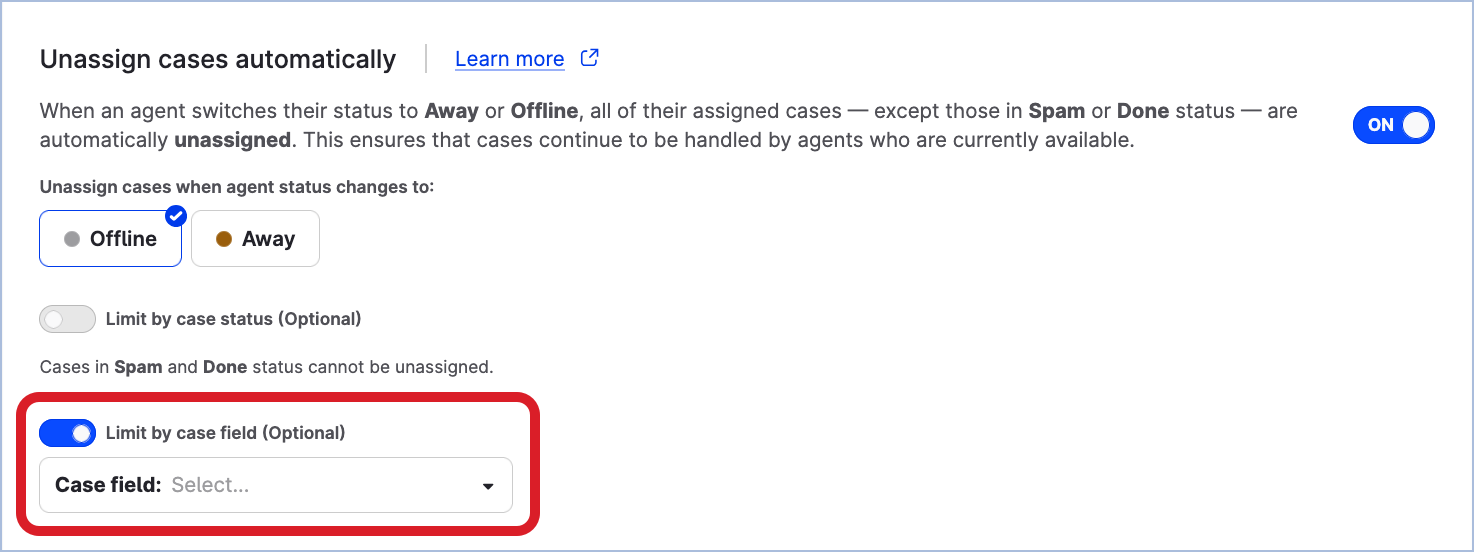
The section for selecting the case field appears.
-
Select the case field, then select the the value of this case field.

When an agent changes their status to one of the statuses that you configured at Step 3, only the cases with the specified case field set to the value that you select at this step will be automatically unassigned from this agent.
-
Once done, click Save at the bottom of the page.
The automated status switch is enabled.