Connecting and Managing Ad Accounts
Connecting an ad account allows you to access a comprehensive view of your ad spend, costs, and engagement. Using these ad insights, report on your performance, see what is resonating with your audience, and discover how you can spend smarter to maximize the value of your ad strategy, and ultimately, deliver on business objectives.
This article is for the users who have an account role with the “Add Pages & Profiles” permission (that is, for Account Admins and the users who have a custom account role with the “Add Pages & Profiles” permission under “Pages & Profiles”; see Account Roles).
Supported platforms
You can add the following ad accounts to your Emplifi account:
Meta (see Add a Meta Ad Account)
Facebook
Instagram
Threads
WhatsApp
Messenger
Audience network
TikTok (see Add a TikTok Ad Account)
TikTok
Pangle
TikTok Global App Bundle
X (formerly Twitter; see Add an X (formerly Twitter) Ad Account)
X
Publisher network
Where to find ad accounts
You can access all the ad accounts in the Settings section of your Emplifi account, under Channels -> Ad accounts.
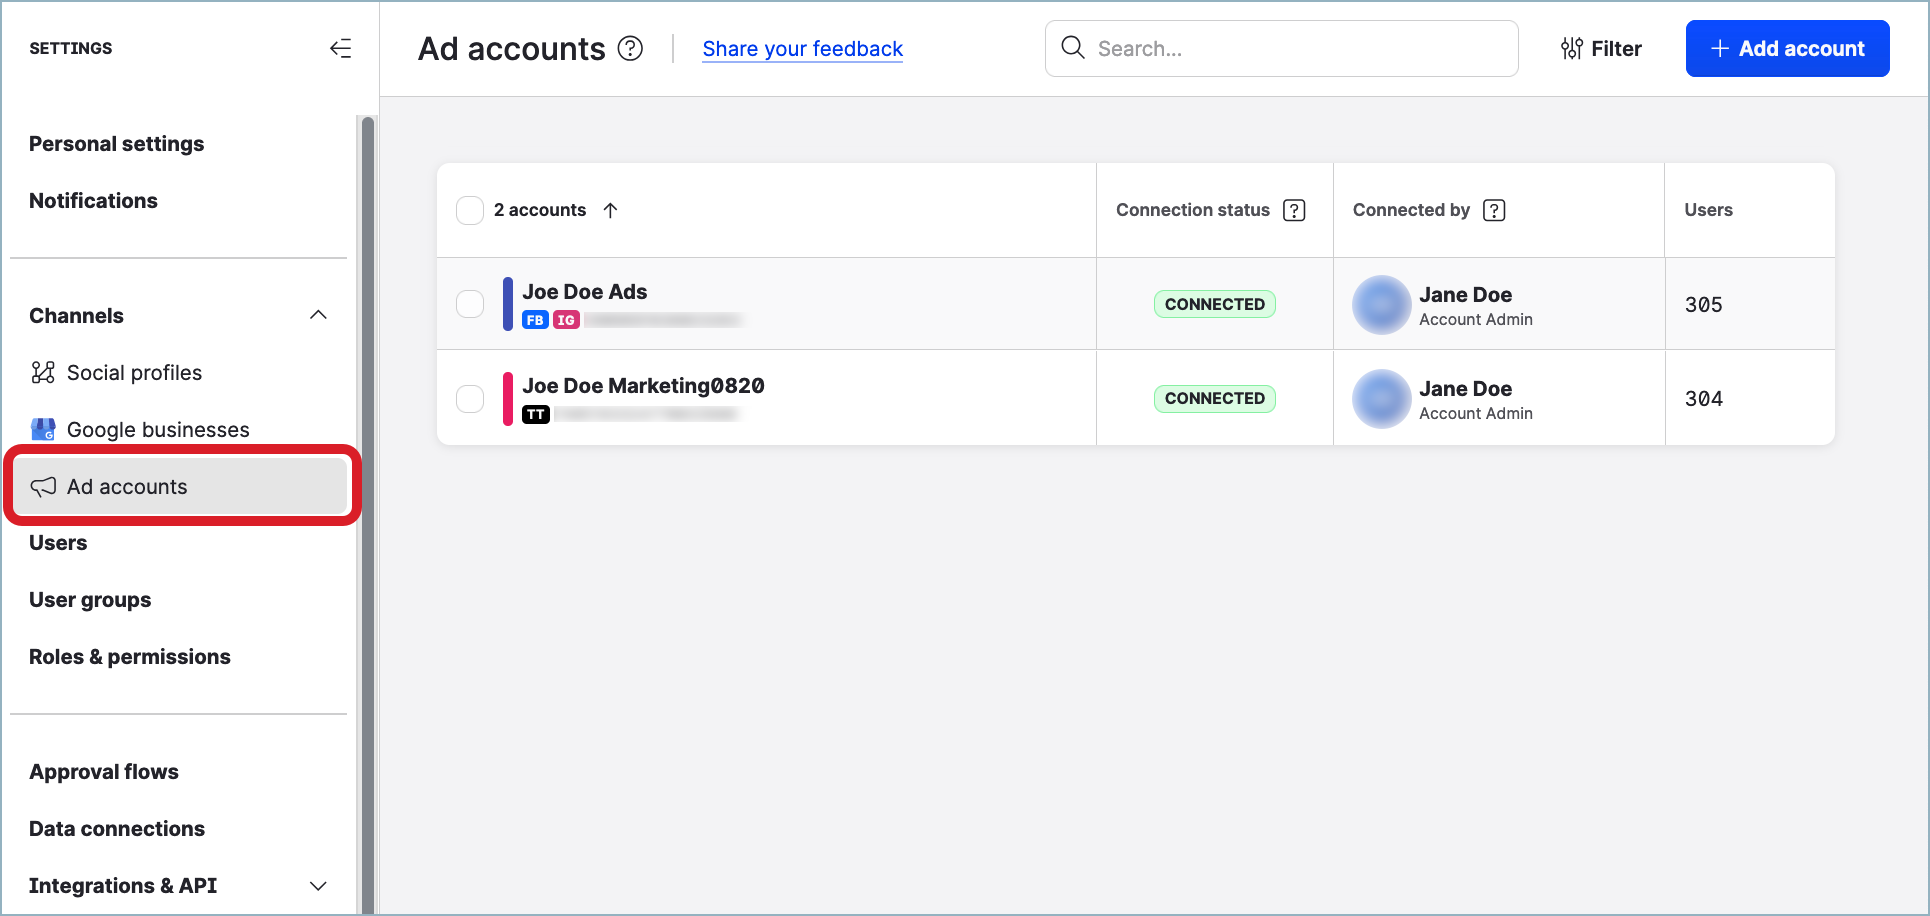
Manage access to ad accounts
Only users who are assigned to an ad account can access this ad account.
Ad account permissions
What a user is allowed to do with an ad account is managed by the ad account permission assigned to the user for this ad account:
View
The users with the “View” permission can view data of the assigned ad accounts in Unified Analytics, Dashboard, and Content (see “Analyze your ad performance” further in this article).Manage
The users with the “Manage” permission can view data of the assigned ad accounts in Unified Analytics, Dashboard, and Content, assign users to and remove users from the ad accounts, and change the other users' ad account permissions.
When a user is not assigned to an ad account, they have no access to this ad account at all.
Who can and cannot access ad accounts
By default, all Account Admins are assigned to all ad accounts in the Emplifi account and have the “Manage” permission for each ad account. This cannot be changed.
The user who initially connected an ad account and any user who connected to the ad account at any time later are also automatically assigned to this ad account with the “Manage” permission.
A user who is not an Account Admin does not have access to ad accounts unless they are assigned to the ad accounts. To grant a user access to an ad account, assign this user to the ad account with a specific permission (see further in this article).
Assign users to an ad account
When you assign a user to an ad account, you grant this user access to the ad account and define the user’s permission for the ad account.
By default, all Account Admins are assigned to all ad accounts in the Emplifi account. You do not have to assign a user who is an Account Admin to the ad account - this user was assigned to all the ad accounts automatically once they were assigned the Account Admin account role.
To be able to assign users to an ad account, you must be an Account Admin (see Account Roles) or be assigned to this ad account with the “Manage” permission.
Steps:
Go to Settings -> Channels -> Ad accounts.
Click the ad account that you want to assign users to.
The ad account opens.Click the Users tab.
Click +Add user.
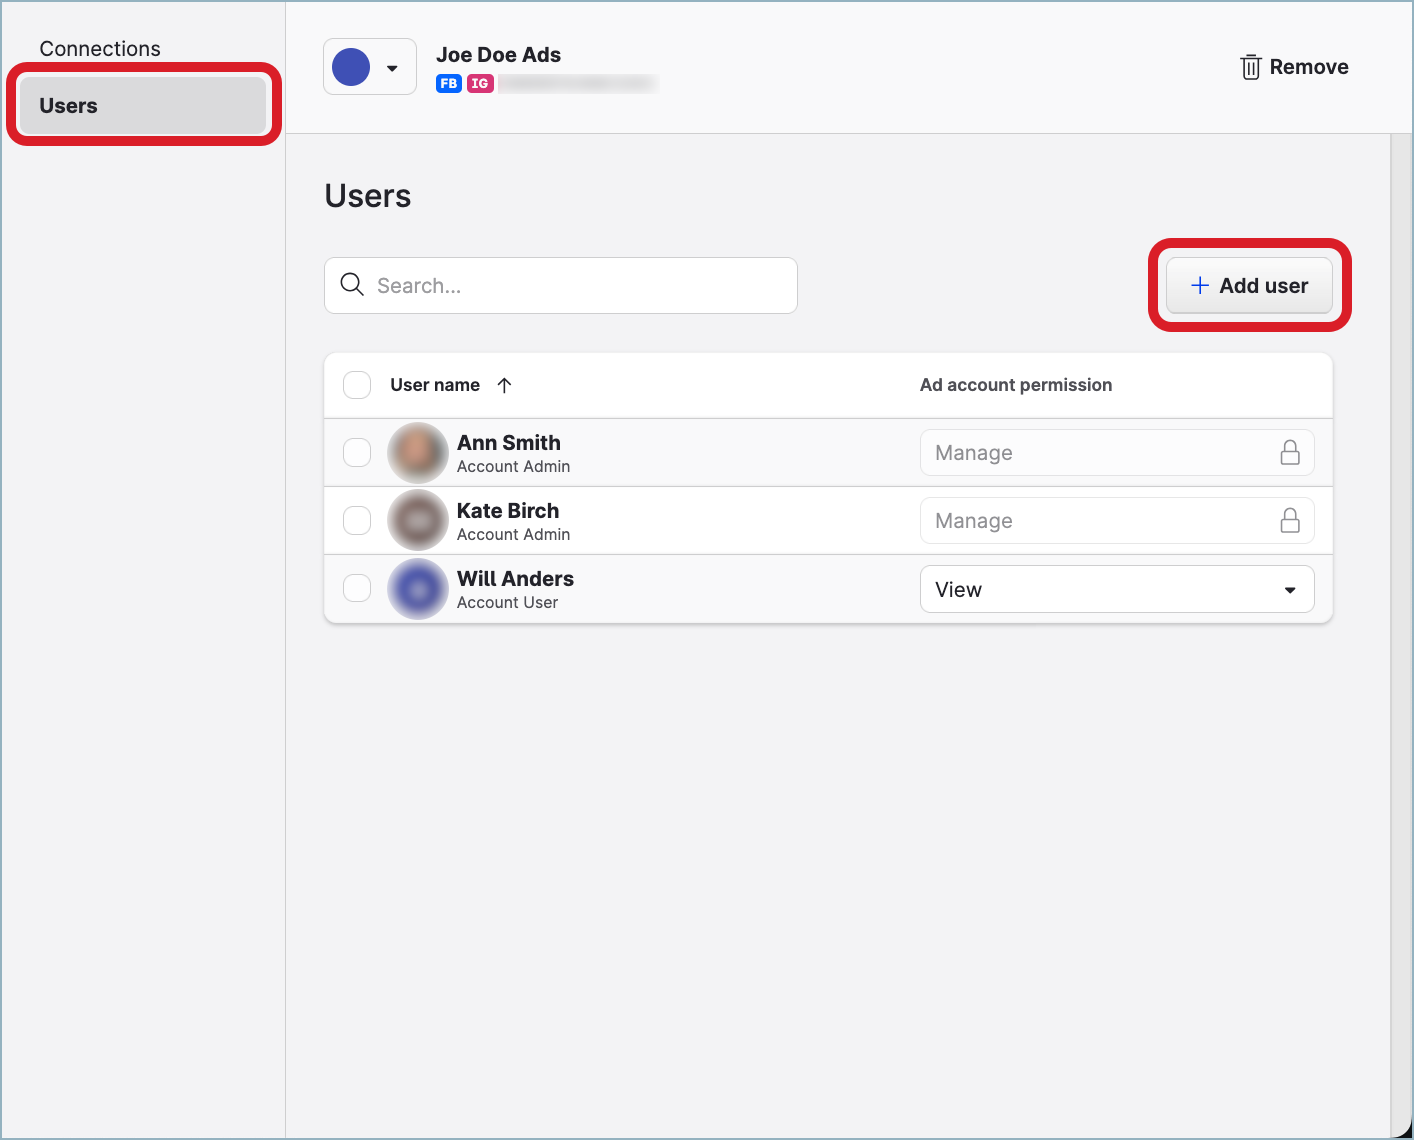
The dialog for assigning users to the ad account pops up.
Select the users to assign to the ad account.
From the Ad account permission for new users dropdown, select the permission to assign to the selected users.
By default, the “View” ad account permission is selected.Click Add users.
The users are assigned to the ad account and appear in the list of users on the Users screen.
The assigned users are granted access to the ad account according to the selected permission.
Assign users to multiple ad accounts
You can assign one or more users to multiple ad accounts at the same time.
When you assign users to one ad account, you can choose what permission to assign the users for this ad account. When you assign users to multiple ad accounts simultaneously, you cannot choose the permission: all the users will be assigned to the ad accounts with the “View” permission. If you want to then change it to a different ad account permission for some users and some ad accounts, you need to do it for each ad account individually (see “Change a user’s ad account permission for an ad account” further in this article).
By default, all Account Admins are assigned to all ad accounts in the Emplifi account. You do not have to assign a user who is an Account Admin to the ad account - this user was assigned to all the ad accounts automatically once they were assigned the Account Admin account role.
To be able to assign users to multiple ad accounts, you must be an Account Admin (see Account Roles) or be assigned to these ad accounts with the “Manage” permission.
Steps:
Go to Settings -> Channels -> Ad accounts.
Select the ad accounts that you want to assign users to. You can first filter the ad accounts to narrow down the initial selection (see further in this article).
The bar with action buttons appears at the bottom of the page.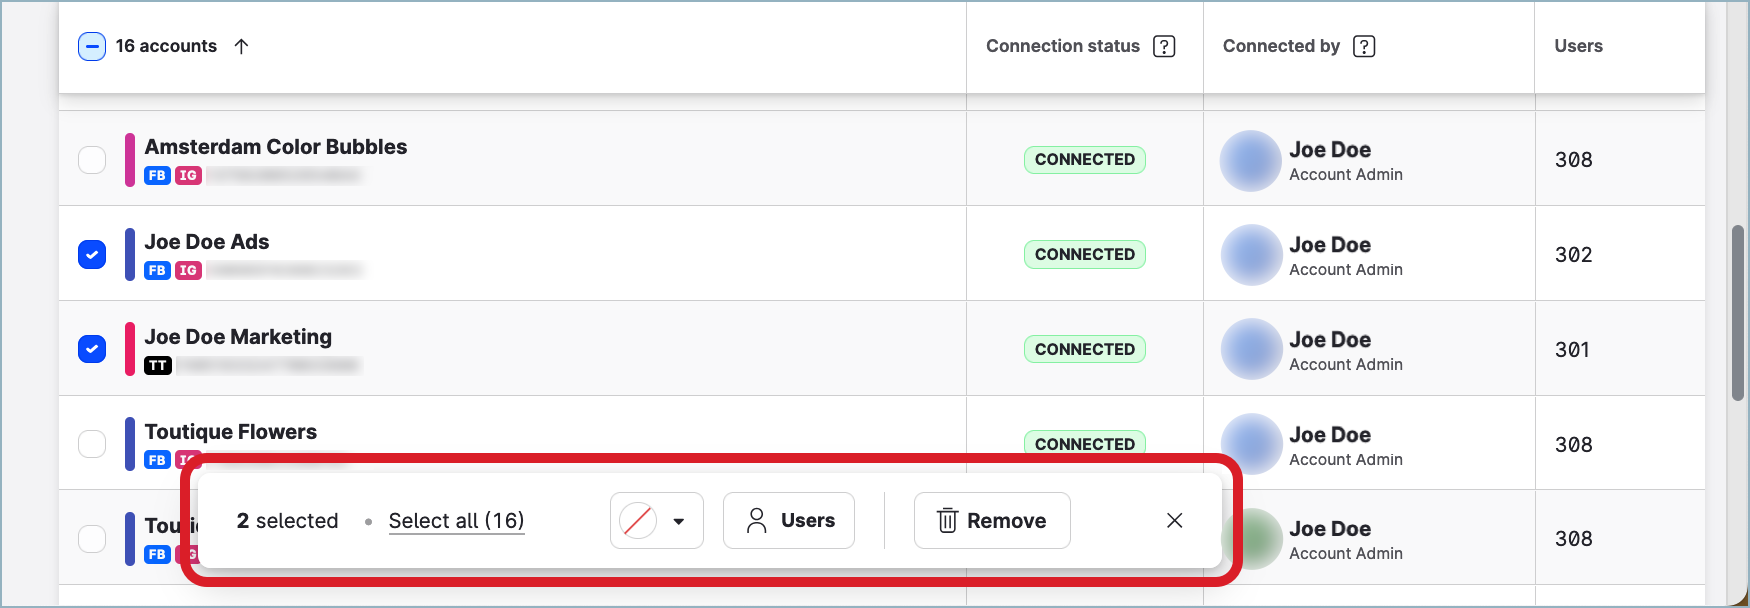
Click Users, select the users to assign to the ad accounts, and click Apply.
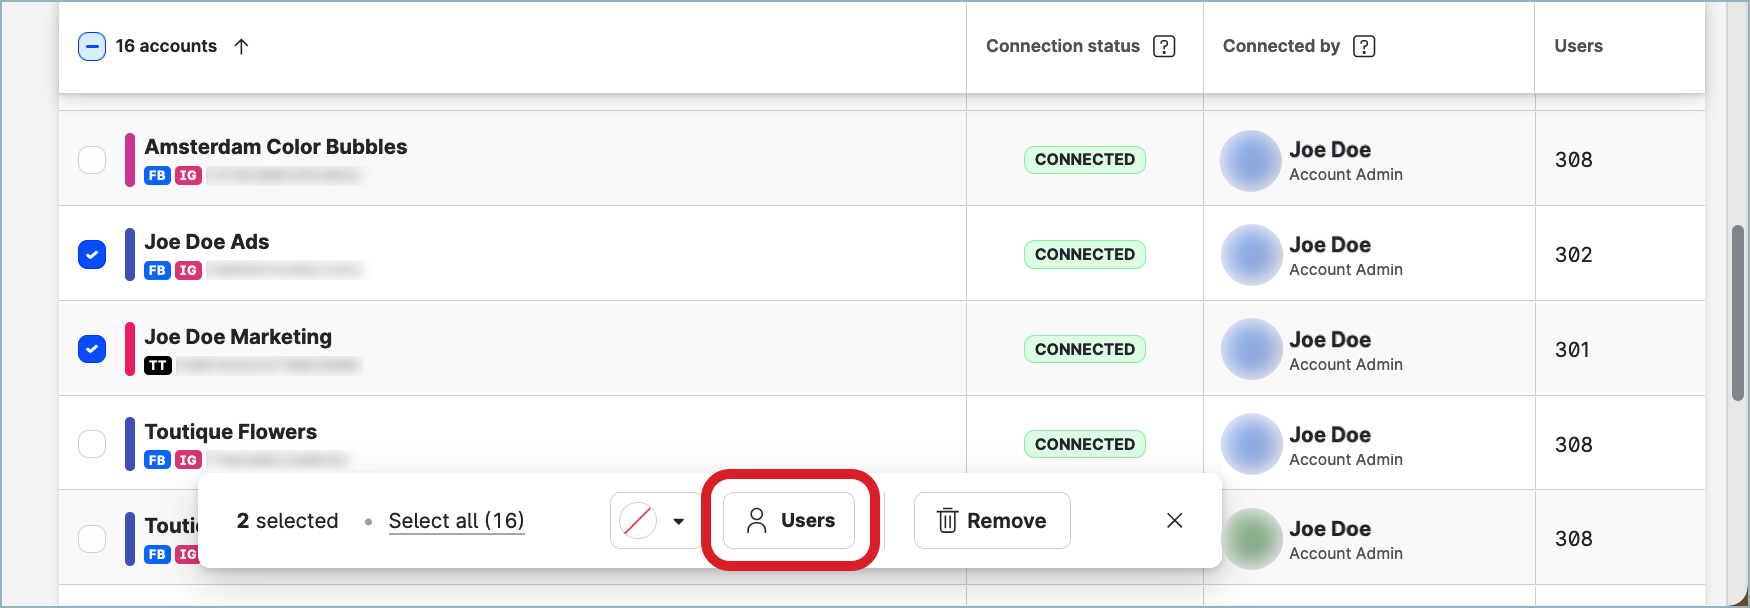
The users are assigned to the ad accounts with the “View” ad account permission. If you want to change it to a different permission for some users and some ad accounts, do it for each ad account individually (see “Change a user’s ad account permission for an ad account” further in this article).
Find out what ad account permission a user has
To be able to find out what ad account permission a user has for an ad account, you must be an Account Admin (see Account Roles) or be assigned to this ad account with any ad account permission.
All Account Admins have the “Manage” ad account permission for all ad accounts by default.
The user who initially connected an ad account and any user who connected to the ad account at any time later are automatically assigned to this ad account with the “Manage” ad account permission.
Steps:
Go to Settings -> Channels -> Ad accounts.
Select the ad account for which you want to check the user’s ad account permission.
The ad account opens.Click the Users tab.
Find the user.
The ad account permission is displayed in the Ad account permission dropdown.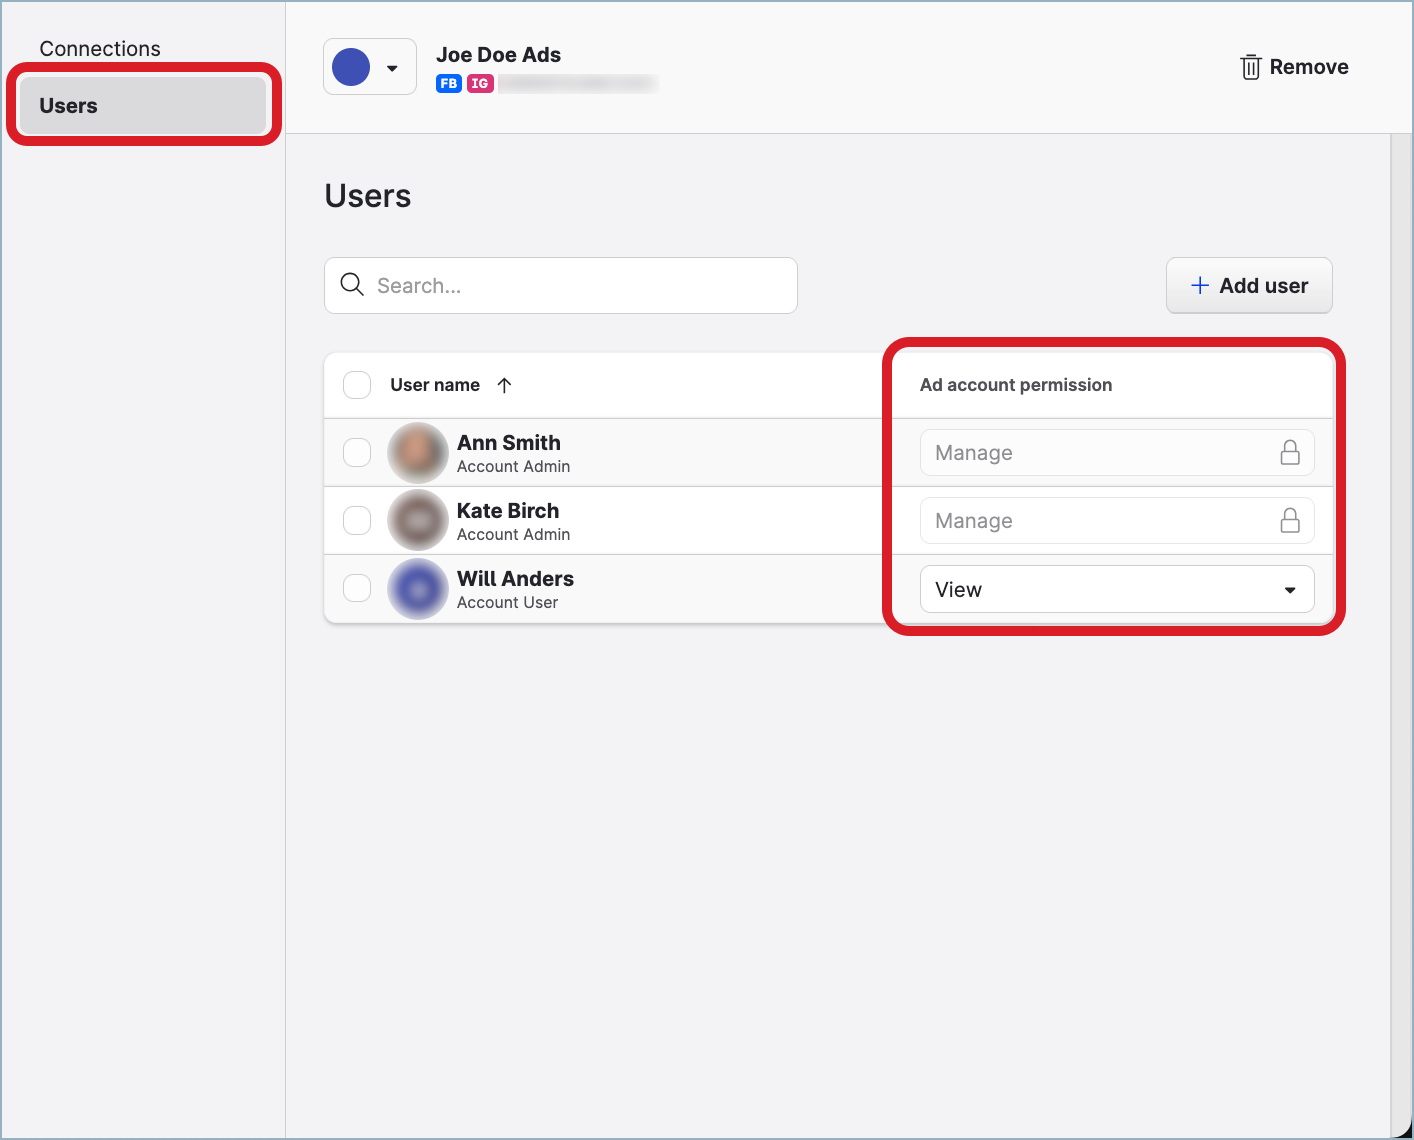
Change a user’s ad account permission for an ad account
Changing a user’s ad account permission for an ad account changes what a user is allowed to do with the ad account.
You cannot change a user’s ad account permission if this user is an Account Admin (see Account Roles). All Account Admins have the “Manage” ad account permission for all ad accounts by default. This cannot be changed.
To be able to change the ad account permission for the other user, you must be an Account Admin (see Account Roles) or be assigned to the ad account with the “Manage” ad account permission.
Steps:
Go to Settings -> Channels -> Ad accounts.
Select the ad account for which you want to change the user’s ad account permission.
The ad account opens.Click the Users tab.
Find the user whose ad account permission you want to change, and select the new permission in the Ad account permission dropdown.
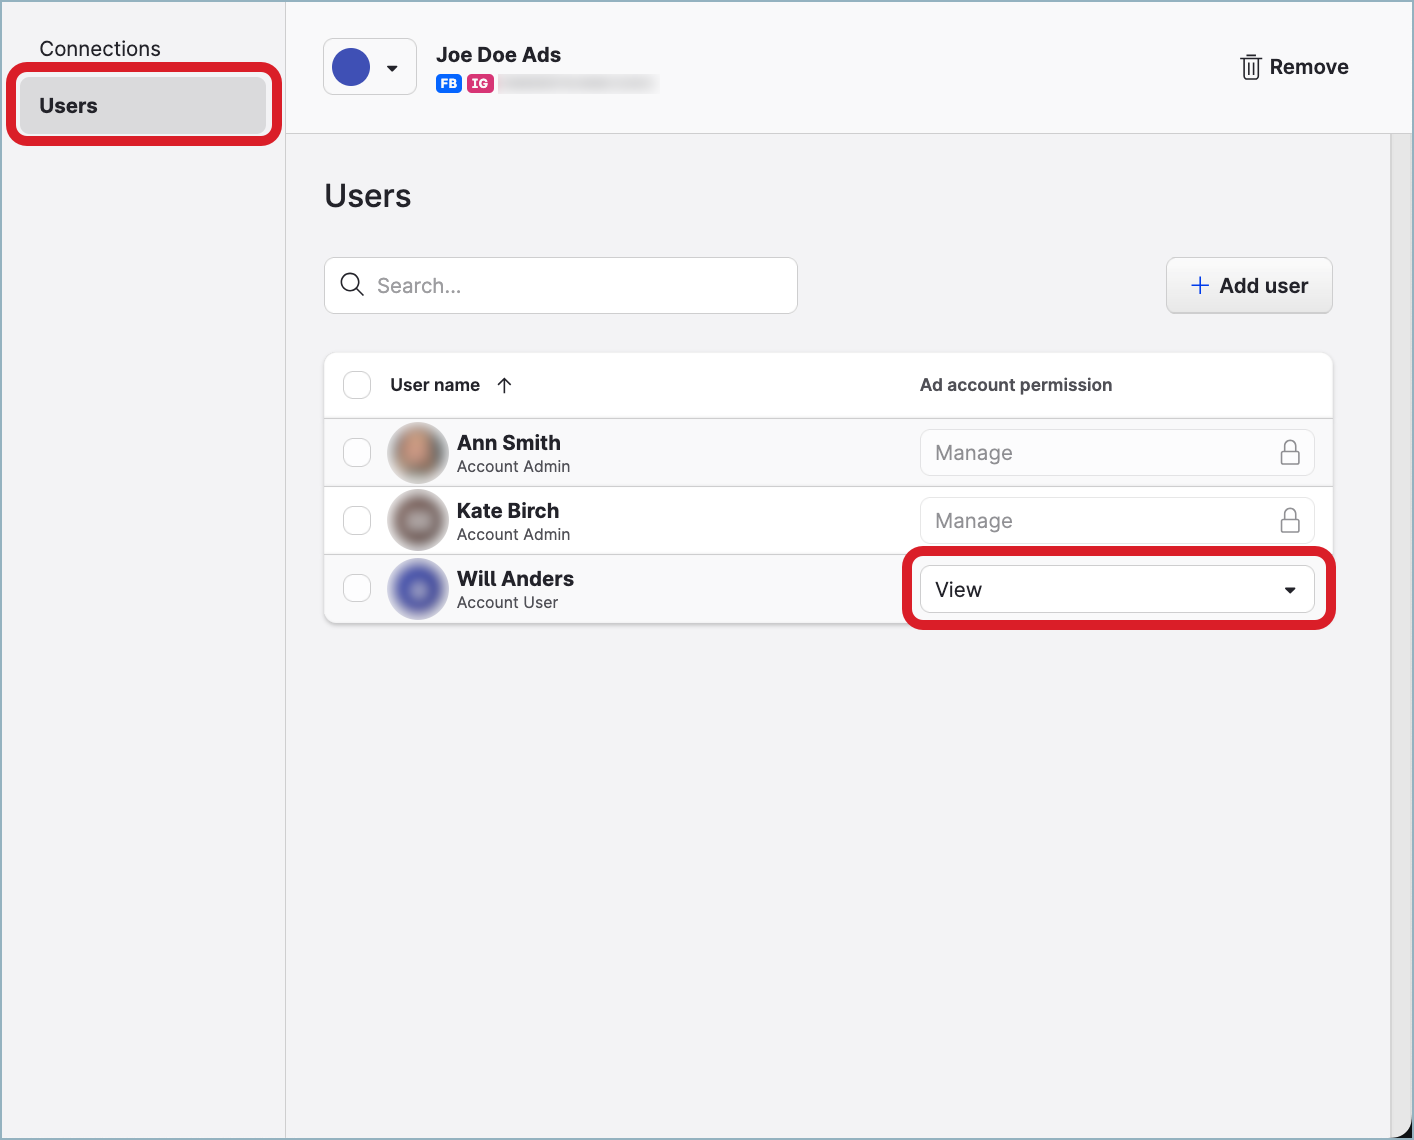
 To change the ad account permissions for multiple users at once, select the users, click Ad account permission on the bar with action buttons that appears at the bottom of the page, and select the new ad account permission to assign.
The change is automatically applied and saved.
Remove users from an ad account
When you remove a user from an ad account, this user loses access to the ad account. They no longer can see this ad account or view data of this ad account in Unified Analytics, Dashboard, and Content.
By default, all Account Admins are assigned to all ad accounts in the Emplifi account and have the “Manage” ad account permission for each ad account. You cannot remove an Account Admin from an ad account.
Steps:
Go to Settings -> Channels -> Ad accounts.
Click the ad account that you want to remove users from.
The ad account opens.Click the Users tab.
Hover over the user that you want to remove from the ad account, and click the trash can icon that appears.
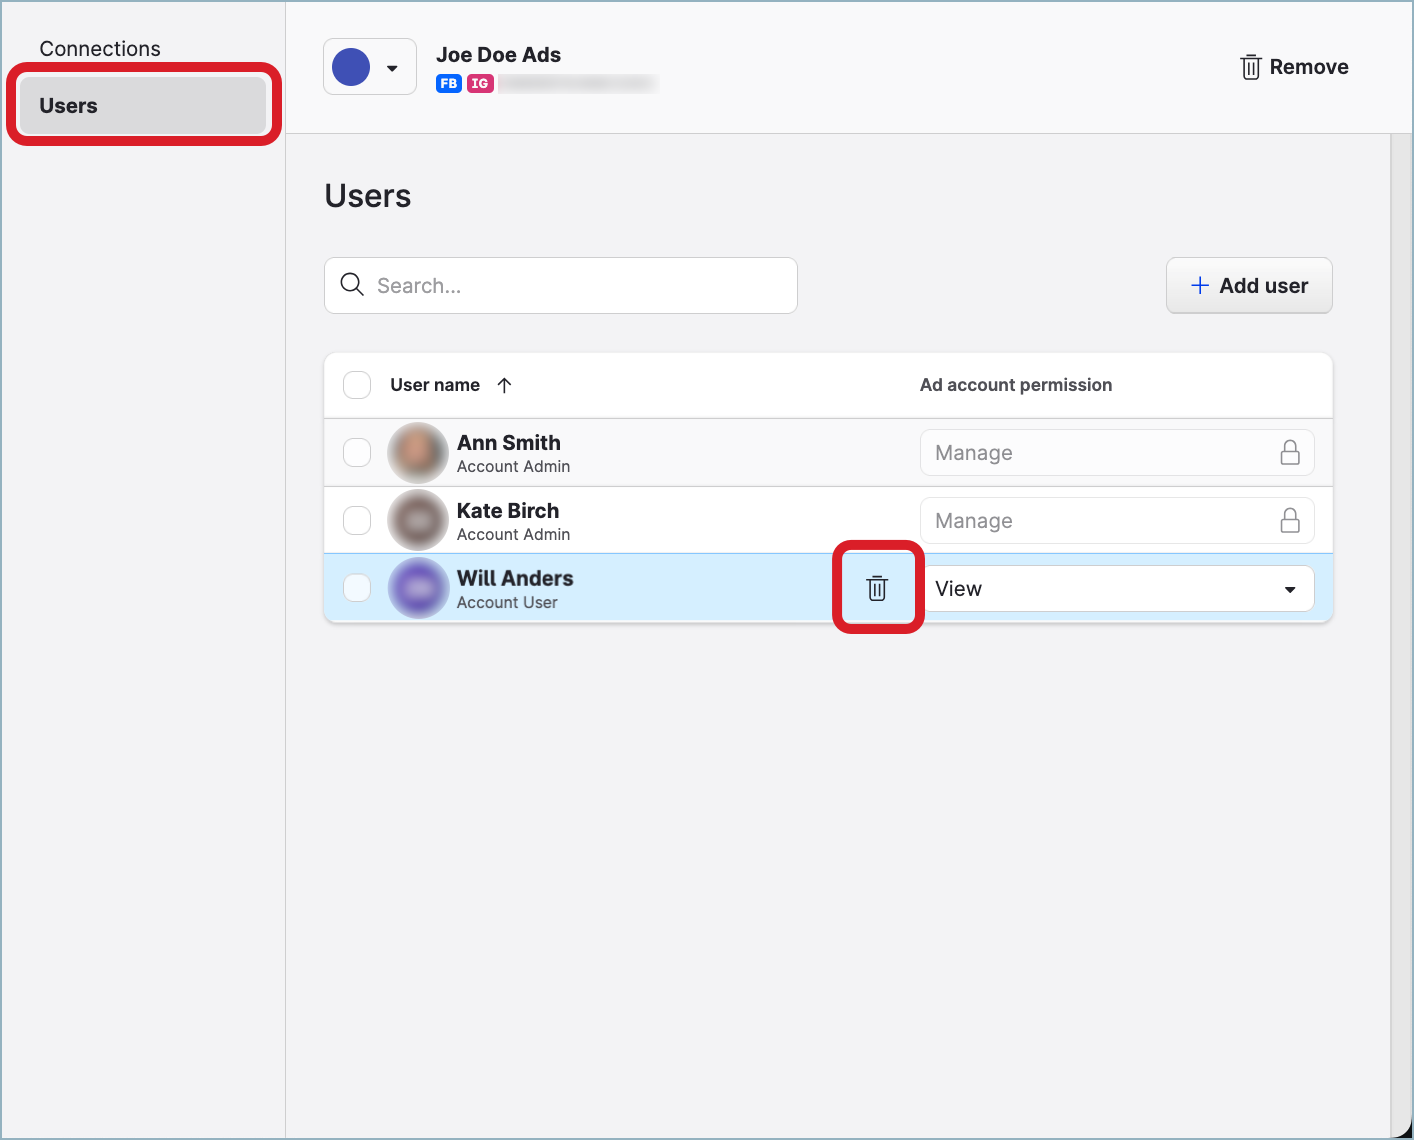
 To remove multiple users from the ad account, select the users to remove, and click Remove on the bar with action buttons that appears at the bottom of the page.
Confirm the deletion.
The user is removed from the ad account.
Filter ad accounts
Filter ad accounts to display only the ad accounts that meet certain criteria.
To be able to filter ad accounts, you must be an Account Admin (see Account Roles) or be assigned to the ad accounts with any ad account permission.
The following filtering criteria are available for ad accounts:
Platforms
Facebook & Instagram
 This options covers all supported Meta platforms (see “Supported platforms” earlier in this article).
TikTok
X
Connection status
The connection status of ad accounts is similar to the connection status of profiles. For more information, see Check and Establish Connections of Owned Profiles.Connected
Expired
Users
The users who are assigned to ad accounts
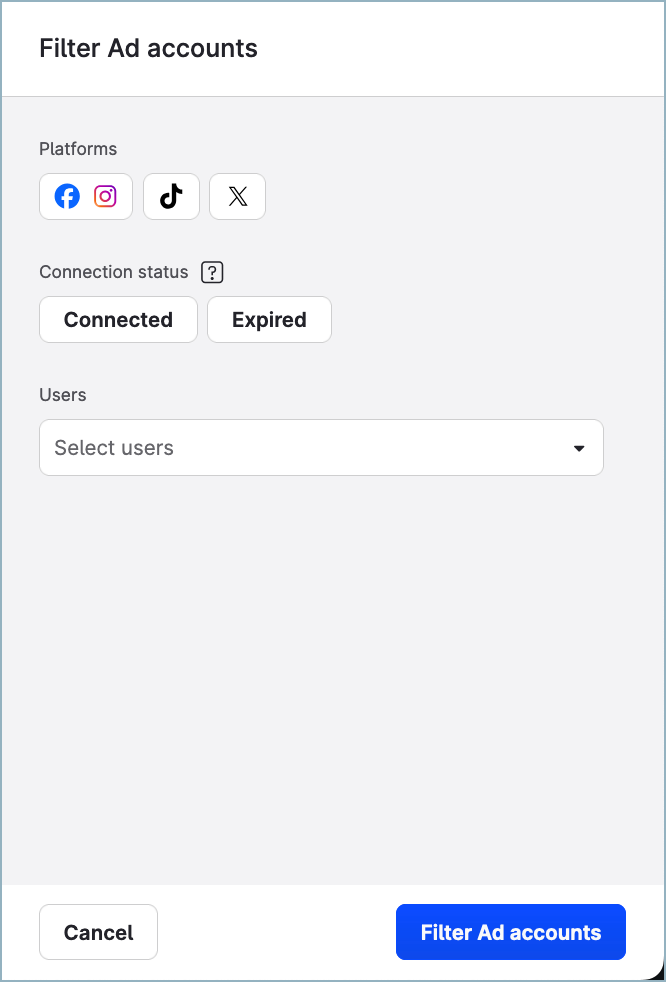
Steps:
Go to Settings -> Channels -> Ad accounts.
Click Filter on the top right.

The filter panel opens.
Set up the filter criteria, and click Filter Ad accounts.
The ad accounts that meet the filter criteria are listed.
To clear the filter and return to listing all the ad accounts, click the cross icon next to Filter on the top right.

Find out who added an ad account and when
The information about who added an ad account and when it was done is available depending on your account role.
The information about when an ad account was added to the Emplifi account is visible to the users who have an account role with the “View Pages & Profiles” permission (that is, for Account Admins, Account Users, and the users who have a custom account role with the “View Pages & Profiles” permission under the Pages & Profiles section; see Account Roles).
The information about who added an ad account to the Emplifi account is visible to the users who have an account role with the “View Users” permission (that is, for Account Admins, Account Users, and the users who have a custom account role with the “View Users” permission under the Users section; see Account Roles).
 If the user who added the ad account was deleted from the Emplifi account since, the information about who added the ad account is not displayed and is not visible to anyone.
To be able to find out who added an ad account and when, you must be an Account Admin (see Account Roles) or be assigned to this ad account with any ad account permission.
Steps:
Go to Settings -> Channels -> Ad accounts.
Find and click the ad account.
The information about the user who added the ad account and when it was done is displayed on the Connections tab.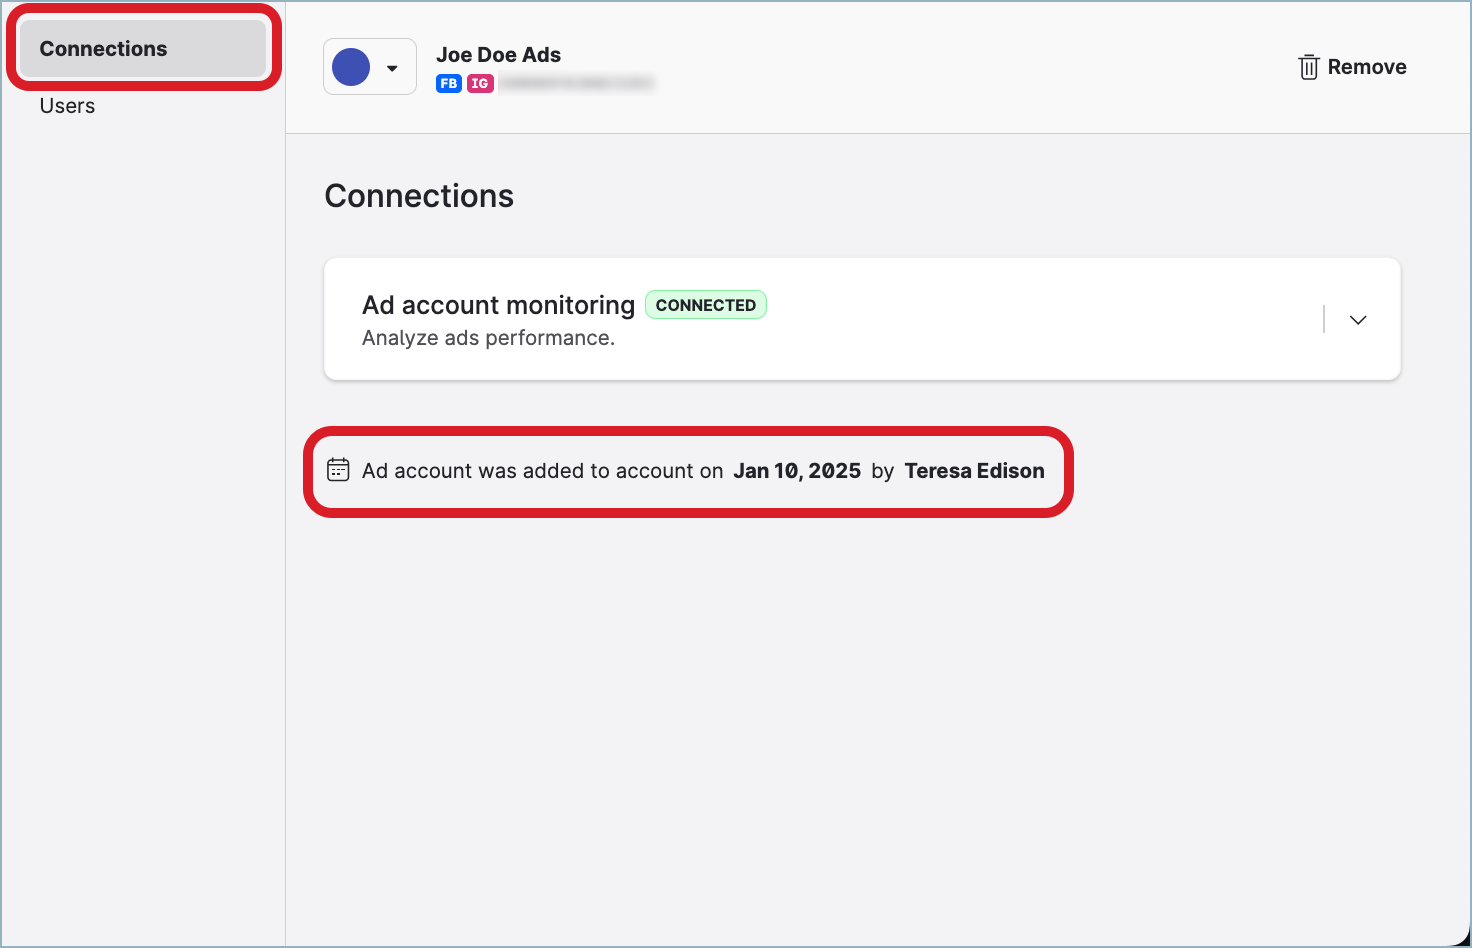
Change the color code of an ad account
Customize the default color of any ad account.
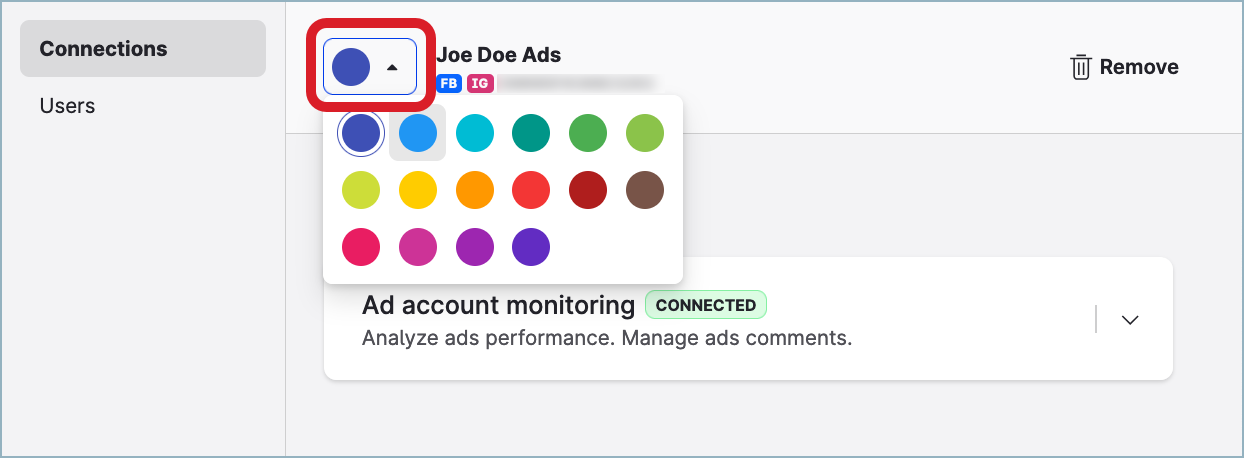
This determines how the ad account appears in various environments across the Emplifi platform, for example, in the analytics tooling and in the Content module.
You can update the color code of multiple ad accounts at once.
Steps:
Go to Settings -> Channels -> Ad accounts.
Select the ad accounts whose color code you want to update. You can first filter the ad accounts to narrow down the initial selection (see earlier in this article).
The bar with action buttons appears at the bottom of the page.
Click the color code icon, and select the color.
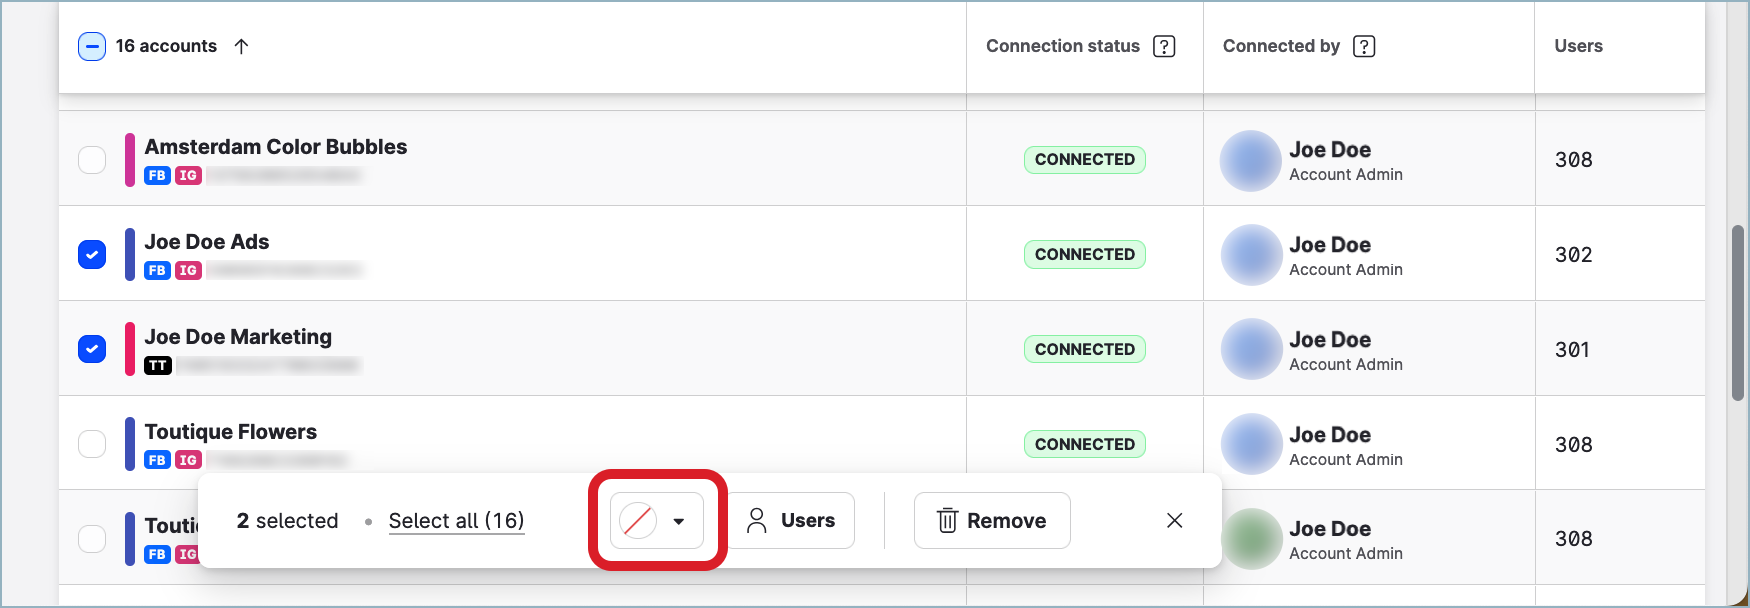
The color code changes for the selected ad accounts.
Delete an ad account
Deleting an ad account deletes all the data related to this ad account. This data is no longer visible in the Emplifi account and cannot be reviewed or analyzed.
To be able to delete an ad account, you must be an Account Admin (see Account Roles).
Steps:
Go to Settings -> Channels -> Ad accounts.
Hover over the ad account that you want to delete, and click the trash can icon that appears.

 To delete multiple ad accounts, select the ad accounts to delete, and click Remove on the bar with action buttons that appears at the bottom of the page.
Confirm the deletion.
The ad account is deleted.
Analyze your ad performance
You can analyze your ad performance from various perspectives:
Review aggregated ad data.
Access essential paid metrics for your ad accounts and campaigns, and compare paid activities across multiple social platforms.
To do so, go to Unified Analytics, and click Paid (see Paid and Organic Data in Unified Analytics).Discover ad-level insights.
Oversee all ads being served from your ad accounts, and review metrics for each individual piece of ad content.
To do so, go to Content, and click Ads (see Ads in Content Hub).Create a dashboard.
Go to Dashboard, and add widgets from the Ads and paid content performance category (see Ads widgets in Dashboard and Create a New Dashboard).
To be able to see and use an ad account in these modules of the Emplifi platform (that is, to select an ad account as a data source in a Dashboard widget or in Unified Analytics, or to see the ad account when searching for content in Content), you must be assigned to this ad account (see “Manage access to ad accounts“ earlier in this article).
