You can boost the efficacy of your Care operations by using user groups (see Organize Users into User Groups). User groups can help you manage Care users in a company, especially when it has multiple Care teams.
Here are some challenges that you may face:
-
Onboarding a new member of a Care team (specifically, assigning the new Care user skills and granting them access to appropriate case views) may be time-consuming.
-
Re-assigning a Care agent from one Care team to another requires you to revoke the agent’s access to the current team’s views and grant access to the new team’s views.
To optimize these processes, organize Care users into user groups and then associate views and skills to the user groups instead of individual users. Every time a new member joins a Care team, just add them to the appropriate user groups, and the new member will automatically get access to the team’s views and get the necessary skills assigned. This way, you do not need to share the views with the new user individually or assign the user all the skills manually.
Similarly, to offboard a Care user, you just need to remove them from the user groups.
In addition, you can use user groups:
-
To filter case views to see cases assigned to the members of a specific Care team
-
To assign a profile role to multiple Care users at once
Manage Care users' skills
Imagine that you have a team of Care users with the same set of skills (for example, the users are experts in C# and speak French).
Steps:
-
Create a user group with the Care users (see Organize Users into User Groups).
You do not have to add any profiles to the user group. -
Create skills (see Manage Skills of Care Users).
When creating each skill, assign it to the user group instead of assigning it to the users individually.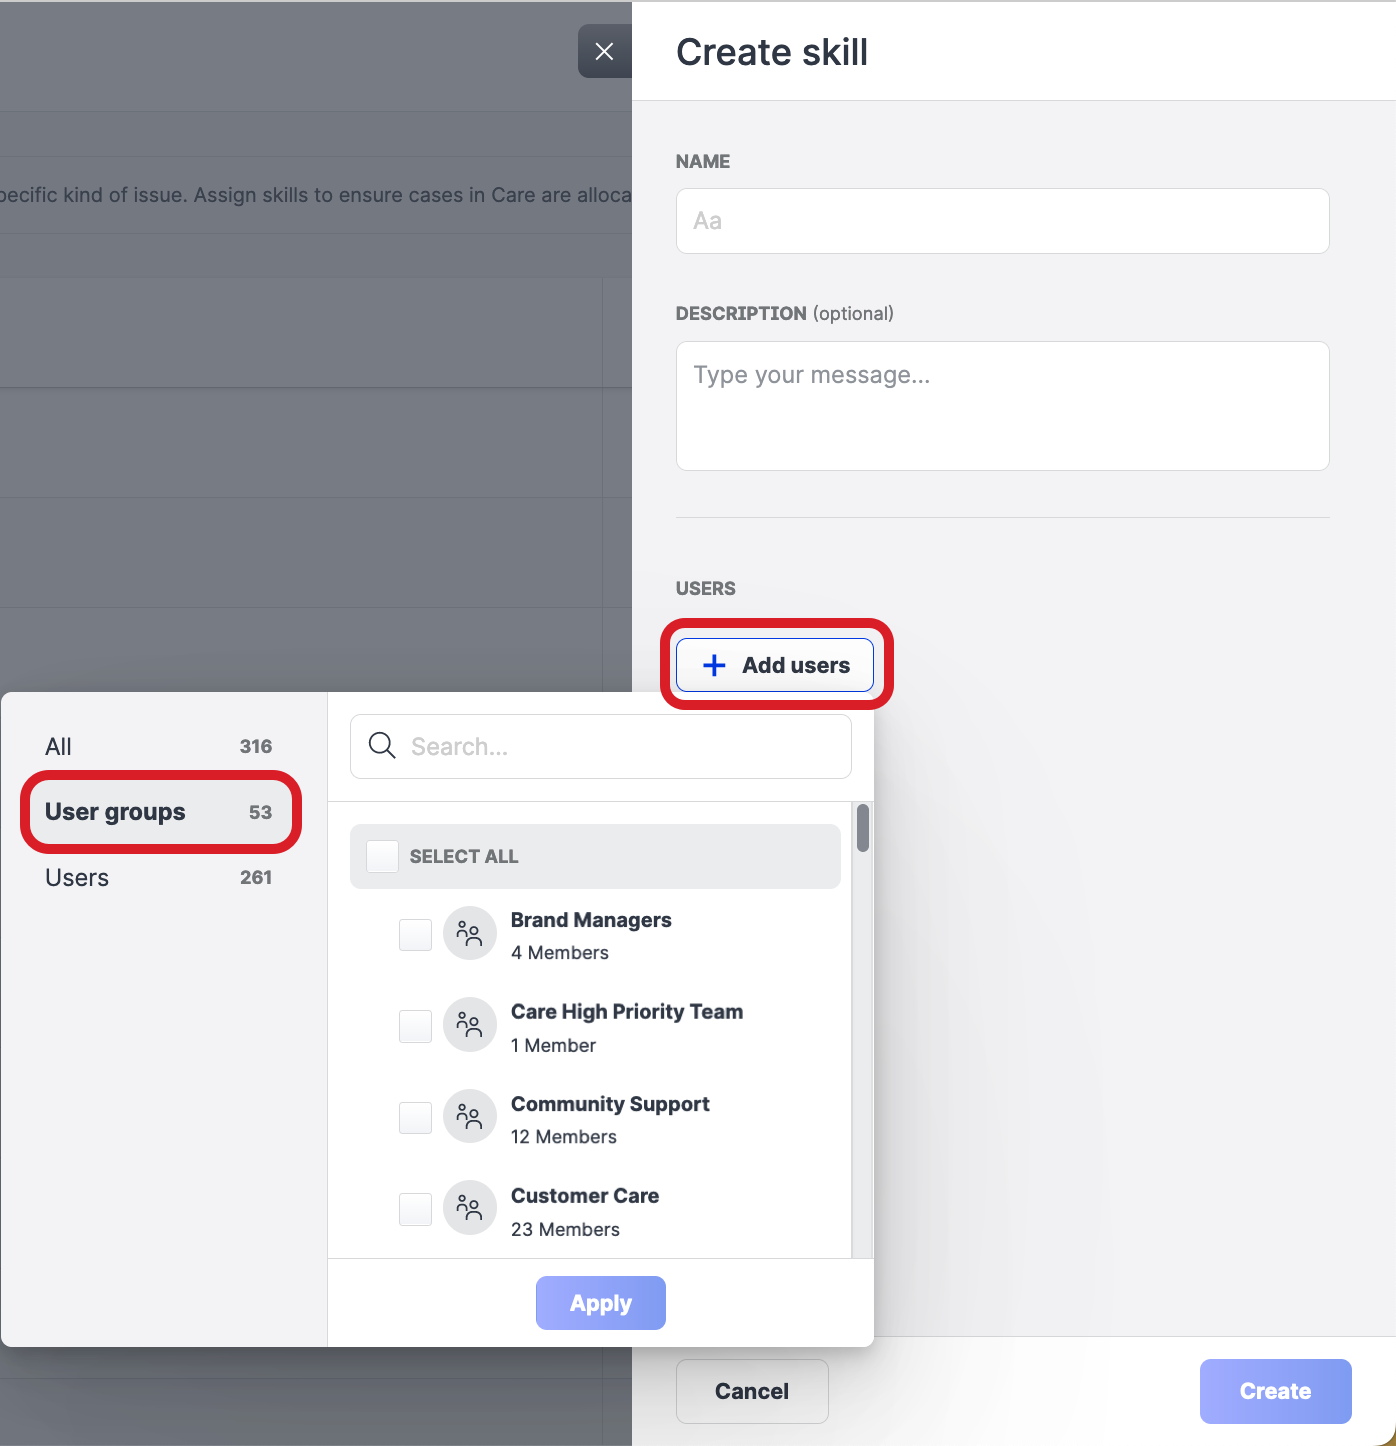
-
When a new member joins the Care team, add the new user to the user group, and the user will automatically get all the skills assigned.
Manage visibility of case views in Care
Imagine that you need to create multiple case views and make them visible to specific Care users.
Steps:
-
Create a user group with the Care users (see Organize Users into User Groups).
You do not have to add any profiles to the user group. -
Create case views (see Create Case Views in Care).
When setting up visibility of each case view, select the user group instead of selecting the users individually.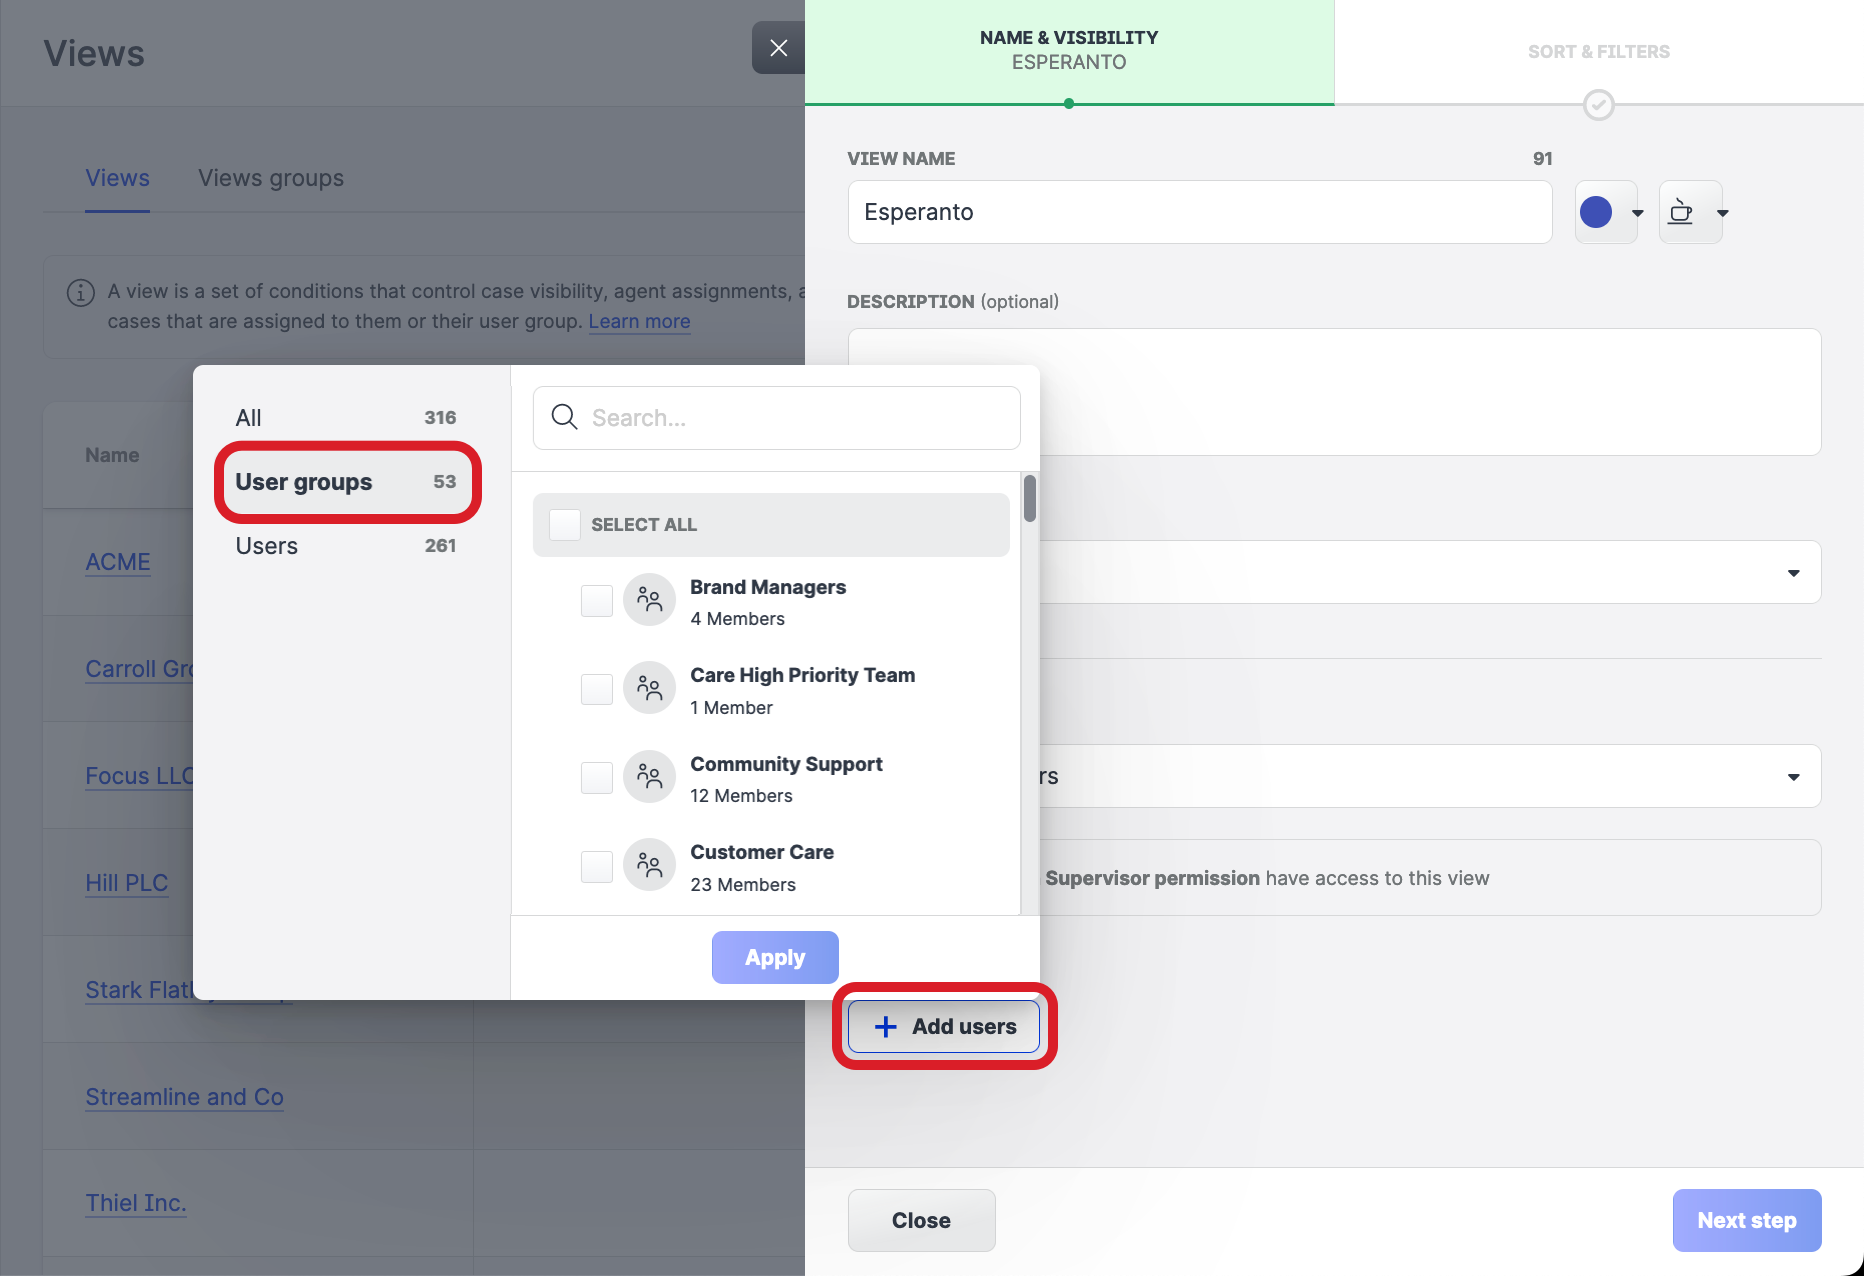
-
When a new member joins the Care team, add the new user to the user group, and the user will be automatically granted access to the case views.
Filter a case view to display only the cases that are assigned/not assigned to specific Care users
Imagine that you need to create a case view that should display only the cases assigned/not assigned to specific Care users (for example, users who cover a specific geo region or share a specific skill).
Because individual Care users can be reassigned to a different region based on business needs and other users can acquire the skill, it is much easier to manage the changes by adding users to/removing users from the appropriate user group than by manually updating the filter in the case views.
Steps:
-
Create a user group with the Care users (see Organize Users into User Groups).
You do not have to add any profiles to the user group. -
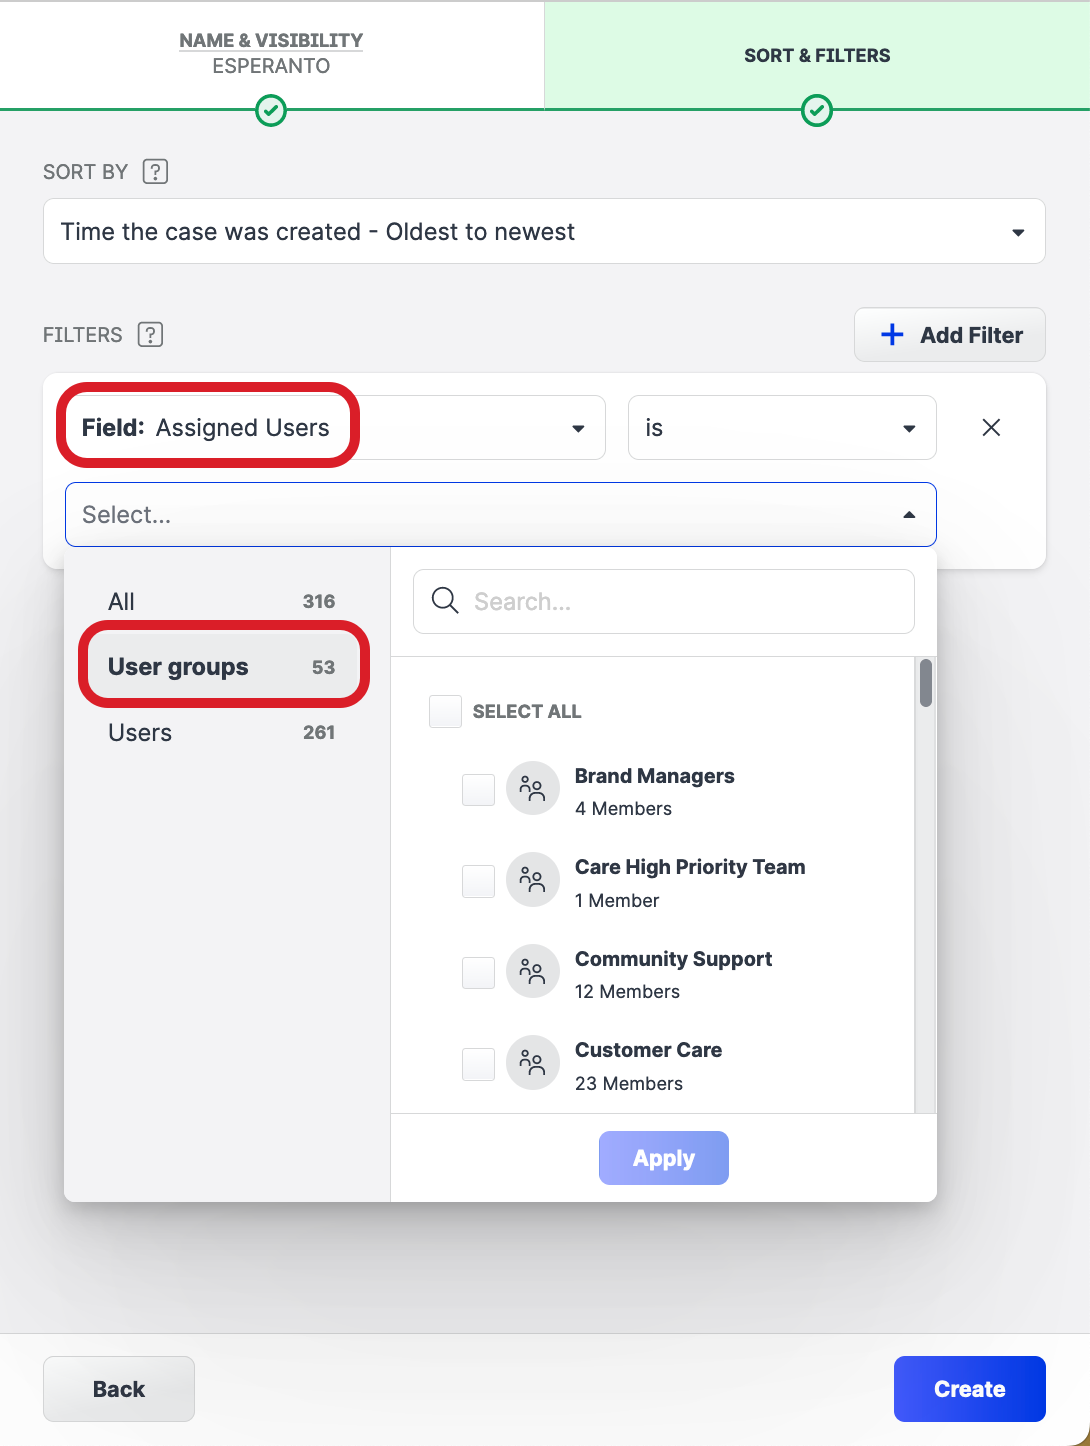
Create case views (see Create Case Views in Care).
-
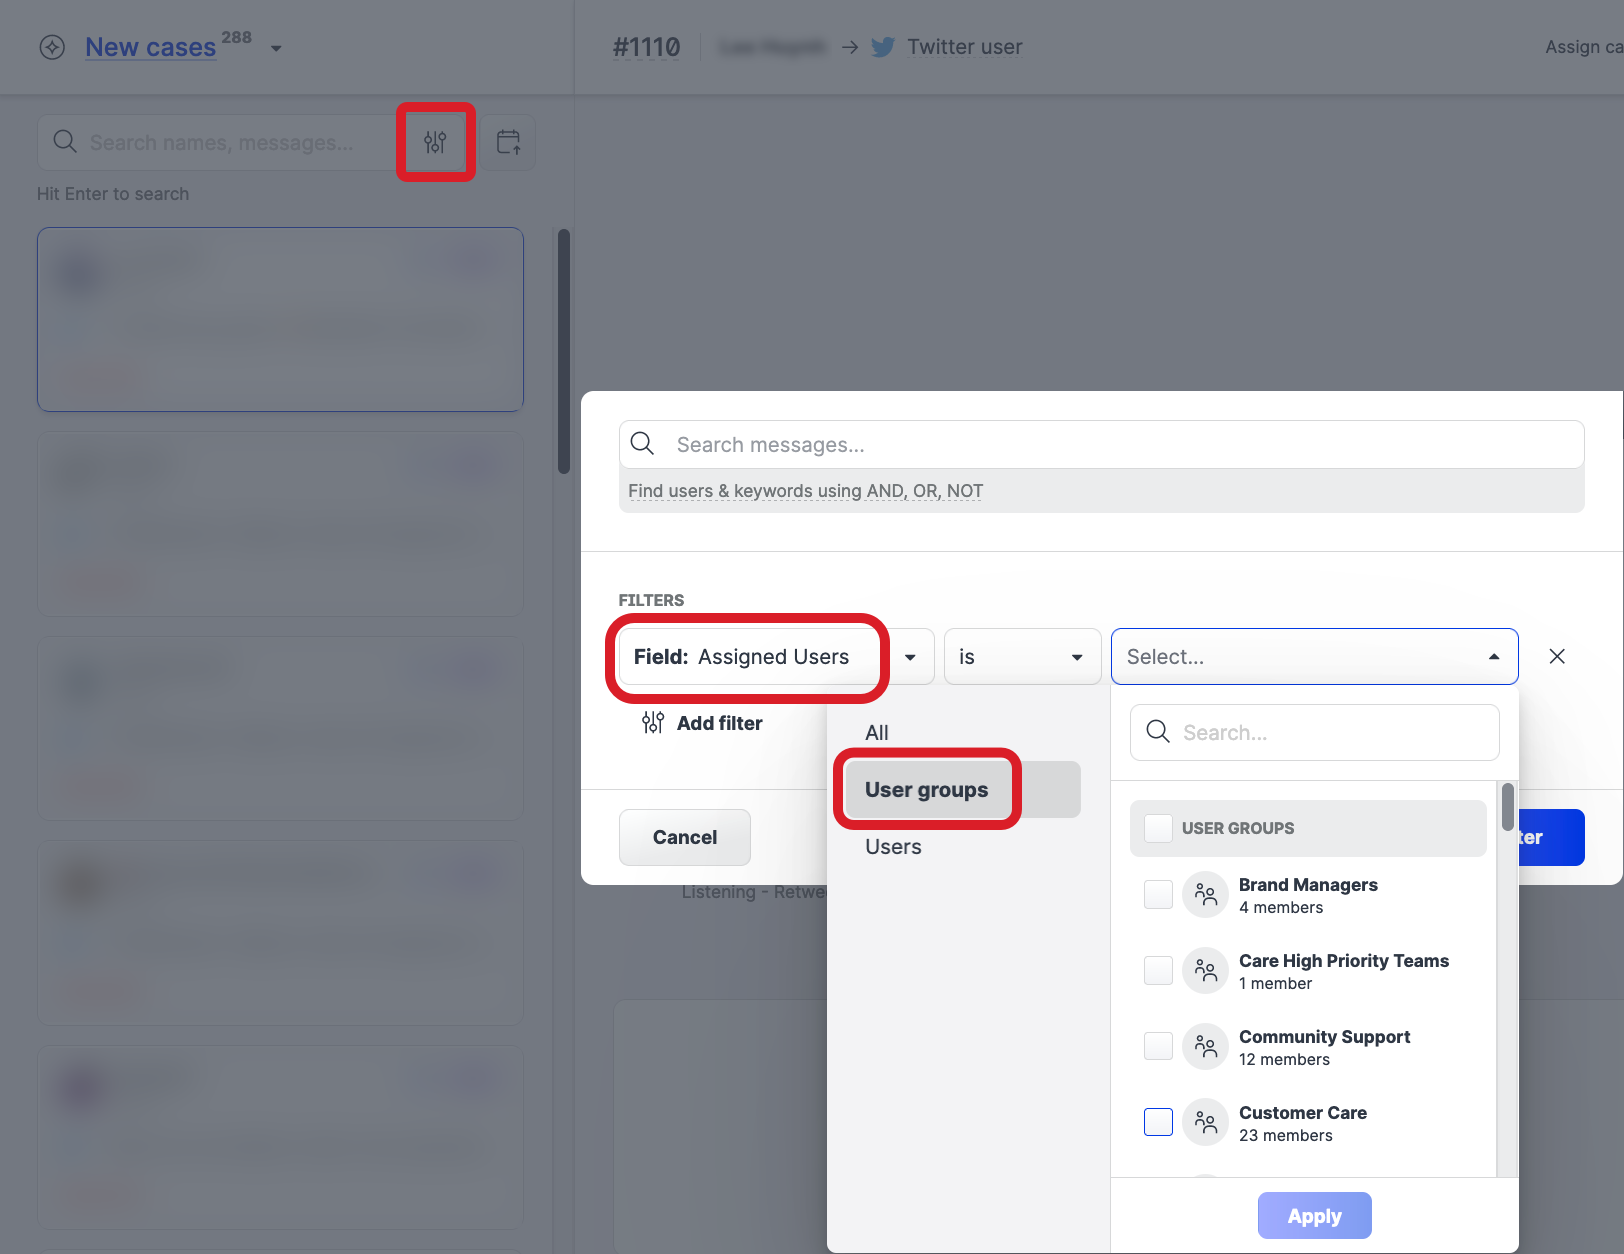
When setting up a filter for a case view, choose Assigned users and select the user group instead of selecting the users individually.
Similarly, you can select a user group instead of selecting users individually when applying an additional temporary filter to a case view to display only the cases that are assigned/not assigned to specific users.
Allow multiple Care users to interact with certain profiles
Imagine that you need to allow specific Care users to interact with certain profiles (for example, these Care users should be able to post a reply to a Care case on behalf of one of the profiles). To do so, you need to assign the same profile role to multiple Care users for the same set of profiles.
To do it in one go, use a user group.
Review additional considerations related to assigning a profile role via a user group (see “Assign multiple users a profile role for multiple profiles“ in Profile Roles).
Steps:
-
Create a user group (see Organize Users into User Groups).
-
When creating the group:
-
Add the users that you want to allow to interact with the profiles.
-
Add the profiles that you need the users to be able to interact with.
-
-
Open the user group, and select the users that you want to allow to interact with the profiles.
You can select all users or just some of them. -
Click Profile role on the bar with action buttons that appears at the bottom of the page, and select the profile role to apply to the selected users for all the profiles included in the user group.
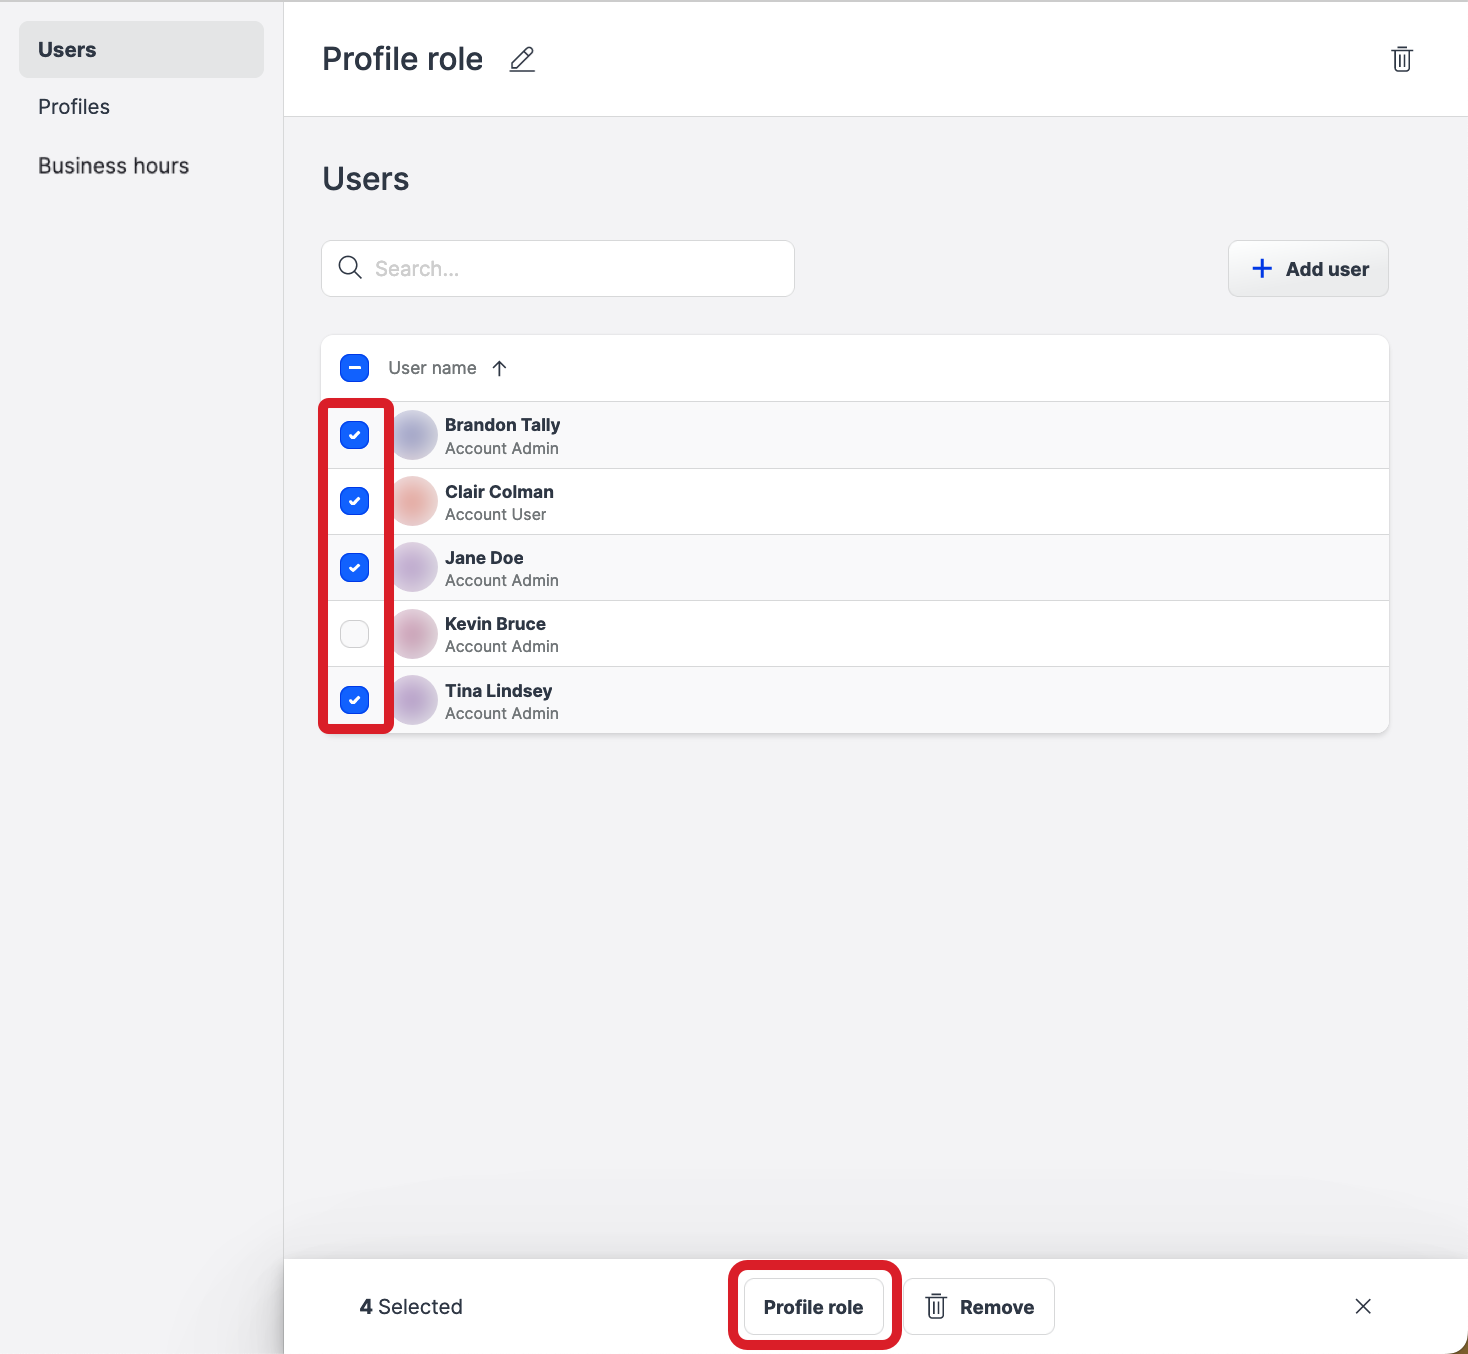
You are asked to confirm the change of the profile role for the selected users.
-
Confirm the change.
The profile role is applied to the selected users for all the profiles included in the user group.