This article will show you how to create and set up an iframe in Salesforce to enable full bi-directional Care-Salesforce integration. After the setup is complete, you will be able to work with a Care case directly from your Salesforce environment.
The steps in this guide require advanced knowledge of the Salesforce setup options and confidence with elementary code editing. We provide both the syntax and practical examples to make the process easy to understand and follow.
If you are not confident enough, we recommend that you involve the help of your Salesforce implementation/Support team.
This guide describes the steps you need to perform in a third-party product. The process and changes in the user interface in third-party products are subject to changes beyond our control, and Emplifi therefore accepts no liability associated with them.
Prerequisites
Ensure that you reviewed the following articles:
Step 1 - Prepare a Custom field in your Case object
In Salesforce:
In your Object Manager, locate your Case object and in the Fields & Relationship section create a new custom field - Text Area (Long).
-
We suggest that your name the field so that it clearly identifies your Care integration, for example Emplifi Conversation.
-
Set the length to at least 128 characters.
Complete the rest of the custom field process according to your Salesforce best practices. The new field will appear in your Care’s Salesforce mapping options.
Step 2 - Associate the new Salesforce field with Emplifi
In Emplifi:
-
Go to Settings > Integrations & API > Salesforce.
-
Click your connected Salesforce account.
-
Click Mapping with Care.
-
Click the record type that you want to use.
The selected record type must be a Case Salesforce object.
We recommend refreshing the page to ensure that the new custom fields propagate from Salesforce to Emplifi.
-
Locate the new custom field in the Salesforce column (we use Emplifi Conversation as the example) and associate it with the Emplifi field called URL for Salesforce.
The URL will appear in the Example values column.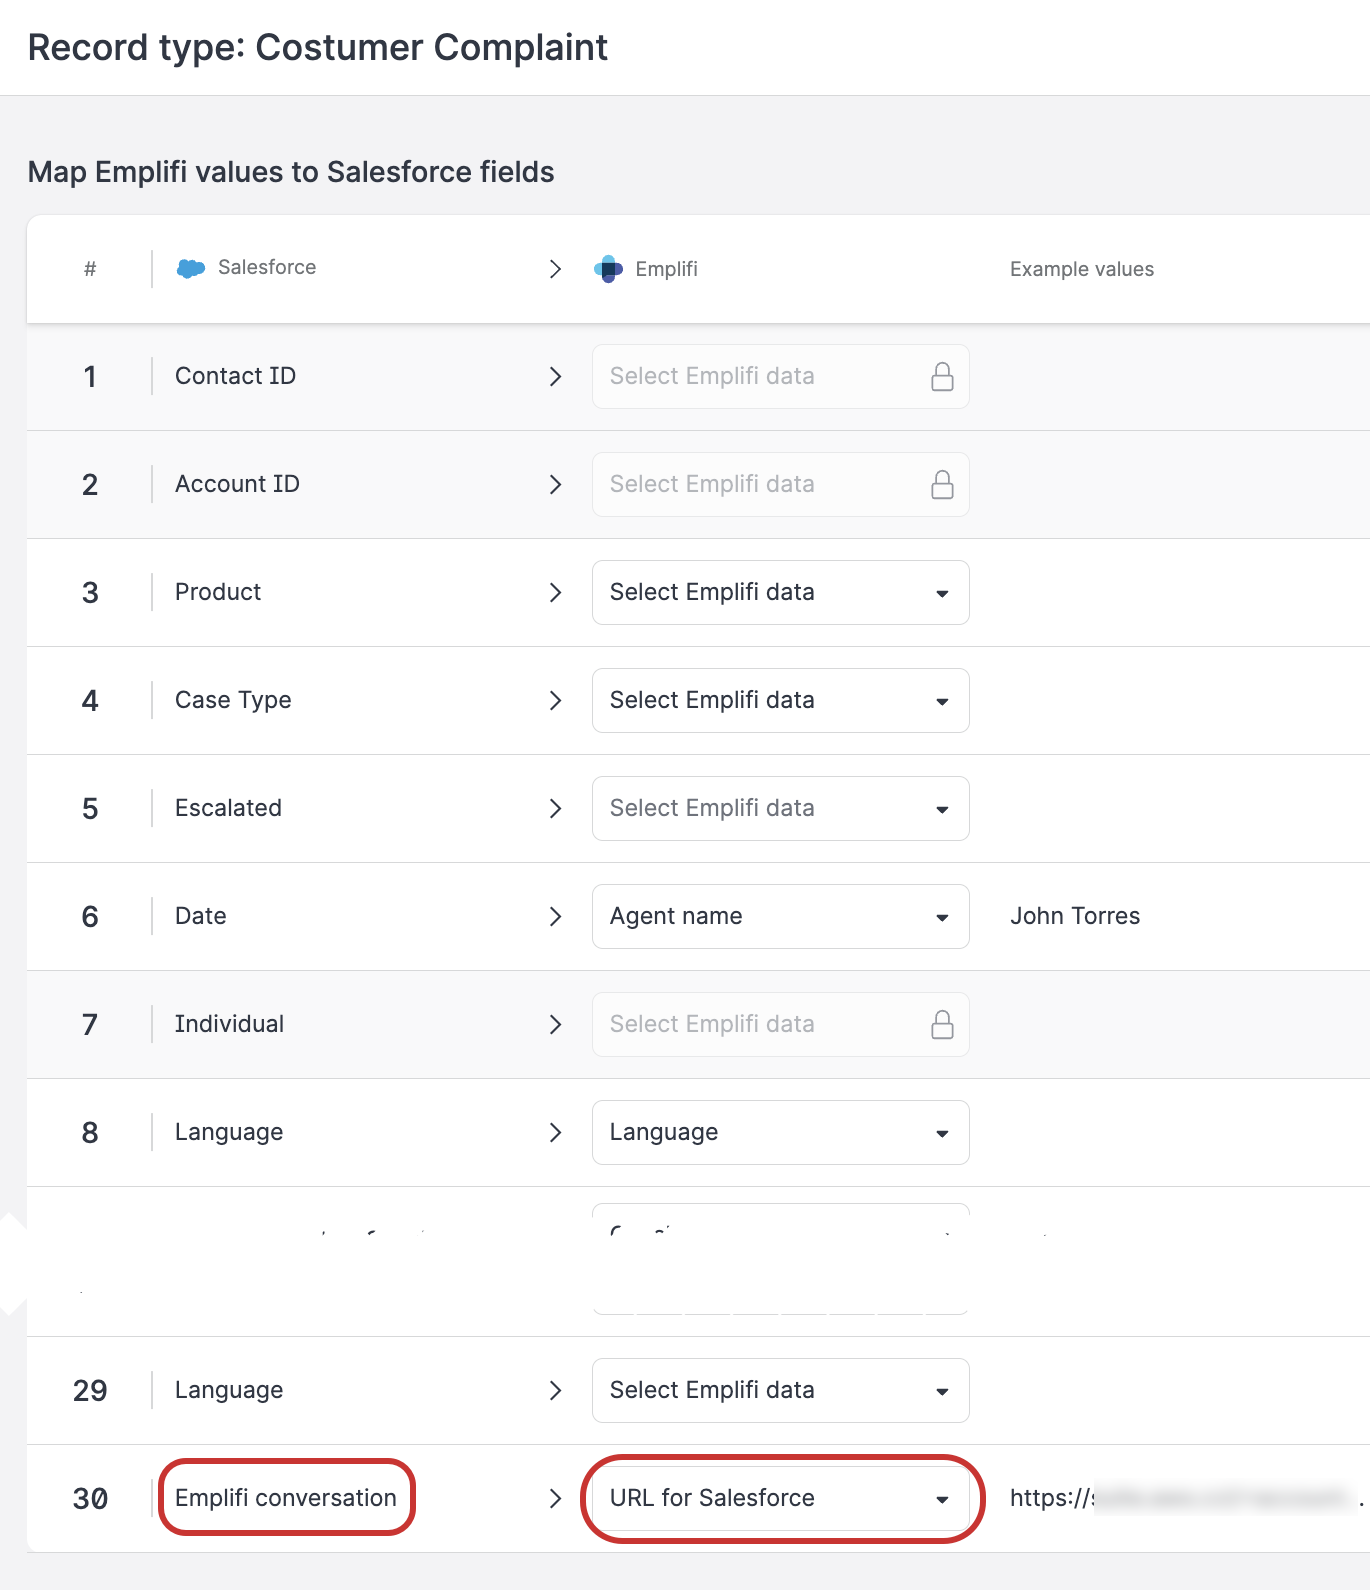
This ensures that the URL of the iFrame that you are preparing can be propagated to the case.
Step 3 - Create a Visualforce page for the iFrame
This steps requires a skilled Salesforce user.
In Salesforce:
In this step, you will create a new Visualforce page in Salesforce. This page will render the iFrame with the value in that field as source, for example:
<apex:page standardController="Case">
  <apex:iframe src="{!Case.Emplifi_Conversation__c}" height="600px"></apex:iframe>
</apex:page>
where:
-
Emplifi_Conversationis the field name that we used in the example above and replaces the generic syntax in{!Case.{YOUR_FIELD}__c}
In your implementation, use the field name that you created.
Syntax:
<apex:page standardController="Case">
  <apex:iframe src="{!Case.{YOUR_FIELD}__c}" height="600px"></apex:iframe>
</apex:page>
Enter the code string with your field’s name into the Visualforce Markup window, then add the following details.
-
label
-
name
-
Then save the Visualforce page.
Step 4 - Add the Visualforce page to Lightning Record Pages
In Salesforce:
In your Object Manager, locate your Case object, and open Lightning Record Pages.
Select a page and open it for editing.
Add a new tab - we recommend that you name it in a way to mark its association with Emplifi’s Care. Click the new tab that you just create and add the Visualforce page that you created in Step 3. Then save the page.
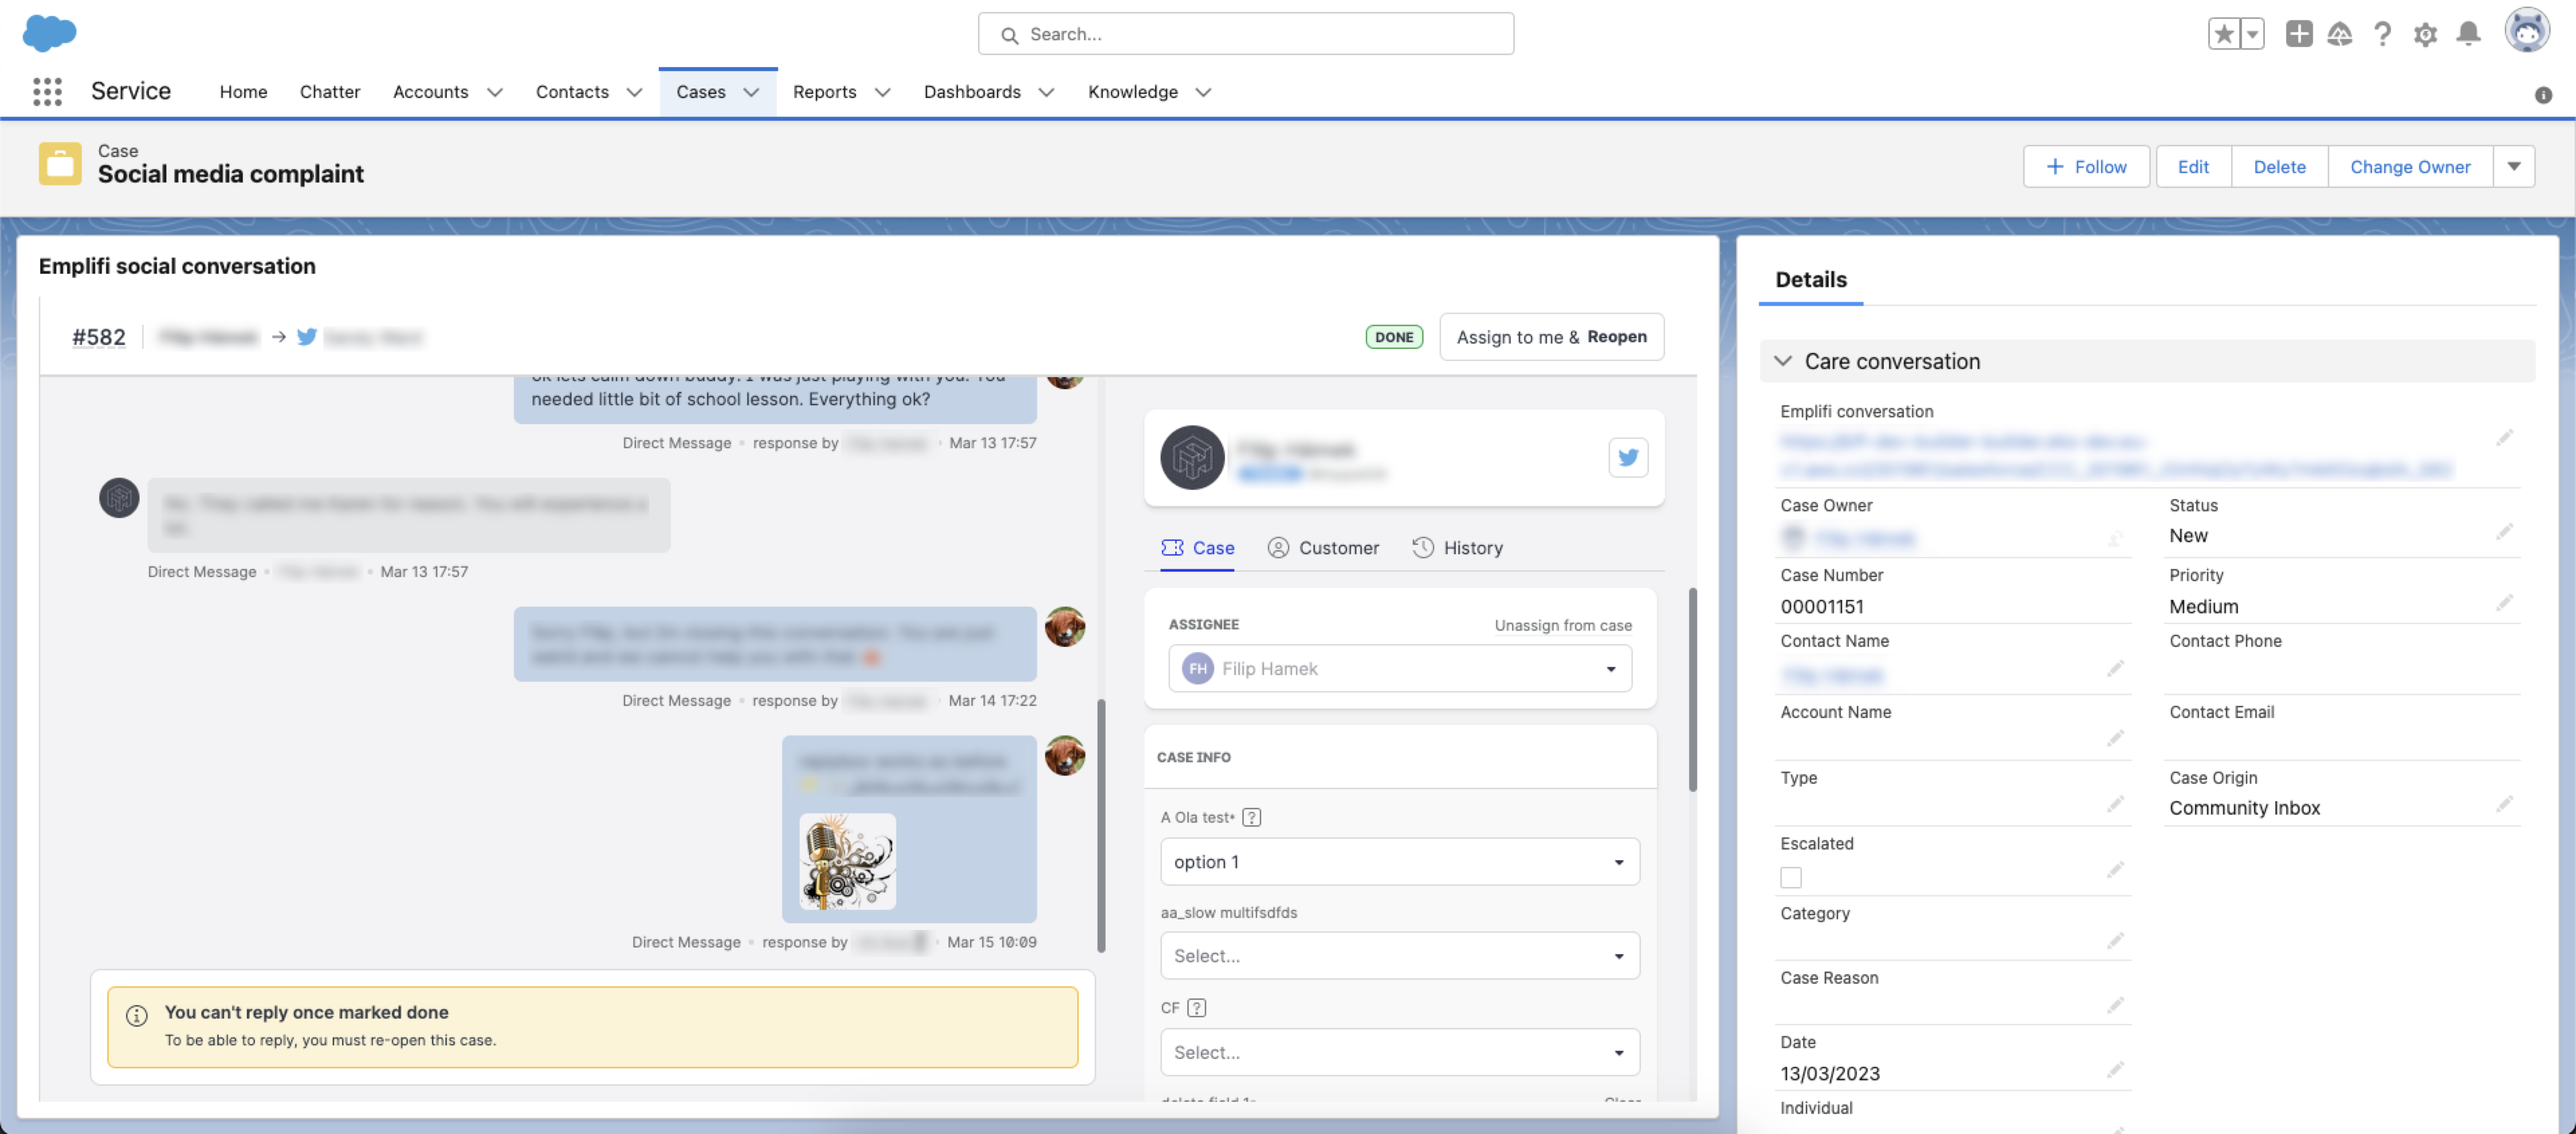
You Care case will appear on that page as an iFrame.
Step 5 - Enable Care login for Salesforce
Only Salesforce agents with a seat at Emplifi Care can work in Care cases from Salesforce.
Salesforce agents might be prompted to log in to Care within the iframe via a popup.
To ensure that the login process works, do the following:
-
Enable third-party cookies.
-
Enable popups.
When popups are not enabled, you may open the pop-up manually.
Once logged in, Salesforce agents can interact with the case in the same way as in the Care module in Emplifi.
Summary
After you complete the process described above, you will be able to interact with Care-sourced cases directly from Salesforce.
Remember that to access Care-sourced cases in Salesforce, your Salesforce agent must also have a seat in Emplifi Care.