After you define your site’s URL, the page (microsite) editor opens.
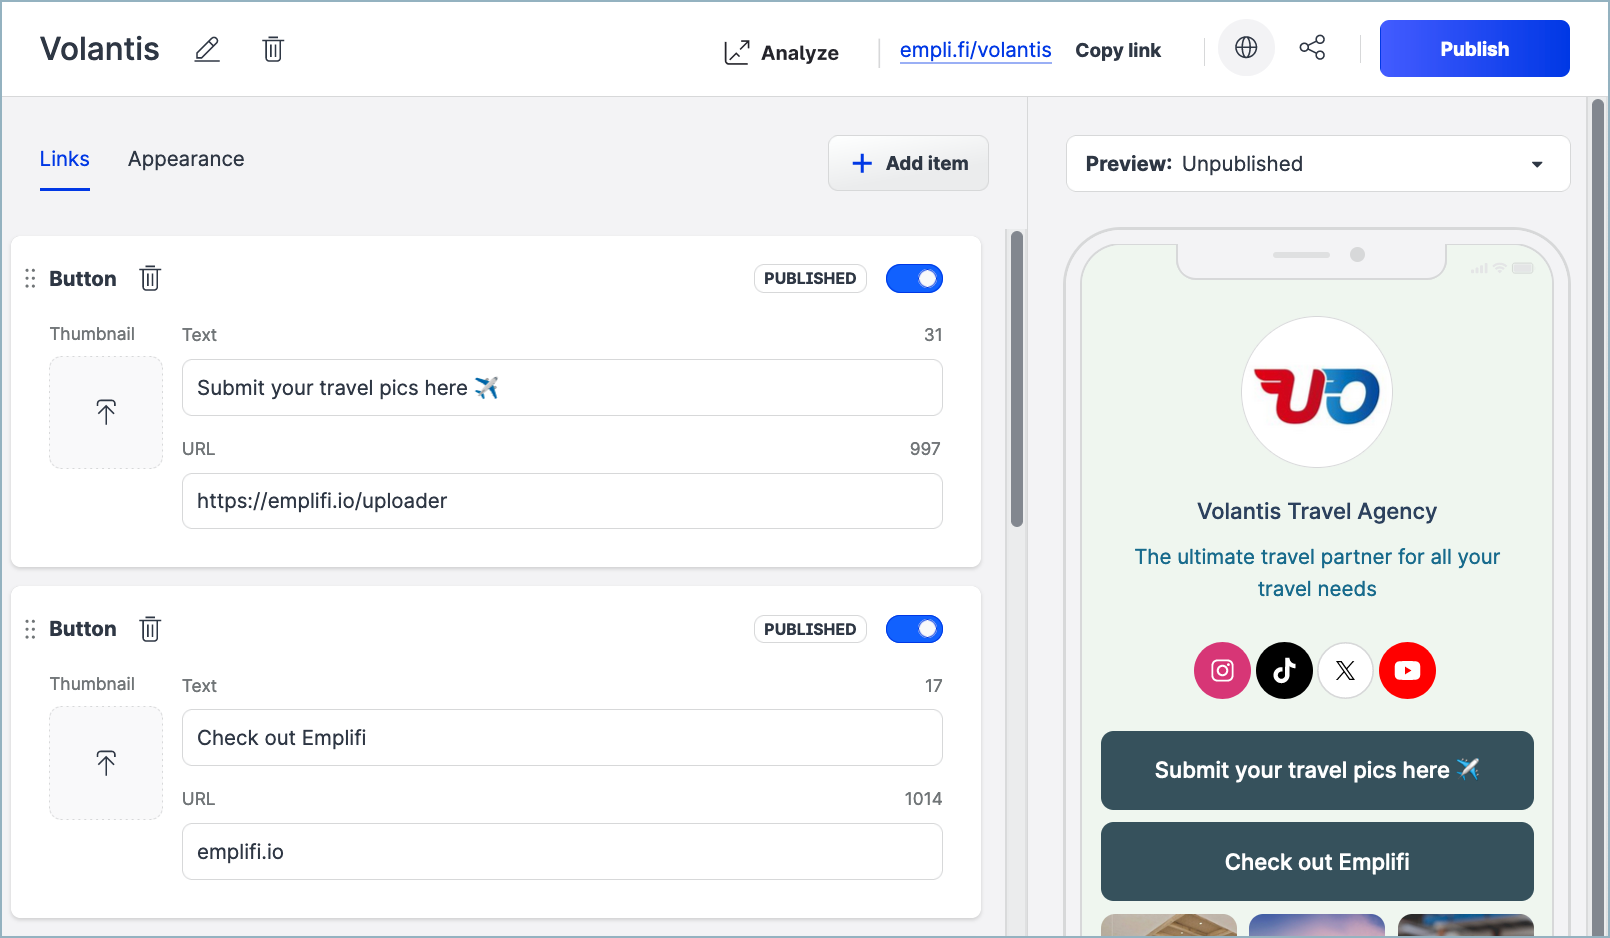
In the page editor, you can define and view the following elements:
-
Name of your page
You can change the page name without impacting the URL. -
Links
Create and manage the content of your page. -
Appearance
Customize the visual look and feel by adding a header image, background, and links to social profiles. You can also choose whether asset tiles in your social grid open media details or redirect visitors to linked pages when clicked.The visual editor is both intuitive and comprehensive. You can customize details such as the corner radii of individual elements. We encourage you to experiment with the editor to get the feel that you are after. To learn more, see Design Your Emplifi Link Page.
-
Analytics
Click Analyze to open the Unified Analytics Link in Bio board to learn how your page is performing.
Clicking Publish pushes ALL changes to your page, including changes that you made in the appearance section.
Create links to content
In the Links section, you can add the following types of content to your page:
-
buttons
-
a social grid
After you create a new page element, it is automatically saved as a draft.
Use the preview menu to change between to change between different views of your page:
-
Unpublished version
The unpublished version is all of the changes you’ve made to the page that haven’t been published.
Only the content that appears on the preview screen will be published when you click the Publish button.
-
Published version (live site)
This is what visitors to your page see when they click your link. -
Future versions
If you have any scheduled posts from Publisher that are part of a button or your social grid, you can see what your page will look like once they publish.
The button or social grid must already be published to your page for this mode to work.
Add a button
Steps:
-
Click Add item, then click Button.
-
Enter the button’s name and the URL.
-
(optional) Upload the thumbnail image.
-
To preview the button, toggle the Draft switch.
-
To publish the button to your page, click Publish.
You can access draft buttons that you created from the Publisher’s Create post menu and schedule them the same as any other post.
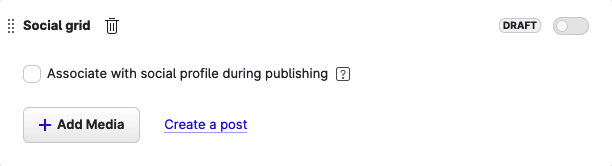
Add a social grid
Add a social grid to your page so you can schedule publishing of individual posts to both your social profile and the link in bio page. You can only have one social grid per a page, but you can connect multiple profiles to one grid.
Steps:
-
Click Add item, then click Social grid.
The Social grid tile is added to the page. -
Choose how you will add assets to your social grid:
-
Check Associate with social profile during publishing to select the profiles that you want to use to automatically populate the content on your page when you publish a post. For the asset to automatically appear in your social grid during publishing, you must add a Link in bio link and description to the asset.
-
Click Add Media and choose one of the following:
-
Upload media
-
Upload from Collections
-
Import from cloud
-
Recently published
-
-
Click Create a post to go to publisher and create a post. You can edit the asset settings while creating the post.
-
-
Click the asset tile to open the Asset settings. Your social grid page settings in Appearance determine which options are available:
-
If you use Direct link:
-
Link
You can add a single link. Clicking the asset tile redirects the viewer to URL. If the asset doesn’t have a link, it is not possible to click the asset tile.
-
-
If you use Open media detail:
-
Links
For each URL, you can optionally add a title, and custom thumbnail as well. If you do not add button text, the text defaults to Learn more. -
A custom, rich text description for the asset
You can include links, emojis, and other rich text formatting options in the description. Links you add in the rich text description do not have buttons.
-
-
-
To publish the social grid to you page, click Publish.
You can also watch this video to get an overview of the process:
Edit social grid assets
You can edit the links attached to the assets published and scheduled to be published on your social grid. You can also edit the content of assets (for example, the image or video post) that are scheduled to be published to your social grid through Publisher. However, you cannot edit the content of assets that are already published to your grid. In this case, you can only edit the asset links and other media details.
-
To edit the content of an asset that is in draft or scheduled to be published, edit the post in Publisher.
-
To edit the links or other media details attached to an asset, click the asset in your social grid.
-
To remove an asset that is already published to your social grid, click the X icon.
-
To remove an asset that is scheduled to be published or from the draft of a draft post, delete the draft or scheduled post.
Edit and remove elements
Use the Publish/Draft toggle to control and edit the elements on you page.
Element creation
When you begin to build your page, any new element that you add defaults to draft. Use the toggle to preview the content on the phone screen.
With toggle in the ON position (Blue), you can preview the changes in real time.
The content that appears on the screen will be published when you click Publish in the header bar.
Page update and editing
If you want to edit your page, for example to change or remove the element, follow these steps:
To edit an element:
To edit an element, you do not have to toggle the switch to the off position. Simply edit the element and click Publish.
To hide an element:
-
Toggle the Published toggle to the off position (from blue to gray).
-
Click Publish.
The toggle changes from Published to Draft and the element is hidden from your page.
If you want to remove the element completely, click the Trash icon.
Change the order of the elements
To change the order of the elements on you page, simply drag them into the order that you want.
Do not forget to click Publish to propagate the changes to the page.
Preview the changes
The preview pane shows the current state of your Page, including any changes (like adding or reordering assets) that will appear after you click Publish.
Content does not appear in the preview pane if the content is from a Publisher draft post or post that is scheduled to be published.

Link in Bio element statuses
Buttons, grids, and content in the page editor can have one of the following statuses:
-
Draft
The button or grid that has been created, but not published.-
Gray toggle switch
The button or grid will stay in draft. -
Blue toggle switch
The button or grid will be published to your page when you click Publish.
-
-
Published
The button or grid has been published.-
Blue toggle switch
The button or grid is live on the page. -
Gray toggle switch
The button or grid will be removed from the page when you click Publish.
-
-
Connected
The button or a piece of content in the social grid is connected to a draft post in Publisher. -
Scheduled
The button or a piece of content in the social grid is connected to a post in Publisher that is scheduled to publish at a later date. This status is indicated by the timestamp for the scheduled publication date.
Appearance
To learn how to change appearance of your link in bio page, see Design Your Emplifi Link Page.
To connect Link in Bio with Publisher, see Integrate Link in Bio into Your Publisher Workflows.