While you can control your link in bio content directly from the Emplifi Link module, you can also use Publisher to schedule posts, updates, and new content.
-
Create link in bio drafts and then use Publisher to schedule when they appear on your page.
-
Synchronize and schedule your social media posts and the link in bio page content.
Currently, if you create customized posts for multiple social networks, only the assets attached to an Instagram post are supported by Link in bio.
For example, if you create a multi-network post for Facebook, Twitter, and Instagram and click Customize in Publisher, only the assets and buttons in your Instagram post will publish to your Link in bio.
If your customized post does not include an Instagram post, you can still create a customized post, but with Link in bio is disabled.
If you want to customize a post for a specific network other than Instagram in a multi-network post and also want the assets or buttons from your post to appear on your Link in bio, you must create a separate post that doesn’t include any network-specific customization. Support for other social networks will be added to Link in bio at a later date.
Prerequisites
To control publishing of your Link in bio content, ensure that you have the following:
-
Emplifi Link in Bio module enabled (Smart or Integrate package)
-
Correct permissions for the Emplifi Link in Bio module.
Schedule a button
After you set up your link in bio page, you can integrate it with you Publisher’s scheduling and workflow.
When scheduling a button, you have two options:
-
use a draft button that you created in the Emplifi Link module
-
create a new button in Publisher
In Publisher, you can only create a plain text button without a thumbnail. To create a button with a thumbnail, use the Emplifi Link module. See Configure Your Link in Bio Page.
Scheduling a button in Publisher is tied to scheduling content.
In this scenario, you will schedule a button that you previously created in the Link in Bio module.
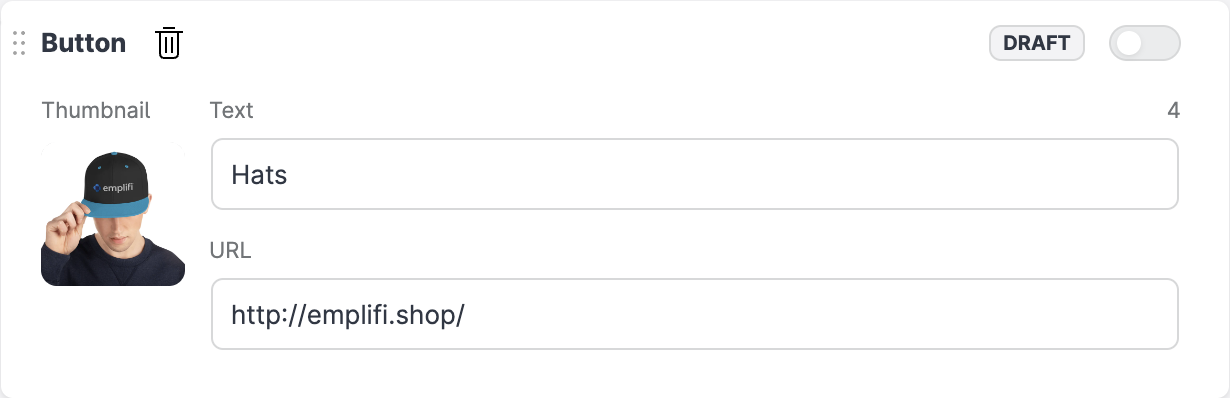
This means that you have a draft button in your Emplifi Link module that looks something like this:
Steps:
-
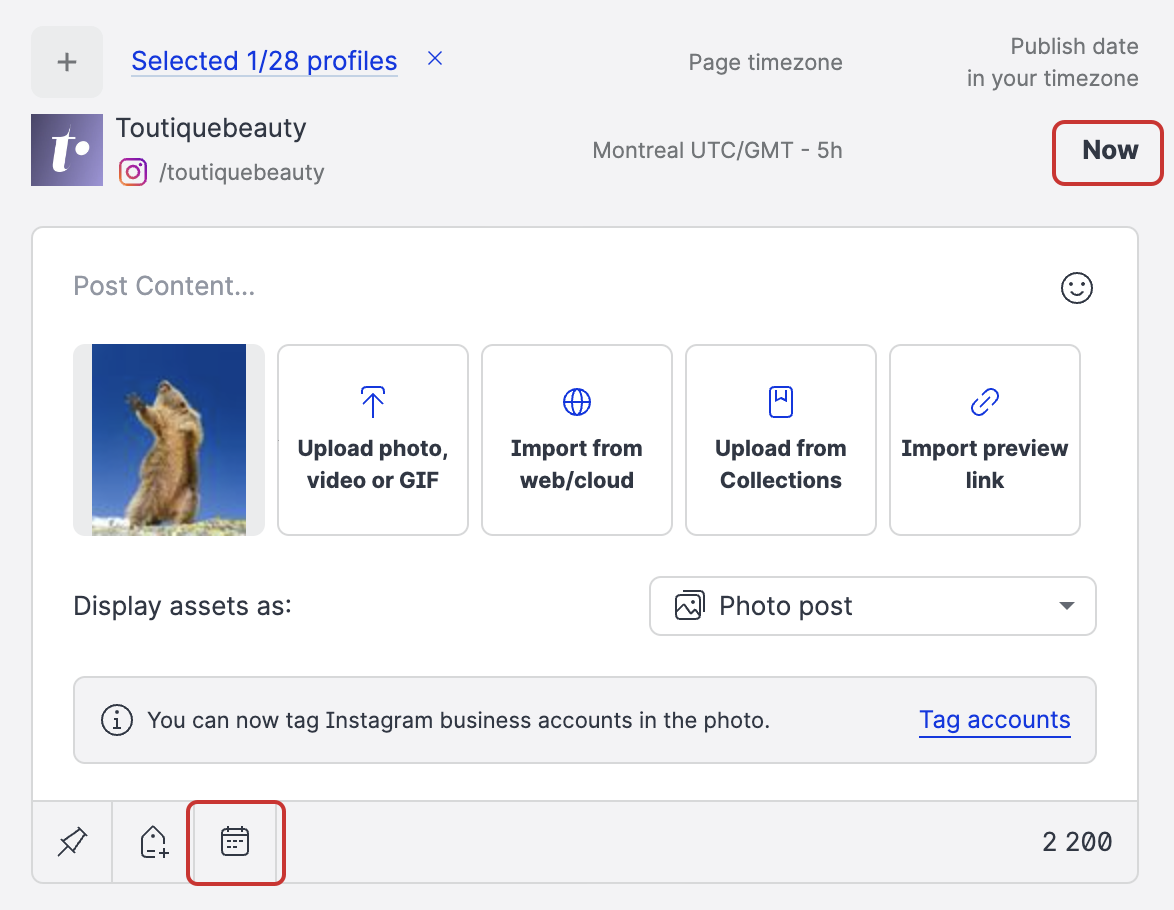
In Publisher, click Create post.
The Select profiles menu panel slides out. -
Select the profiles that you want to publish with and click Use selected profiles.
The New content screen opens. -
In the Link in bio panel at the bottom of the new content screen, click Add button.
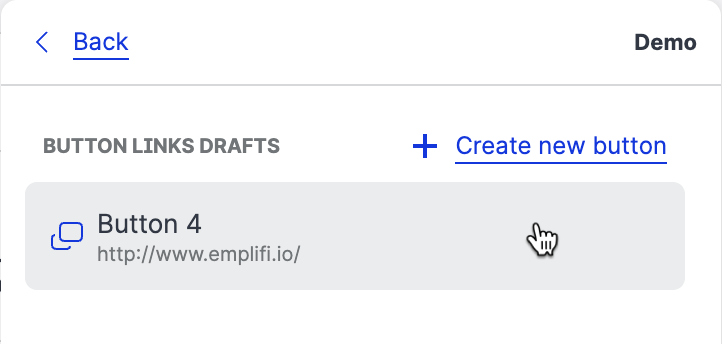
In the Link in Bio’s list of pages that appears, find and click the page that you want to use. -
Select a draft or create a new button.
-
In the list of draft buttons that appears, select the one that you want to schedule.
-
Click Create new button.
The button is added to you Link in Bio section on the New content page.
-
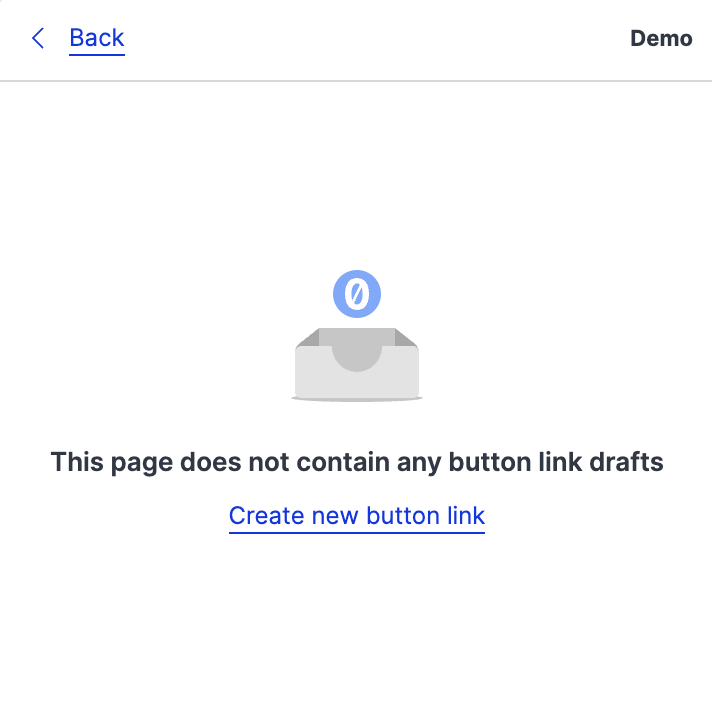
If there are no drafts, click Create new button link.
-
-
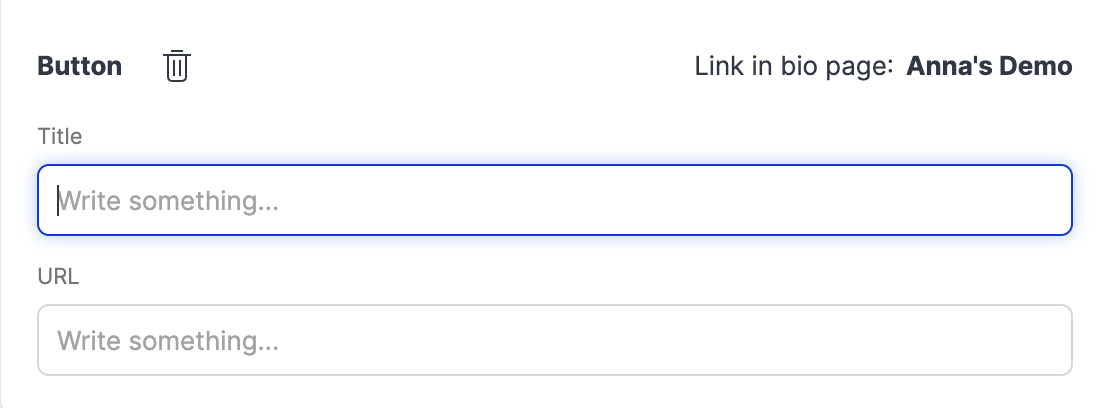
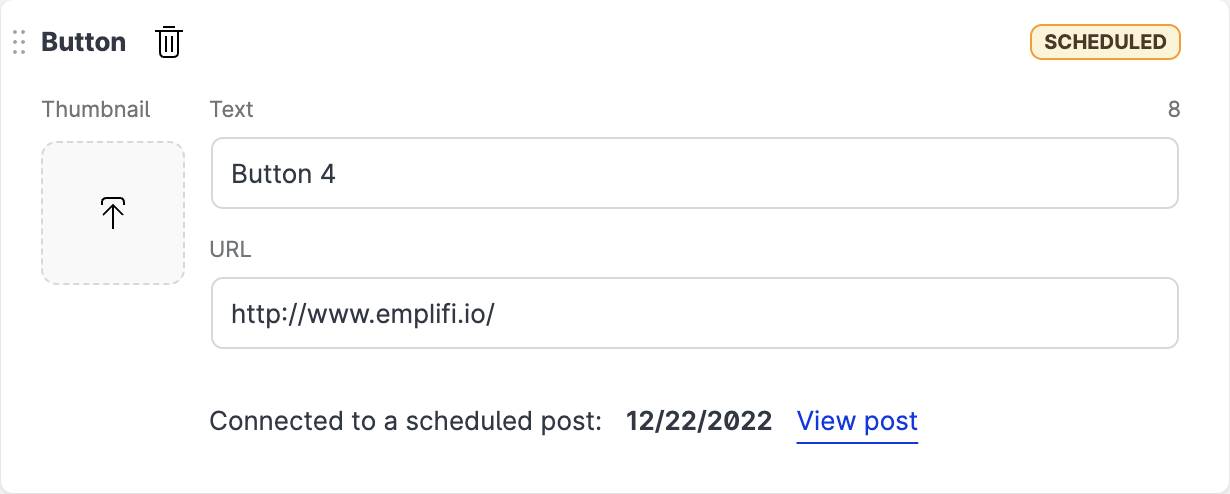
Enter the Title of the new button and specify the URL.
-
In the Post content section, upload the content that you want to associate with the button (photo, video, link).
-
(Optional) Select a social grid, if you added one.
For more information, see Configure Your Link in Bio Page.
-
To schedule the post, click the schedule icon or Now.
-
In the scheduling panel that slides out, select the date and time, then click Schedule.
Instead of scheduling, you can instead click Publish to push the content to your profile and Link in bio page immediately, or save it as a draft.
-
Back in the New content page, click Schedule.
Your post will appear in the Publisher’s Calendar and the button’s status in the Emplifi Link module changes to Scheduled.
Schedule a post to a social grid
By default, all posts you create that are associated with a social grid on a Link in bio page are automatically published to the social grid of the pages associated with that profile if the post has an asset with a Link in bio link or description. You also have the option of selecting a specific social grid from a Link in bio page when you schedule a post. To learn more about social grids, see Configure Your Link in Bio Page.
To ensure your assets automatically appear in the social grid for your Link in bio page, add a link and description to the asset when creating the post in Publisher.