When Emplifi Bot is integrated with Emplifi Agent, bots are able to seamlessly escalate a customer to an agent, either automatically or at the customer's request. This enables the customer to get immediate assistance from an agent. When an agent answers the incoming Bot conversation, a case is created, and the information provided by the bot will fill in the case fields. If a case already exists, an agent has the opportunity to link this conversation to an existing case.
Bot Interaction panel
When the agent logs into Emplifi Agent, the Bot Interaction panel will display on the home page, as shown below.
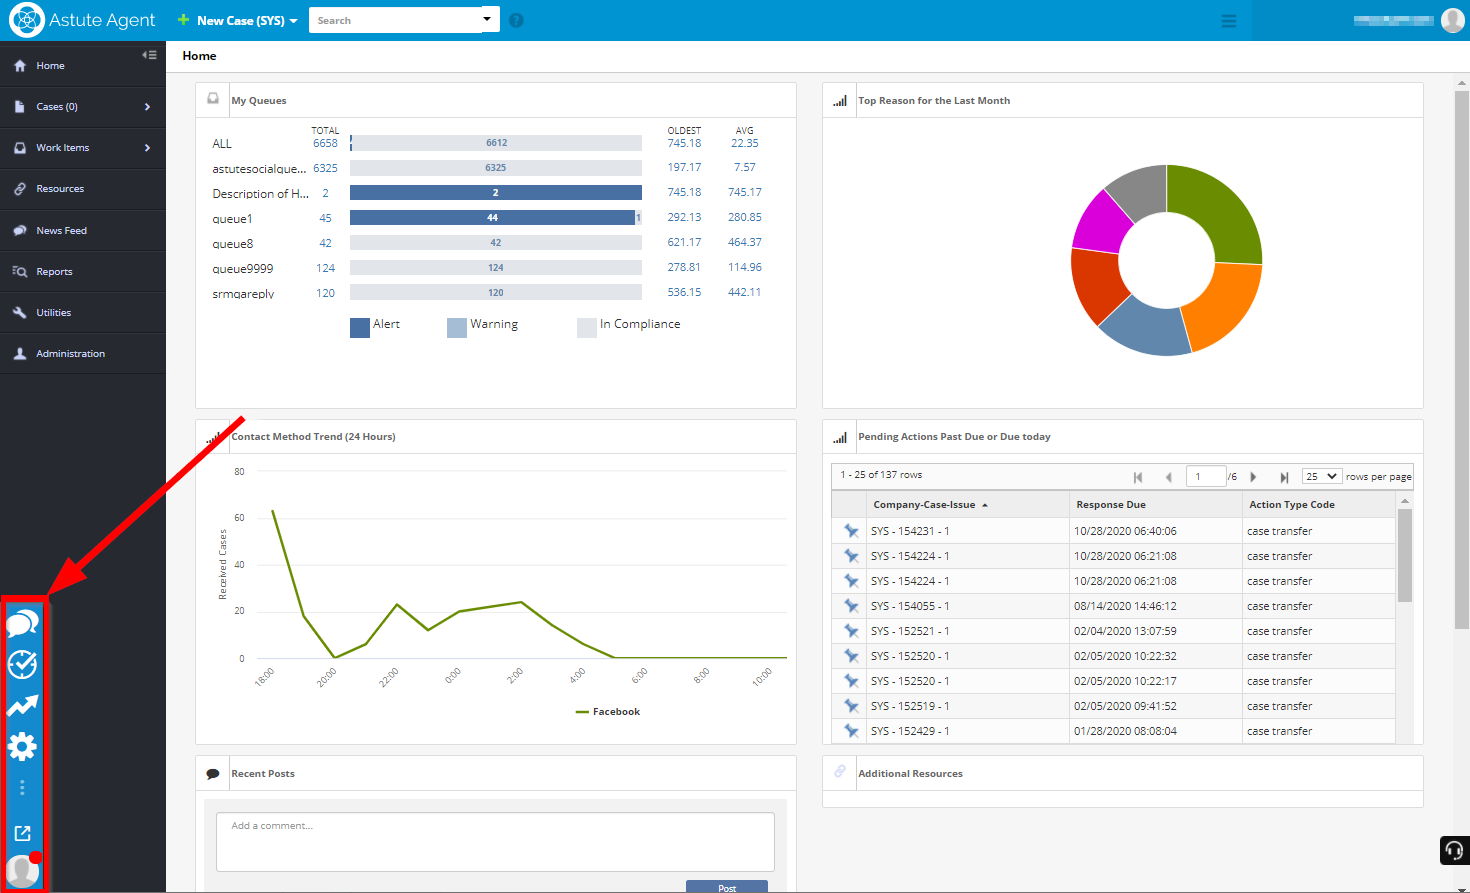
An agent can use the drag-and-drop operation to move the interaction panel. The interaction panel will dock on either the left or right side of the screen. When an agent clicks an icon on the panel, a new window will open. The agent is then able to resize the window.
Using the Bot Interaction Panel
The Bot Interaction Panel contains icons that, when selected, will open a window with specific functions. The icons that are available to an agent will depend on the agent's configuration. Not every icon shown below may display on an agent's interaction panel.
|
Icon |
Name |
Description |
|---|---|---|
|
|
Chat |
Allows you to view incoming, active, and recently closed bot conversations with customers. |
|
|
Manage |
Allows managers/supervisors to view agent queues, time spent on conversations, open cases, and more, all in real-time. |
|
|
Analytics |
Allows you to view reports on the conversations that have passed through the system. For more information, see Agent Analytics. |
|
|
Administration |
Allows an administrator to configure settings for agents, queues, and more. For more information, see Setting Up Agents. |
|
|
Open in Separate Window |
Opens up the Bot Interaction Panel in a separate window. |
|
|
User Profile |
Allows you to update your activity status. |
Setting Your Conversation Status
When you sign into Emplifi Agent, your status defaults to "Away". You must set the status to "Online" in order to receive incoming conversations. To do so:
-
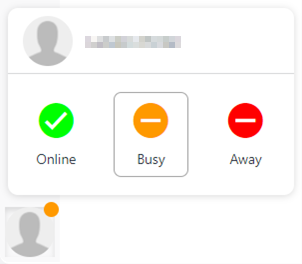
From the Bot Interaction Panel, click the User Profile button. The status window will open, as shown below.
-
Click Online to show that you are ready to accept bot conversations.
-
Click Busy when you are active but unable to accept bot conversations.
-
Click Away when you are unavailable.
Accepting a Bot Conversation
When the bot escalates a conversation to Emplifi Agent, the conversation will ring for available agents. You must accept the conversation in order to interact with the bot customer. To do so:
-
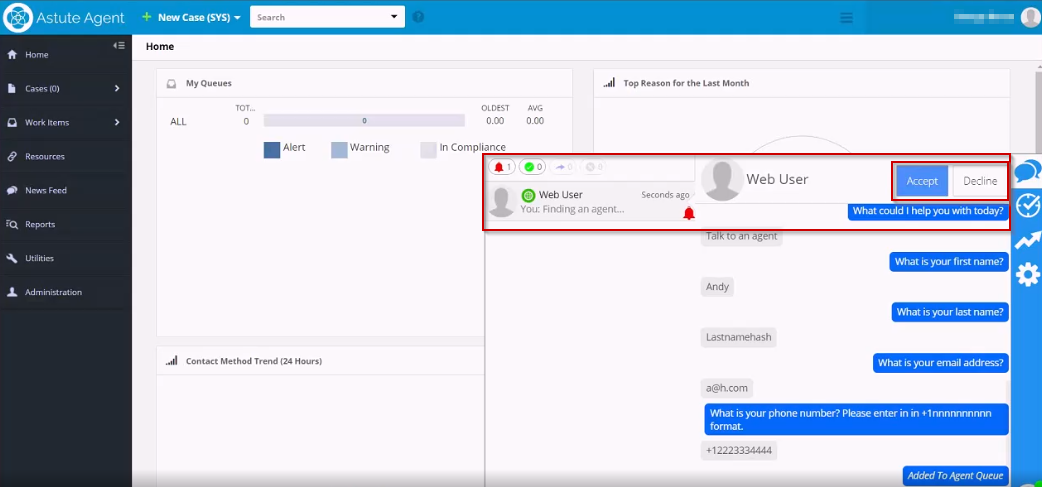
From the Chat window, click Accept to begin the conversation with a customer. Once you accept the conversation, it will display in the Chat window for you to review, the case is created, and information provided by the bot will autofill in the case. If you click Decline, you will not be called again for this customer, and your conversation status will be changed to "Away". The conversation will ring for the next available agent with the appropriate responsibilities.
-
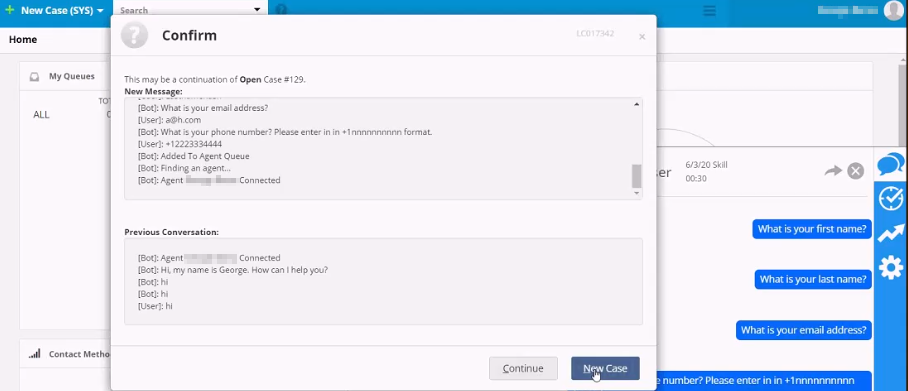
When you accept a conversation, the system will check the phone number or email address to see if there is already an existing case for this customer. If so, the Confirm window will open for you to verify if this case is a continuation of a previous case. You may choose to:
-
Click Continue if this case is a continuation of the existing case number shown.
-
Click New Case if a new case should be created.
-
-
In the Type response here field, type your response to the customer.
-
Optionally, by clicking the Attachment button, you can send attachments or images to the customer in your response.
-
-
Click Save to save the case and add the new conversation to the Text section of the case. The conversation is added to the Text section of the case with a Text Type of "Chat".
-
Click the Close button on the Chat Window banner to close the conversation.
Transferring a Bot Conversation
After accepting a Bot conversation, you can transfer the conversation to a specific agent or to agents with a specific skill (the available agents are restricted by the skill required by the chat). The agent who receives the transferred conversation can view the previous conversation and view the case. To transfer the conversation:
-
From the Chat window, click the Transfer button on the banner. The Transfer window will open.
-
Select the agent who will receive the conversation. To do so:
-
On the Agent tab, select an agent from the list of available agents.
-
On the Skill tab, select a Skill from the list of Skill types.
-
-
Click the Transfer button.
A Bot conversation must be accepted before it can be transferred to another agent.
Managing Conversations
Click the Manage button to open the Manage window. This is where a manager/supervisor can view information about bot conversations in real-time, as well as transfer or disconnect conversations. A manager can view:
-
Information about each queue.
-
All agents and their activity.
-
All open conversations and information about each conversation.

Analyzing Data
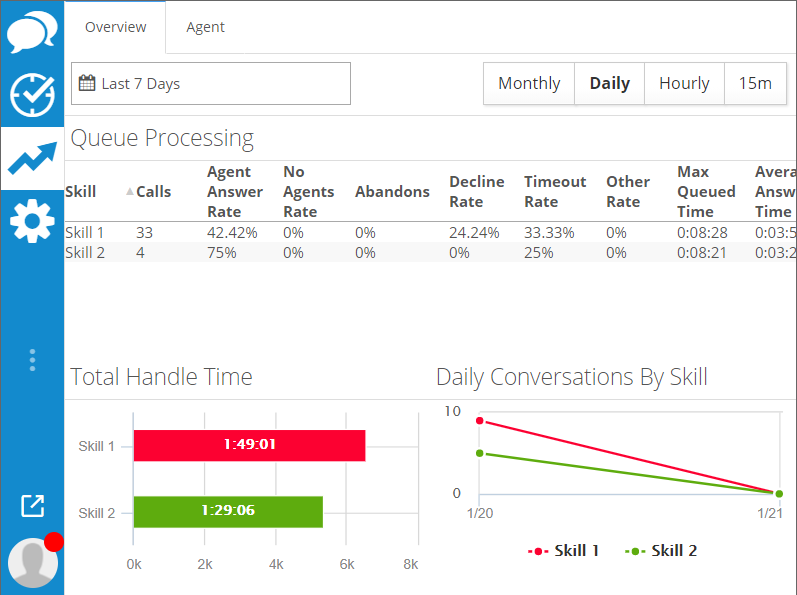
Click the Analytics button to open the Analytics window. This window contains various kinds of data about agent performance, which can be displayed over configurable time ranges and intervals.
The Analytics window consists of two tabs: Overview and Agent.
The Overview tab contains the following data:
-
Queue Processing
-
Total Handle Time (by skill)
-
Daily Conversations By Skill
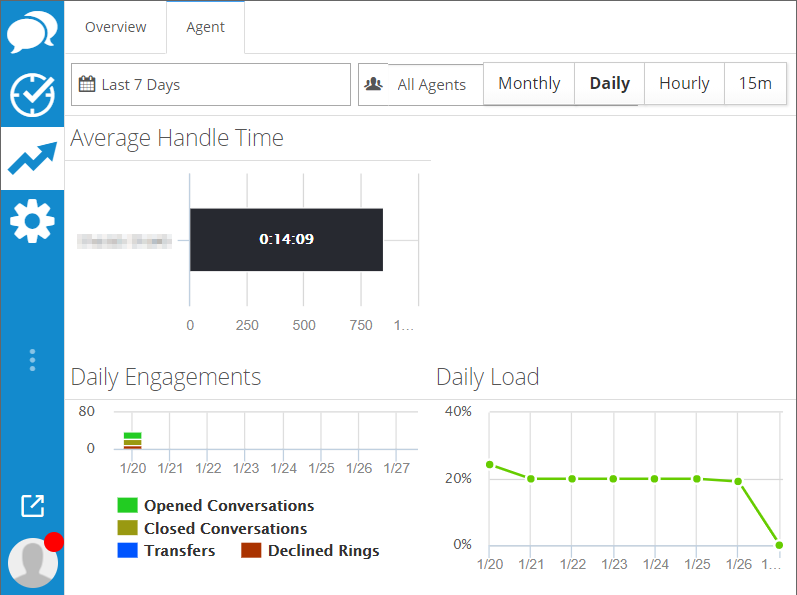
The Agent tab can display the data of all agents or of individual agents. It contains the following data:
-
Average Handle Time
-
Daily Engagements
-
Daily Load
For more information, see Agent Analytics.
Configuring Agent Settings
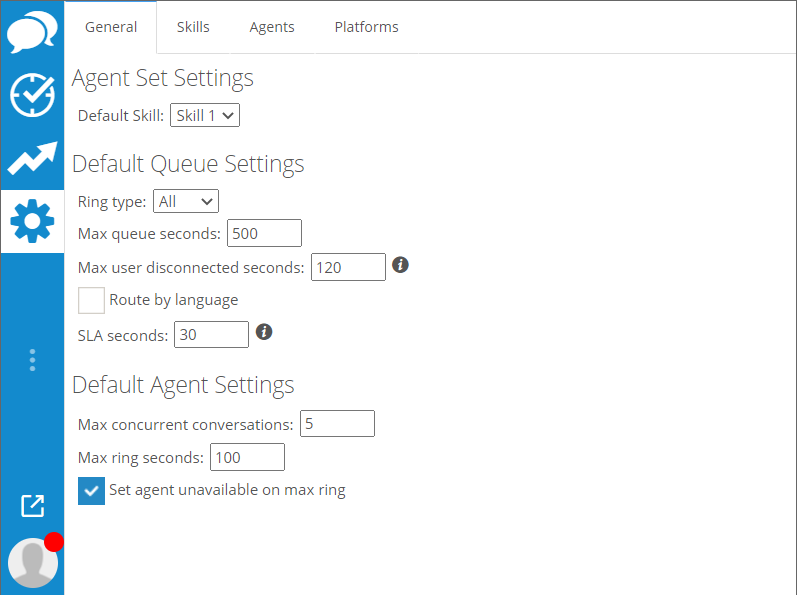
Click the Administration button to open the Administration window. From this window, you can configure a variety of agent settings.
The Administration window consists of four tabs: General, Skills, Agents, and Platforms.
For more information, see Setting Up Agents.
List of File Types
Below is a list of accepted file types that Bot can receive from a user. This list applies to the Bot-Agent integration and regular Bot conversations. These files are also compatible with Web Chat. However, some platforms may not support all of these file types.
.png
.gif
.jpg
.jpeg
.txt
.csv
.doc
.docx
.xls
.xlsx
.ppt
.pptx