Use this procedure if you chose the use case “D. You already have a WhatsApp Business account connected to your Emplifi account, and you want to add another WhatsApp Business account to Emplifi” (see “Choose your use case” in Add an Owned Profile for Your WhatsApp Business Account).
Steps:
-
In a browser, log in to your Facebook account.
-
In the same browser window, access Emplifi, and go to Settings -> Channels -> Social profiles.
-
Click +Add profile.
The dialog for adding a new data source pops up. -
Click Connect owned profiles.
You are prompted to select a social media platform. -
Click WhatsApp.
A popup opens, and Facebook asks you to confirm that you want to continue under the currently logged-in Facebook user. -
Confirm that you want to continue.
You are presented information about what data Emplifi will be able to access once you add an owned WhatsApp profile to the Emplifi account. -
Review the information, and click Get started.
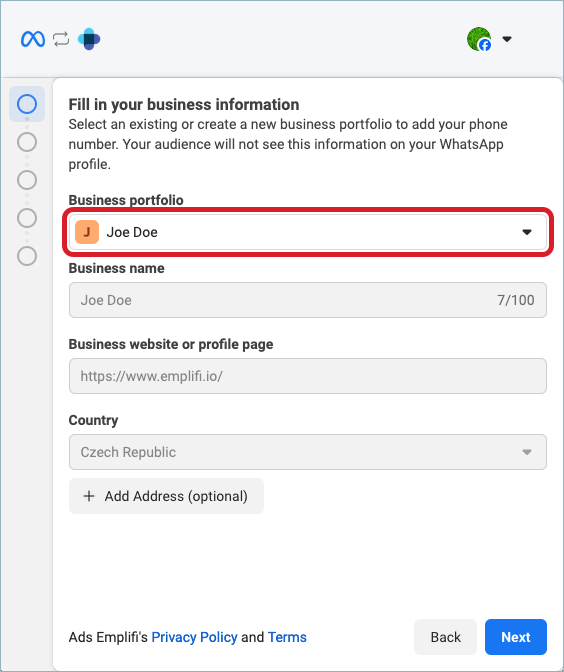
You are asked to either create or select a Facebook business portfolio. -
Select the portfolio that your WhatsApp Business account is tied to, and click Next.
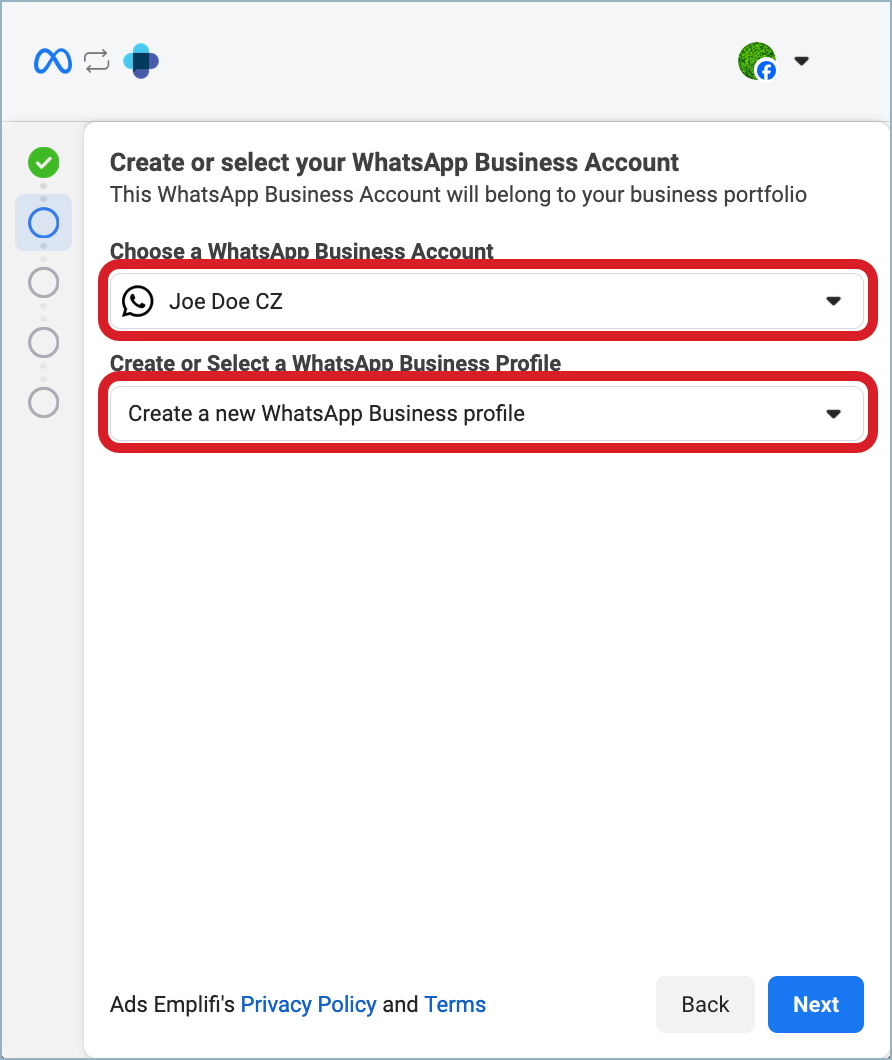
You are prompted to either create or select a WhatsApp Business account and a WhatsApp Business profile.
-
Select your existing WhatsApp Business account, then choose to create a new WhatsApp Business profile, and click Next.
A “WhatsApp Business profile” here refers to an entity within the Facebook account that is created under a WhatsApp Business account and holds an individual phone number (not to be confused with a WhatsApp profile that you are adding to the Emplifi account).
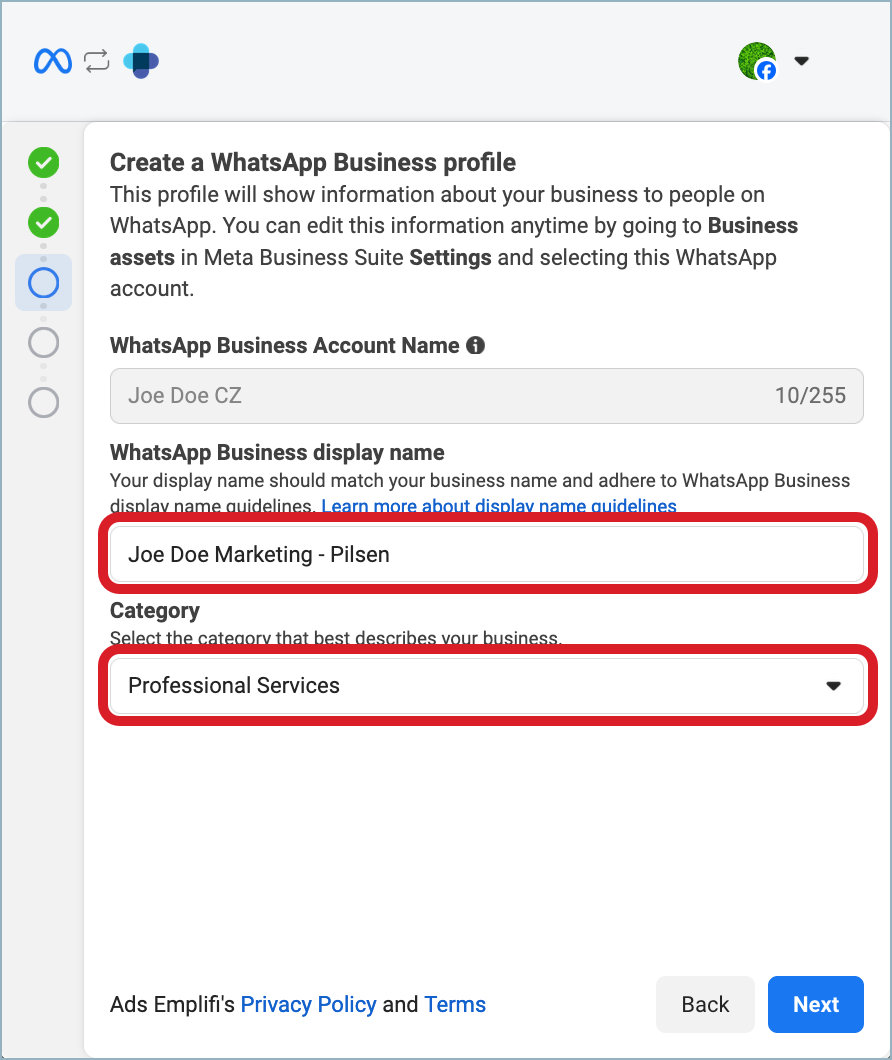
You are asked to provide details about the new WhatsApp Business profile that will be created.
-
Enter the display name and the category of the business, and click Next.
You are asked to add a phone number.
-
Select Add a new number.
Then, enter your phone number and select whether you want to receive a text message or a call with the verification code, and click Next.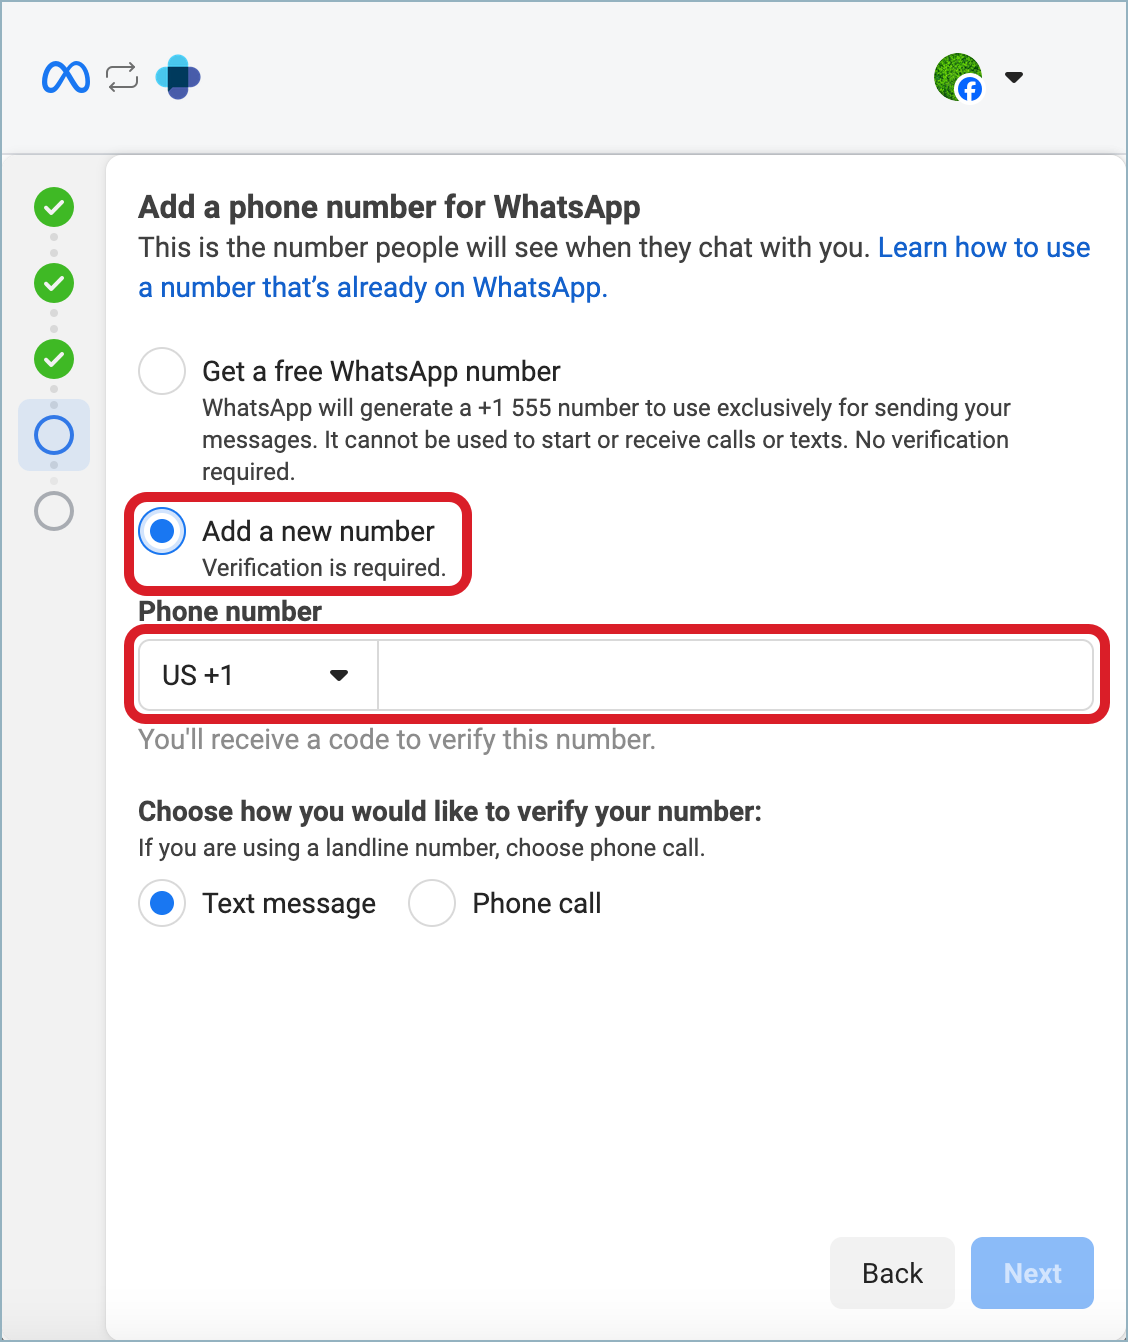
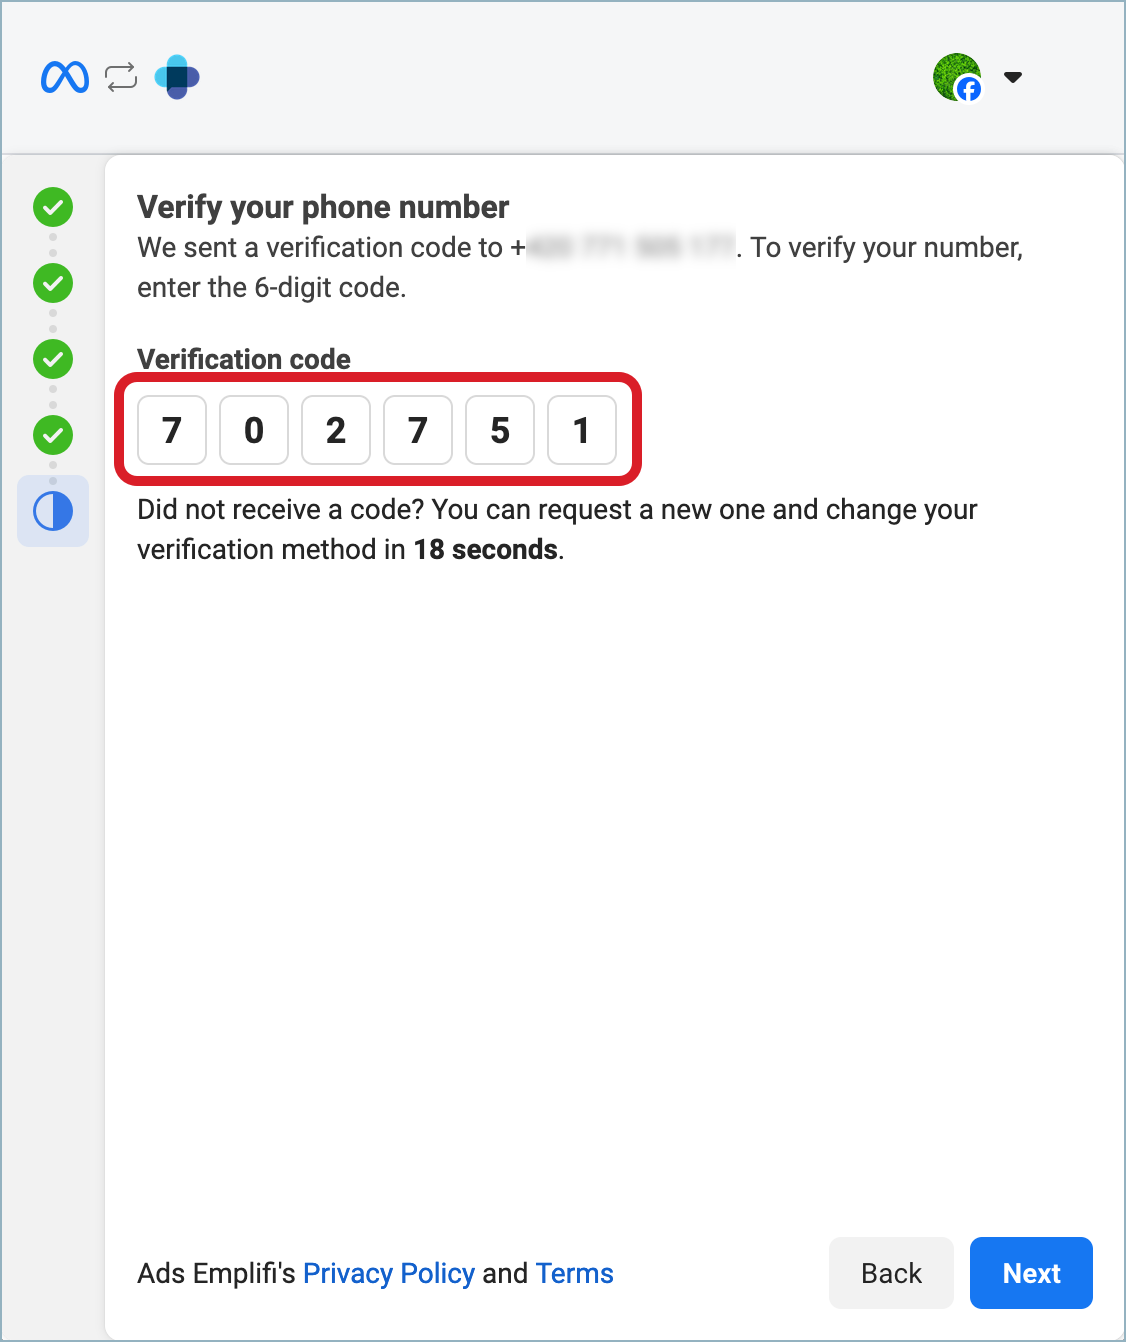
You are prompted to enter the verification code.
-
Wait for a text message or a call with the verification code.
-
Enter the verification code, and click Next.
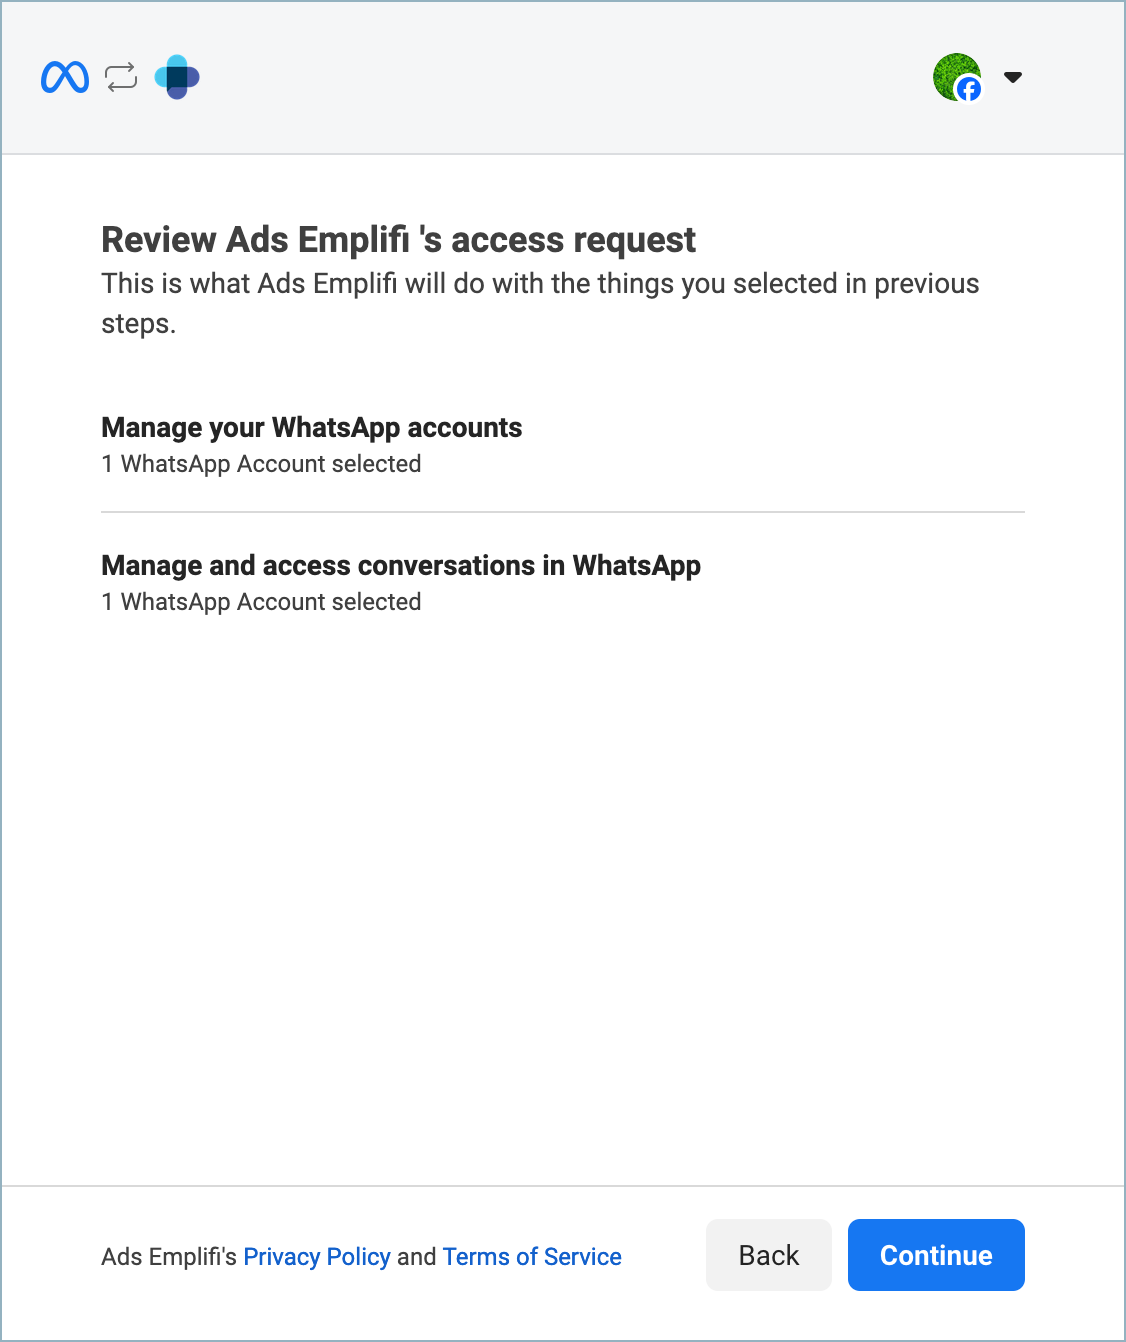
You are presented information about what Emplifi will be able to do with the new WhatsApp Business account.
-
Review the information, and click Continue.
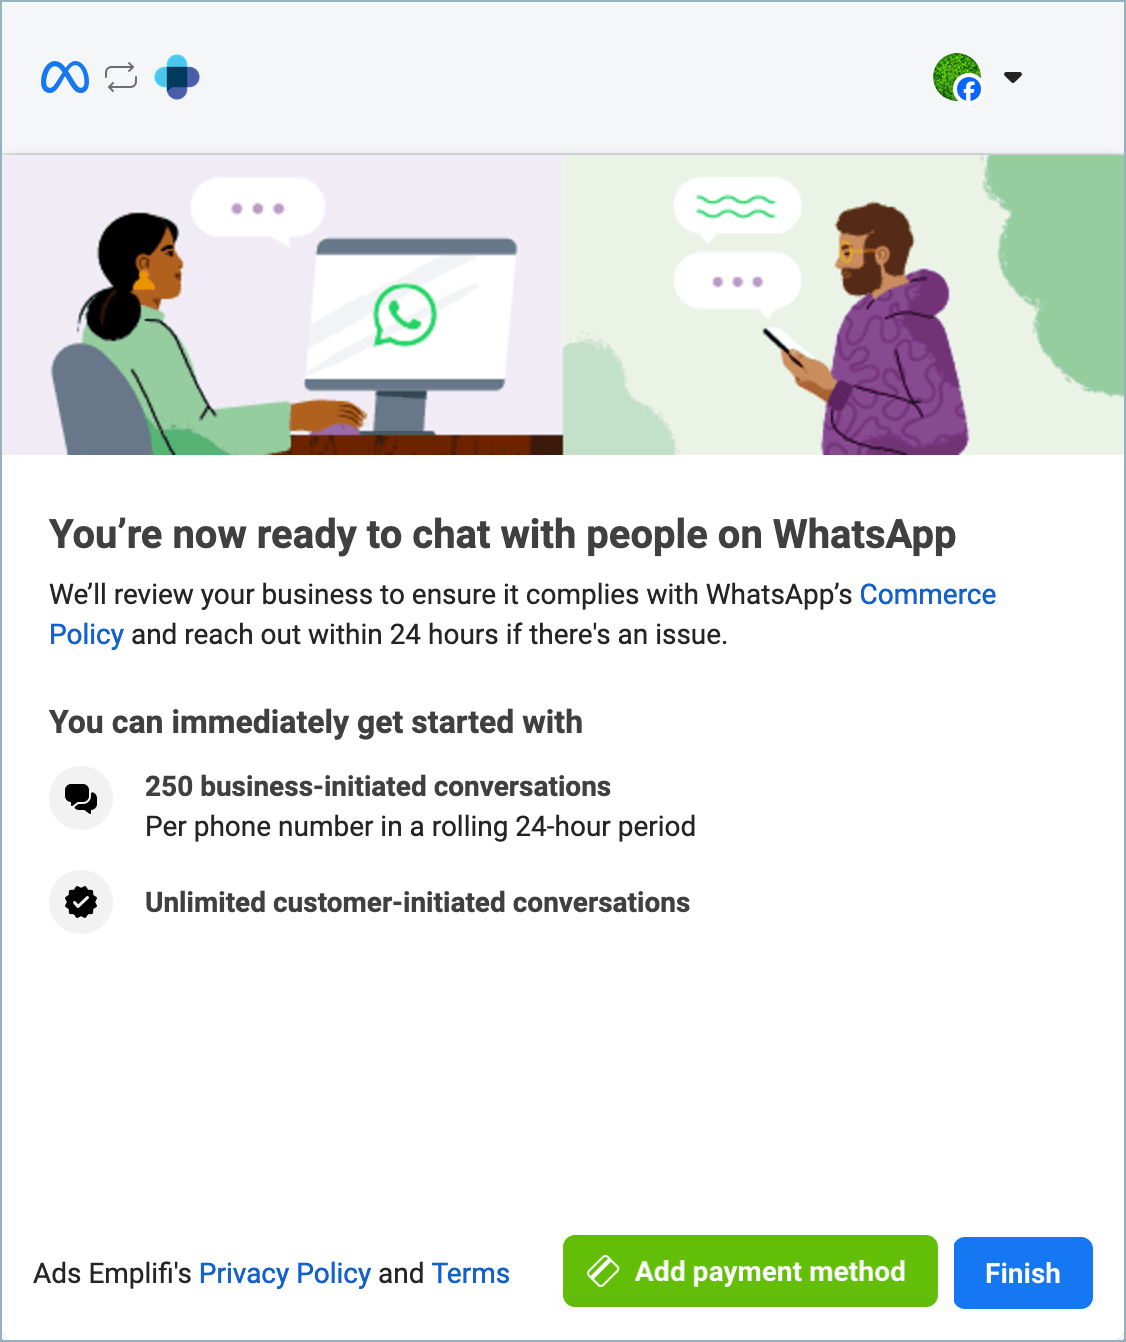
Facebook gets the WhatsApp Business account ready, and you are presented with an account overview.
-
Click Finish.
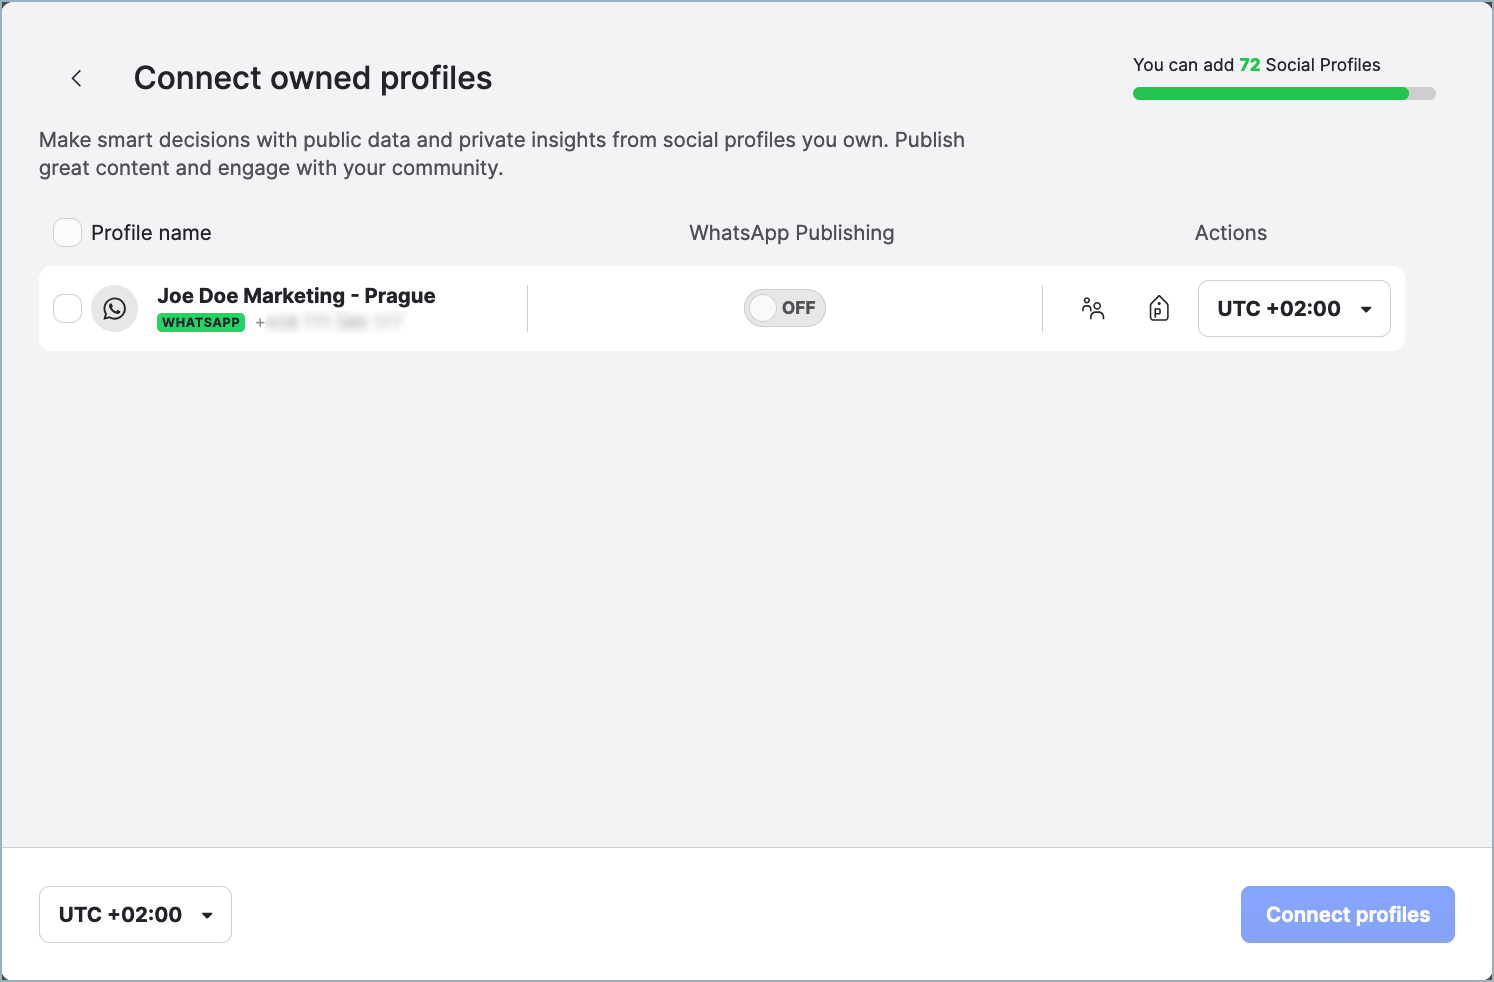
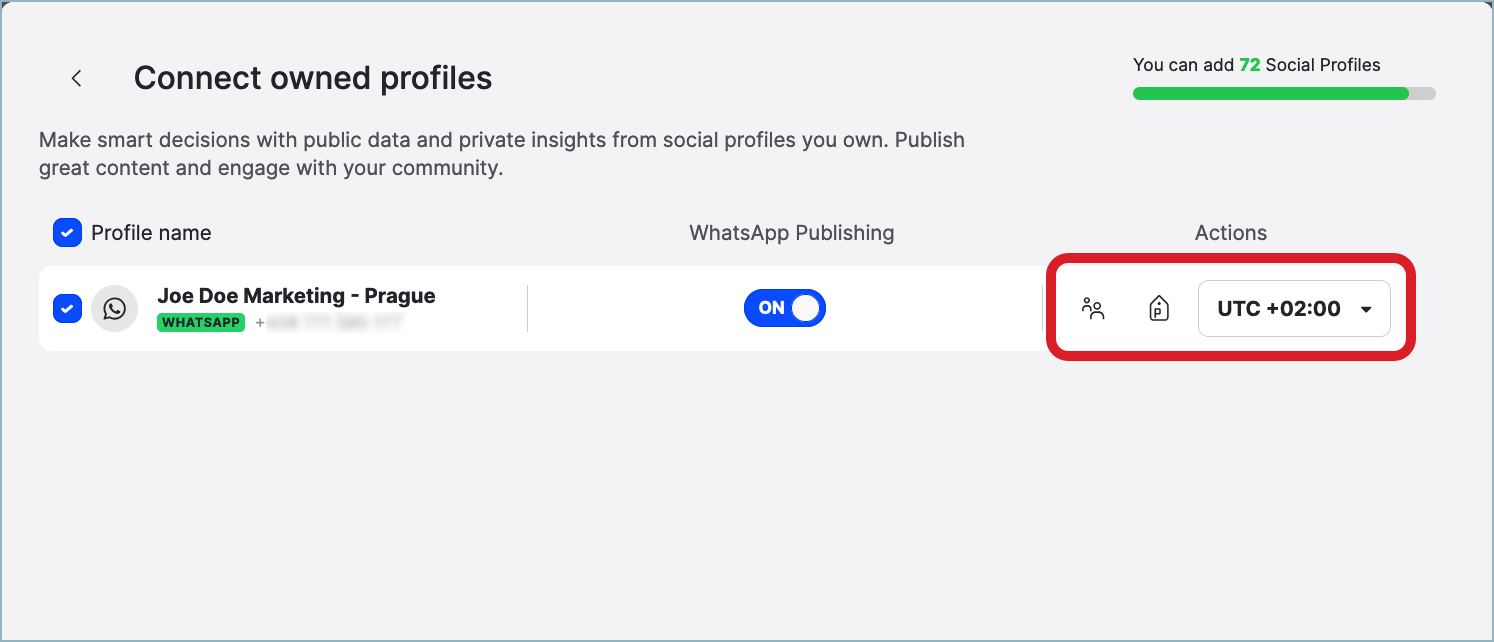
The popup closes. Emplifi accesses the data from WhatsApp, and the dialog shows the WhatsApp Business account.
-
Toggle the switch for the WhatsApp Publishing option to ON to enable messaging with the WhatsApp Business account.
The Connect profiles button on the bottom right gets enabled. -
(Optional) Perform the following actions:
-
Click the group icon to set up the visibility of the profile in the Emplifi account.
By default, the profile is set to be visible only to you and Account Admins (for more information about visibility, see Set Up Visibility of a Profile). -
Click the label icon to assign labels to the profile (for more information about the labels, see Set Up Labels).
-
Select the timezone to apply to the profile (for more information about the timezones, see Customize the Properties of a Profile).
By default, the timezone is set to your default timezone.
-
-
Click Connect profiles.
The WhatsApp Business account is added as an owned profile and appears in the list of profiles.
The newly added profile is activated for Community by default (the switch next to the Community Management option is set ON; for more information, see Activate Profiles for Community and Set Up Profile Roles).
Next steps
Now that you have added your WhatsApp Business account as an owned profile, do the following:
-
Review “Keep the WhatsApp Business profiles connected” further in this article and take necessary steps to keep the profile connection active.
-
(Optional but strongly recommended) Verify your WhatsApp Business account.
A WhatsApp Business account that is not verified is allowed to have only 250 business-initiated conversations per 24 hours. Verifying your account lets you overcome this limit and be able to use your WhatsApp Business account to the fullest as a service channel.
For information about how to verify your WhatsApp Business account, see this Facebook help article.
Keep the WhatsApp Business profiles connected
Once you added WhatsApp Business profiles to your Emplifi account, make sure that the profiles stay connected and their connections do not get expired.

If the connection of a WhatsApp Business profile gets expired, make sure to re-establish it as soon as possible. When a WhatsApp Business profile is not connected, you cannot send or receive WhatsApp messages. Any incoming communication that may take place during the period when the profile is not connected will be lost and cannot be retrieved later due to Facebook and WhatsApp API limitations (Meta does not provide a public API for obtaining historical WhatsApp data).
For more information about profile connections, why they may get expired, and how to stay informed when a connection gets expired, see Check and Establish Connections of Owned Profiles.
Troubleshooting
If something is going wrong while you are adding an owned profile for a WhatsApp Business account, take the following actions, and try adding an owned profile again:
-
Make sure that you chose the right use case for your situation (see “Choose your use case” in Add an Owned Profile for Your WhatsApp Business Account).
-
Check that all the prerequisites for the use case that you chose are met (see the prerequisites in the section for your use case in Add an Owned Profile for Your WhatsApp Business Account).
-
Check that you are logged in to the correct Facebook account.
-
Make sure that the phone number is not used by or connected to any application (including WhatsApp Messenger and WhatsApp Business) and is not used in another Emplifi account.
If none of those actions helped, contact Emplifi Support at support@emplifi.io.
An owned WhatsApp profile is stuck on public after re-adding
Problem
When you are re-adding a WhatsApp profile to your Emplifi account after you have deleted it from either the same Emplifi account or a different one, the WhatsApp profile is added as public and not as owned (private). The connection status of the profile is Not connected (represented by a dash (-)).

Because of that, the profile cannot be not activated for Community (the switch next to the Community Management option is set to OFF and disabled), and you cannot use the profile for messaging in Community or Care.
Why is that?
This happens when you are re-adding a WhatsApp profile 14 or more days after you originally added it to the Emplifi account for the first time.
When you first added a WhatsApp Business account as an owned profile to the Emplifi account, Facebook verified the phone number associated with the WhatsApp Business account. The verification is valid for 14 days only. After 14 days, Facebook considers the verification invalid and does not allow the Emplifi platform to add the WhatsApp Business account as an owned profile.
Solution
In the Meta Business Suite, delete the phone number from your WhatsApp Business profile (the entity within the Facebook account that is created under a WhatsApp Business account and holds an individual phone number; not to be confused with a WhatsApp profile that you added to the Emplifi account). Then, add the WhatsApp Business account to the Emplifi account as an owned profile as usual.
Doing so will re-verify the phone number, and the profile will be added as owned.
Steps:
-
Log in to the Emplifi account where the WhatsApp profile is stuck on public, and delete this WhatsApp profile.

-
Log in to the Facebook account that manages the WhatsApp Business account.
-
Go to the Meta Business Suite, and click Settings on the bottom left.
-
In the menu on the left, locate the Accounts section, and click WhatsApp accounts.
-
Select your WhatsApp Business account, and click WhatsApp Manager on the bottom of the panel that opens.
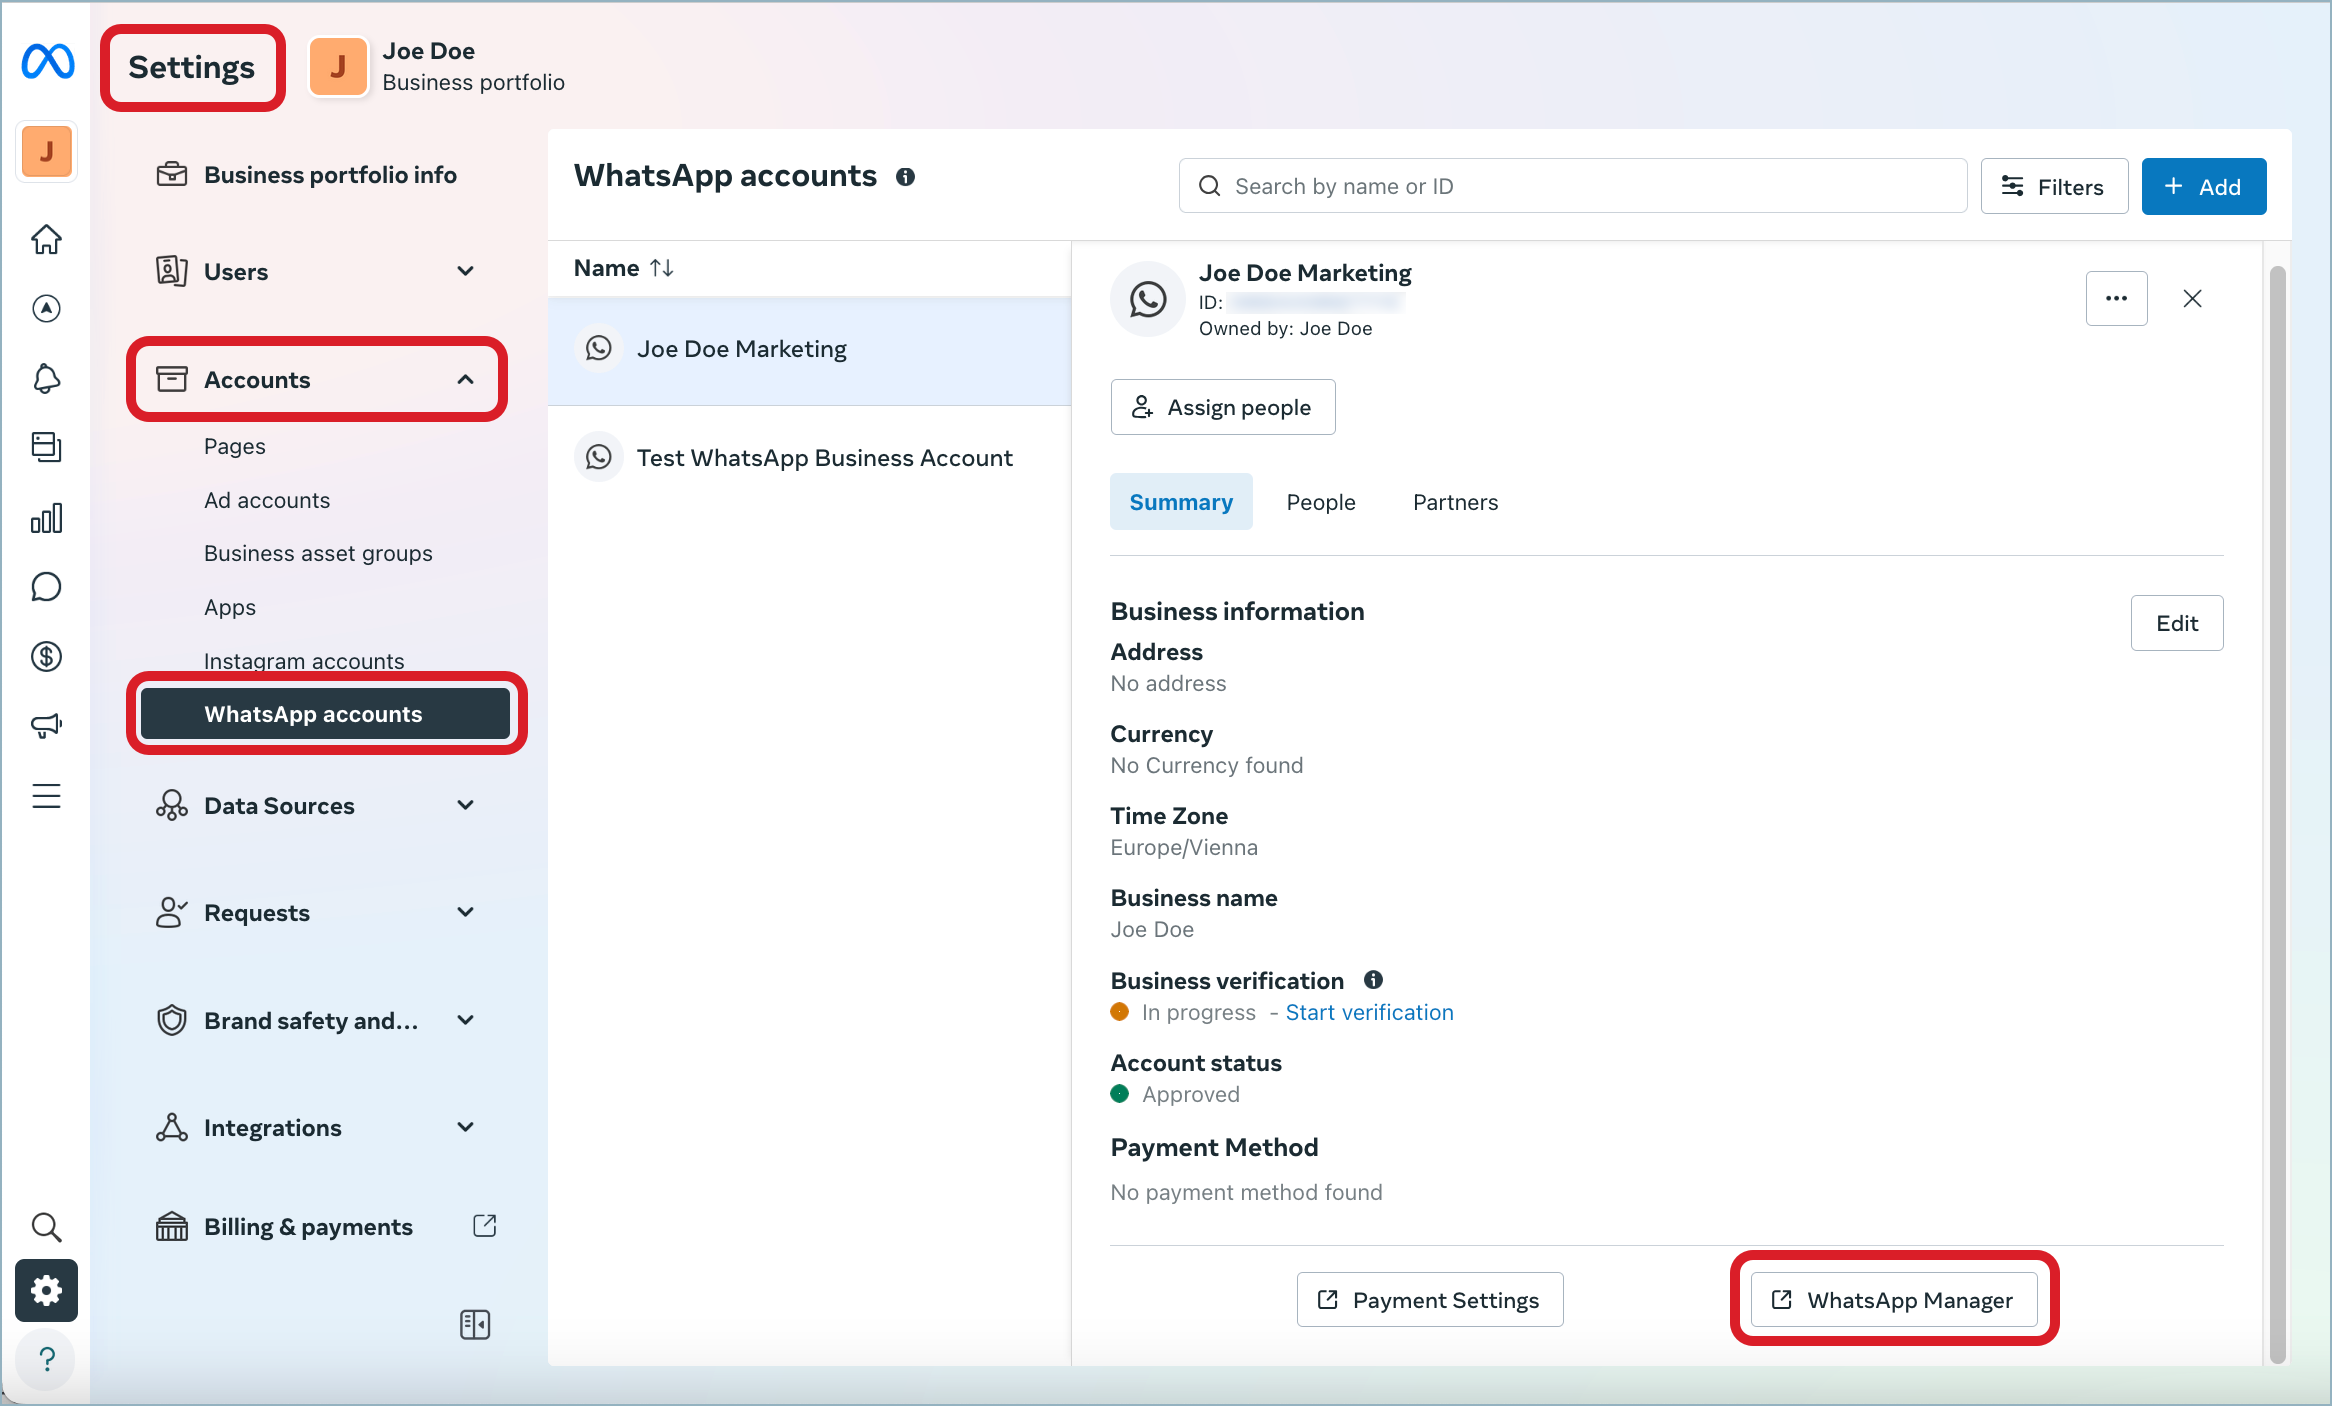
The WhatsApp Manager opens showing the phone number connected to the WhatsApp Business account.
-
Locate the phone number, and click the trash can icon.
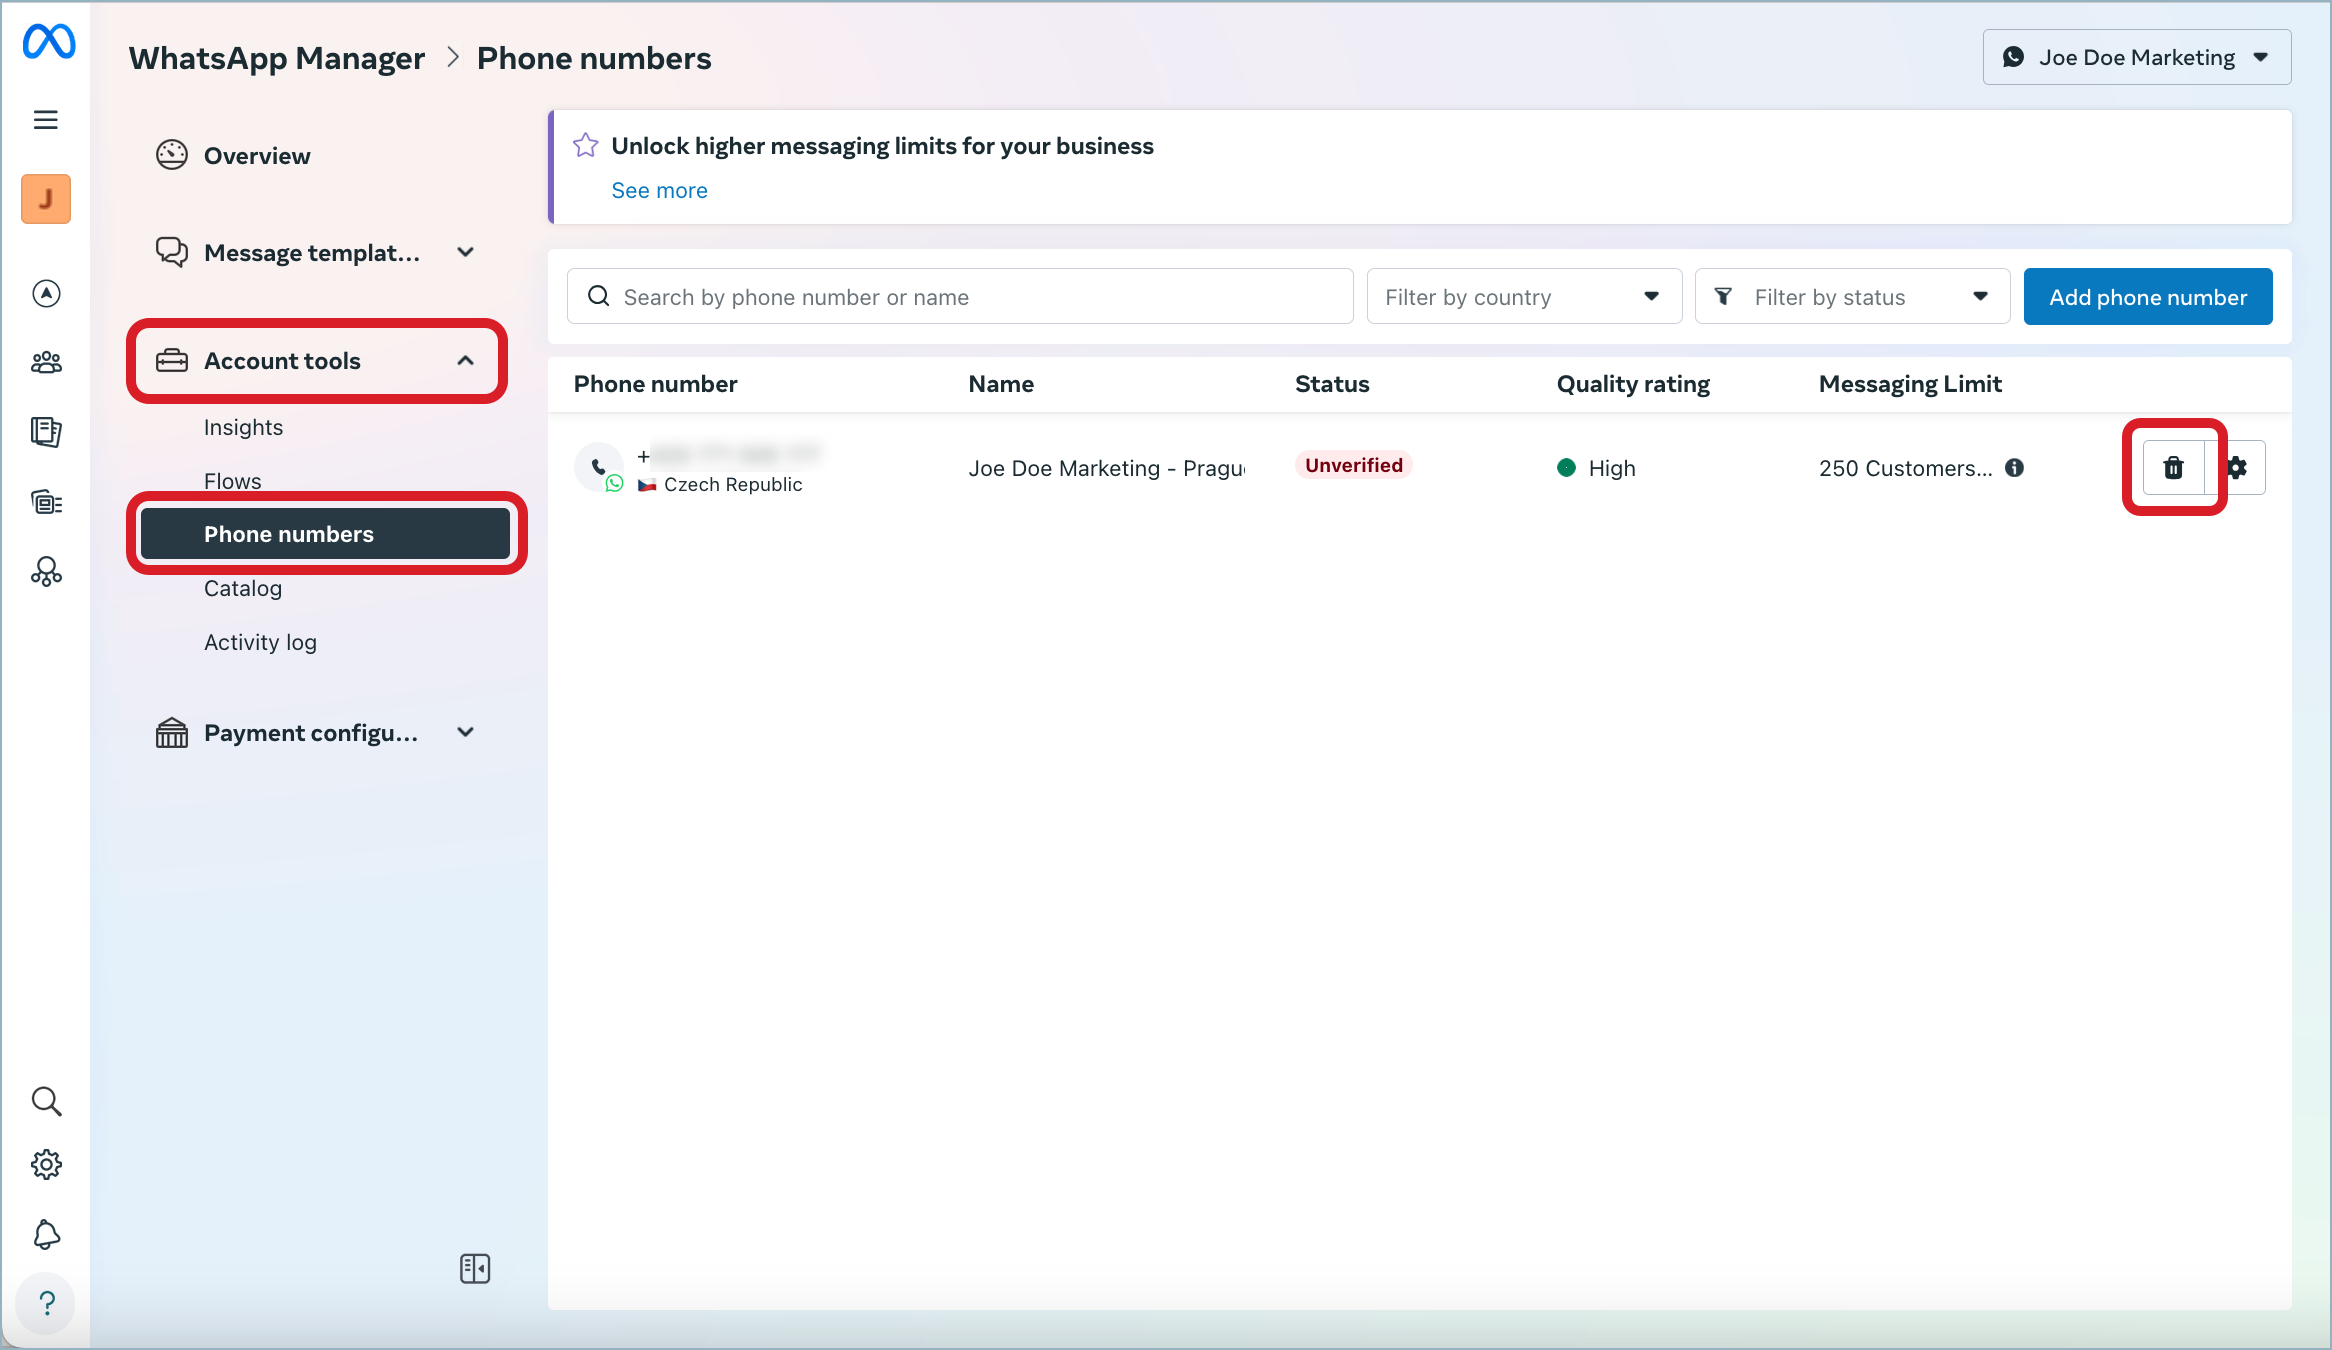
The dialog appears prompting you to confirm the deletion.
-
Follow the instructions on the dialog, and confirm the deletion.
The number is deleted.
-
Go back to the Emplifi account, and add the WhatsApp Business account as described earlier in this article.
The WhatsApp profile is now added as an owned profile.
While there is a way to re-verify the phone number from within the WhatsApp Manager in the Meta Business Suite, it may be unreliable. We do not recommend using this method.
If you are proficient with development tools, you can re-verify the number via an API call.