The Setup Wizard of the SpeedFlex Design Editor is meant for new sites that haven't created a theme for their site. In order to follow this guide, the following items must be set.
-
Your widget configuration has been deployed on your site instance.
-
You're able to access the SpeedFlex Design Editor.
-
You've read through the main areas of the SpeedFlex Theming Guide.
When you're set with the above items, you're ready to start configuring your theme in the Setup Wizard. Start by clicking Widgets design editor in the navigation menu.
Step 1: Using existing styles
You can pull the CSS style from your website and use those style values during the Setup Wizard process. Enter the URL of your site or product detail page. If the page is accessible, we will pull the styling from the URL provided so you can reference those styling values through the setup process.
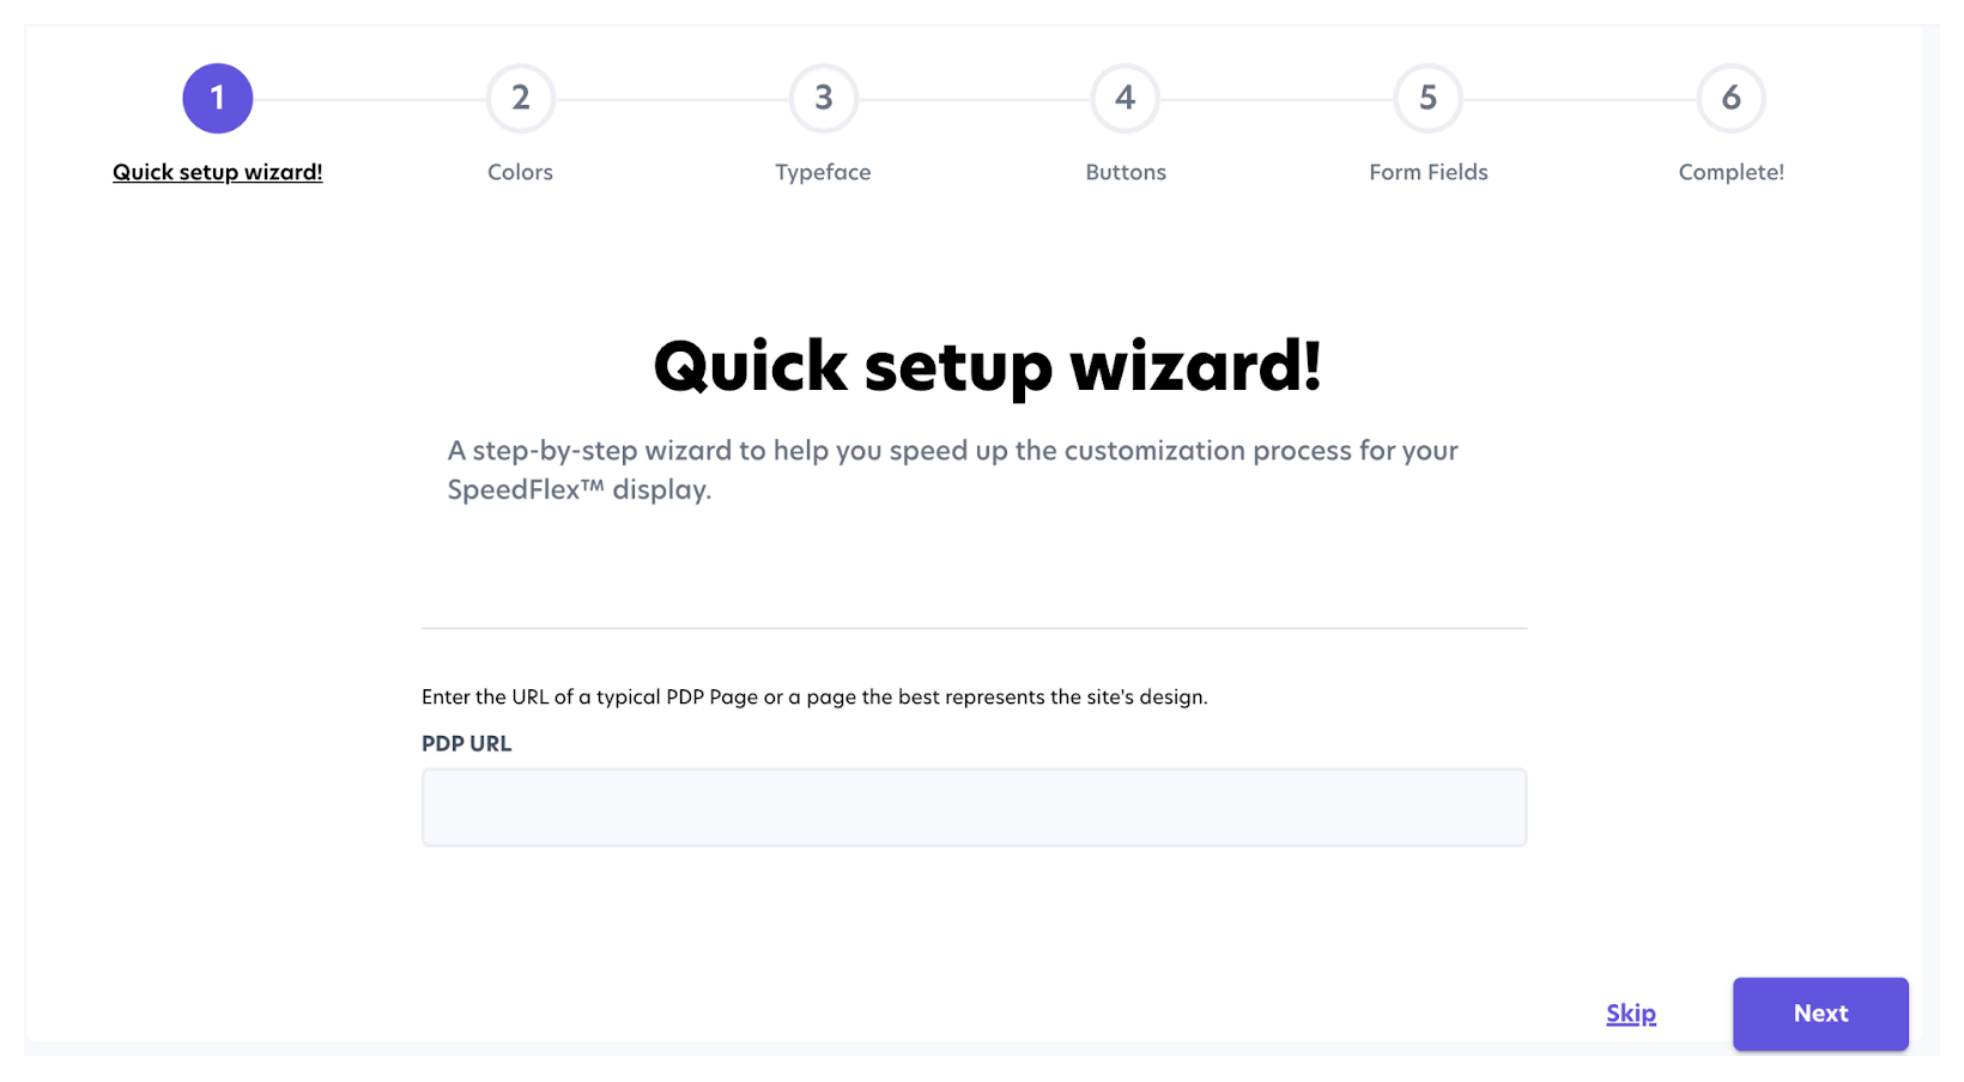
If you don’t have a URL where you can pull styling details from then you can skip this step and manually enter in the styling value on the other steps.
Step 2: Selecting the colors for your SpeedFlex Widget
On step 2 you’ll be able to select the two most important colors of your SpeedFlex Widget. Please reference Branding and Colors to make sure you’re selecting the appropriate colors.
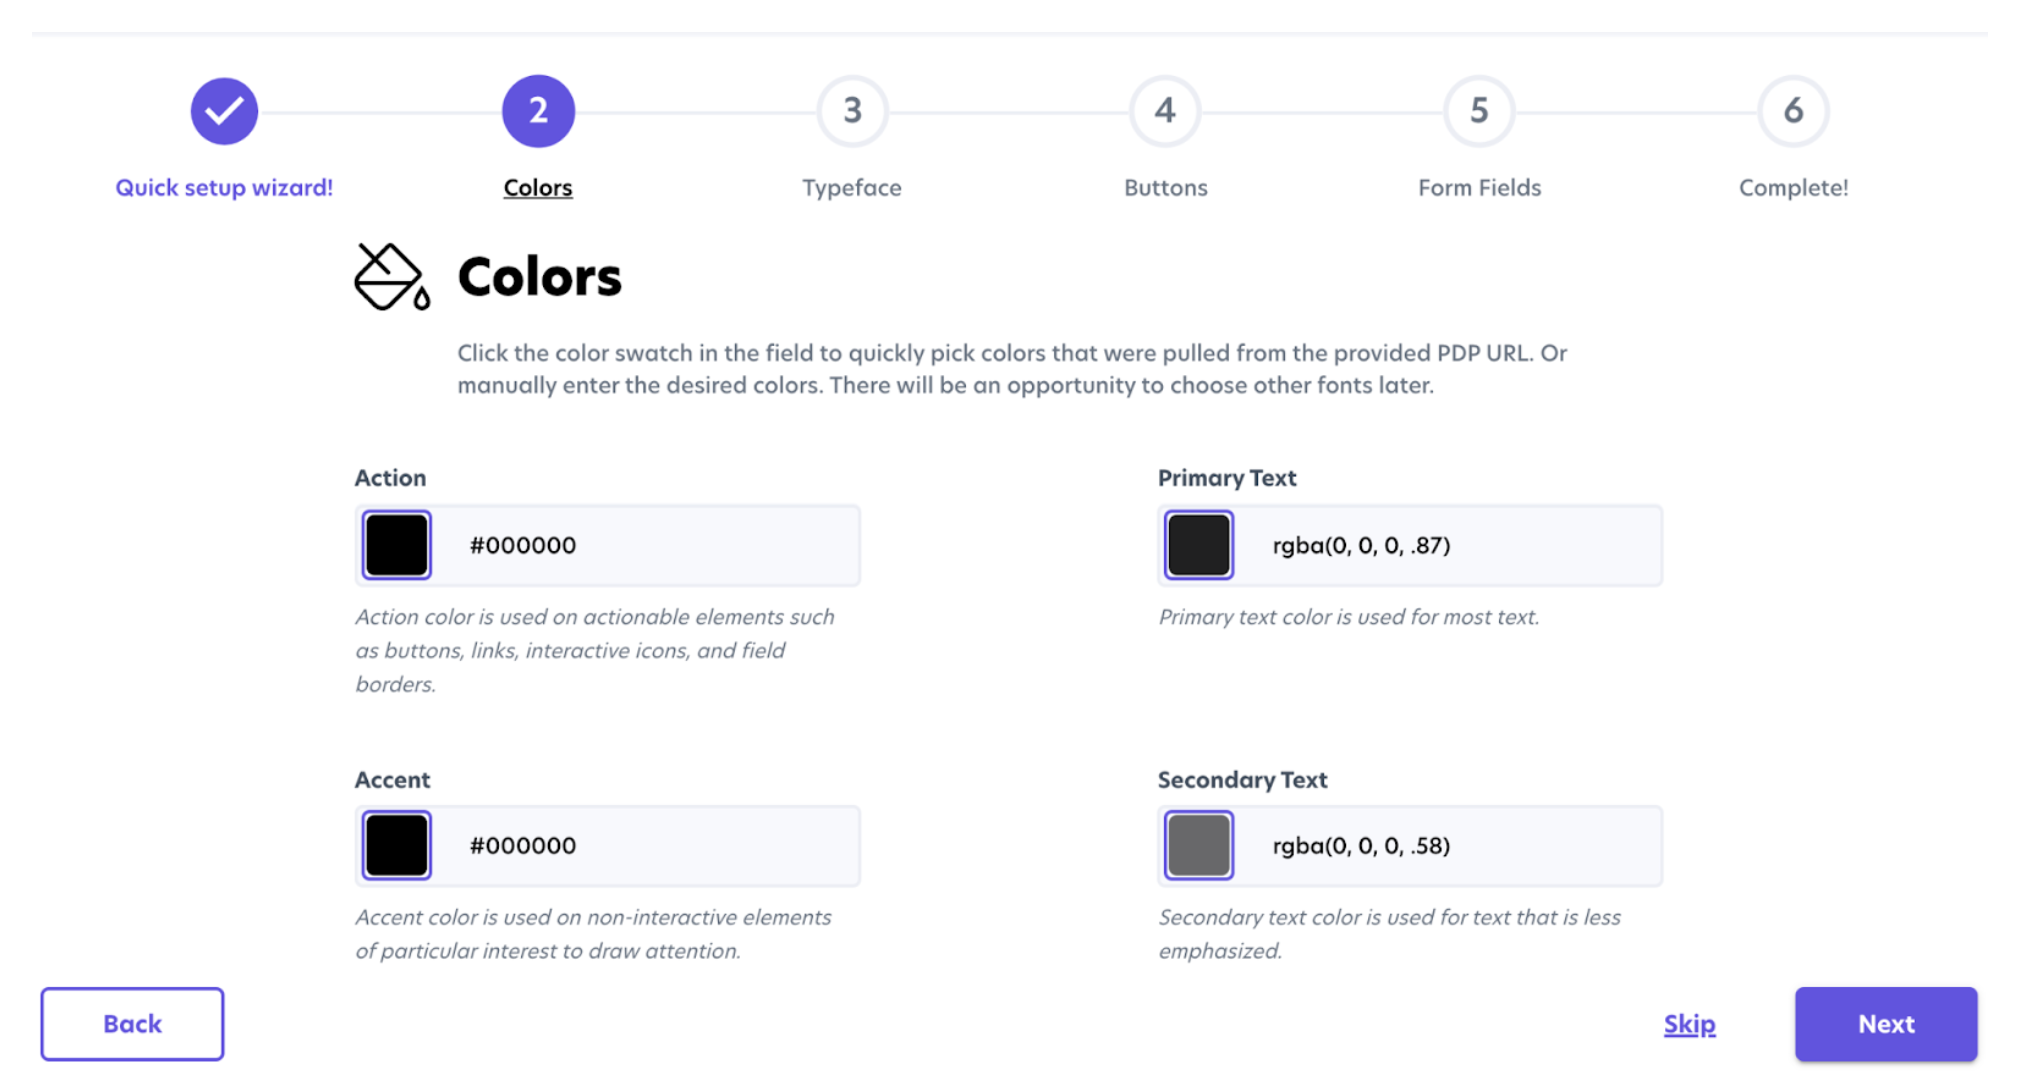
If you added a URL to pull styling from your site, you’ll be able to click the color box to see color swatches from your site.

If you aren’t sure which color to select, you can skip this step.
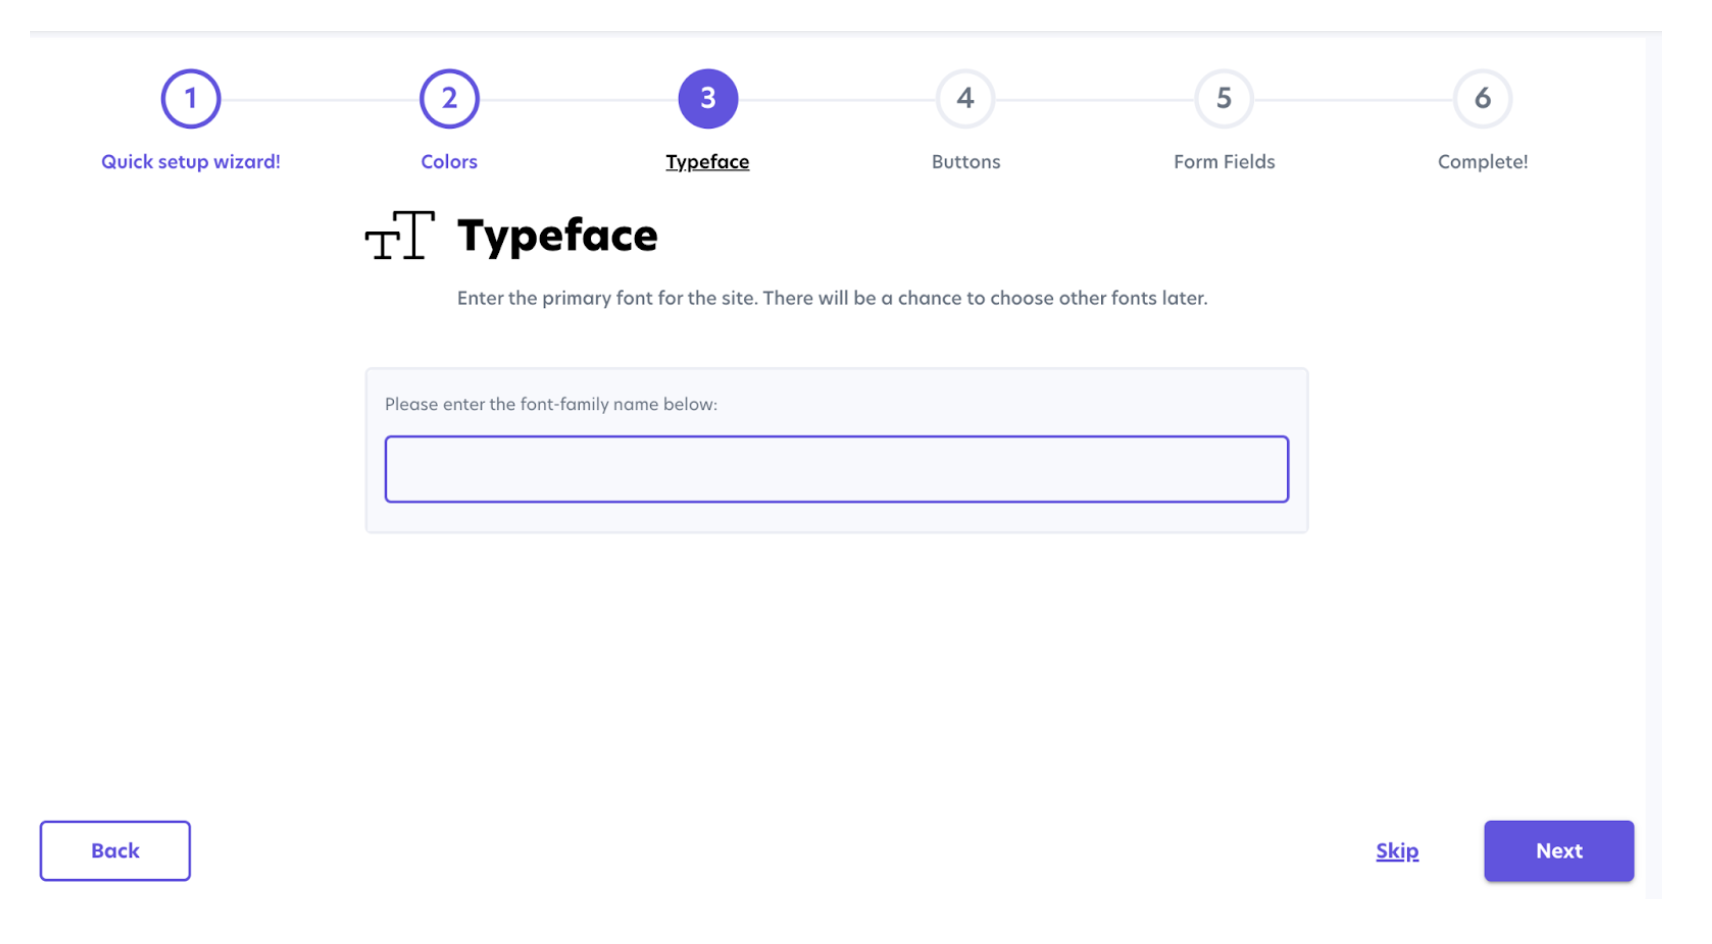
Step 3: Select your fonts
If you provide a URL to pull styling from, we’ll highlight the most used fonts on your site. You’ll be able to select which fonts should be used within the widget.
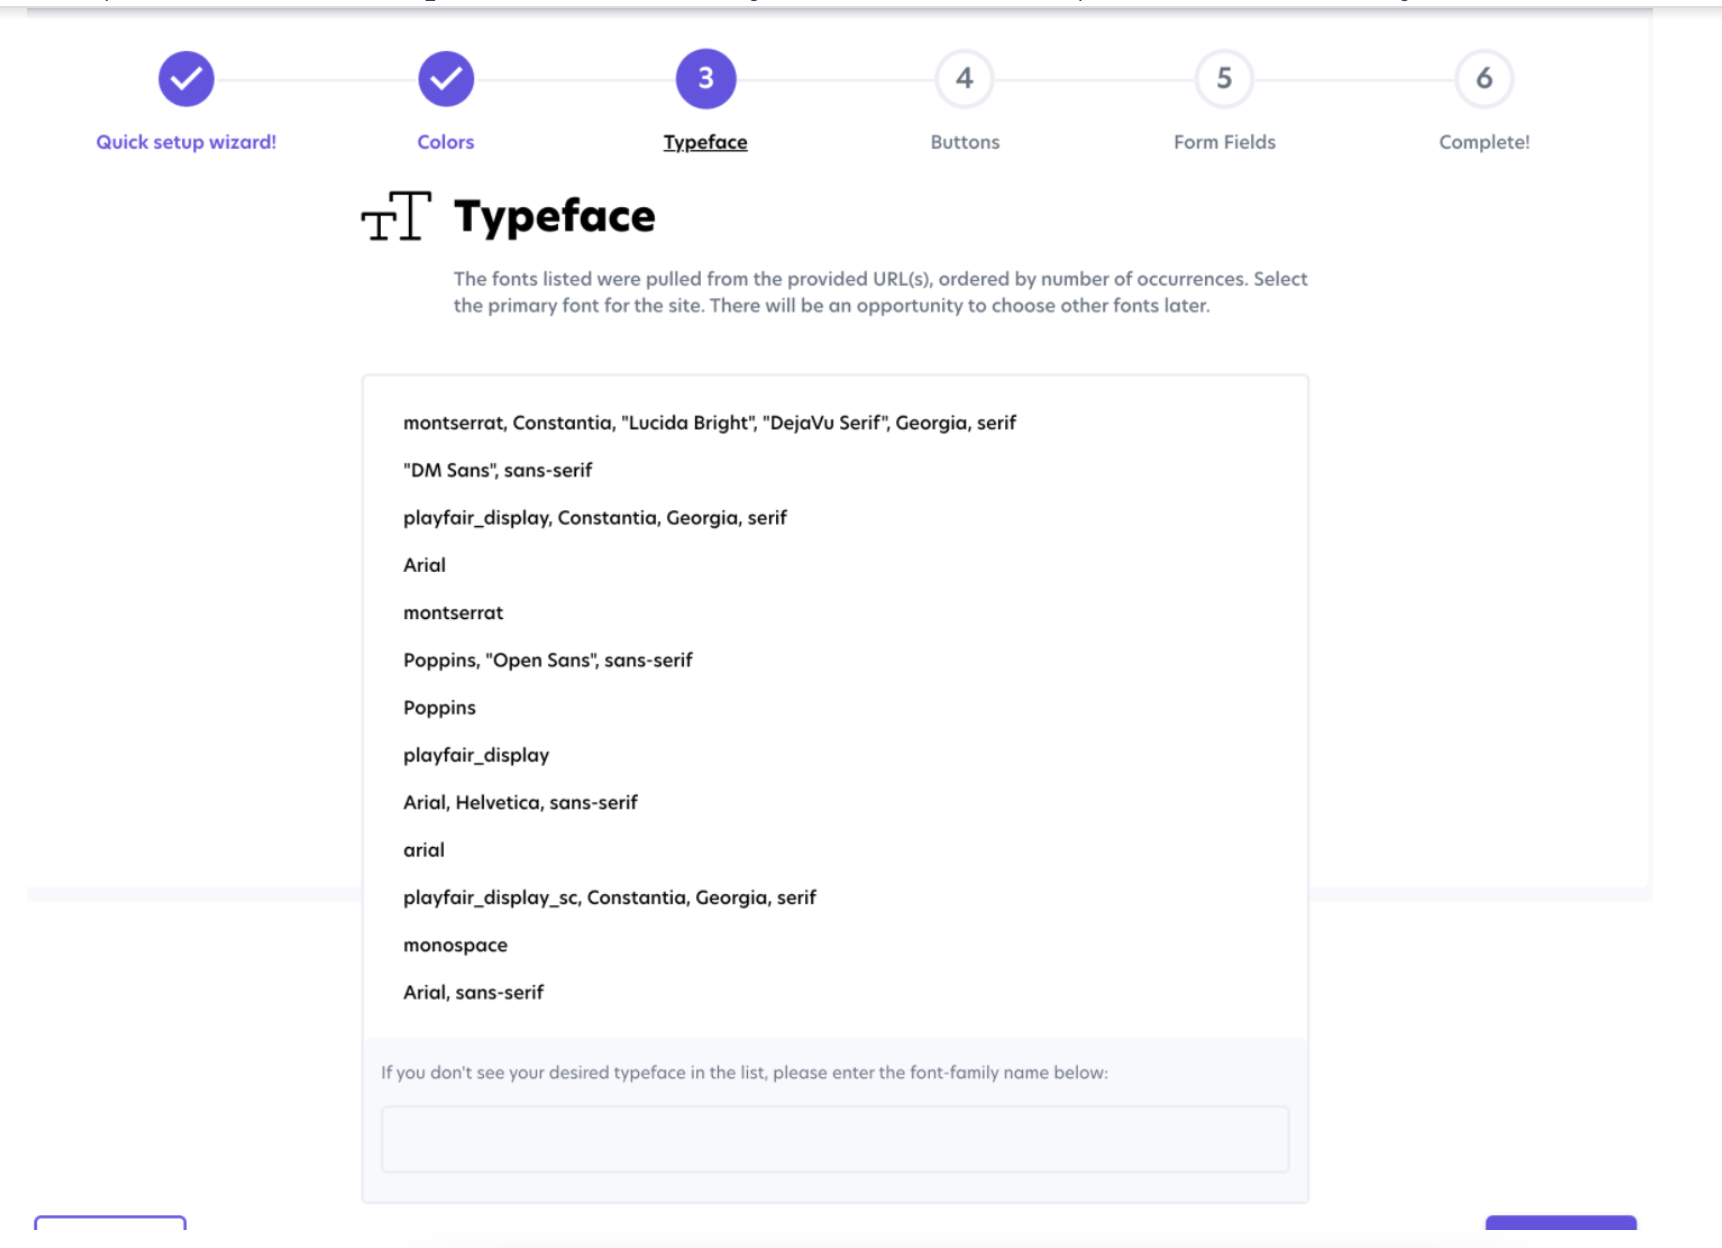
If you don’t see your font on the list or didn’t add a URL. You’ll be able to type out the font in the text field.
If you are using a custom font that only works on your site then the font won’t display properly in the SpeedFlex Design Editor. The font will appear correctly on your website.
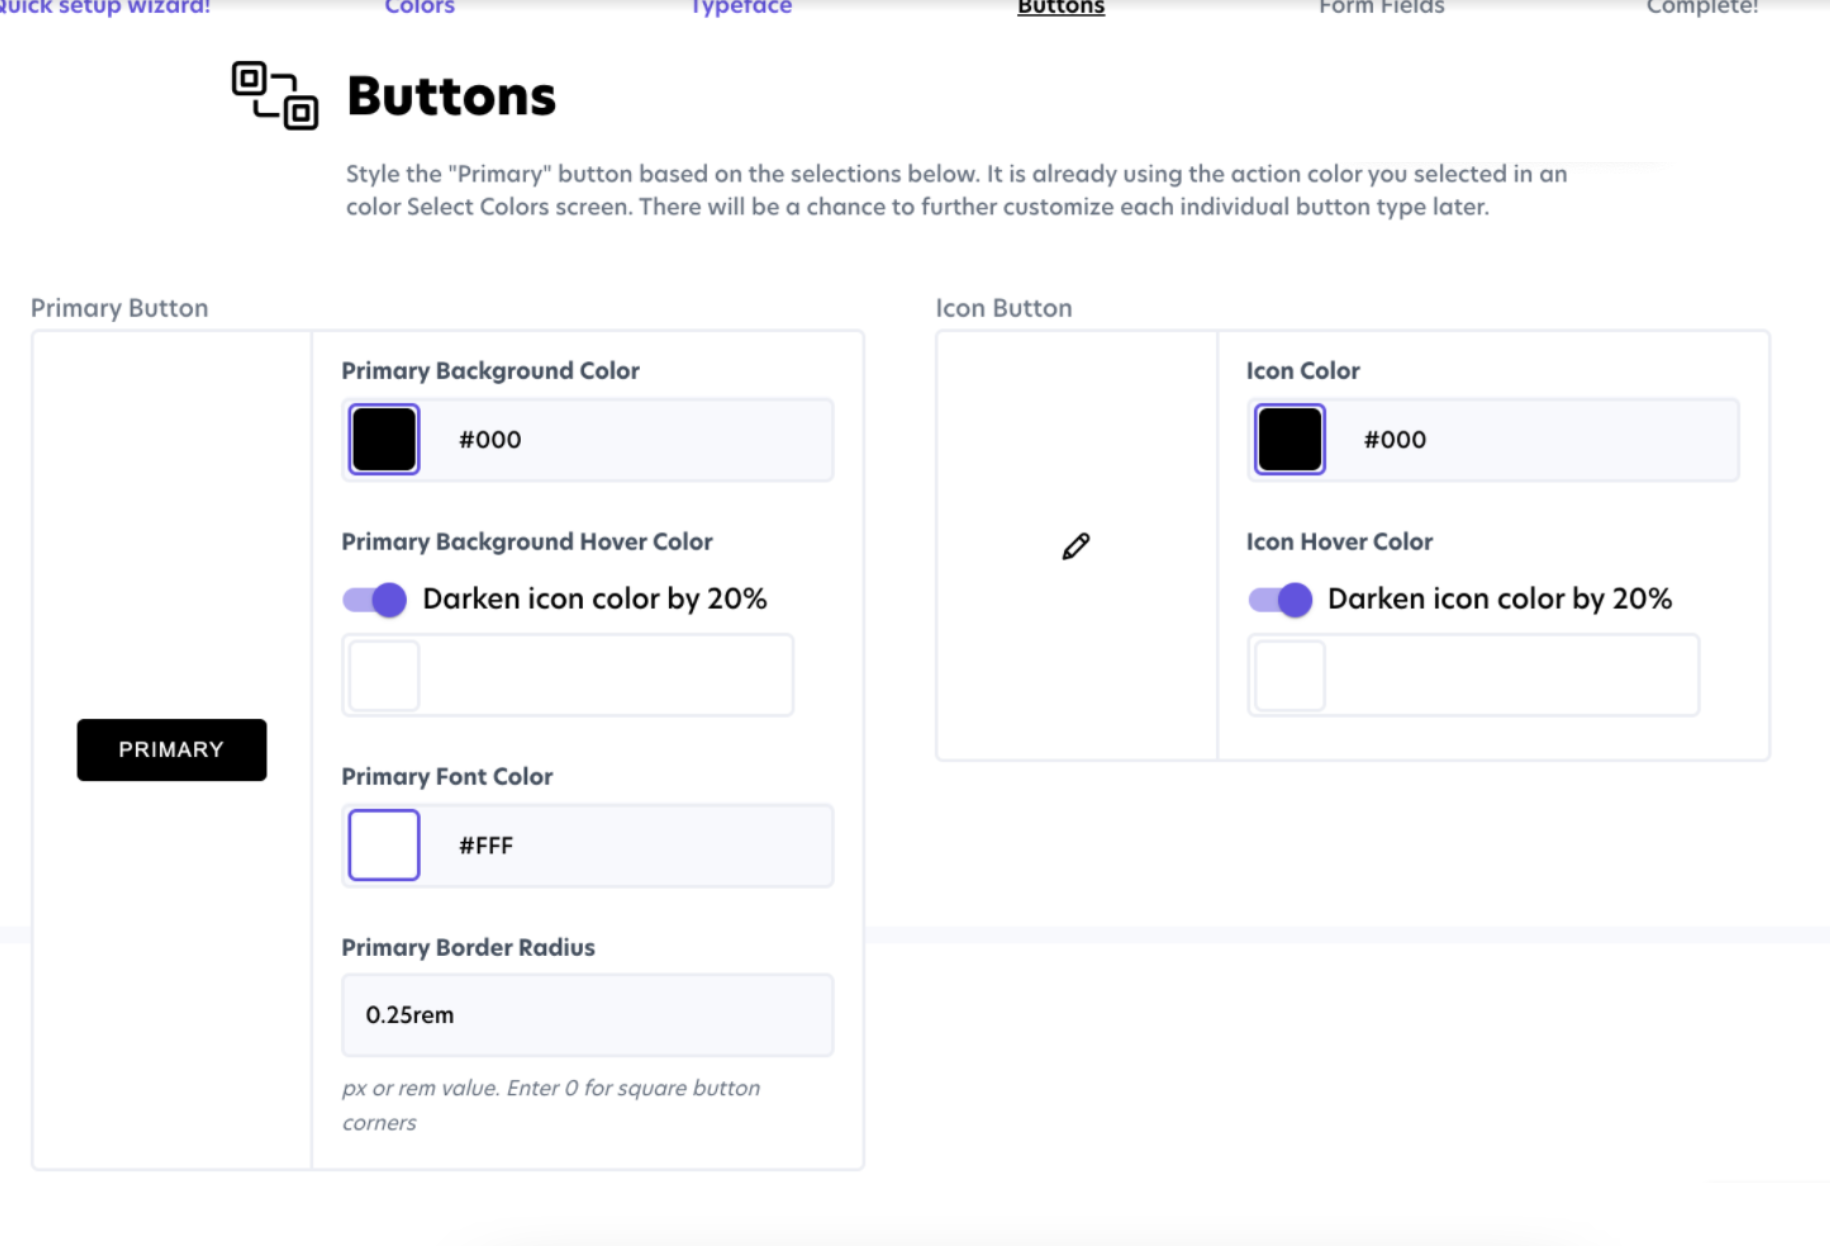
Step 4: Select your button and icon colors
On step 4, you’ll be able to configure the most common styling value of the primary and icon button’s and styling.
Primary Button
-
Primary Background Color: The background color will be the button's background color
-
Primary Hover Color: By default SpeedFlex will have the hover color off buttons be 20% darker than it’s background color. You can leave it like that or provide another color hex code for it’s hover color.
-
Primary Font Color: The primary font color will change the color of the text within the button.
-
Primary Border Radius: Rounded radius value of the buttom. Must be set in px or em
Icon Button
-
Icon Color: The background color will be the icon's background color
-
Icon Color Hover: By default SpeedFlex will have the hover color off icons be 20% darker than it’s background color. You can leave it like that or provide another color hex code for it’s hover color.
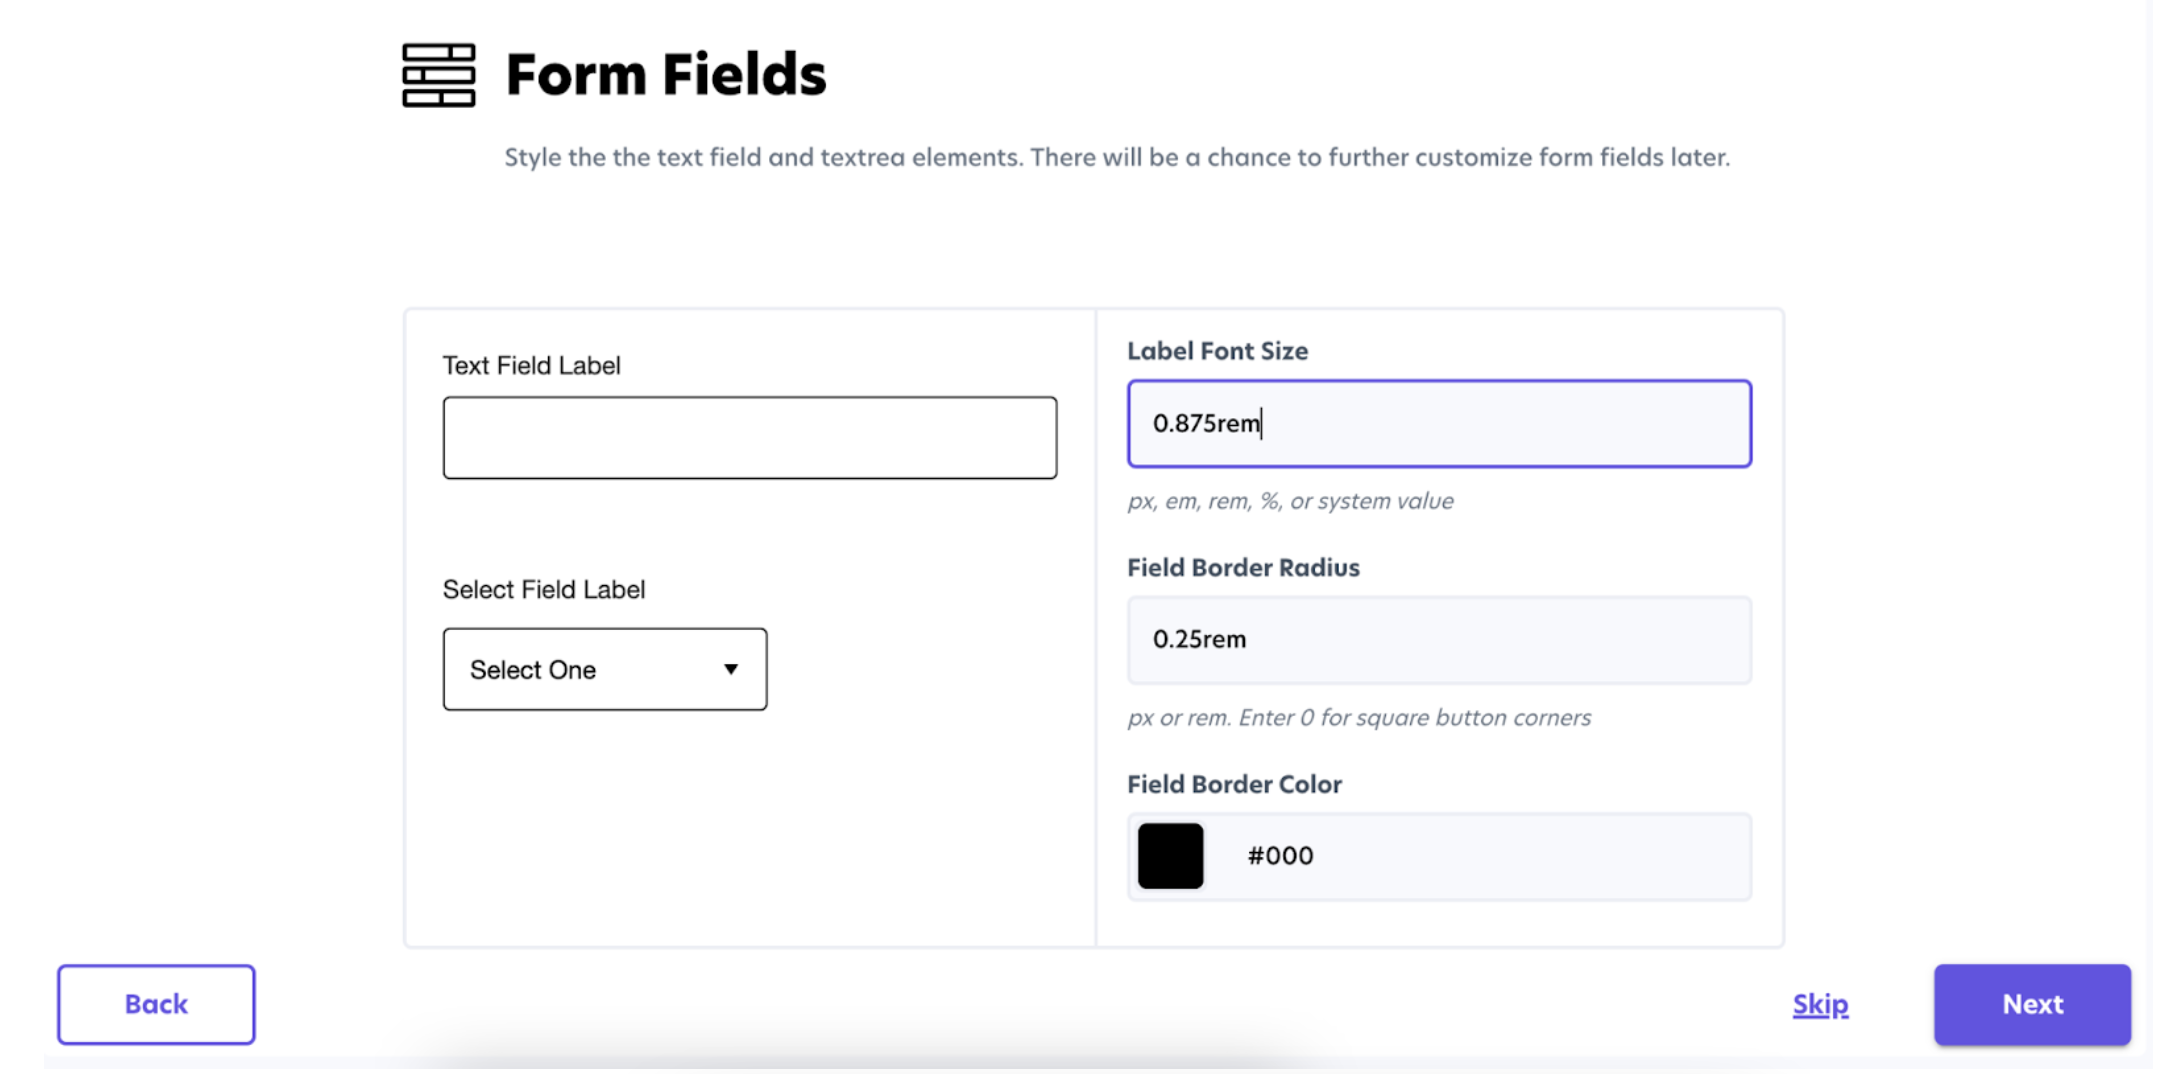
Step 5: Styling for your input and form fields
You'll be able to control the size of the input labels and set the form elements border radius. You can also set the color outline of the input elements.
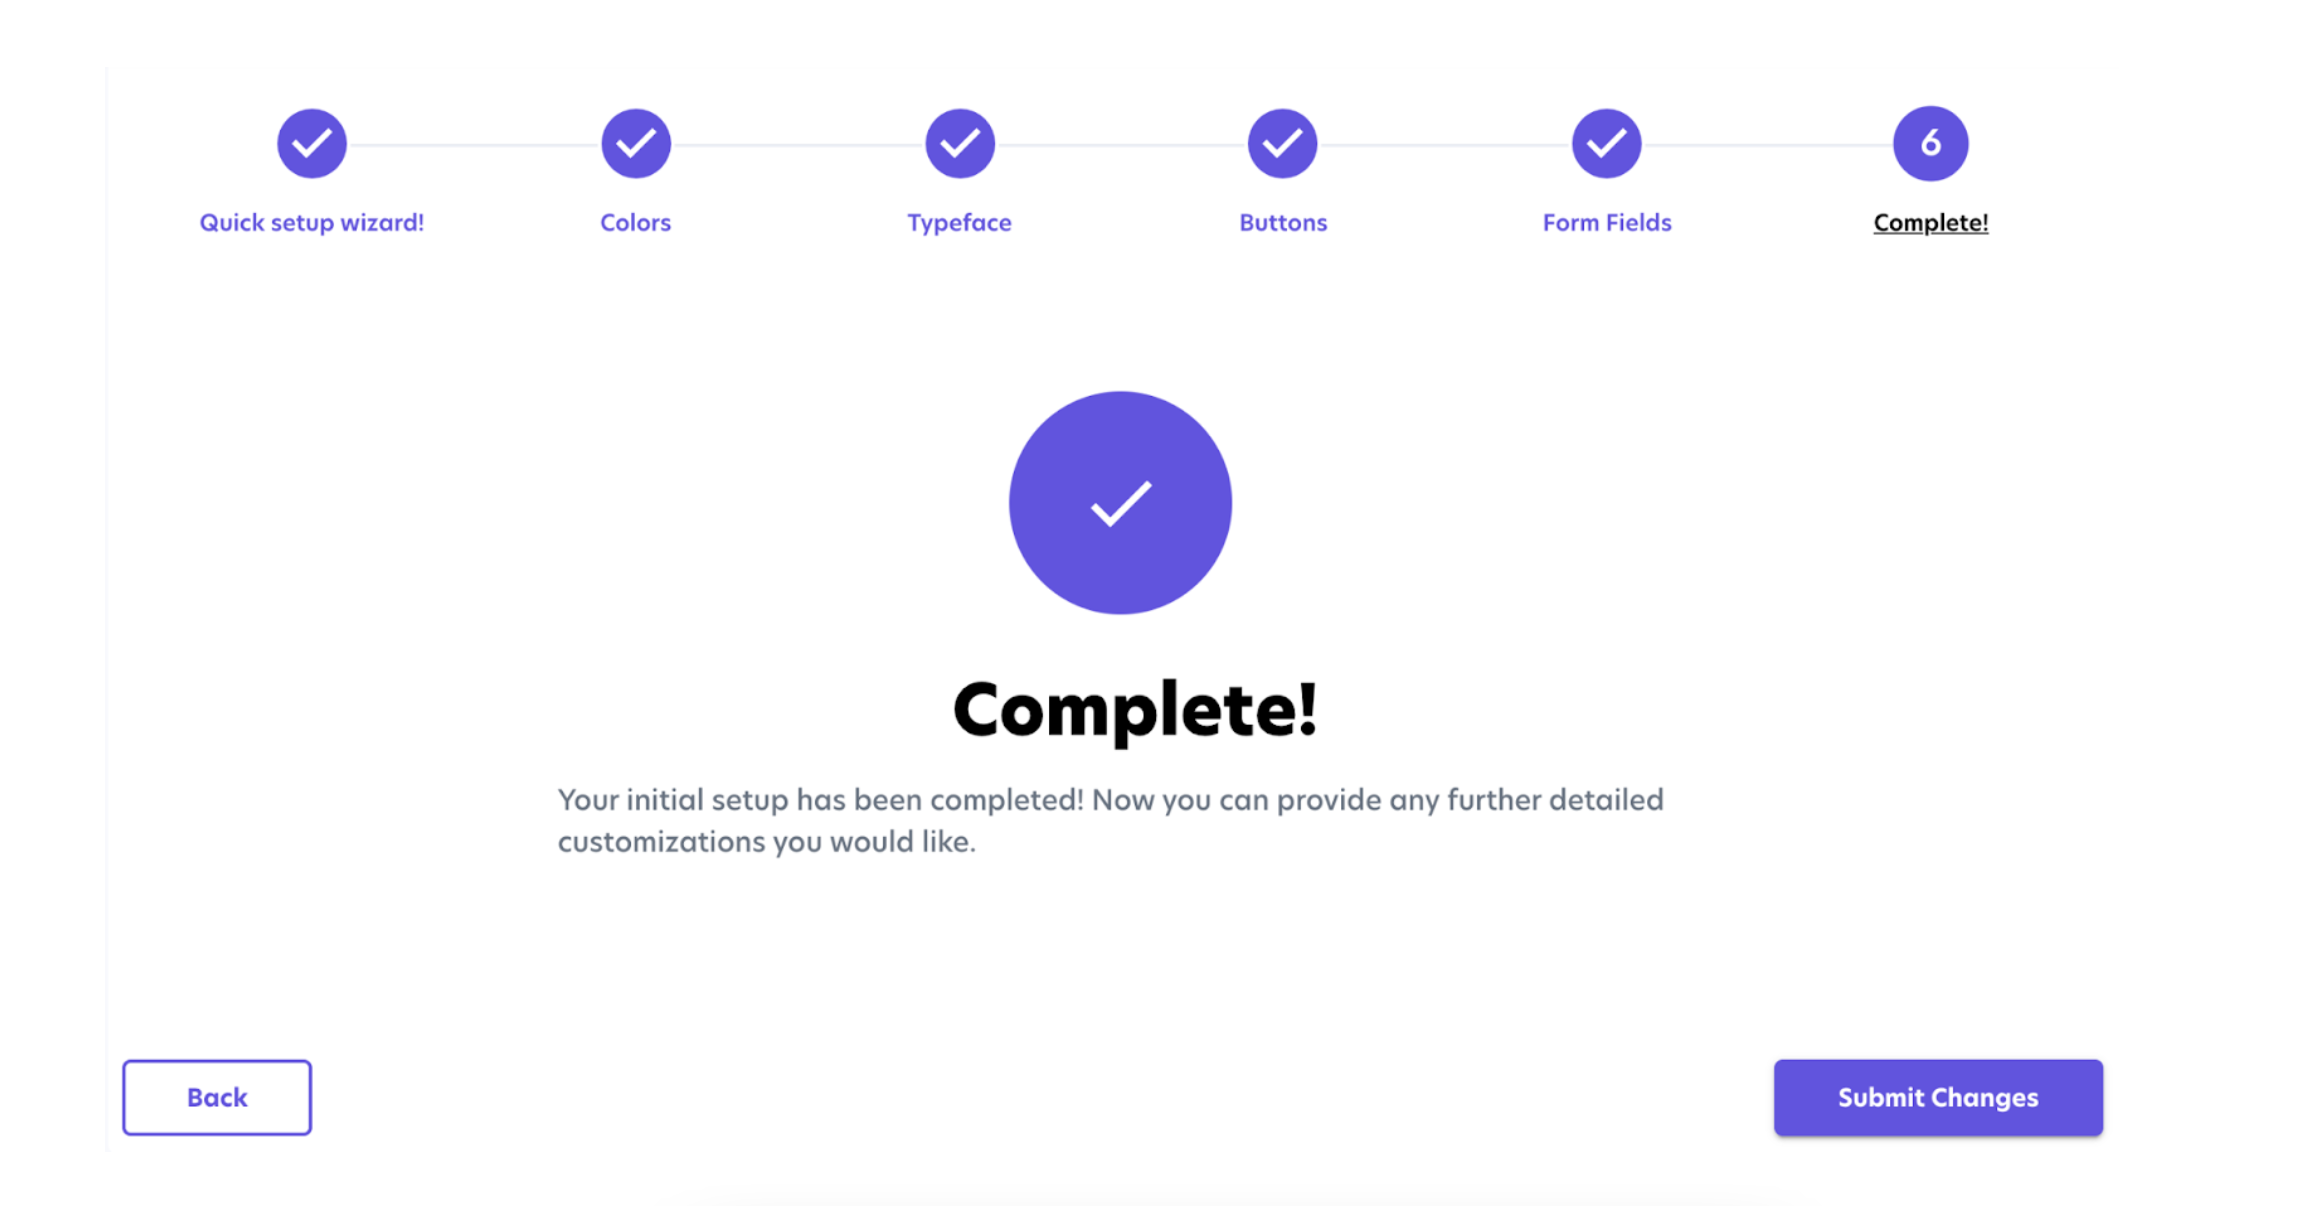
Step 6: Submit your changes
After you’ve configured the settings in the Setup Wizard, click Submit Changes.
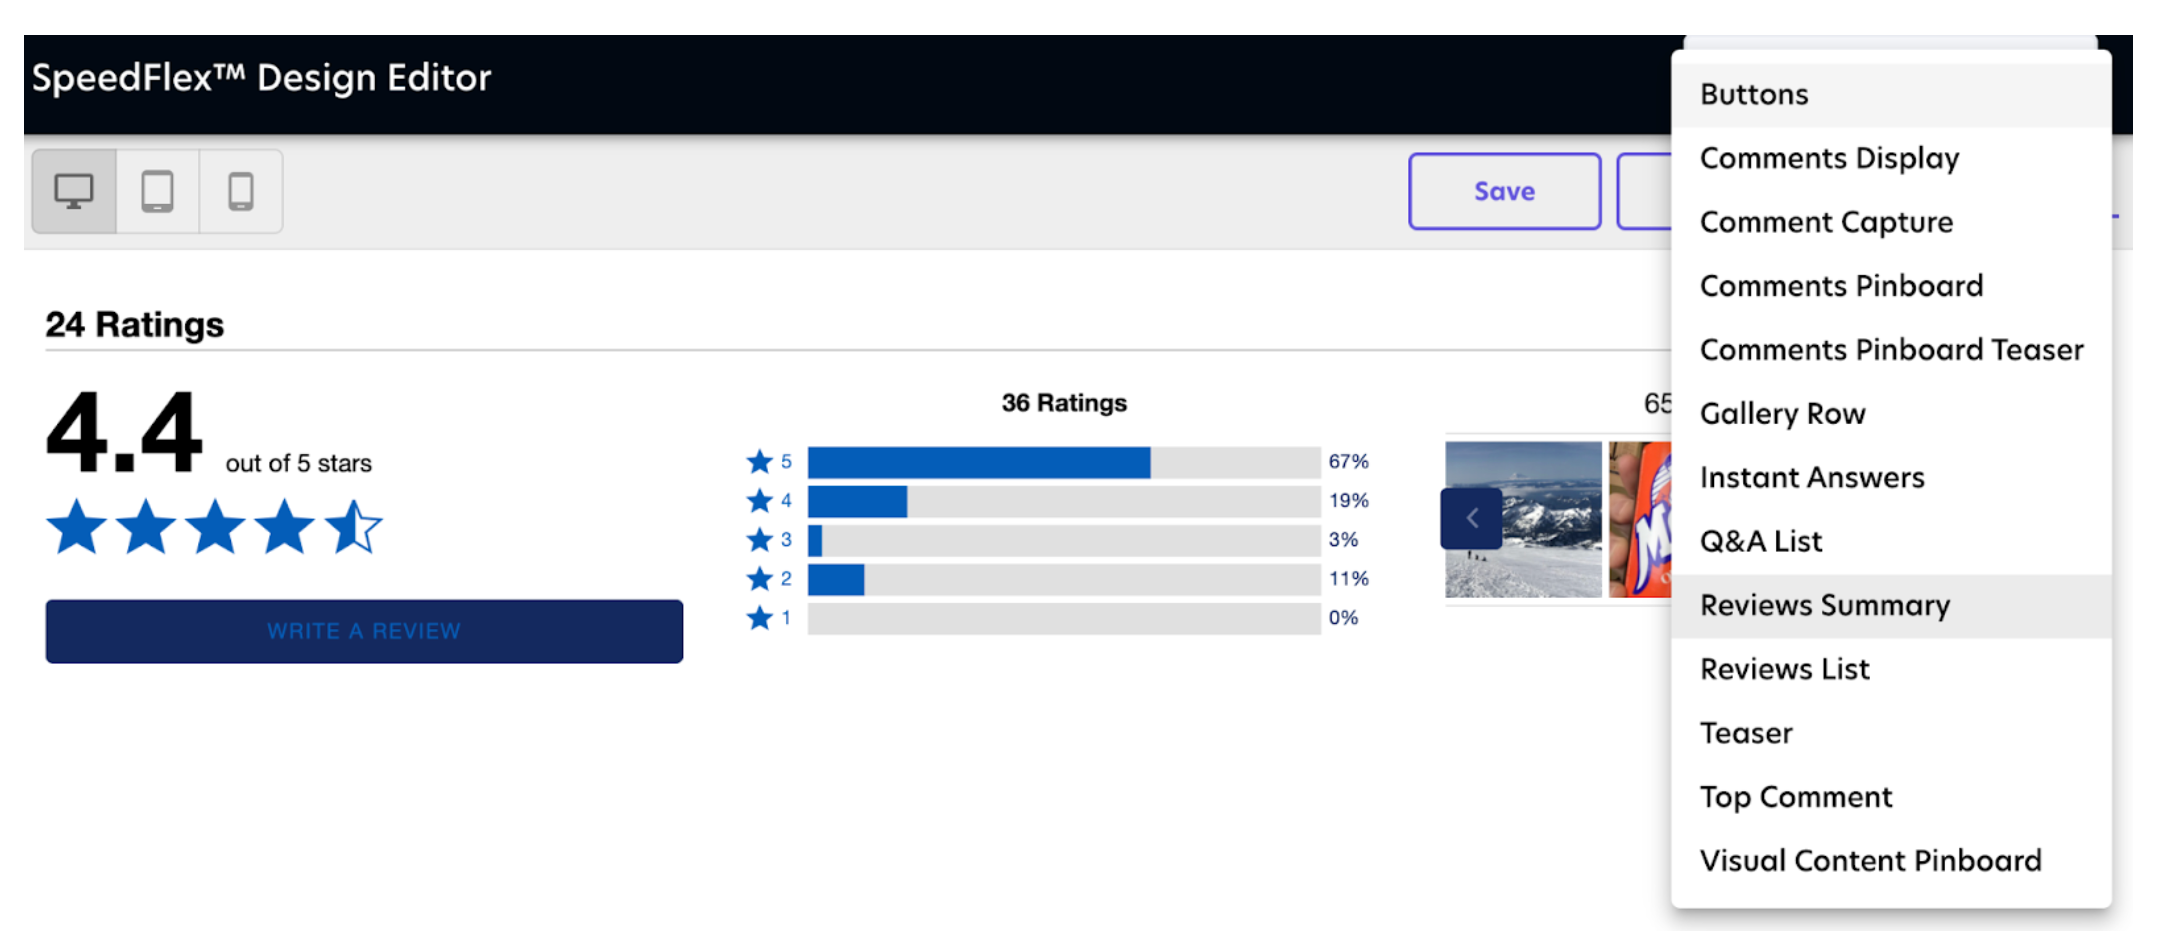
After you submit your changes you can select a widget from the dropdown menu, which provides a preview of each widget with the designs that you selected. Note that the widget previews use demo data rather than your site's data.
Saving and Building your Theme Configuration
When you’re finished with your design, you can save the widget theme and build the configuration. Building the configuration deploys the widget theme to your site.
To copy an existing theme to another site, use the "Copy To Site" button.

This is intended for copying a test site's theme to your production site. We recommend configuring your theme on your test site first. When you are satisfied with your updates, copy that theme to your production site.