Before you create your first flow, read the Flow Automations Components Overview and Flow Canvas Overview to learn about the different parts of a flow and how to use the editor.
Only administrators can create a flow.
Before activating your flow, make sure you read and understand the Flow Activation Examples.
Consider the following information in advance:
-
Which content source the flow should work with
-
What data from the content source the flow should process
-
What the flow should achieve (the outcome of the actions)
Steps:
-
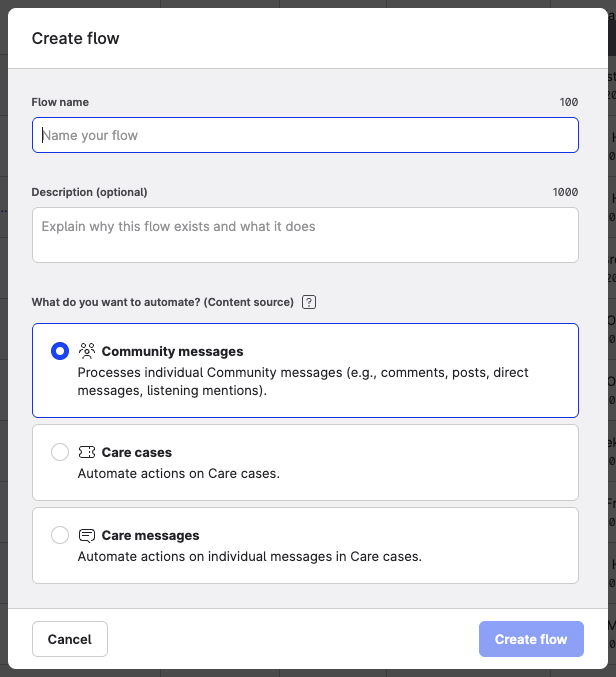
From Automation → Flow Automations, click Create flow.
A setup window appears.
-
Name your flow and add a description that allows other users on your team to identify what it does. This description will also appear within the canvas editor.
-
Select the content source. The source cannot be changed after you create the flow.
-
Community messages
-
Care cases
-
Care messages
-
-
Click Create flow.
The flow opens to the canvas editor.
Canceling changes If you decide not to proceed with the flow creation or configuration, you can click the Cancel button or the "x" icon in the top right corner of the window. This will close the form and return you to the previous screen without saving any of your changes.