The flow canvas is where you add components to create your flow and edit existing flows. You can also disconnect sections of your flow content from processing through those sections.
In order to save your flow, you must link together at least one trigger node and one action node. While condition nodes are optional elements, more complex flows can be achieved only with the inclusion of conditions.
We recommend that you read the following articles before designing your first flow:
View-only
When a user does not have access to one or more resources within a flow, they are able to view the flow components but they are unable to change the flow parameters.
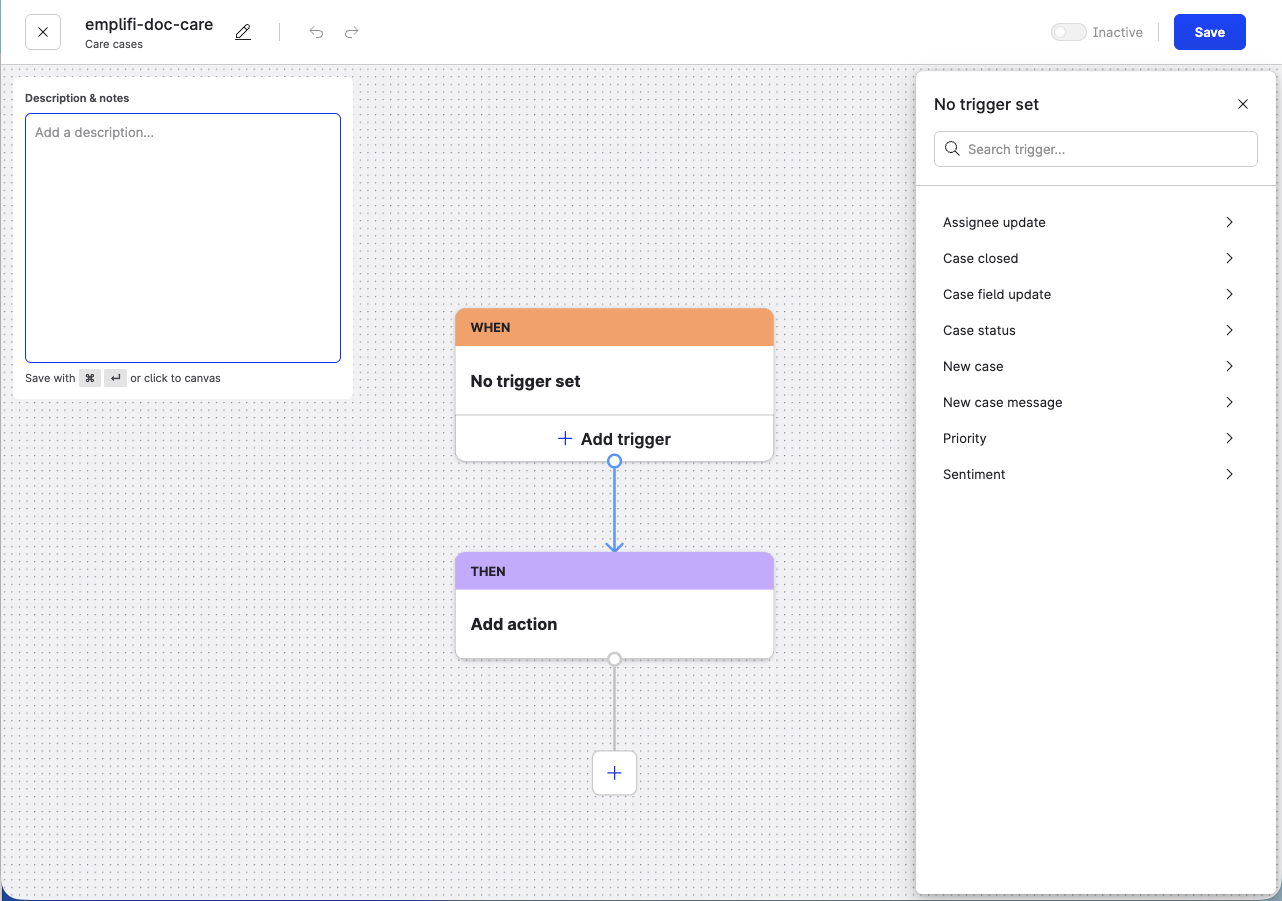
Description & notes
The description of the flow is accessible directly within the canvas editor. Any change to the description here will also update the description of the flow on the Flow automations home page.
Navigation
To move the canvas itself, click and hold the canvas background to drag the canvas to the position you want.
You can use the canvas controls to:
-
Zoom in
Increase the size of the flow’s components. -
Zoom out
Decrease the size of the flow’s components. -
Zoom to fit (center the canvas)
Center the canvas and change the size of components relative to the size of the screen and overall flow. -
Lock / Unlock
Lock the flow canvas to prevent editing of components. Unlock to edit. -
Edit name
Edit the flow name and description. -
Undo / Redo
Undo or redo your interactions within the canvas editor. -
Save
Save the flow. If the flow is already activated, the changes are also immediately activated.
It is important that you understand how your flow should operate before you activate your flow or introduce changes into an active flow. It’s not possible to undo the actions of your flow once the flow is activated. Whenever you’re unsure of how the flow will perform, consider disconnecting nodes from the flow before saving changes.
Add a component
You can add a component to your flow by clicking the Add component button (the + icon).
Steps:
-
Click Add component.
-
Select the component you want to add to the flow. The choices available are contextual. Review Flow Automations Components Overview to learn more about which components you can connect to each other.
Component options
When you hover your cursor over an edge (the blue/gray line/arrow between nodes), additional component options are available.
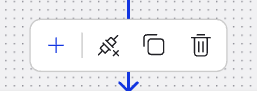
From left to right, the available options are as follows:
-
Add a component
Adds a condition node, action node, branch, or else branch to the flow. -
Disconnect/Restore branch
Disables or restores processing for connected components below the edge.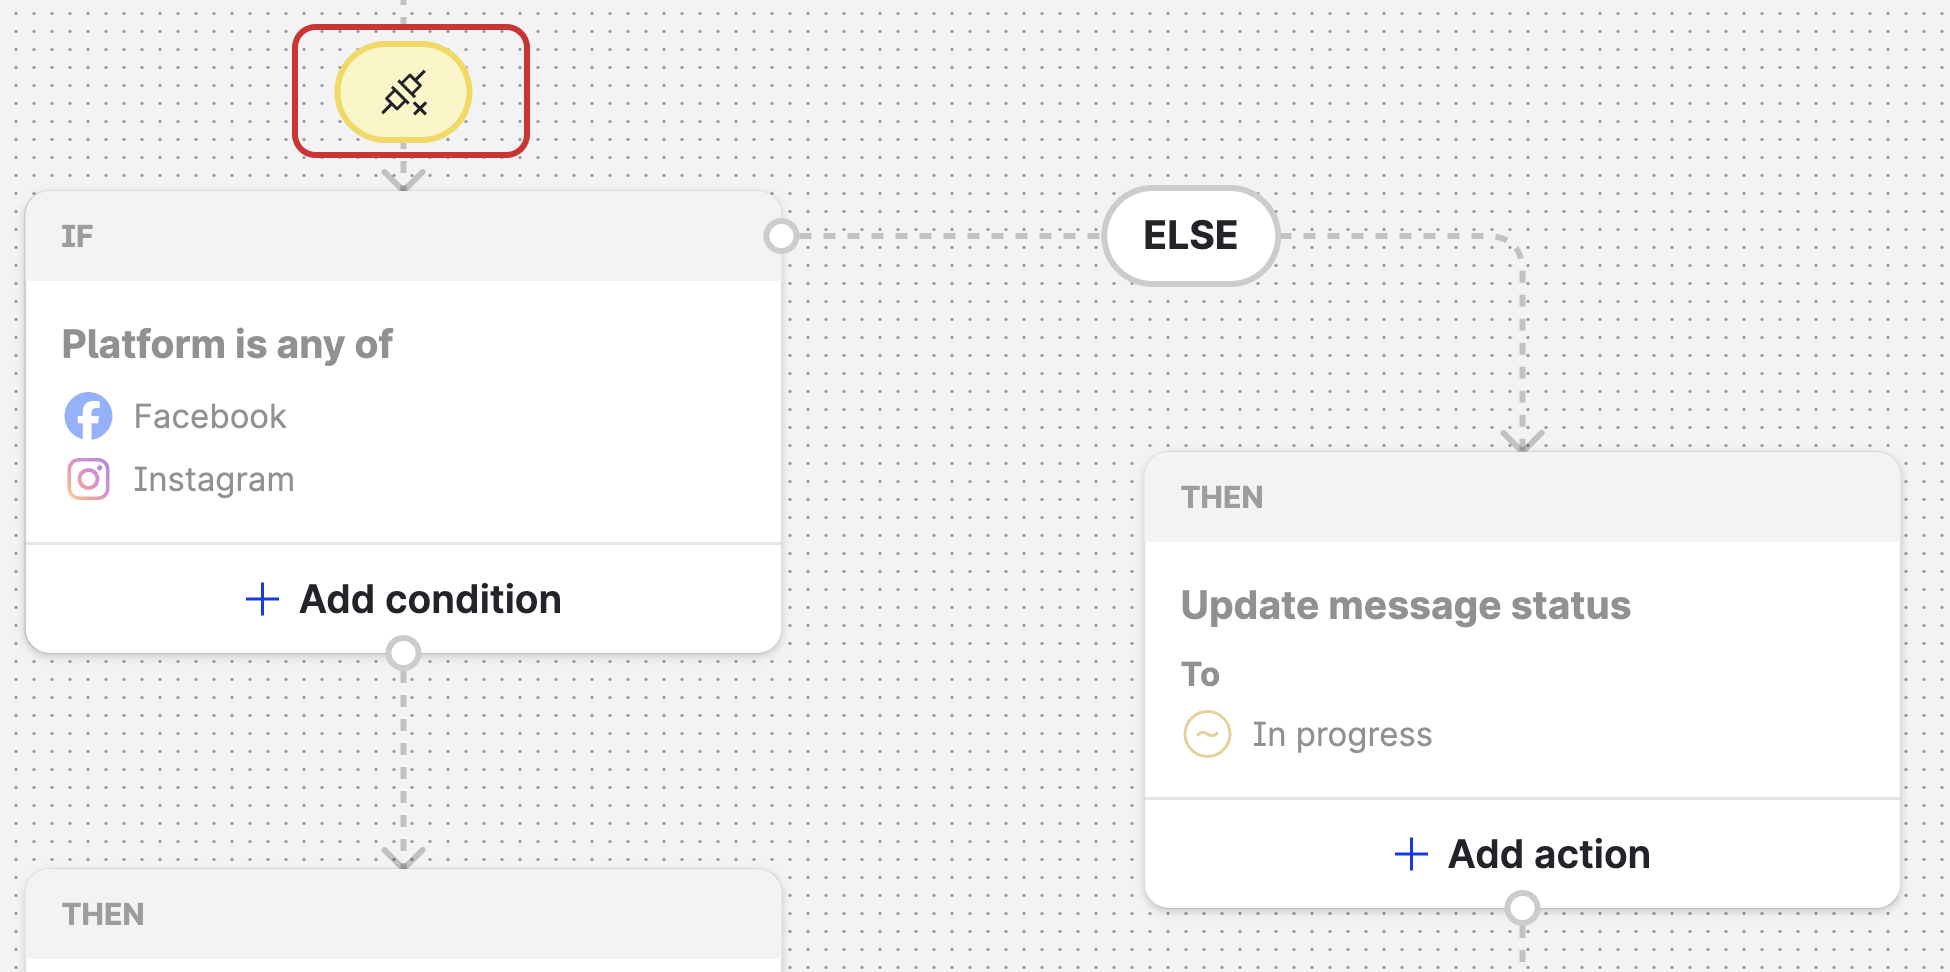
Disconnected branches are grayed out and indicated by the yellow disconnected icon.
After adding a component to a currently active flow, you can disconnect the components before saving to have a “draft” of your flow design. This prevents your changes from affecting production.
-
Duplicate branch
This allows you to duplicate a whole branch, including all conditions and actions located below the selected edge. This is useful for quickly replicating complex logic paths that require minor adjustments.
-
Remove branch
Deletes the edge and all the connected components directly below the edge. -
Transform to branch (contextual)
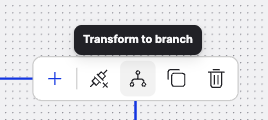
Available specifically for Else branch edges. This feature allows you to simplify complex logic by converting an "Else" path into a standard branch. This is particularly useful when the condition node's logic has evolved and you no longer require a catch-all "Else" path, but instead want to treat that sequence as a unique, independent condition branch sharing the same parent node.
Add elements to a node
The elements you can add to a node depend on the node type. The newest element always occupies the slot below the previous element in the node.
Steps:
-
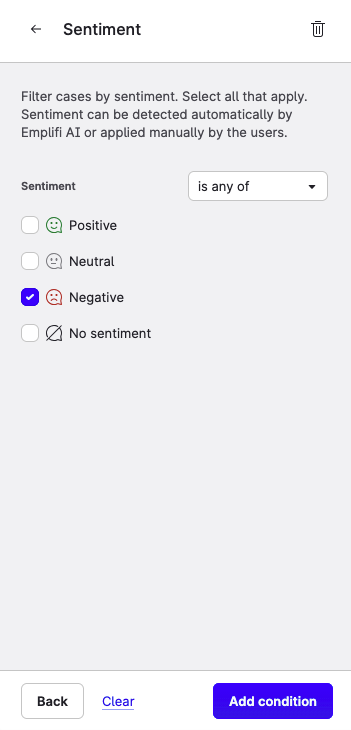
Click Add trigger, Add Condition, or Add action.
The element panel opens on the left with more options. -
Select and configure the element. The available elements depend on the node type and content source.
When adding an element, you can click Back or the Go back arrow to return to the list of elements you can add to the node. Alternatively, you can click Clear to remove all selections from the current element.
-
Click Add trigger, Add Condition, or Add action to confirm your configuration and add the element to the node.
Edit elements in a node
To edit the elements within a node, click on the element. The elements panel opens and you can change the parameters of the current element.
You can also remove an element by hovering over the element in a node and clicking the trashcan (Remove).
Click the back button or arrow in the elements panel to change the element to a different one.
Node options
When you hover over a condition node or an action node, a floating toolbar appears above the node. Additionally, you can interact with the node handle to rearrange your flow.
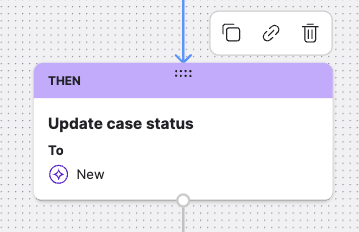
The following options are available:
-
Move node (8-dot handle)
To move a node to a different position in the flow, click and hold the 8-dot handle at the top center of the node and drag it to a new compatible position.
-
Duplicate
Creates a copy of the node (including its internal elements) and adds it to the same branch directly below the original node. This is useful for quickly building out repetitive sequences in a branch.
-
Copy link
Copies a unique URL for that specific trigger, condition, or action node to your clipboard. You can paste this link into a support ticket or internal message to share a direct reference to that part of the flow, which significantly assists in debugging and collaboration.
-
Remove
Deletes the node and its elements from the canvas.