Integrate the Public Emplifi API into Your Application
To keep it very simple, an API (Application Programming Interface) is basically a way of accessing data and other services between different software programs.
From a customer’s point of view, the Emplifi API could be mainly used to retrieve social media metrics from profiles monitored in the customer's Emplifi account to be then used or visualized in another tool or solution. With the API, this process runs automatically, and you do not need to create an export, edit the export, conform to the expected data formats in another application, and copy that file to a different application.
For situations when reports are a daily requirement or when the data available in the default exports contains metrics that are not relevant for your analysis, you may find it more efficient and time-saving to automatically extract data using the Emplifi API and generate your own dashboard/report.
What data the Emplifi API can retrieve
The Emplifi API obtains data from the profiles (both public and owned) that you have in your Emplifi account (see Add a Profile as Owned (Private) or Public).
For public profiles, the API obtains only public data that is available via the API.
For owned profiles, the API obtains the private data about insights of the connected social media accounts.
 For the API to be able to get this data, the owned profiles must have the insight permission connected/not expired (see Check and Establish Connections of Owned Profiles).
The Emplifi API cannot provide data for social media accounts that are not added to your Emplifi account as profiles.
Check your access to the Emplifi API
The Emplifi API is not enabled by default. Emplifi Support enables the API per request.
Check whether the Emplifi API is enabled in your Emplifi account and, if not, request it.
Steps:
Go to Settings -> Integrations & API.
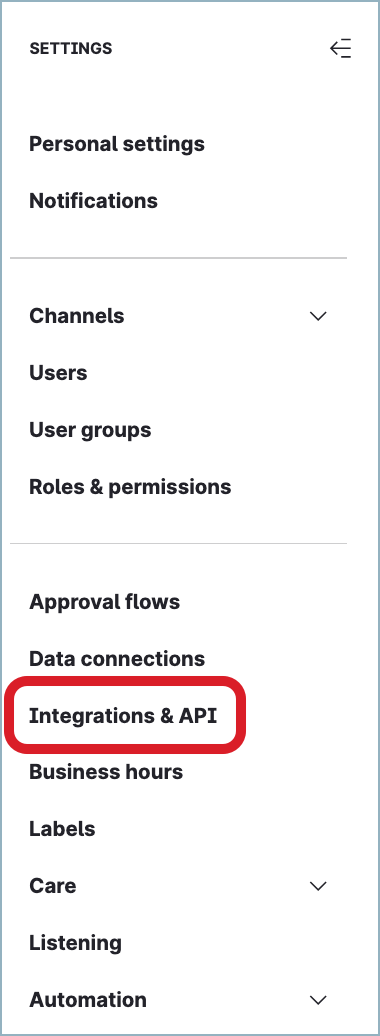
The list of available integrations opens.
Check under which category Emplifi Public API is listed.
If Emplifi Public API is listed under Integrations in Your Subscription, Connect Them Right Now, the public Emplifi API is enabled in your Emplifi account.
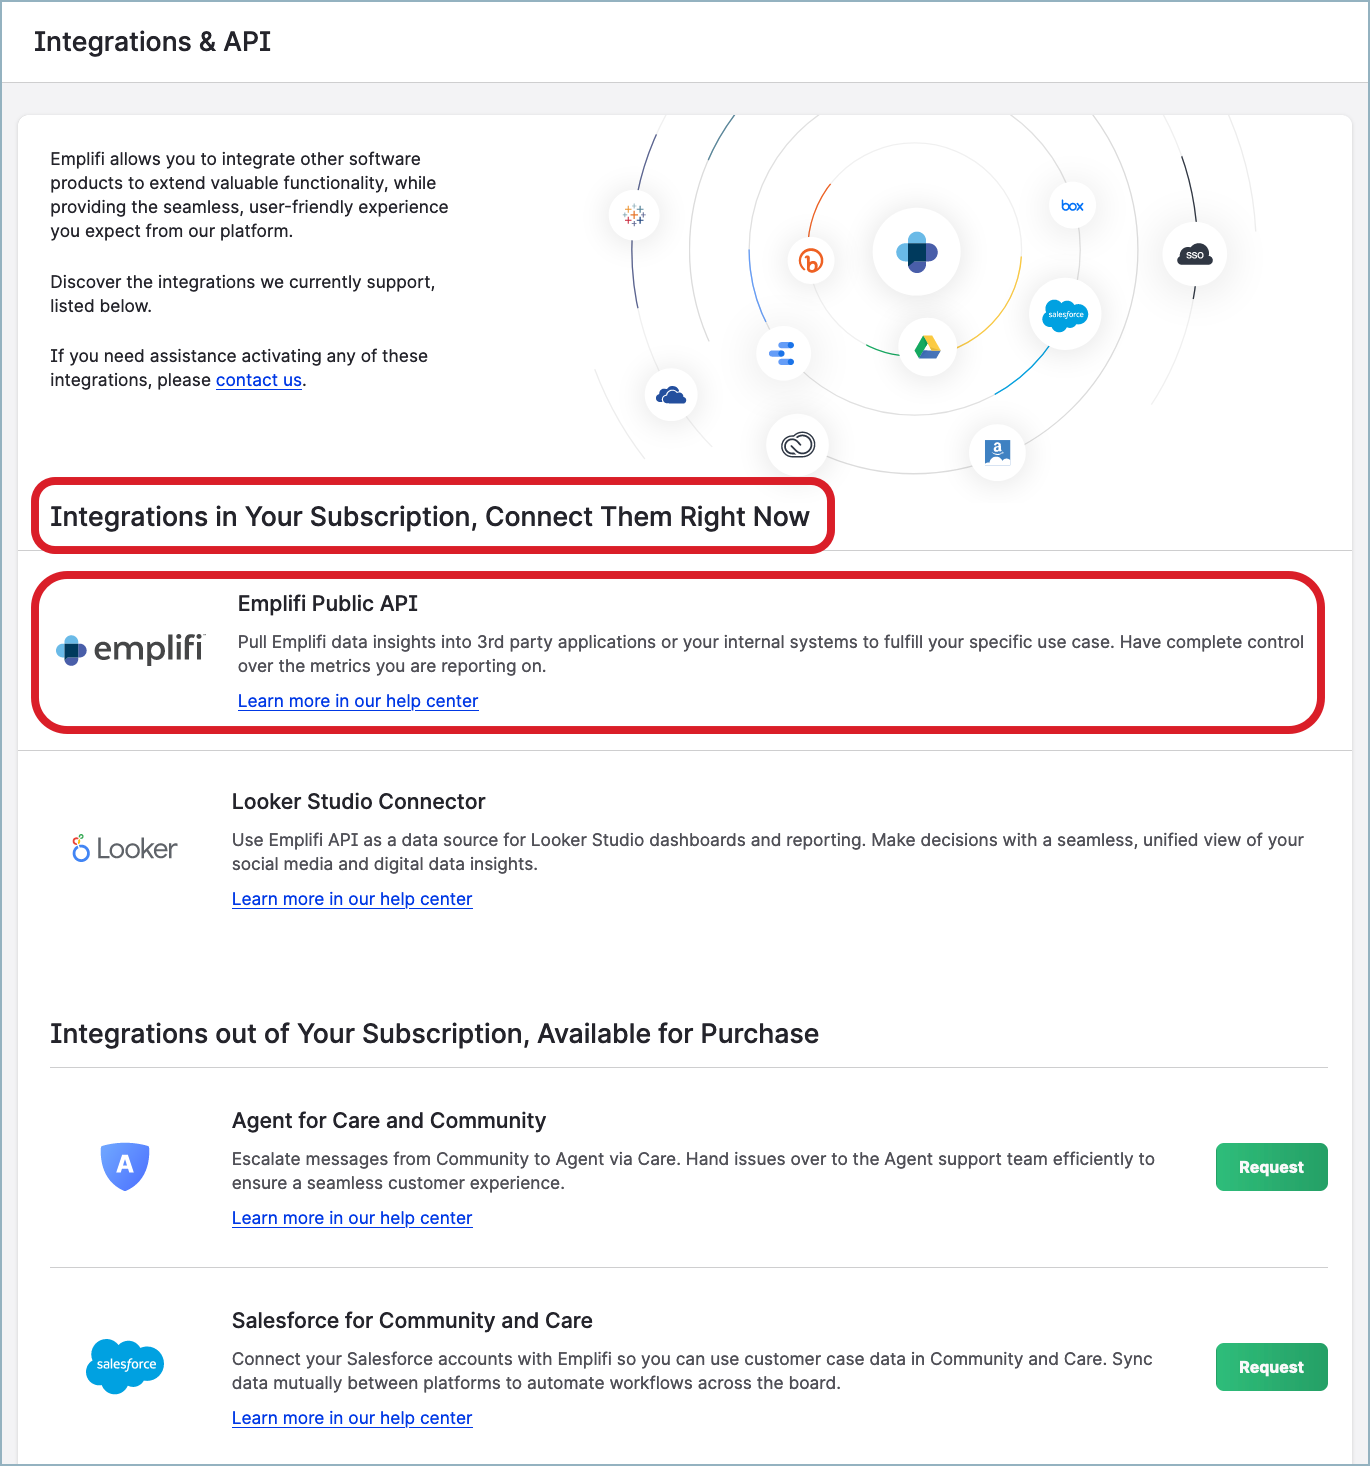
To start using the Emplifi API, review “Choose the authorization method” further in this article and decide what authorization method you want to use.
If Emplifi Public API is listed under Integrations out of Your Subscription, Available for Purchase, the public Emplifi API is not enabled in your Emplifi account.
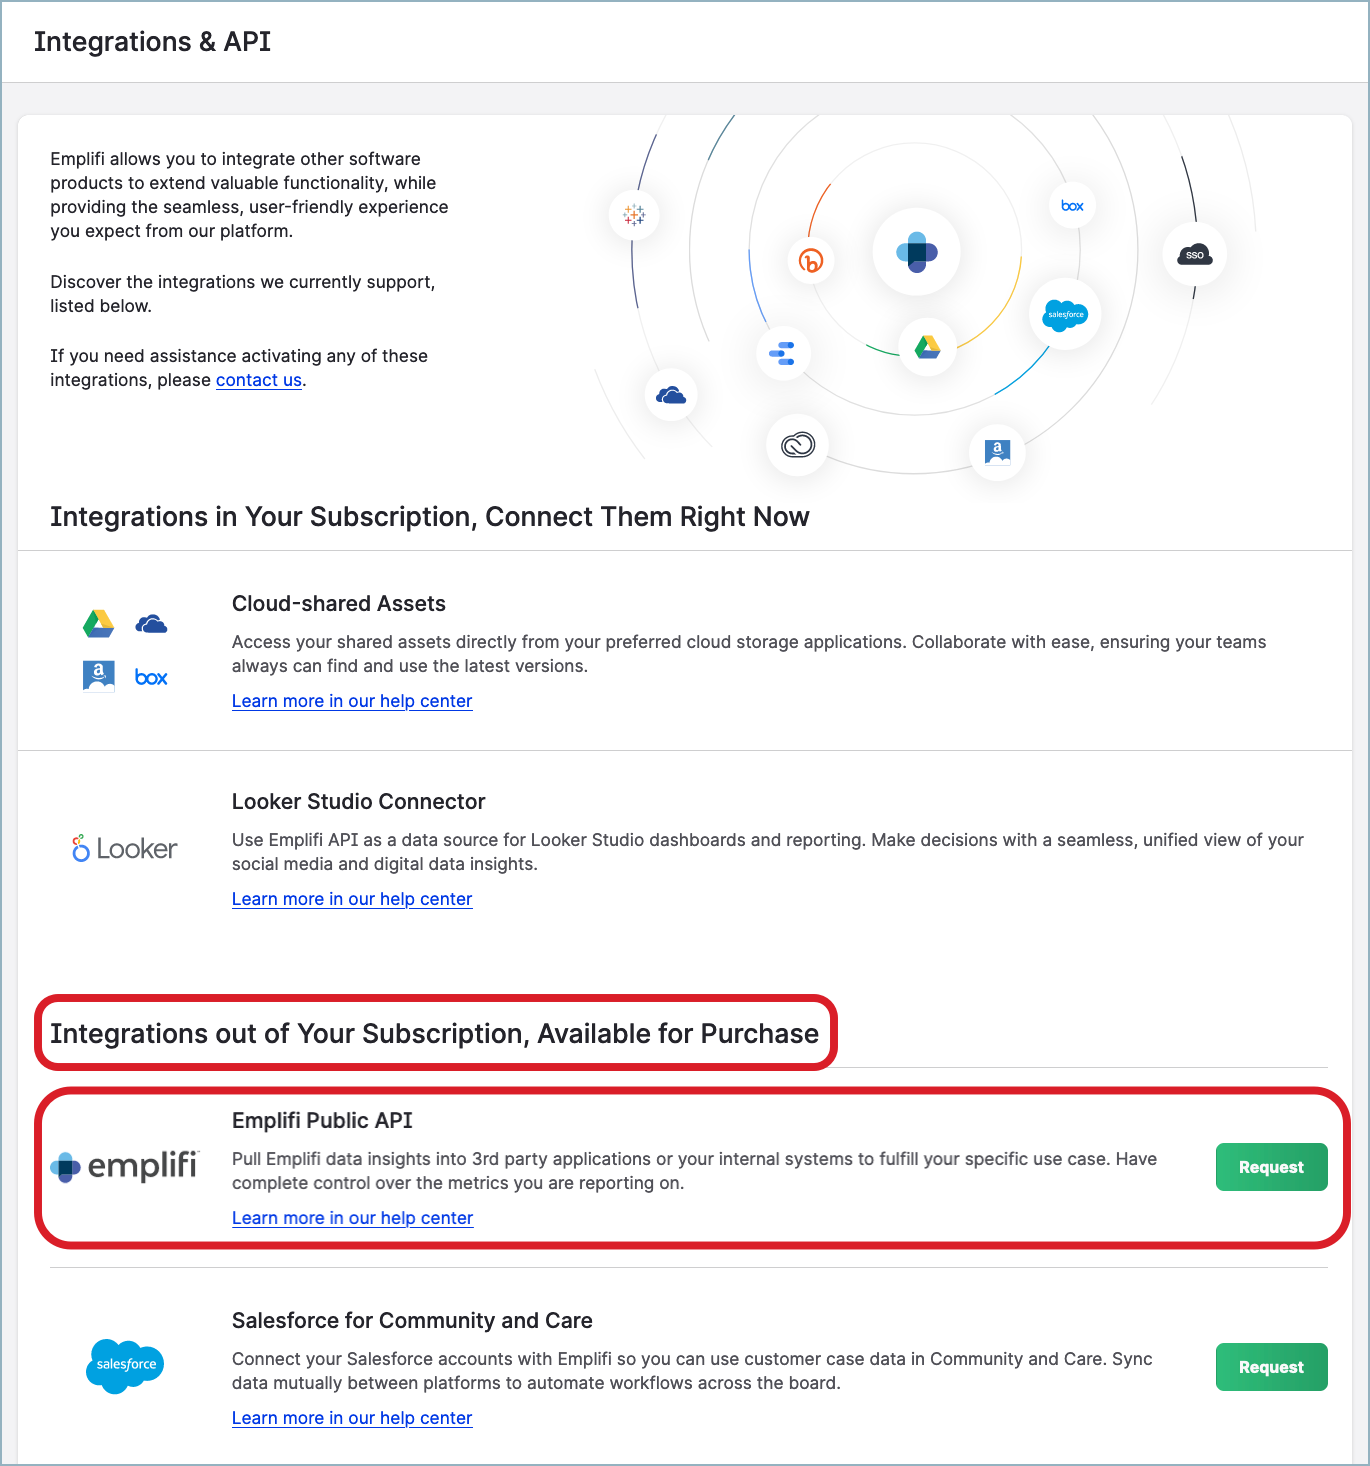
Request access to the public Emplifi API:
Click Request next to Emplifi Public API.
The request is sent to Emplifi. Your Customer Success Manager gets a notification about your request.
The status of the API integration is changed to “Requested”.Review “Choose the authorization method” further in this article and decide what authorization method you want to use.
When the Customer Success Manager contacts you, discuss the authorization method that you decided to use.
The Customer Success Manager enables the Emplifi API in your Emplifi account and provides you with the next steps that you may need to take to start using the Emplifi API.
Once the API is enabled, you will see the API integration under Integrations in Your Subscription, Connect Them Right Now on the Integrations & API page.
Choose the authorization method
The Emplifi API supports the following authorization methods:
Basic HTTP authorization using a token and a secret
OAuth 2.0 authorization
Basic HTTP authorization using a token and a secret
Basic HTTP authorization uses a combination of a token and a secret that are separated with a colon and encoded into Base64. The resulting string is sent in an HTTP header in API requests.
For example, if the token is Aladdin and the secret is OpenSesame, then Aladdin:OpenSesame encoded into Base64 produces QWxhZGRpbjpPcGVuU2VzYW1l, which is the string that should be sent in an HTTP header.
Each user who wants to use the Emplifi API must have their own unique token and secret. The token and secret are generated and distributed by Emplifi Support per request.
Contact Emplifi Support at support@emplifi.io and ask for a token and a secret. Emplifi Support will generate them for your Emplifi user and send them to you. You can now start using the Emplifi API.
For more information about basic HTTP authorization, see the API Reference.
OAuth 2.0 authorization
OAuth 2.0 authorization uses the OAuth 2.0 framework. The Emplifi API supports the OAuth 2.0 authorization code flow.
OAuth 2.0 authorization is enabled by Emplifi Support per request.
For more information about OAuth 2.0 authorization, see the API Reference.
Steps:
Contact Emplifi Support at support@emplifi.io and ask for OAuth 2.0 authorization to be enabled.
Emplifi Support enables OAuth 2.0 authorization for your Emplifi account and sends you an email confirmation.Log in to your Emplifi account, and go to Settings -> Integrations & API -> Custom integrations.
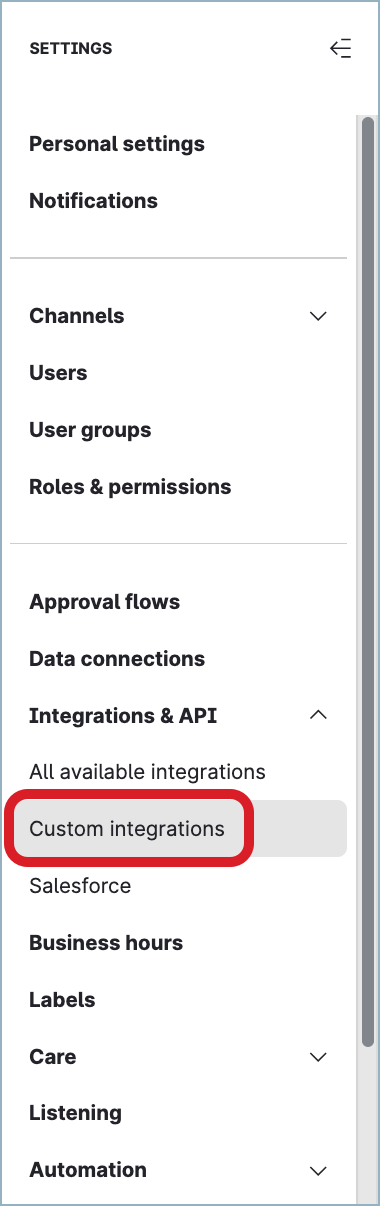
 If you cannot see the Custom integrations sub-menu, the OAuth 2.0 authorization is not enabled for your Emplifi account. Contact Emplifi Support at support@emplifi.io.
Click +Add integration.
The new integration panel slides out.Enter the name of the integration.
In the User access section, specify who should be able to access the integration: anyone in the Emplifi account (global visibility), only specific users/user groups, or only you.
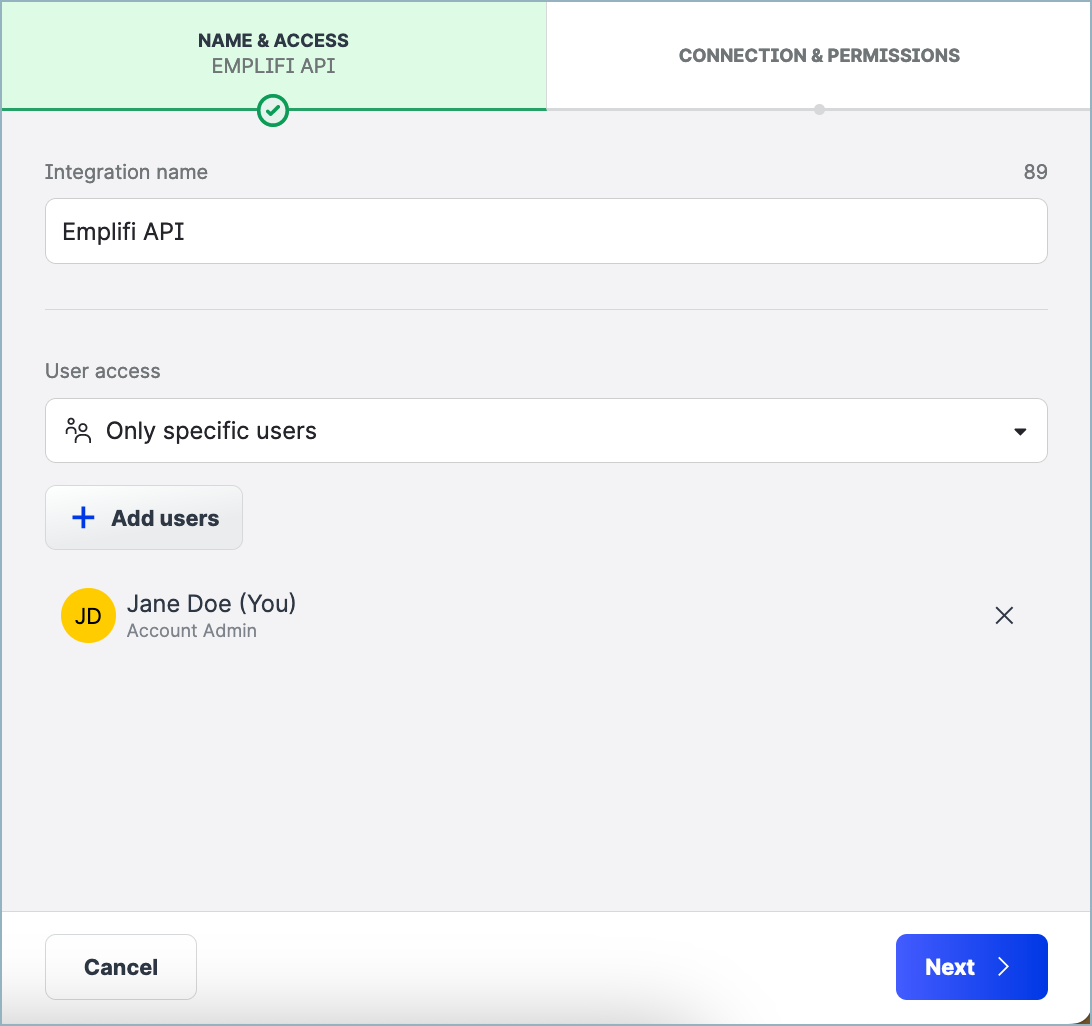
Click Next.
Enter the callback URL that you got from your application, and click Create.
The integration is created.
The popup dialog opens with the generated client ID and the client secret.Copy the client ID and the client secret, and enter them in your application.
You can copy the client ID and the client secret at any time later from the integration that you have just created.Click I understand to close the popup dialog.
Follow the instructions described in the API Reference to complete the authorization process.