Social AI Chatbot Settings - Escalation, Messages, Questions and Answers, Analytics
With Emplifi Social AI Chatbot, resolve more questions faster on social media and drive satisfaction across the customer journey 24/7. In this guide, we will focus on the four major sections of the Chatbot settings: Escalation, Messages, Questions and Answers (Topics), Analytics.
The Social AI Chatbot settings menu allows you to configure the various elements of your chatbots, including escalation settings, message content, and topics (the most common questions coming in and the answers the chatbot will use to resolve them). There is also an analytics section, which displays data regarding the efficiency of your chatbot and what can be improved.
Once you have the confirmation that the Chatbot feature is activated in your Emplifi Suite Account, head to your Emplifi Suite Settings, Chatbot Settings.

Escalation
In the Escalation panel, you can configure the hours in which agents are available to assist end-users, the time zone to which these hours belong, the phrases that end-users can enter in order to get escalated to agents, and the labels that are assigned to those escalations (this label will later appear in your Emplifi’ Community threads for reference).
Setting up Hours of Operation
You can configure when agents are available to assist end-users who have been escalated from the chatbot. This helps the chatbot determine which message to send to an end-user when they are escalated. To configure the Hours of Operation, follow the steps below:
To add a new entry in the Hours of Operation list, click the Add Hours button at the bottom of this section.
To edit an entry in the Hours of Operation list:
In the Day column, use the drop-down menu to select a day of the week.
In the Start and End columns, click the text box to enter a time. When you are finished, click Enter on your keyboard.
To delete an entry in the Hours of Operation list, select an entry and click the Delete button (bin icon) that appears. The entry will be immediately deleted.
Configuring Timezones
When configuring the Hours of Operation, it’s crucial to specify the time zone. To do so, follow the steps below:
In the upper right corner of the Escalation panel, click the Time Zone button. A drop-down list appears.
Select the time zone in which your agents are operating. The Hours of Operation will automatically function in the selected time zone.
Escalation Phrases
Escalation Phrases are predefined examples of end-user messages which trigger an immediate escalation to a live agent at any point of a conversation. The chatbot recognizes, interprets, and learns from these phrases, and will perform an escalation to an agent sitting in Emplifi’ Community when an end-user says something similar to them.
It is beneficial to include both generalized escalation phrases (e.g. “I want to speak to an agent,” etc.) and company-specific escalation phrases (e.g. “[Product name] made me sick,” etc.).
To add a new escalation phrase, click the Add Question button at the bottom of the Escalation Phrases Section.
To edit an escalation phrase, click the text of the phrase, then type what you would like the phrase to be. When you are finished, click Enter on your keyboard, or click anywhere outside the text box.
To delete an escalation phrase, hover with your mouse over an entry from the list and click the Delete button (bin icon) to the right. The entry will be immediately deleted.
Escalation Labels
To escalated conversations can be assigned escalation labels. When the escalated conversation appears in the Emplifi Community module, it is tagged with the label that you have configured here. Escalation label configurations are unique to each chatbot and to each language supported by the chatbot.
To add an escalation label to the chatbot, click the Label button at the top right corner of the Escalation panel. A drop-down textbox displays.
In the textbox, enter the escalation label that you would like to add to the chatbot.
You can enter an existing Emplifi label, or you can enter an entirely new label. If you enter a new label, that label will be created in Emplifi upon the first escalation involving the label.
You can also follow these steps to edit or delete an escalation label.
Messages
In the Messages panel, you can configure the selected chatbot’s responses to common scenarios that end-users encounter.
Types of Messages
Greeting Message
This is the first text to appear when an end-user initiates a conversation.Fallback Message
This message appears when the chatbot can’t answer the end-user question. A chatbot can’t answer a question when it doesn’t match any of the preconfigured Questions & Answers or Escalation phrases set, or if the end-user is contacting with a language other than the languages set for the chatbot’s usage.
It’s recommended to configure this message as something similar to, “I’m sorry, I couldn’t understand your question. Could you please try to rephrase it?”Escalation Started
This message appears when a conversation is escalated during your agents’ hours of operation.Escalation Ended
This message appears when an escalated conversation ends and the end-user is returned to the Chatbot.Agents Offline
This message appears when end-users requests to be put in touch with an agent (escalation is triggered) outside your agent’s Hours of Operation.
Configuring Messages
In order for the selected chatbot to send meaningful messages to end-users, you must first author the messages’ content.
Text Boxes
Click the textbox and type the message that you would like the chatbot to send to the end-user. When you are finished, click Enter on your keyboard or click anywhere outside the text box.
If you would like to include a clickable hyperlink in your answer, enter it in the following format: [Clickable Text](URL)
Changing the format between image and text:
To change from image format back to text, click the Text button. Hover over the image box, and the button will appear to the right of it.
If your response is currently set to text format, press the image icon to the right side of the text box to change the format to an image.
Selecting the Image option displays an empty Image Box. Click the Image Box to display an Image URL textbox and an Image Alternative Text textbox (you need to include both):
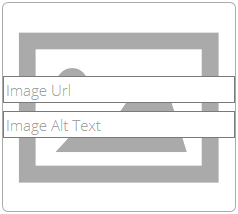
To add an image, paste or enter the image URL on the Image URL textbox.
Enter an alternative text in the Image Alt Text textbox for cases when the image won’t load. When you are finished, click Enter on your keyboard.
Changing the order of responses:
If you have more than one response on a message category, you can change the order of the responses
Hover over the response boxes in order to display the arrow icons.
Press the up or down arrow to move a response order up or down.
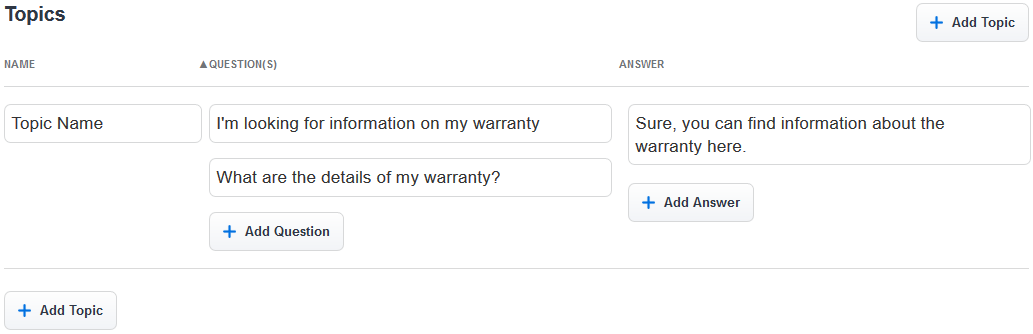
Topics
In this panel, you can configure various end-user questions that the chatbot is then able to recognize and answer. It does so by using natural language processing to match the question to a specific topic, which is a predefined interpretation of end-user messages that trigger certain actions from the chatbot. When the topic is matched, the chatbot sends the end-user a response that you have configured in this panel.
The chatbot is not case sensitive.
Adding a topic
In order for the chatbot to recognize and respond to end-user messages, you must first add topics. To do so, follow the steps below:
Click the Add Topic button at the bottom right corner of the Topics panel.
To rename the new topic, click its name text box. Type the name that you would like the topic to have. When you are finished, click Enter on your keyboard.
The names that you assign to your topics are important because they appear in two other places:
The Top Questions section of the Analytics panel, where the data regarding the performance of your topics is displayed.
The agent’s view of escalated conversations, alongside the conversation’s escalation label.
Adding Questions to a topic
After adding a topic to the chatbot, you must then populate it with questions, which the chatbot uses to match end-user messages to the topic. To do so, follow the steps below:
To add a question to a topic, click the Add Question at the bottom of the Question(s) column.
To configure a question, click the text box. Type the question that will trigger the topic when it is sent by the user. When you are finished, press Enter on your keyboard or click anywhere outside the textbox.
 To get the best results from your topics, it is crucial that you add a variety of similar questions to each one. The questions that you add to a particular topic should be similar in meaning, but different in form.
Use different synonyms, verbs, and sentence structures to cover as many potential phrasings of a question as possible.
An absolute minimum of five questions per topic is required to function properly, but ten or more is recommended for optimal performance.
To delete a question, hover over an entry from the list and click the delete button (bin icon ) that appears. The question will be immediately deleted.
Configuring Answers
After an end-user message triggers a topic, the chatbot sends a response back to the end-user. In order for the chatbot to send a meaningful response to the end-user, you must author the response’s content:
Text Boxes
Click the textbox and type the answer that you would like the chatbot to send to the end-user. When you are finished, click Enter on your keyboard or click anywhere outside the text box.
If you would like to include a clickable hyperlink in your answer, enter it in the following format: [Clickable Text](URL)
Changing the Format Between Image and Text:
To change from image format back to text, click the Text button. Hover over the image box, and the button will appear to the right of it.
If your response is currently set to text format, press the image icon to the right side of the text box to change the format to an image.
Selecting the Image option displays an empty Image Box. Click the Image Box to display an Image URL textbox and an Image Alternative Text textbox (you need to include both):
To add an image, paste or enter the image URL on the Image URL textbox.
Enter an alternative text in the Image Alt Text textbox for cases when the image won’t load. When you are finished, click Enter on your keyboard.
If you would like your chatbot to refer to end-users by their name, include any of the following variables in your answer:
First name of end-user – {{userInfo.firstName}}
Last name of end-user – {{userInfo.lastName}}
Full name of end-user – {{userInfo.name}}
The end-users’ name will replace the variable in the sent message.
If you would like to include a clickable hyperlink in your answer, enter it in the following format: [Clickable Text](URL)
Changing the Order of Responses:
If you have more than one response on a message category, you can change the order of the responses
Hover over the response boxes in order to display the arrow icons ()
Press the up or down arrow to move a response order up or down.
Deleting Topic Entries:
There are three different delete buttons (next to each topic entry: topic name, question or answer). The delete button next to the topic name deletes the whole topic.
Analytics
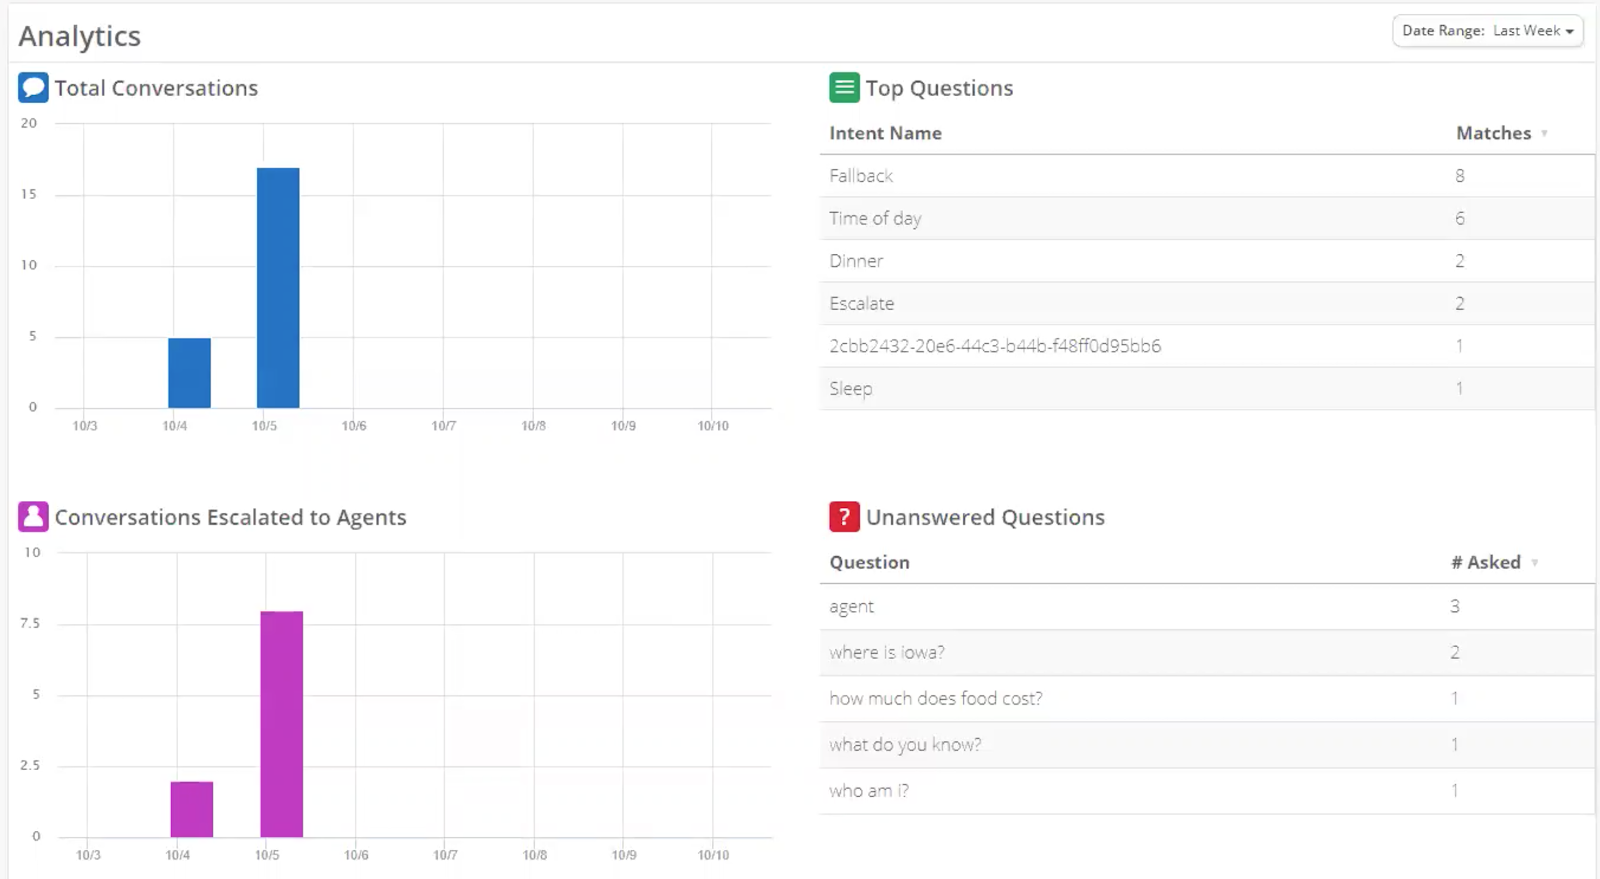
The Analytics panel displays four charts that are based on data regarding the efficiency of the conversation workflow for the selected chatbot.
Types of Charts
Total Conversations
This bar chart displays the number of chatbot conversations that have taken place on each day. (1 conversation = 1 user DM thread).Conversations Escalated to Agents
This bar chart displays the number of conversations that have been escalated to a live agent on each day.Top Questions
This chart displays a list of the topics (by its name) that have been most frequently matched to end-user questions, along with the respective number of matches that have occurred.Unanswered Questions
This chart displays a list of end-user questions that the chatbot was unable to match to any existing topics, along with the respective number of times each question was asked.To create a new topic from an unanswered question, select a question from the list. On the selected question, click the Add Question and Answer button.
Date Range
The Analytics charts display chatbot data from a specified date range, which you can adjust to view data across different stretches of time.
To change the date range of the charts, click the Date Range button in the upper right corner of the Analytics panel. A drop-down list displays.
From the list, select the date range that you would like the charts to display data for. The charts adjust automatically.
If you select Custom, a calendar appears for you to select a start date and an end date. After you have made your selections, click Apply.
