In this article, you will learn how to set up Emplifi SSO for Okta, Onelogin, and MS Azure. All three of these providers include Emplifi in their catalogs.
If you would like to check our general guidelines on setting up the SSO through the Emplifi self-service, see Single Sign-on (SSO).
These guides describe the steps required to set up SSO details within third party products. Process and UI changes are subject to change and Emplifi therefore accepts no liability associated with them.
Okta
Emplifi is listed in Okta's Trusted App catalog, and the integration is very straightforward:
-
Open Okta administration.

-
In the left-hand side menu, click Applications under Application.
-
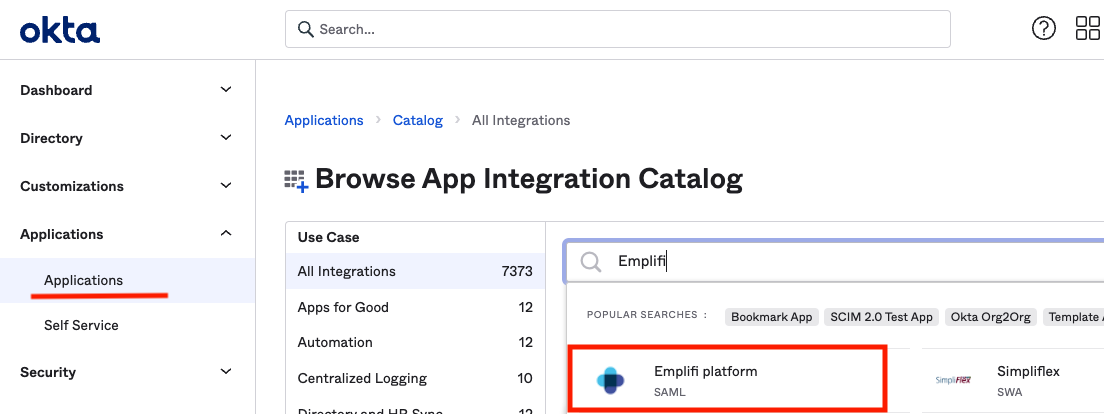
In the Application, window click on the “Browse App Catalog” blue button.
-
Emplifi has a preconfigured integration. Simply search for "Emplifi" and on the new screen click Add Integration.
-
Fill in the General settings and click Done.
-
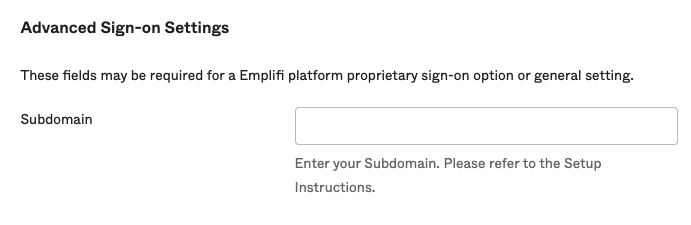
On the next screen switch to the Sign On tab. Click on the Edit and scroll to the Subdomain field, type the domain that you have selected in the Emplifi SSO self-service. Click Save to finalize.
-
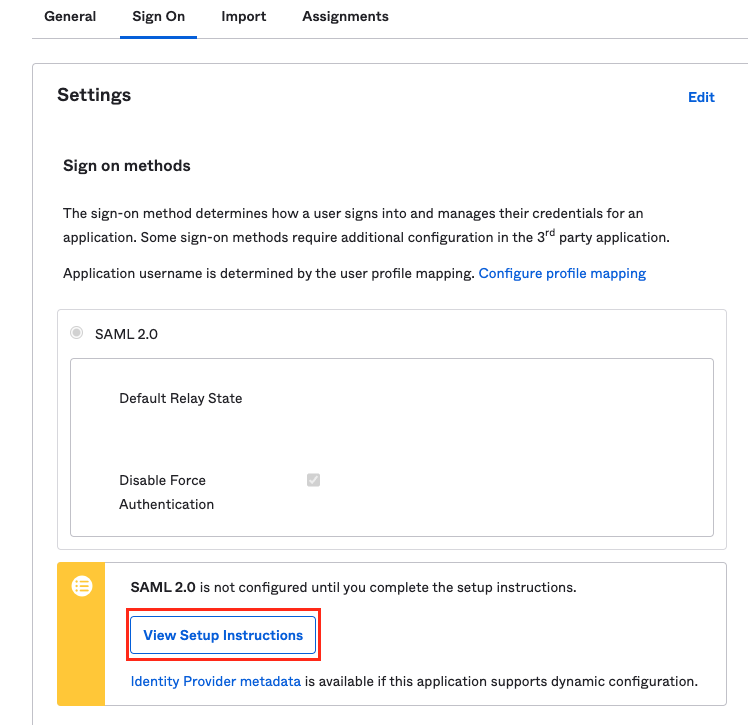
Still in the Sign On tab, click View Setup Instructions.
-
A new screen will appear, here you can review the supported features. Copy and paste the Metadata URL to the Emplifi self-service.
-
Follow the wizard and instructions in the Emplifi SSO self-service to finish the SSO setup.
OneLogin
Emplifi is listed in OneLogin’s Trusted App Catalogue, and the integration is very straightforward:
-
Open OneLogin administration.

-
Click Application in the top menu -> Click on the “Add App” button.

-
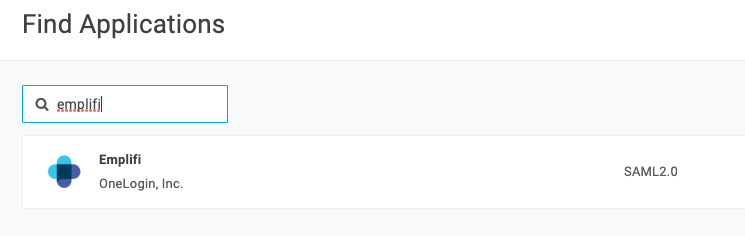
Emplifi has a preconfigured integration, so search for "Emplifi" and click on it to add.
-
Enter your desired Display name - how the app will appear in your administration and Save it.
-
Move to the Configuration tab and type in the domain that you have selected in the Emplifi SSO self-service.
-
Now, move to the SSO tab and ensure the SAML Signature Algorithm is set to SHA-256. Save
-
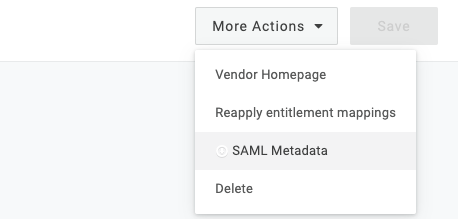
Copy the Issuer URL OR click More Actions -> SAML Metadata. An XML file will be downloaded to your computer.
-
Copy and paste the Metadata URL OR the file to the Emplifi self-service
-
Follow the wizard and instructions in the Emplifi SSO self-service to finish the SSO setup.
MS Azure
Emplifi is listed in MS Azure AD App Gallery, and the integration is very straightforward:
-
Log in to the Azure portal at https://aad.portal.azure.com/.
-
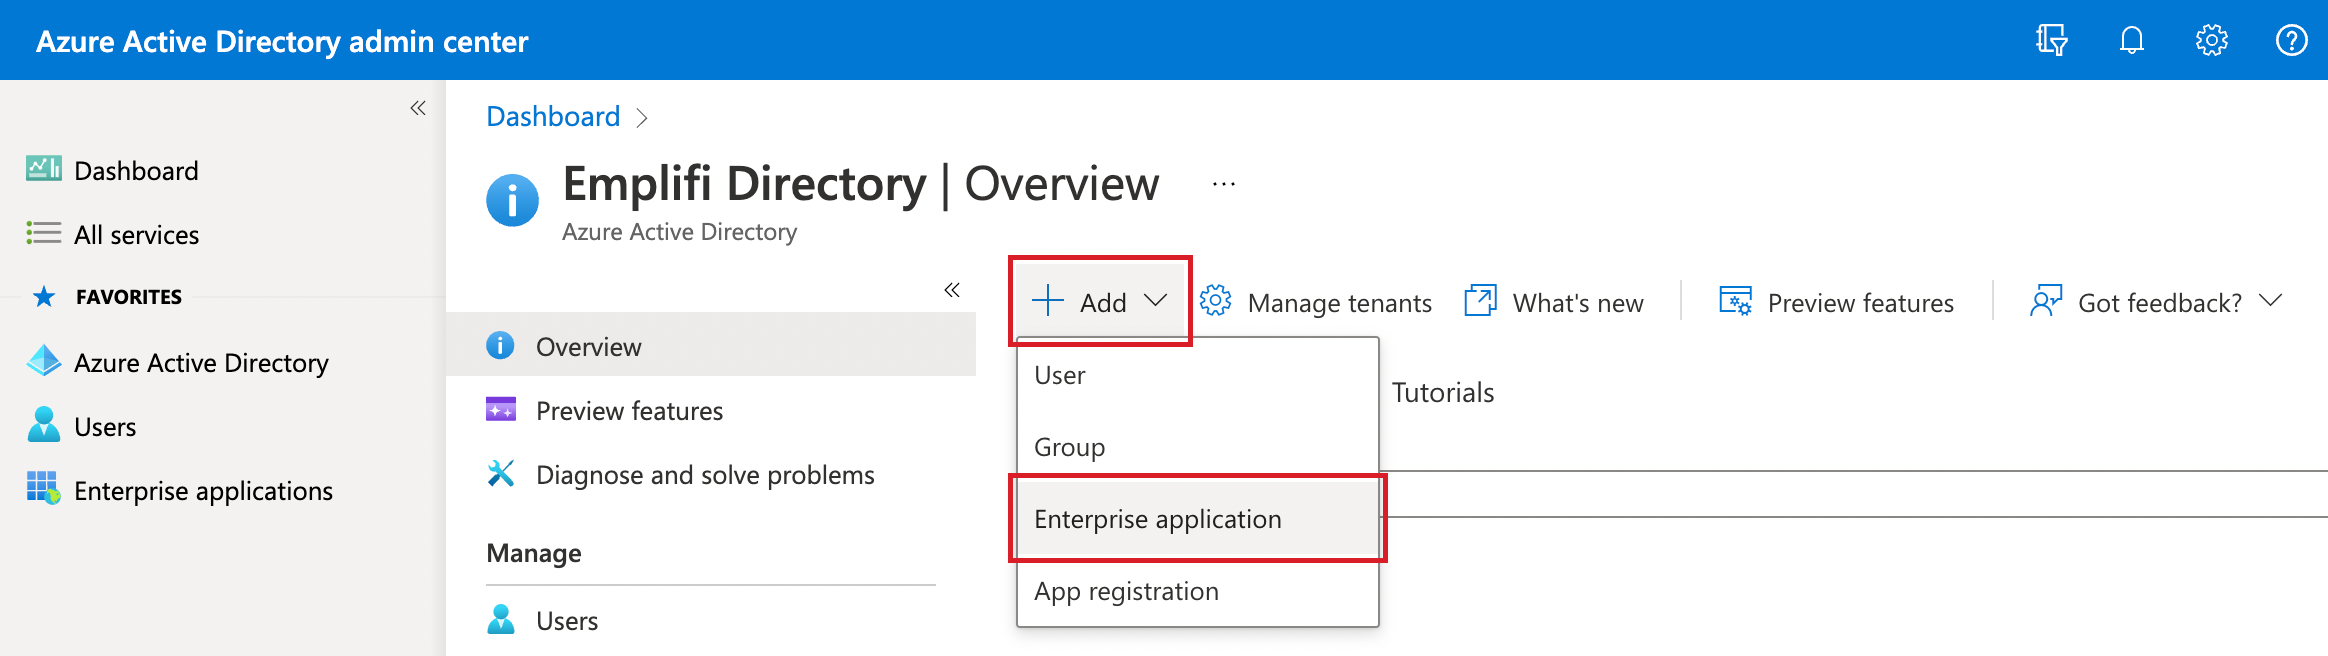
On the Azure Active Directory page, click Add, and select Enterprise application.
-
Search for Emplifi platform.
-
Click the tile with the Emplifi logo, and click Create.
A new instance for the Emplifi platform is added. -
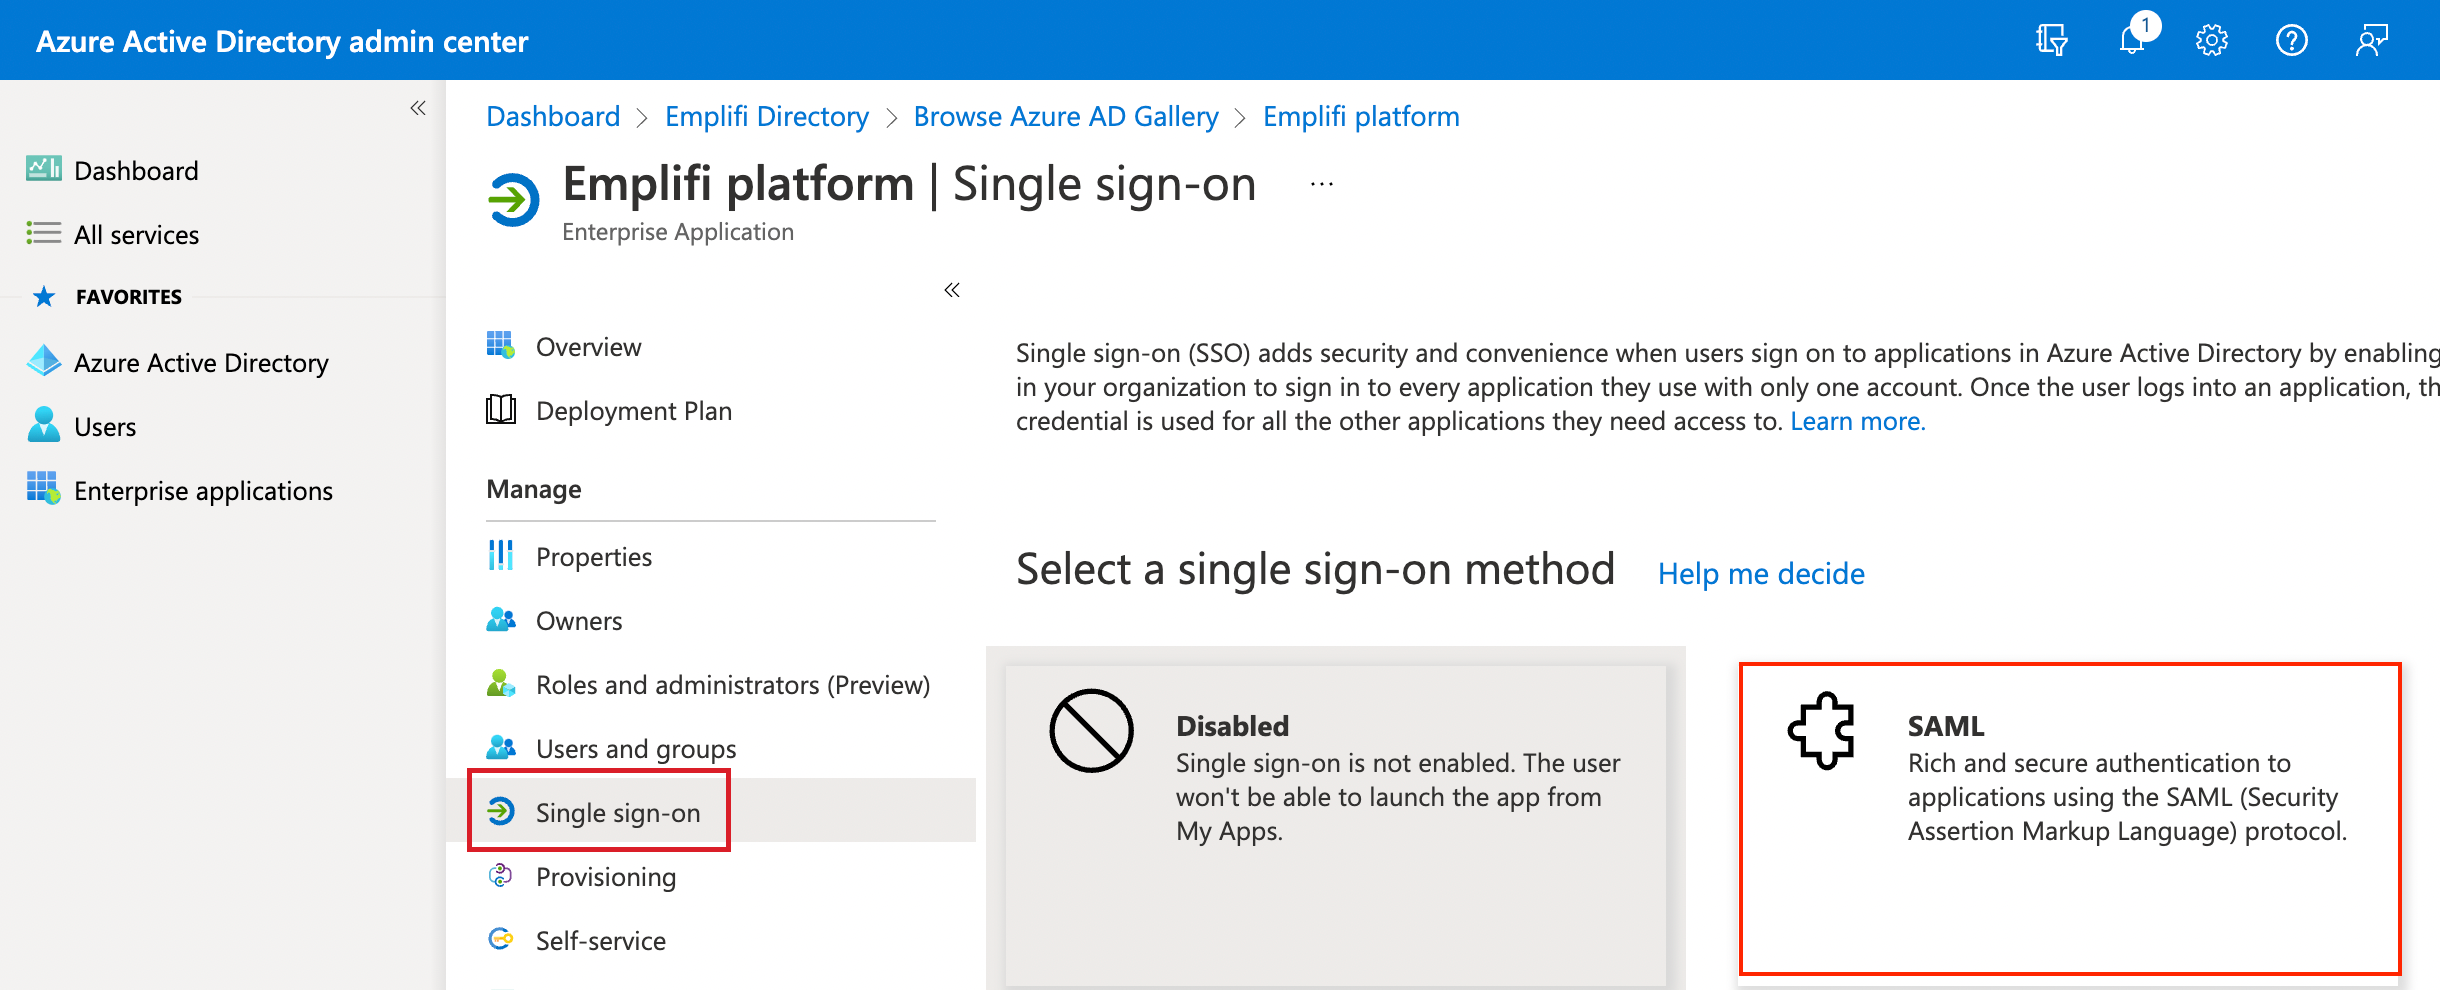
Click Single sign-on on the left, and select SAML as an SSO method.
-
Click Edit on the Basic SAML Configuration panel.
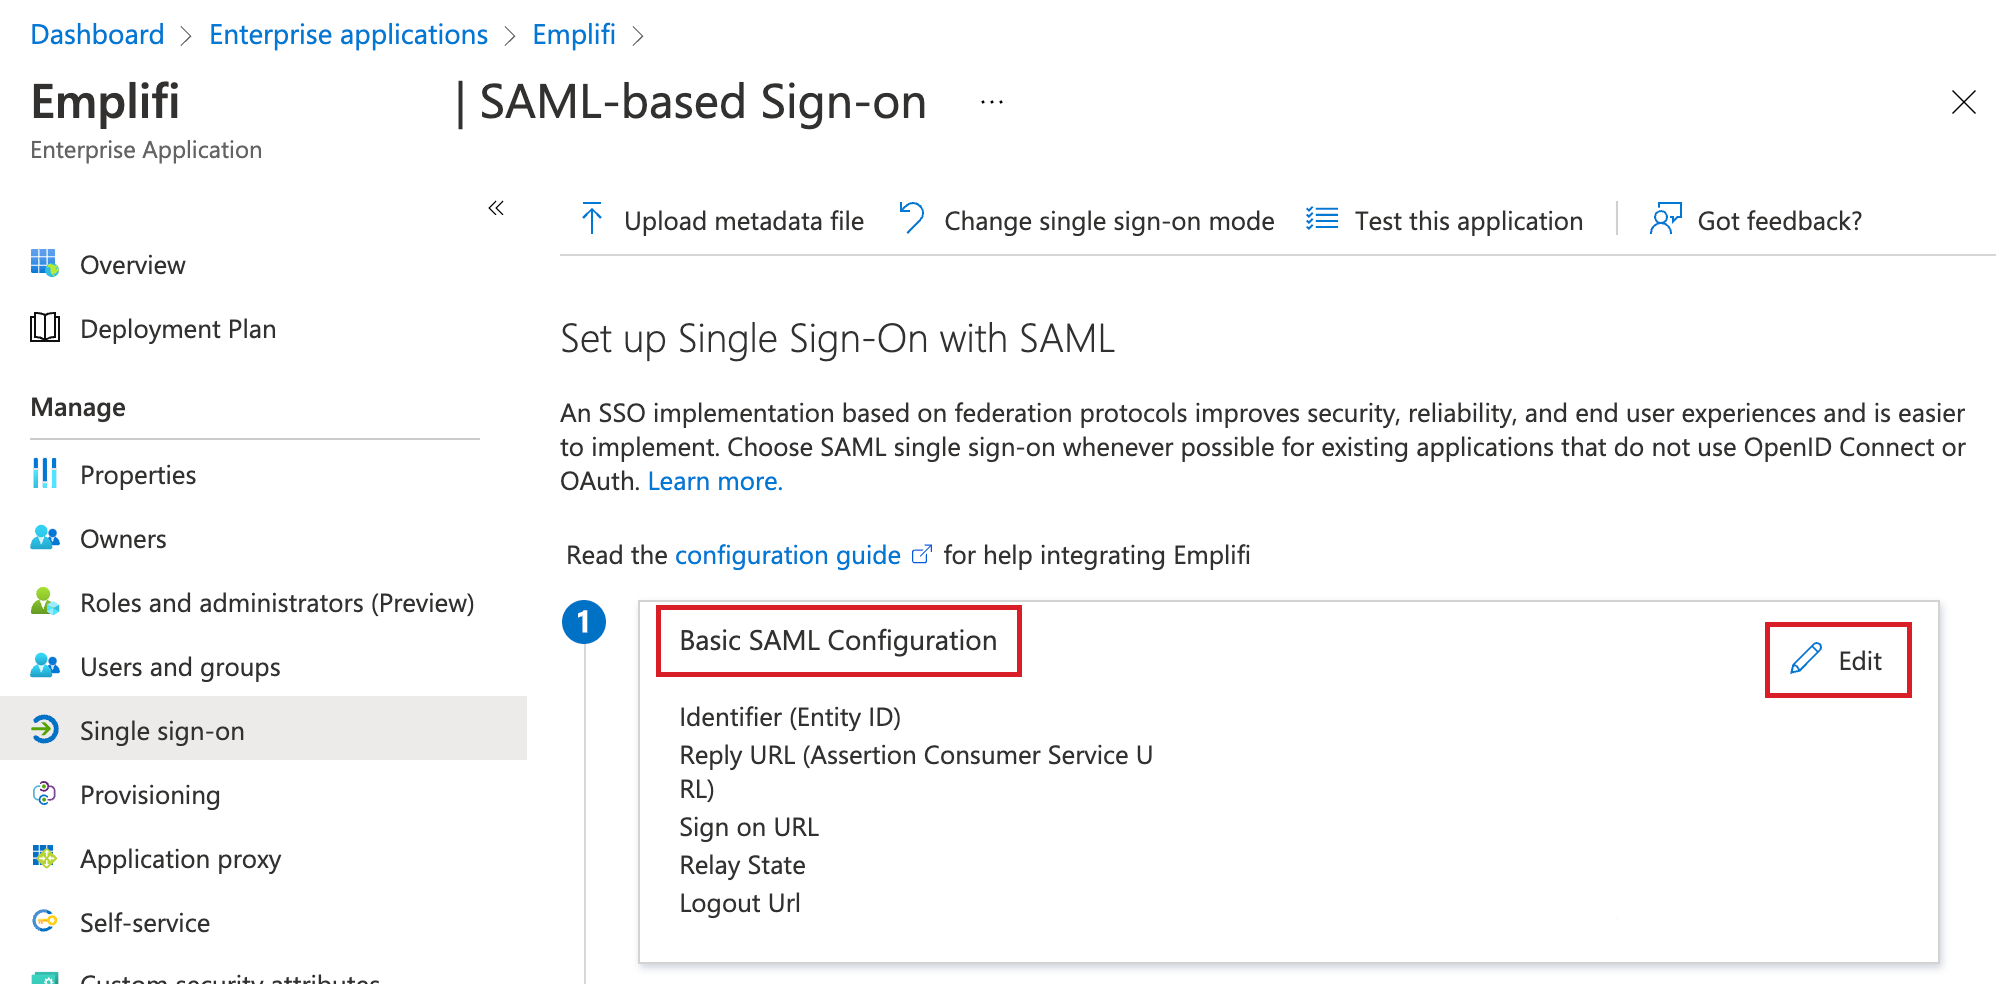
You are prompted to provide the SAML parameters.
Instead of entering the SAML SSO parameters manually, you can download the Emplifi metadata file from the Emplifi SSO configuration as described in Single Sign-on (SSO) and upload it to the Azure SSO configuration.
-
Set up the parameters for the SAML SSO сonfiguration:
-
In the Identifier (Entity ID) section, add the Emplifi and Socialbakers identifiers exactly as they are provided in the Emplifi SSO configuration:
https://<domain>.account.socialbakers.com
https://<domain>.account.emplifi.io-
In the identifiers, replace
<domain>with the domain that you have provided in the Emplifi SSO configuration as described in Single Sign-on (SSO). -
Mark the Emplifi identifier as a default.
-
-
In the Reply URL (Assertion Consumer Service URL) section, add the Emplifi and Socialbakers reply URLs exactly as they are provided in the Emplifi SSO configuration:
https://<domain>.account.socialbakers.com/login/saml
https://<domain>.account.emplifi.io/login/saml-
In the reply URLs, replace
<domain>with the domain that you have provided in the Emplifi SSO configuration as described in Single Sign-on (SSO). -
Mark the Emplifi reply URL as a default.
-
-
If you are using the other parameters such as the signon URL or logout URL, enter these URLs exactly as they are provided in the Emplifi SSO configuration as described in Single Sign-on (SSO).
-
-
Click Save to save the SAML SSO configuration.
-
Scroll down to the SAML Signing Certificate section, and copy the app federation metadata URL.
-
Go back to the Emplifi Suite.
-
Click Settings -> Single sign-on, and open your SSO configuration with Azure.
-
Paste the app federation metadata URL into the Metadata URL field in the Emplifi SSO configuration.
-
Click Next to complete the SSO configuration in the Emplifi Suite. For a detailed description, see Single Sign-on (SSO).
.