Send Permission Requests
Before you use any user-generated content (UGC) on your website, in your emails, social profiles, or other channels, you must first request permission from the original poster. How you request permission depends on the social media network the content originates from and what the network’s API limitations are.
You can draft a comment from scratch or use Permission Request Templates you created in advance.
Sending Permission Requests to Instagram
Because of Instagram API limitations, there are different methods for requesting permission depending on whether or not the caption for the content has an @mention for your account (for example, @emplifi). In both circumstances, once you receive a reply from the content creator with an @mention of your account, the content will be marked as Permissioned.
When the caption for the content includes an @mention for your account, Emplifi UGC can use the Instagram API to comment directly on the content creator’s original post on Instagram.
![]() You can use the Mentions filter to find the content you want faster.
You can use the Mentions filter to find the content you want faster.

Steps:
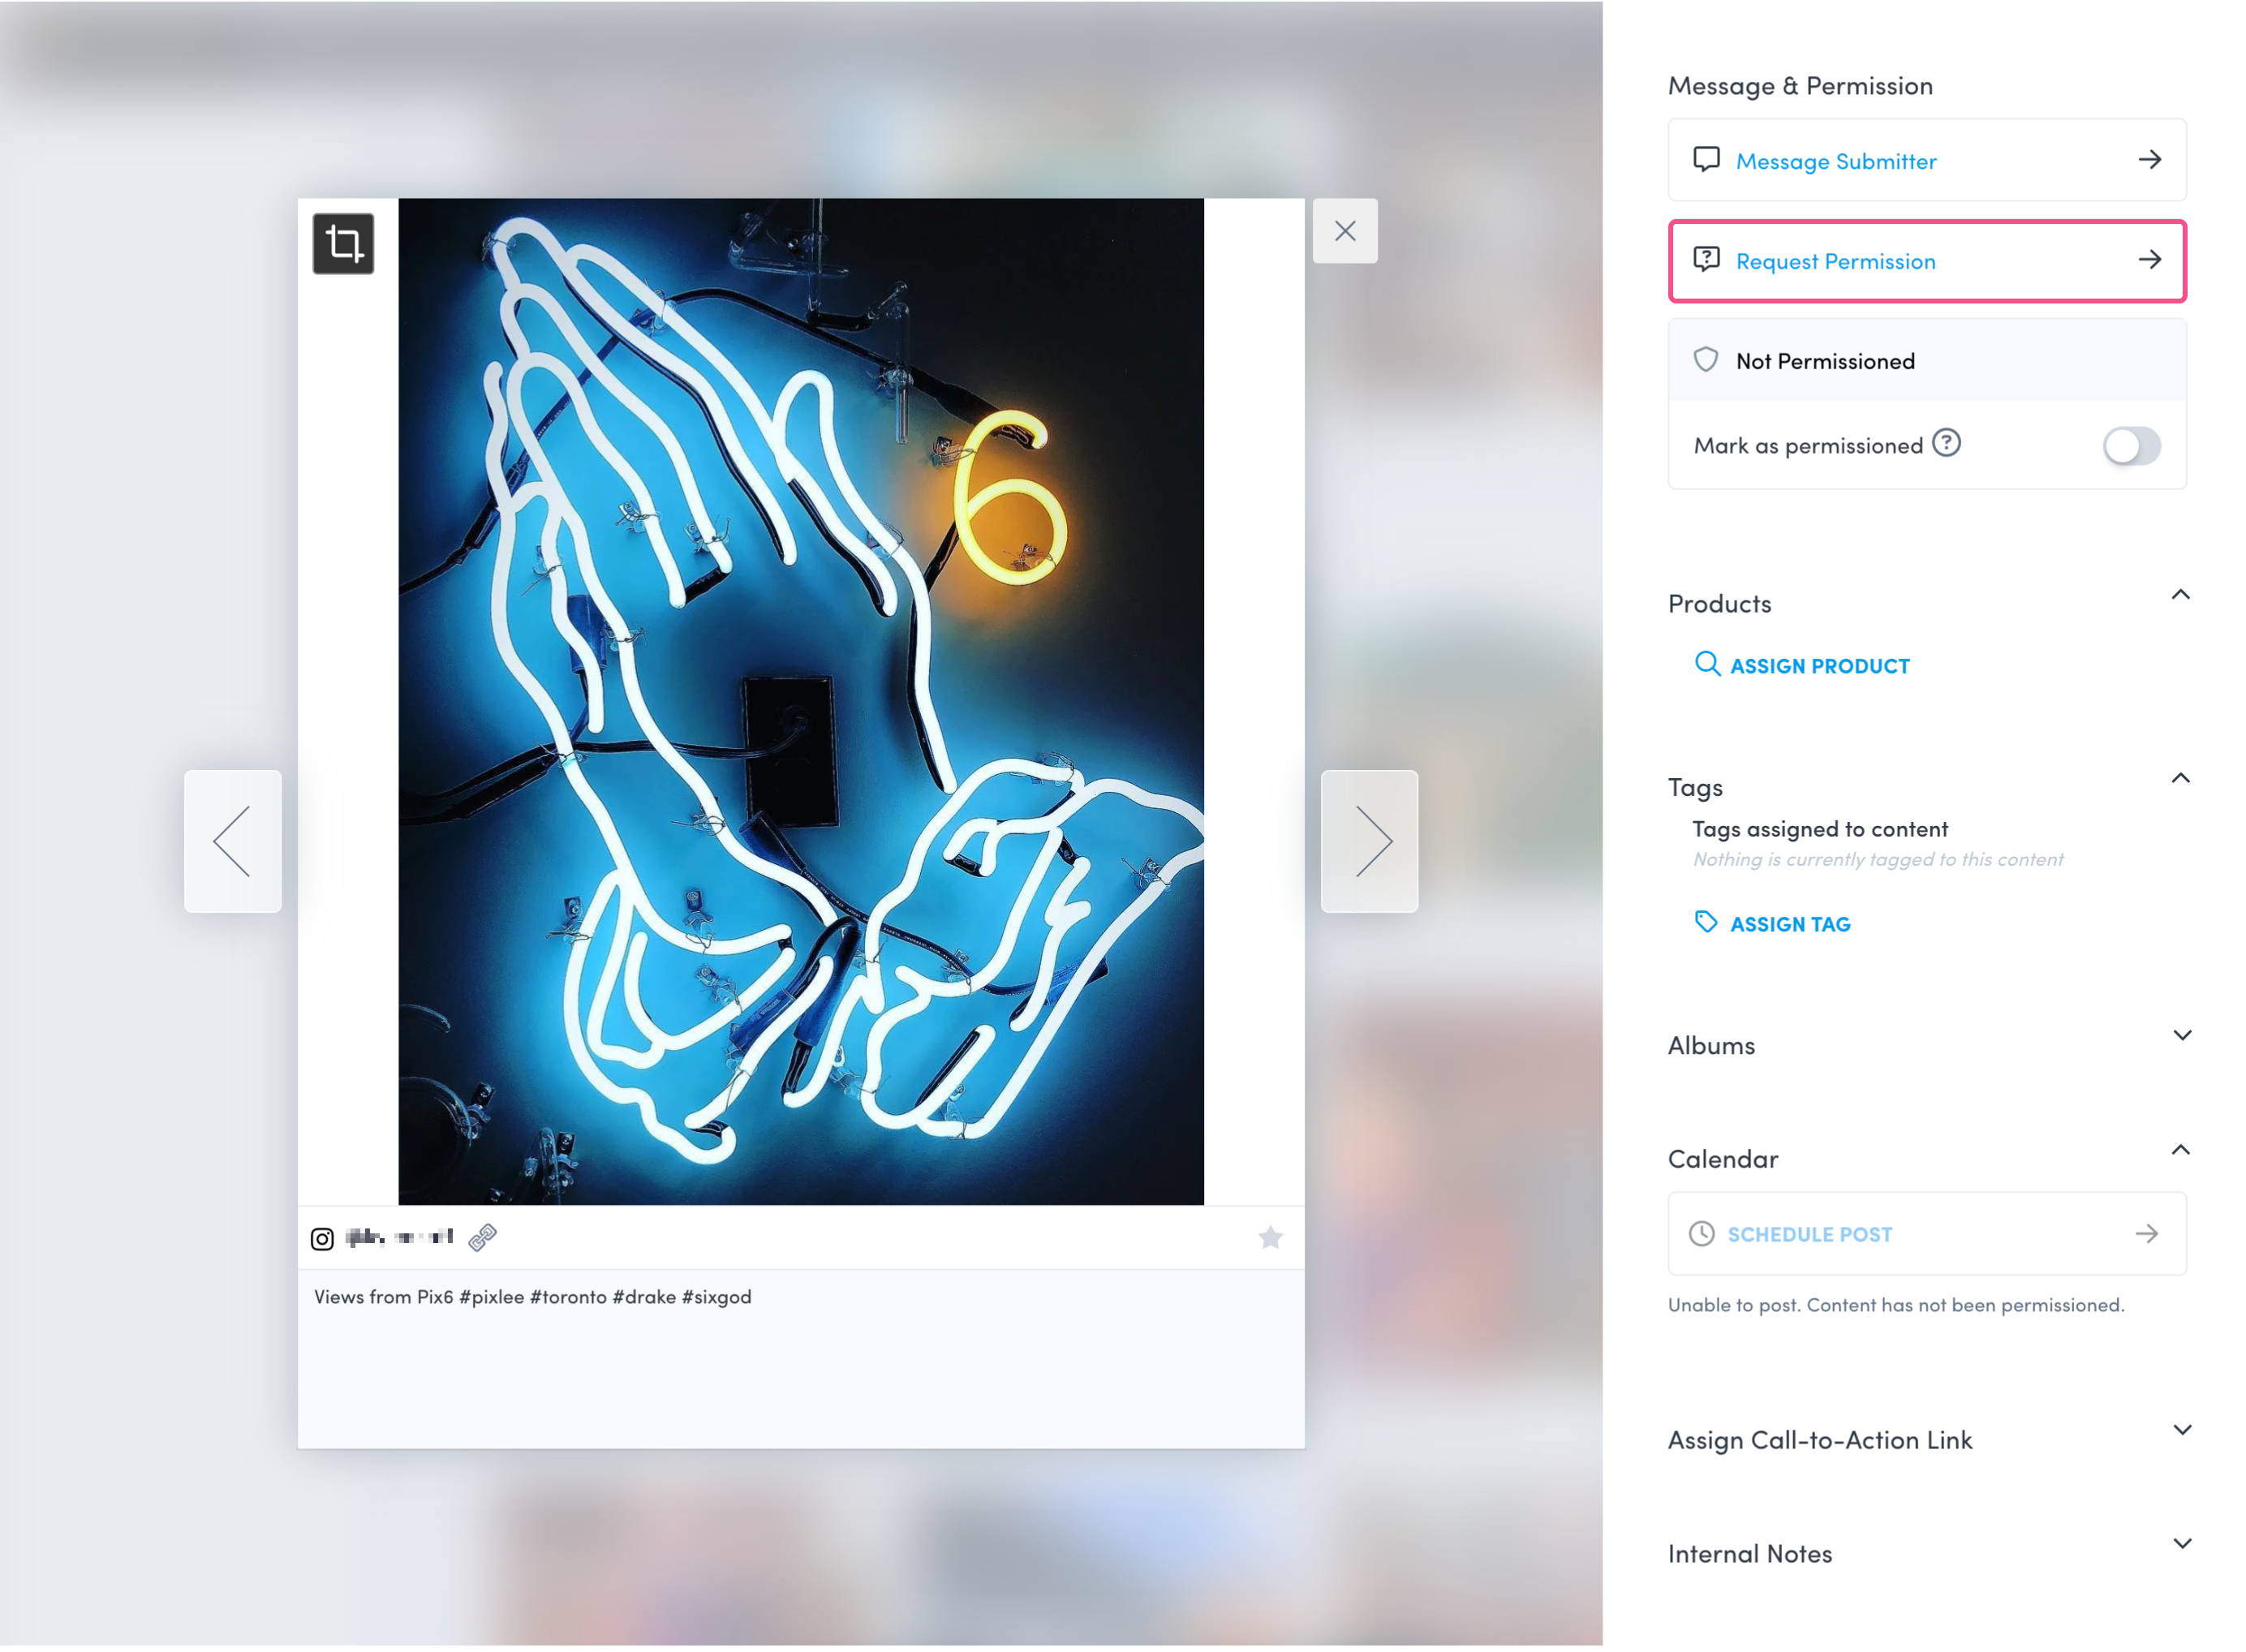
Click on a piece of content from Instagram with a brand @mention in the caption.
The content lightbox opens. Or, you can use the multi-select tool to select multiple pieces of content at once.
 Click Request Permission either in the content lightbox or from the multi-select menu.
Complete the permission request form:
Select which account to send the request from.
 Only Enterprise subscriptions have the ability to switch Instagram usernames.
Select a preset permission template or create a new comment manually.
When asking for permission, make sure to ask the content creator to use the hashtag you defined in the permission template when they reply in order to automatically permission the content. If they reply without using the hashtag, you will need to manually set the content to permissioned.
Click Post to Instagram.
The comment is posted to Instagram, and the permission status is set to Awaiting Permission.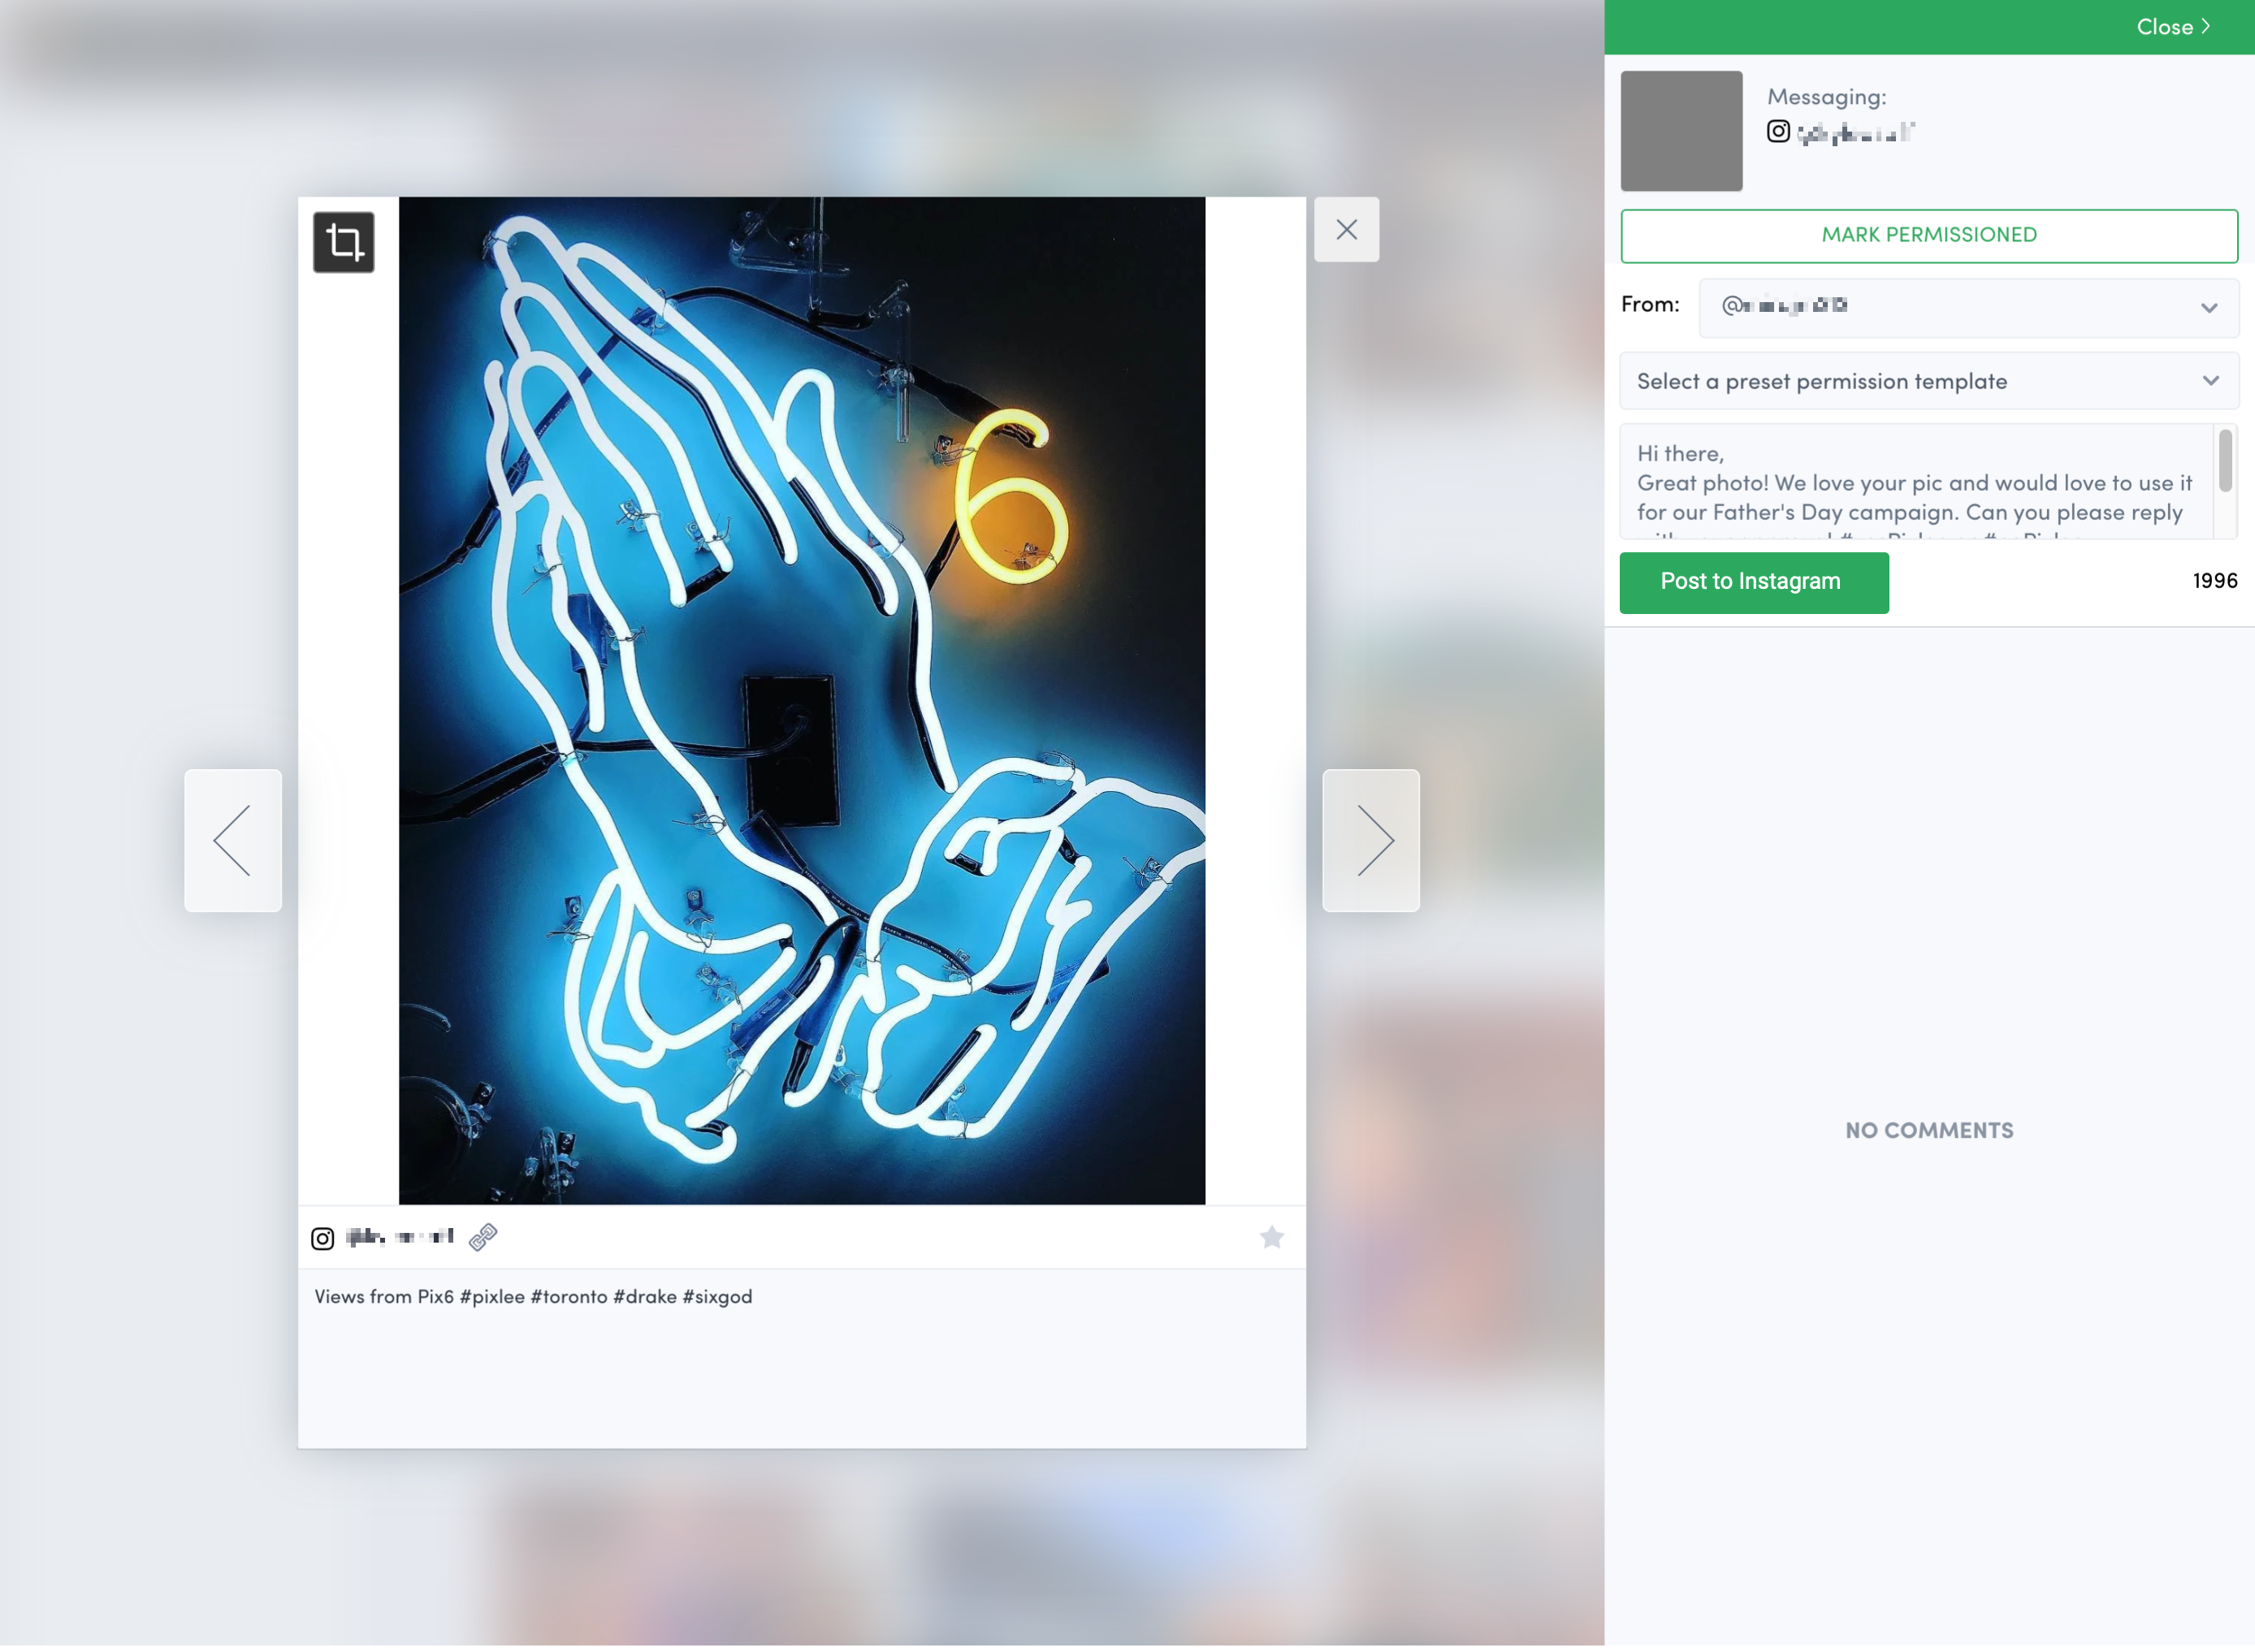
Because of Instagram API limitations, content that tags your brand in the photo or through a hashtag in the caption require you to manually post the comment to Instagram.
![]() You can use the Captions filter to find content with a specific hashtag faster or the IG photo tag filter to find content that tagged your brand in the photo.
You can use the Captions filter to find content with a specific hashtag faster or the IG photo tag filter to find content that tagged your brand in the photo.
Before requesting permission, make sure you are logged into the correct Instagram account.
Steps:
Click on a piece of content from Instagram that does not have a brand mention.
The content lightbox opens. Or, you can use the multi-select tool to select multiple pieces of content at once. Click Request Permission either in the content lightbox or from the multi-select menu.
Complete the permission request form:
Select which account to send the request from.
Only Enterprise subscriptions have the ability to switch Instagram usernames.Select a preset permission template or create a new comment manually.
When asking for permission, make sure to ask the content creator to use the hashtag you defined in the permission template when they reply in order to automatically permission the content. If they reply without using the hashtag, you will need to manually set the content to permissioned.
Click Copy & Paste to Instagram.
The permission status is set to Awaiting Permission.
The content of your template is copied to the clipboard, and the Instagram post opens in a new tab. If the content is part of a carousel, Instagram opens to the first image of the carousel.
Paste and post the comment in Instagram.
Close the Instagram tab to return to Emplfi UGC.
Sending Permission Requests to X (formerly Twitter) or Facebook
You can post comments to the content creator’s X (formerly Twitter) or Facebook post directly through Emplifi UGC. Once you receive a reply from the content creator with an @mention of your account, the content will be marked as Permissioned.
Steps:
Click on a piece of content from either platform.
Request Permission.
Select a preset permission template or create a new comment manually.
When asking for permission, make sure to ask the content creator to use the hashtag you defined in the permission template when they reply in order to automatically permission the content. If they reply without using the hashtag, you will need to manually set the content to permissioned.Click Post to Facebook or Post to X (formerly Twitter).
Your comment posts and the permission status is set to Awaiting Permission.
Requesting Permission from Other Social Networks
Due to API limitations it is not possible to request permission for content from Youtube or TikTok through Emplifi UGC. To request permission from these social networks, you must contact the content creator outside of Emplifi UGC. After you receive a favorable response, store the proof of permission and then manually turn on Mark as permissioned.
Store Proof of Permission
When you ask permission to use content from a platform that does not support native permissions, you can store the response you receive from the content creator within Emplifi UGC. This proof could be a screenshot of messages between the brand and the content creator, an email, or a contract with an influencer.
Steps:
Click on a piece of content in an album.
Click Attach Proof of Permission.
Browse your files to select the proper proof and then click upload.
From here you can add additional files for proof, as well as view, download, and delete attached files. From the view of the content from albums, you can easily see how many files are uploaded for proof.
Requesting Permission for Multiple Pieces of Content in an Album
You can select multiple pieces of content that has been collected from the same social network to request permission for them all at once (also known as a bulk request).
Steps:
Select more than one piece of content that has been collected from the same social network.
Click Request Permission from the selected photos panel.
The Permission Request for content lightbox opens.
Once the Permission Request for content lightbox opens, your choices will depend on the social network the content was collected from.
Instagram Bulk Permission Requests
When you request permission to use multiple pieces of Instagram content at once, the requests are automatically separated into content with an @mention, and content without an @mention.
Content with an @mention is processed first in the lightbox. Content without an @mention is processed second in the lightbox.
For enterprise customers with multiple Instagram accounts in Emplifi UGC, only content that has an @mention for the Instagram account you select in the dropdown menu will appear in the @mention section. If the content has an @mention for an account other than the one selected in the dropdown menu, that content will appear in the without @mention section.
Select which Instagram account to send the request from.
Only Enterprise subscriptions have the ability to switch Instagram usernames.Select the Permission template group.
You can click Edit Templates to edit your templates without leaving Albums.Click the Cycle through templates within this group toggle to turn on or turn off template cycling.
By cycling through the templates in a group, you can create a more personal connection to your shoppers and avoid having your comments flagged as spam.Click Request permission.
For each piece of content with an @mention, your request for permission is immediately posted directly to Instagram and the permission status for the content is set to Awaiting Permission. If you also selected content without an @mention, the lightbox automatically opens to the content without an @mention where you can then request permission for the content.
Before requesting permission, make sure you are logged into the correct Instagram account.
Select which Instagram account to send the request from.
Only Enterprise subscriptions have the ability to switch Instagram usernames.Select the Permission template group.
You can click Edit Templates to edit your templates without leaving Albums.Click the Cycle through templates within this group toggle to turn on or turn off template cycling.
By cycling through the templates in a group, you can create a more personal connection to your shoppers and avoid having your comments flagged as spam.Click Copy & Paste to Instagram.
The content of your template is copied to the clipboard, and the Instagram post for the currently selected piece of content opens in a new tab.Paste and post the comment in Instagram.
Close the Instagram tab to return to Emplifi UGC.
The permission status for the content is set to Awaiting Permission and the lightbox displays the next piece of content requiring permission until you have you requested permission for all pieces of content.
Facebook and X (formerly Twitter) Bulk Permission Requests
Permission requests for Facebook and X (formerly Twitter) content are posted directly to either Facebook or X (formerly Twitter) through Emplifi UGC. You can only send bulk permission requests for content that is sourced from the same platform.
Steps:
Select which account to send the request from.
Only Enterprise subscriptions have the ability to switch usernames.Select the Permission template group.
You can click Edit Templates to edit your templates without leaving Albums.Click the Cycle through templates within this group toggle to turn on or turn off template cycling.
By cycling through the templates in a group, you can create a more personal connection to your shoppers and avoid having your comments flagged as spam.Click Request permission.
Your request for permission is posted directly to the social network and the permission status for the content is set to Awaiting Permission.
Do you have feedback or more questions? You can contact us through our Emplifi Customer Center.